INVENTORY
Inventory
Creating new operation types 59
INVENTORY
Inventory management is one of the most important areas of corporate operations that must be maintained with the highest care and accuracy. Effective inventory management is always given top priority by business owners since even a small mistake in the movement of merchandise has the potential to hurt their company. The demand for a specialized inventory management system increases as the business grows. With comprehensive strategic plans that optimize the operations of organizing, monitoring, and controlling inventory in real-time, the Odoo17 Inventory management system is here to assist you. Odoo guarantees reliable inventory tracking, enabling your company to process orders as quickly as feasible.
Odoo17 makes sure that the Inventory module has access to every feature crucial for streamlining inventory management and performs at a high level. Using the fully loaded inventory management system provided by Odoo, a business can achieve the advantages of inventory management, including
-
Tracking the stock at the company's warehouses should be accurate and simple.
-
Accurate order fulfillment.
-
Advanced ordering and inventory planning techniques..
-
Quick to identify inventory needs.
-
Characteristics for immediate product restocking that are dependent on demand.
-
Provides a thorough overview of the products in question.
-
Gives a history of all actions taken during inventory movements on a product.
-
Automates the movement of orders between locations and warehouses.
-
For inventory analysis, effective quantitative and analytical reports are available.
-
Uses serial numbers and lots to track products.
These are some of the key features Odoo17 offers its users to simplify inventory management. In the subsequent sessions of this chapter, we'll talk about more features. Let's start by talking over the product management tools available in the Odoo 17 Inventory module.
Product Management
For the efficient upkeep of inventory, keeping track of every facet of a product is essential. You can set up new products in your database that will efficiently track and monitor all actions to improve the inventory management of the relevant products using the Odoo17 Inventory module. The Sales and Purchase modules' and the Inventory module's processes for configuring products are essentially identical. For successful product management in Odoo17, you will receive a distinct menu called Products on the main menu bar of the Inventory.
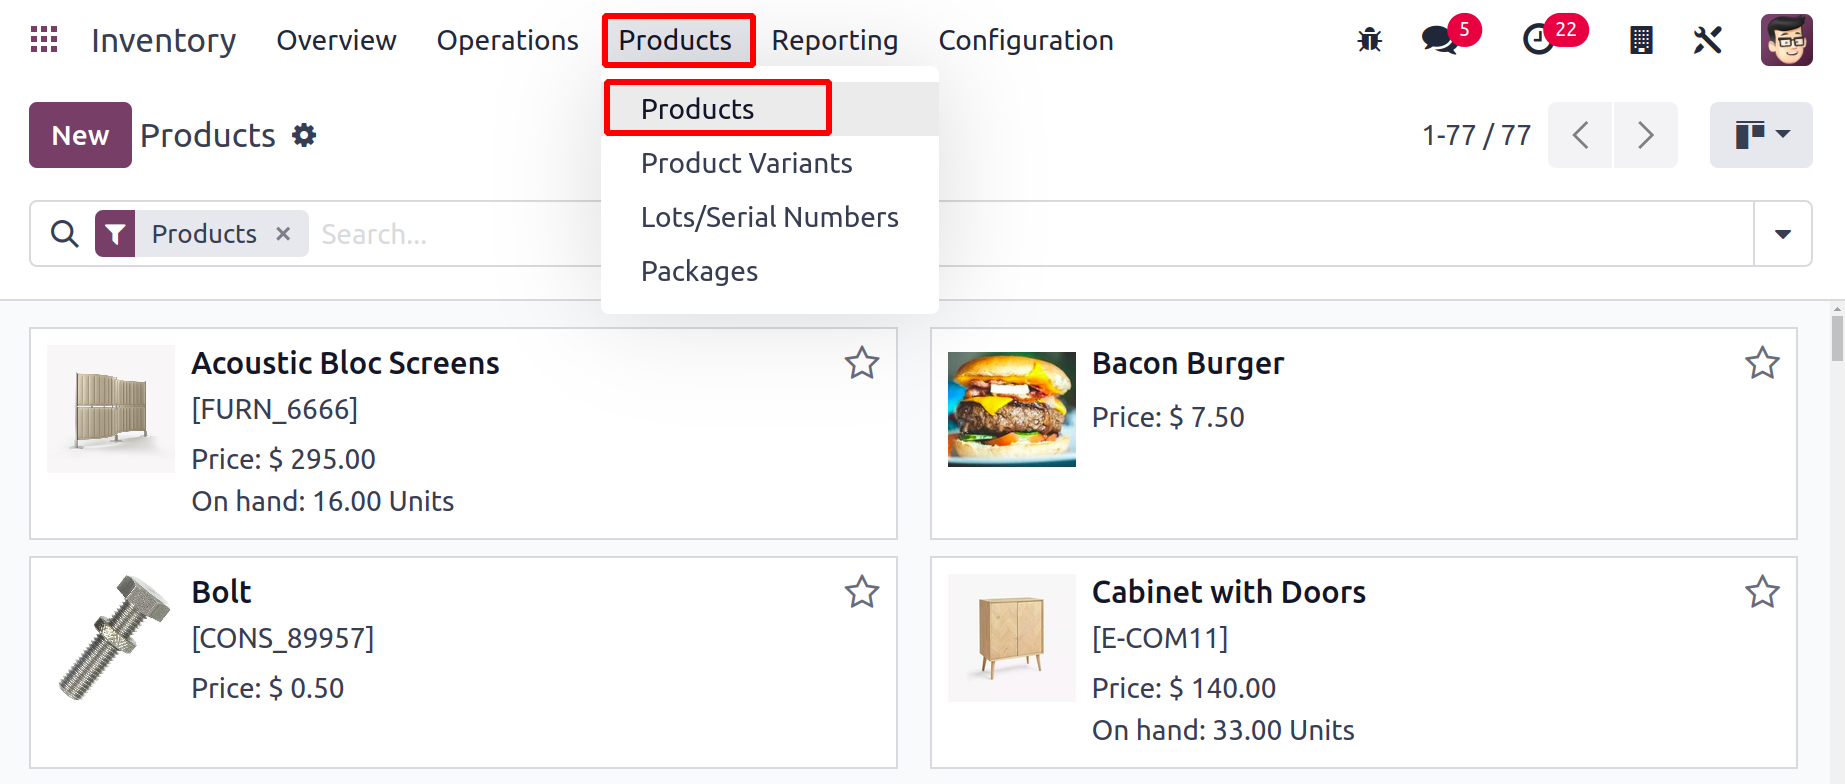
By selecting the items option, it is simple to see all configured items. The configuration of new products via the Products menu will be covered first.
The Kanban view of the product's platform is depicted in the image. On each product tab, you will find the names of the items as well as crucial details like the price, picture, quantity on hand, etc. You can add products to your Favorite list by selecting the star symbol. This will enable you to quickly and easily find all of your favorite products.
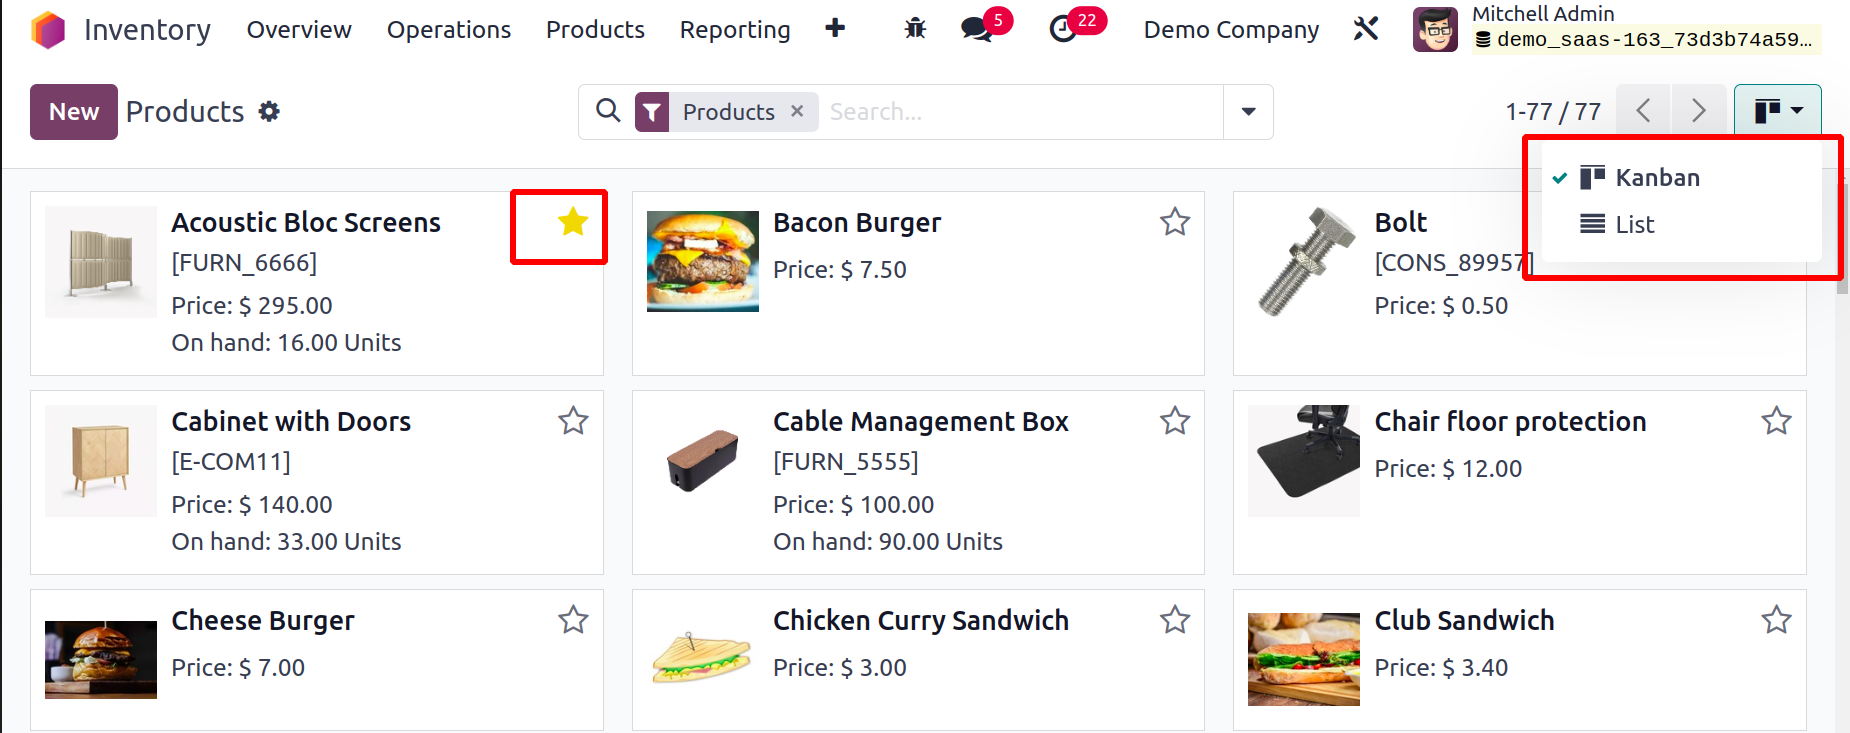
As you are aware, Odoo17 offers sophisticated sorting options across nearly all platforms. Additionally, you will find the Filters and Group By options in this window, which will allow you to quickly locate the necessary information regarding the product listed in the Inventory module.
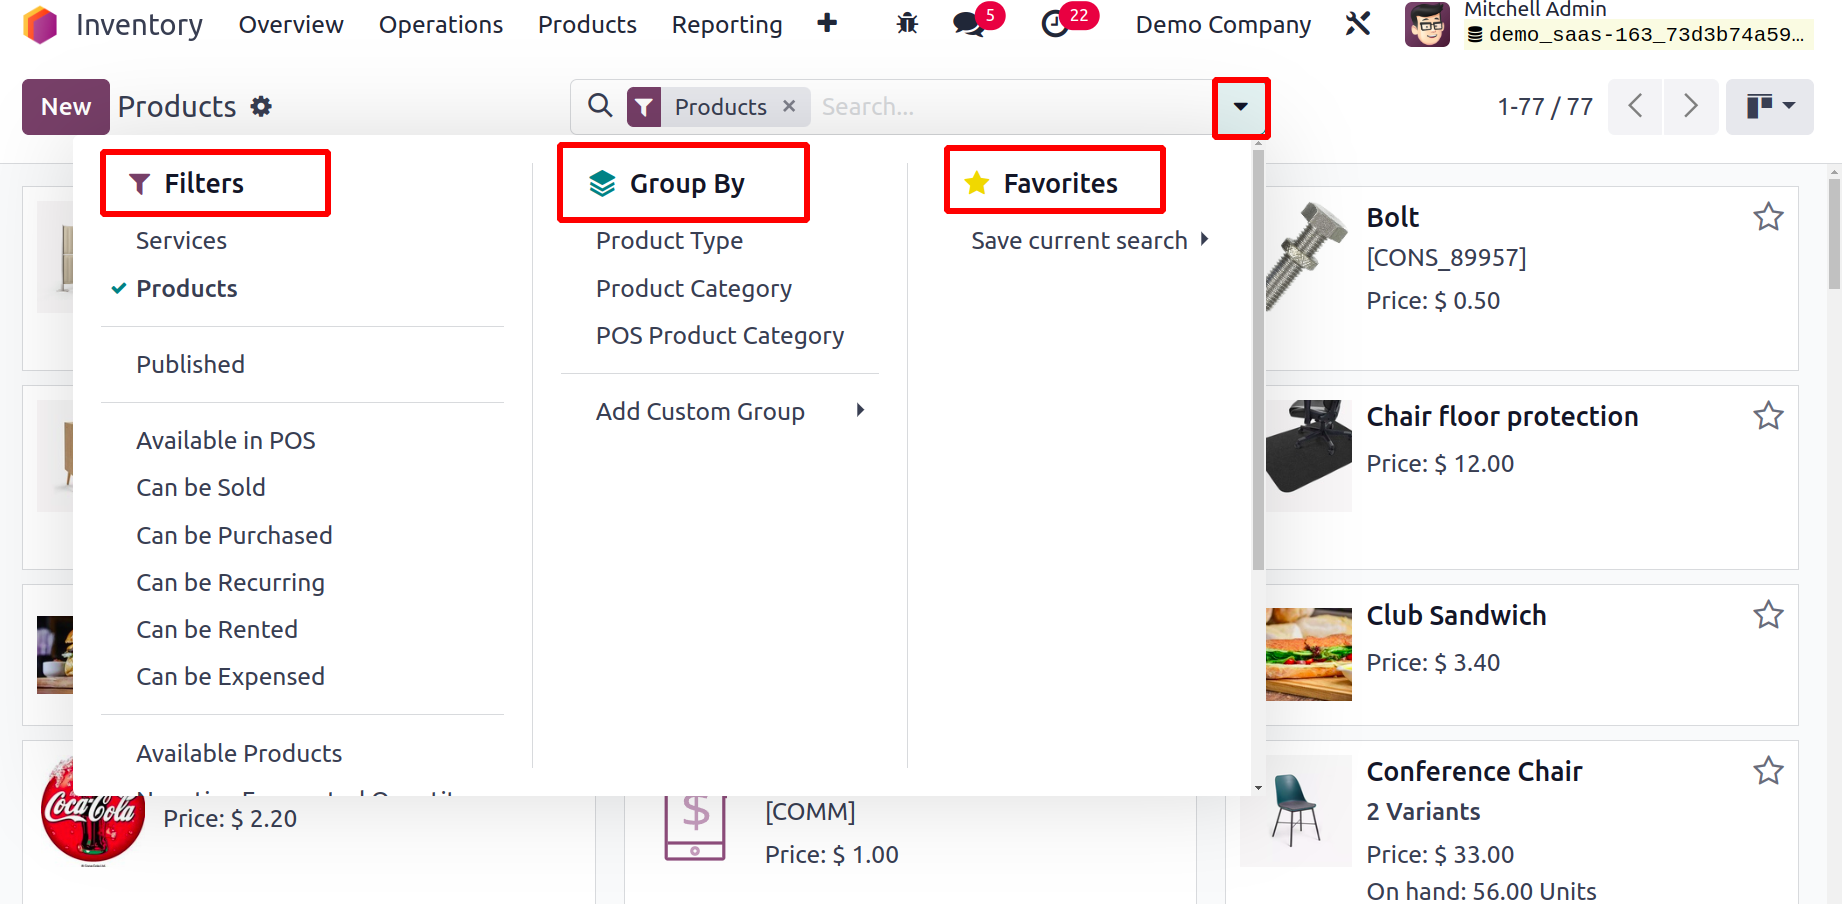
The Filter option offers both standard and bespoke capabilities to find the necessary data. The default choices allow you to filter Products, Services, Published, Available in PoS, Can be Sold, Can be Purchased, Can be Rented, Can be Subcontracted, Can be Expensed, Available Products, Negative Forecasted Quantity, Favourites, Warnings, and Archived Products. You can add new custom filters to the products using the Add Custom Filter option. Similar choices for default and custom sorting are available in the Group By function as well. You can organize products based on the Product Type, Product Category, and POS Product Category using the default selections. To build additional grouping options that meet your needs, use the Add Custom Group tool.
You can see a preview of the products in the list view, as shown below. The product name, internal reference, responsible, product tags, sales price, cost, quantity on hand, anticipated quantity, and unit of measurement are all included in the preview. You can expand the list view by selecting extra fields from the default selections, such as the Website ID, Barcode, Company, POS Product Category, Product Category, Product Type, and eBay Status. You can include custom fields in the list view by selecting the Add Custom Field option.
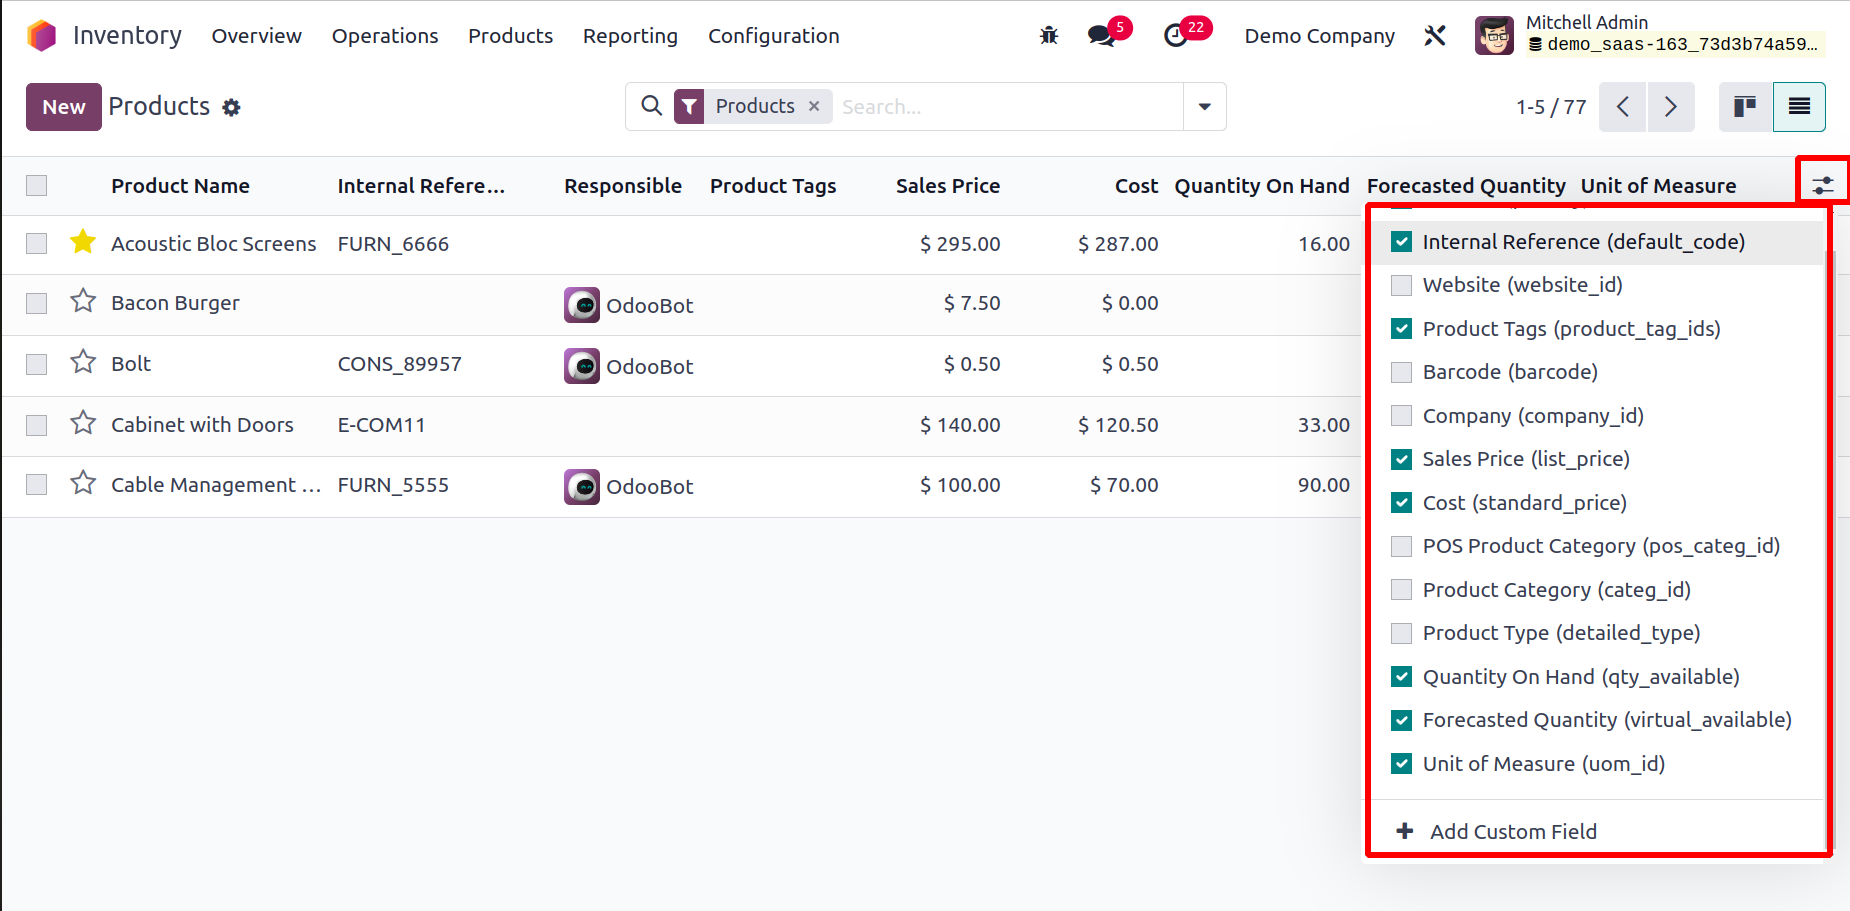
By selecting the necessary goods from the list, you can manage and change any product's details. As seen in the illustration below, the product details window can be seen.
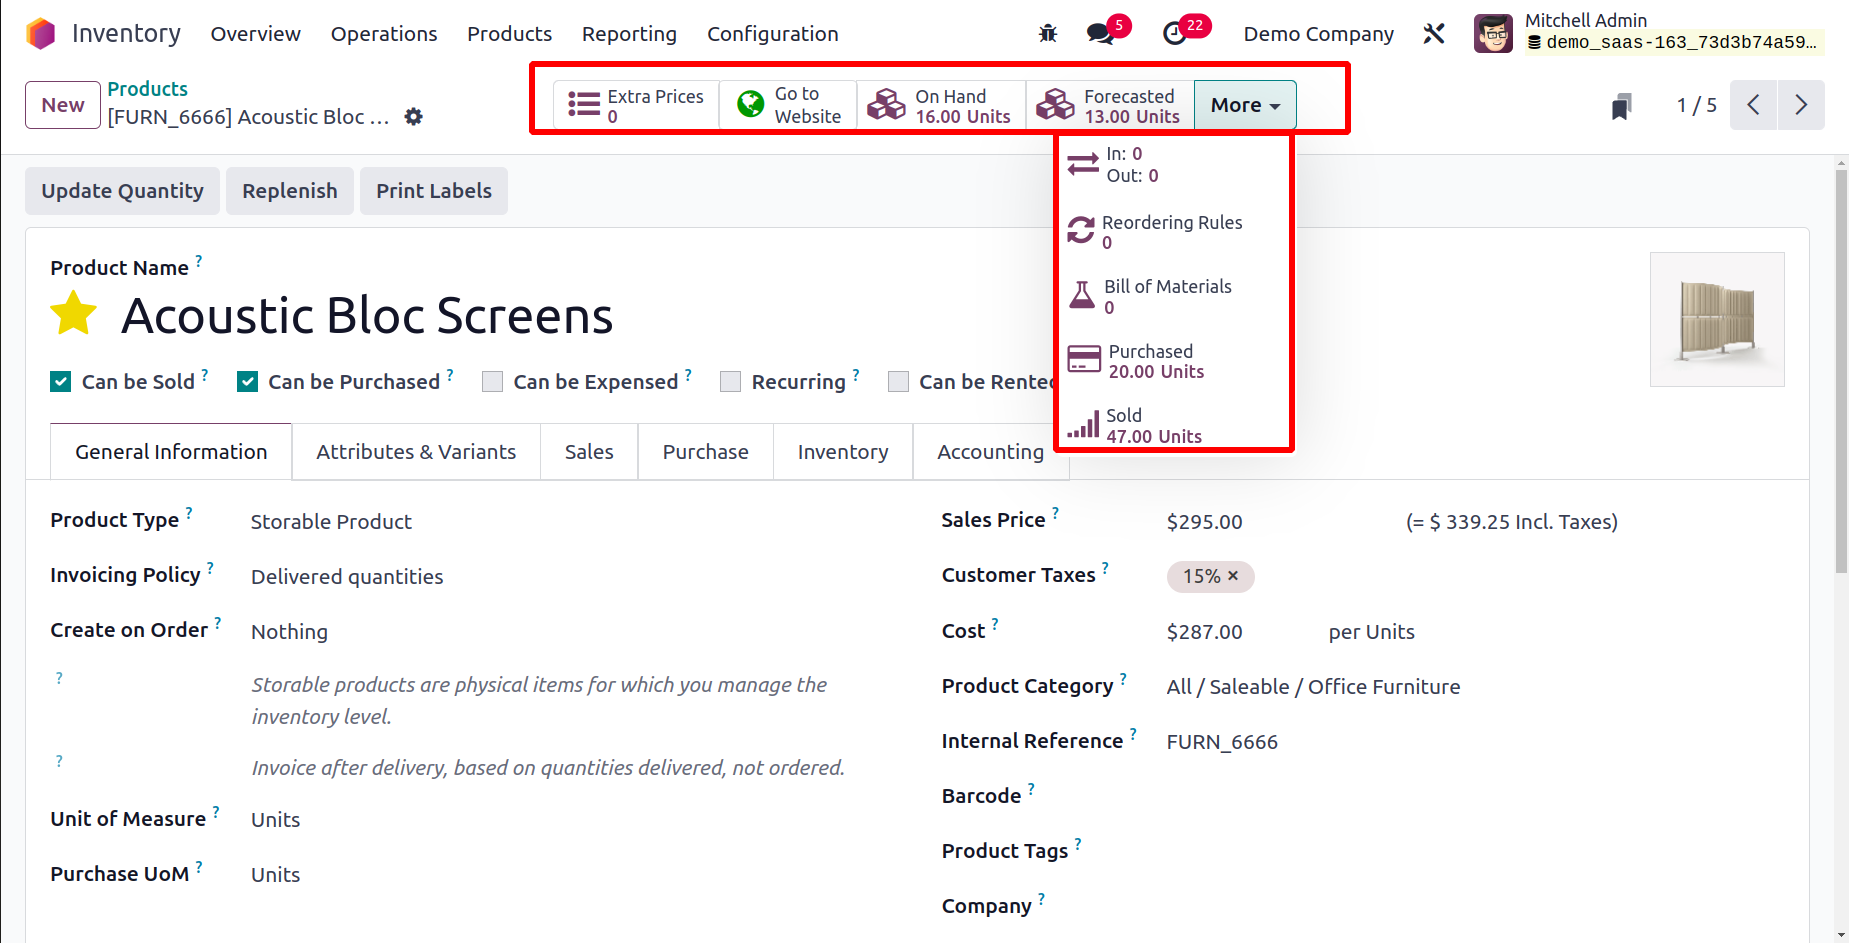
Based on the data configured on the relevant goods, the user will receive sophisticated smart buttons in the products window. To manage other price lists for the product, click the Extra Prices option. With the aid of the Go To Website, the product may be readily launched and managed on eCommerce. The On Hand button will display the inventory's available amounts. Similar to this, the Forecasted button will display information on the numbers that have been predicted. The movement history of the items in the inventory is shown by the In & Out button. The corresponding smart buttons can be used to access the configured Reordering Rules and Lots/Serial Numbers for this product. When you click the More button, you'll see more possibilities for finding information on the product's Bill of Materials, Engineering Change Orders, Putaway Rules, Quality Control Points, Storage Capacities, Purchase Analysis, Sales Analysis, and Digital Attachments.
Let's now use the New button to create a new product and talk about the choices available in the product settings box. Odoo17 will direct you to the product setup window, as shown below, as soon as you click the New button on the product dashboard.
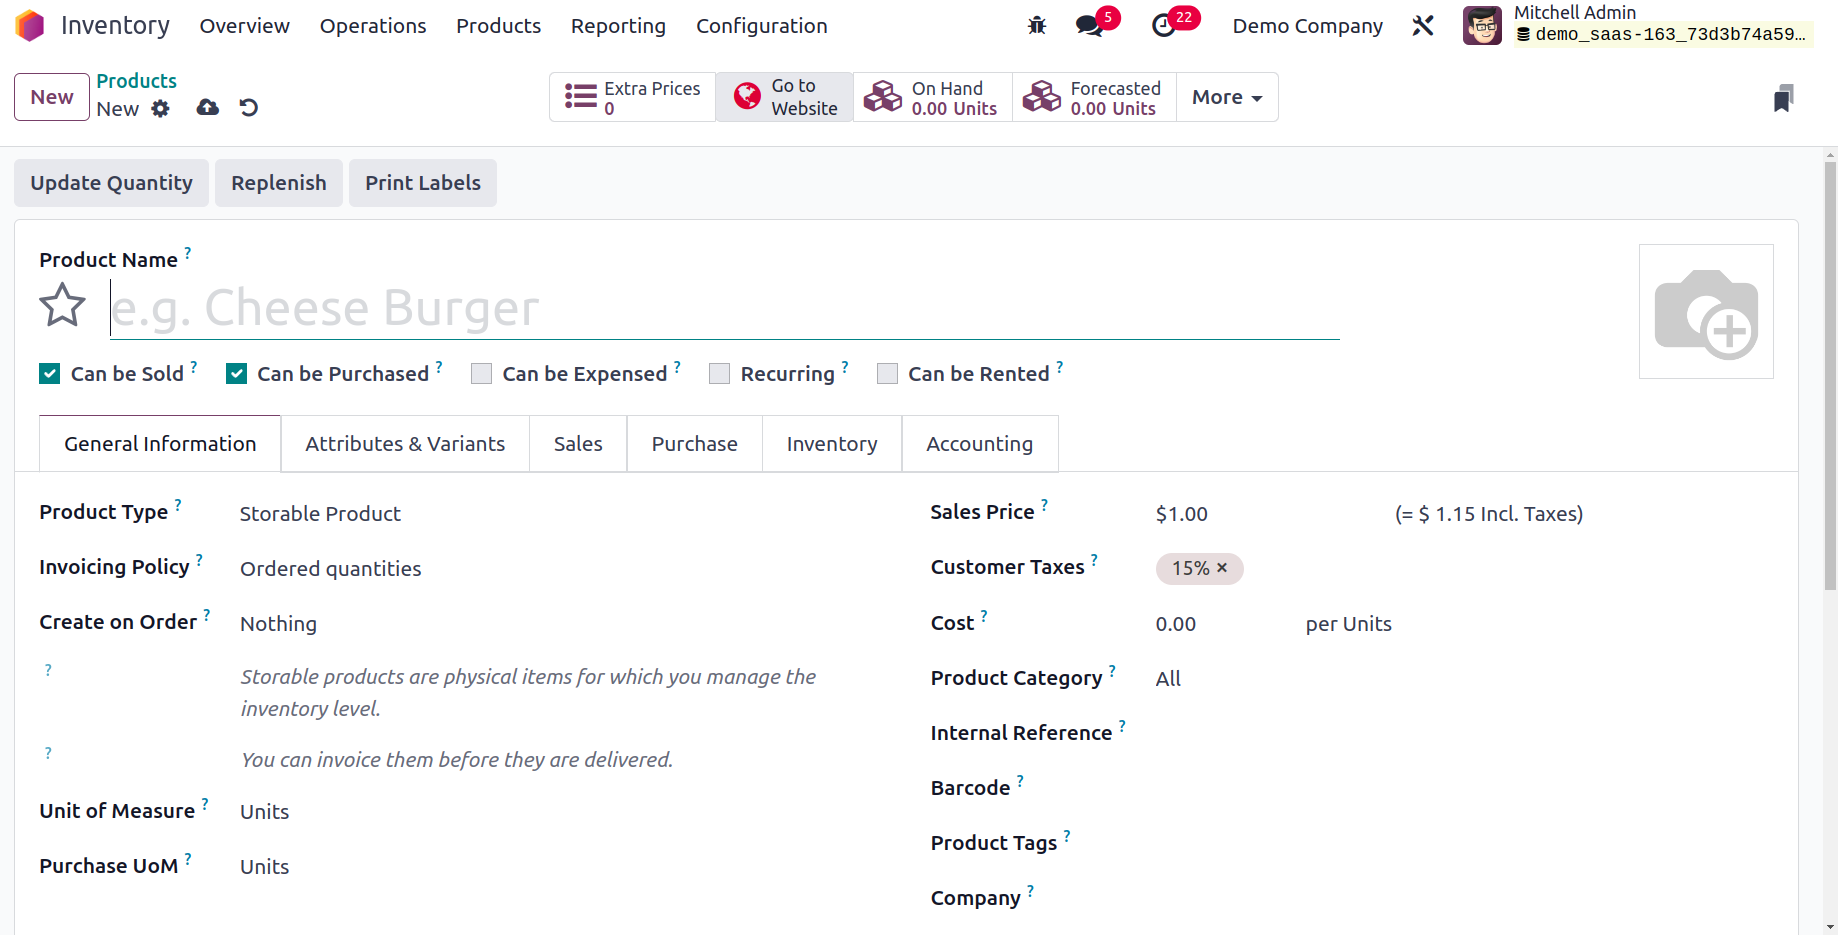
In the Product Name field, you can start by mentioning the name of the product. You are welcome to use the Star symbol to add this new item to your list of favorites. You can use the space provided to add a lovely image of the product
You will be prompted to choose the product-related operation types while configuring a new product. The choices are:
Choose the option Can be Sold, if your stuff can be sold.
Choose this option Can be Purchased, if the product is able to be bought.
If you want to choose this product while creating costs, use this option Can be Expensed.
Choose the choice Can be Recurring, to start a subscription while approving purchases of this item.
To allow rental of this product, choose this option Can be Rented.
We have General Information, Attributes & Variants, Sales, Purchase, Inventory, Accounting, and eBay tabs to add more information about the product. Below is a link to the tab for general information.
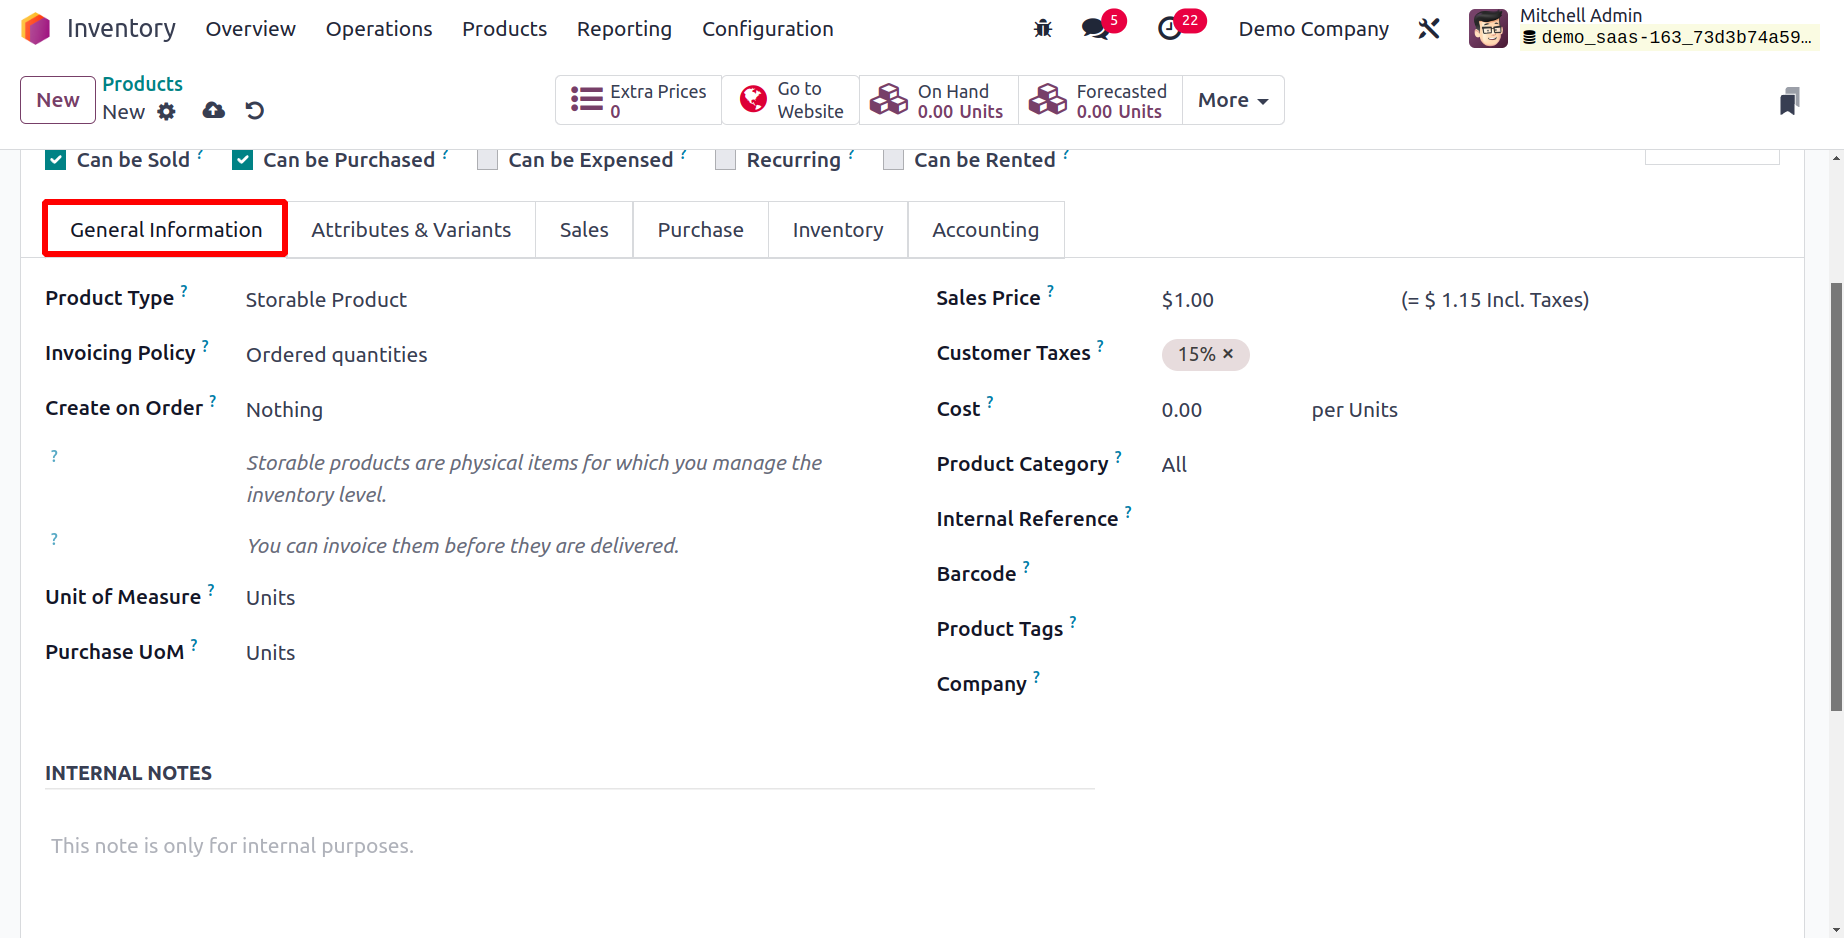
You can select the Product Type from the available options on this page. You can view a list of the various product kinds from the drop down menu.
Consumable goods:These are sent straight from suppliers to the appropriate clients, so you don't need to keep inventory of them.
Service: Odoo views all services provided by an organization as Service items. This kind of product's inventory cannot be maintained by the user. It is a service that a business provides that is not tangible.
Storable: Products that are storable are the ones for which stock management is necessary. This product type cannot be delivered until there is enough inventory on hand. Using the reordering guidelines on the products, you can replenish the inventory. If not, Odoo17 will produce caution messages while creating orders to indicate that there is not enough stock.
Event Ticket: Using this product category, the tickets for an event may be set up in Odoo17 as a product.
Event Booth: The Event Booth product type in Odoo17 can be used to configure the booths that a business provides during an event as products.
Course: It is a non-tangible good that a business offers as a component of eLearning programmes.
Combo: Combinations of multiple products can be created. And the customers can choose what they require.
Booking Fee: This type of products are usually used for online booking.
You can specify the Invoicing Policy after indicating the product type. For its users, Odoo17 provides two different kinds of invoicing policies.
Ordered Quantities: With the help of this billing policy, you can create invoices for the quantities that a client has ordered. By doing this, you'll be able to bill for all of the quantities specified in the order even before it's delivered.
Delivered Quantities: Only the delivered quantities will be taken into account when generating invoices under this invoicing strategy. When a customer orders 12 quantities of a product but only delivers 5, Odoo will use this invoicing policy to create an invoice for the delivered 5 quantities. Only after delivery will an invoice be created for the remaining 7 amounts.
The Unit of Measure parameter can be used to provide the default unit of measurement for all stock activities for this product. The default unit of measure for purchase orders for this product is indicated by the Purchase UoM . In the Sales Price section, you can provide the price at which you offer this product to your clients. In the Customer Taxes column, you can specify the default taxes that are applied to products when they are set up. The taxability information codes that are utilized to determine precise tax rates for each class of goods are referred to as the TaxCloud Category. In the relevant fields, you can include information about the Avatax Category, Cost, Product Category, Current Version of the product, Barcode, Product Tags, and Company. The product-related notes that are intended only for internal usage might be specified in the Internal Notes box.
The fields that are available for service-type products, such as event tickets, event booths, and courses, may vary in several ways. Below are four different sorts of invoicing policies that you can find here.
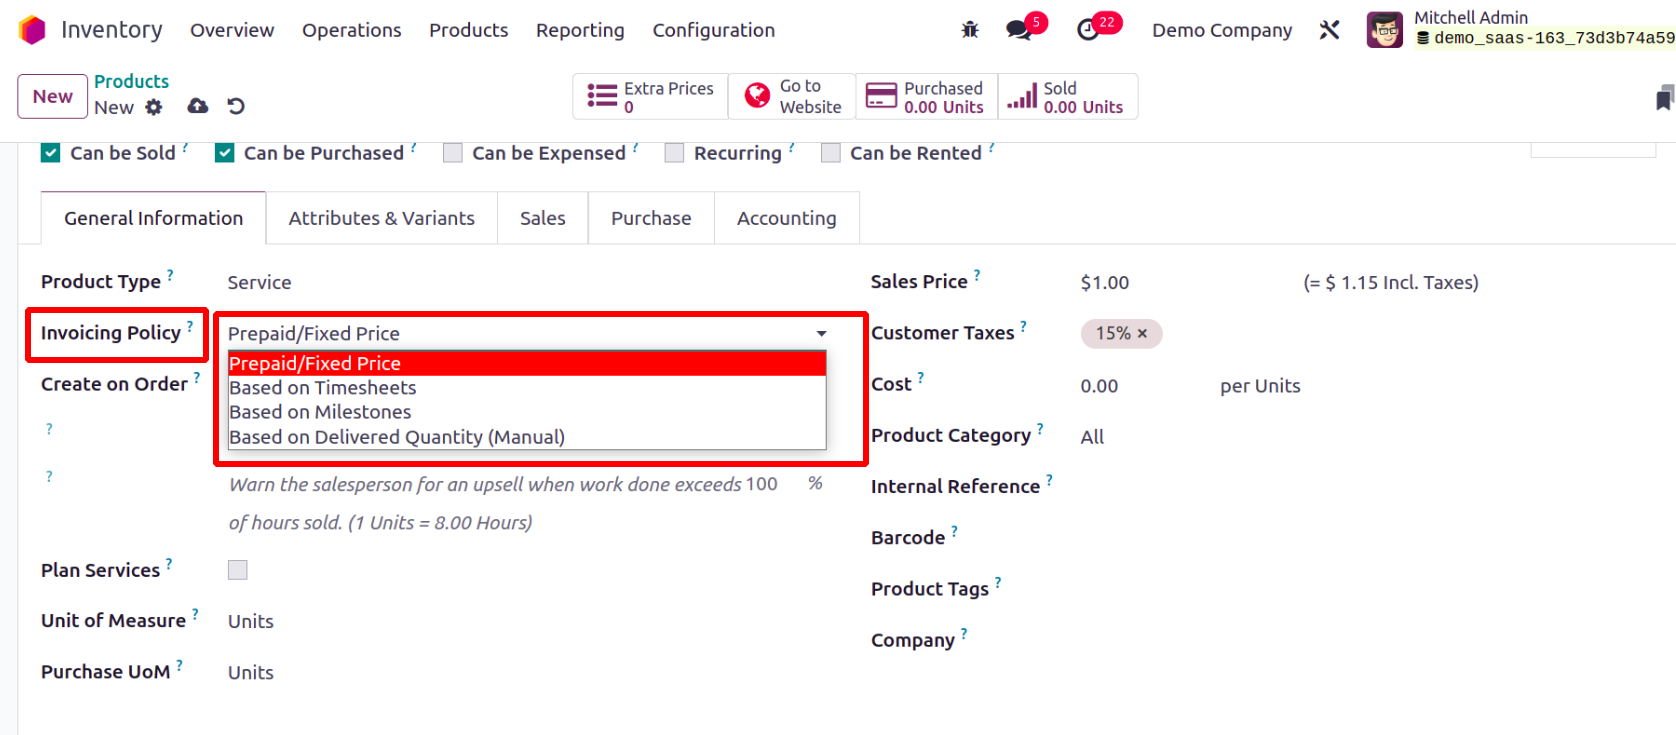
Prepaid/Fixed : Based on the ordered quantities, invoices may be generated as necessary.
Based on Timesheet : Invoice tasks or projects in accordance with timesheets for the quantities supplied.
Based on Timesheet: Invoice tasks or projects in accordance with timesheets for the quantities supplied.
Based on Milestones : Invoice jobs or projects in accordance with reached milestones.
Based on Delivered Quantity: Invoice services based on quantities that were actually delivered.
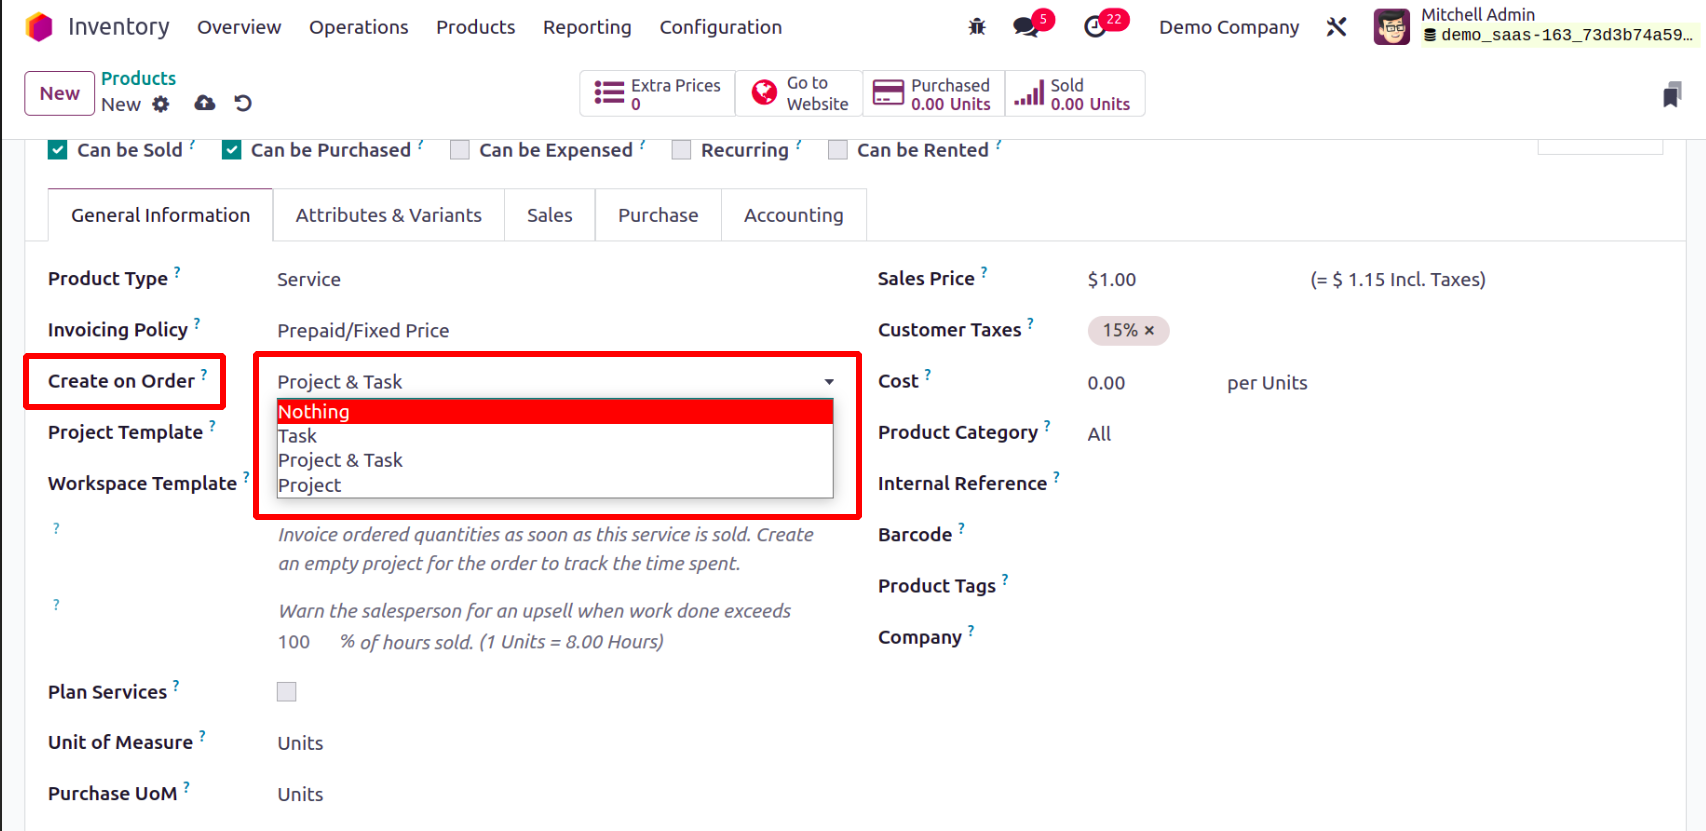
Within the Create on Order area, you can choose an appropriate alternative. Depending on the option you choose, this product can generate a Project, Task, or a Project and Task combined upon sales confirmation. You can track the service that you are selling using this project or task. When finalizing the sales order, a shift will be automatically generated for the chosen position if the Plan Services option is used. After enabling the Plan Services, an area will emerge where you may describe the job.
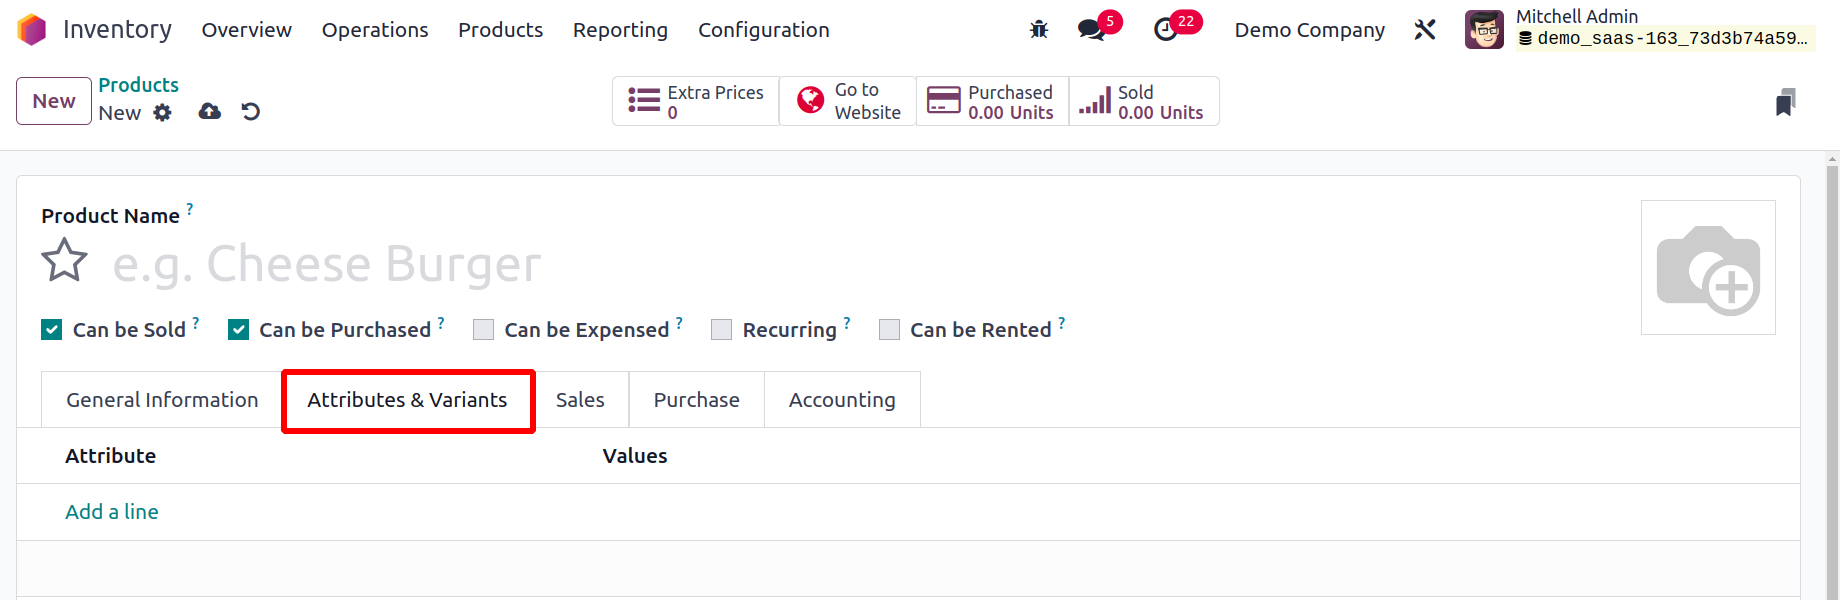
In Odoo17, you may keep track of several product versions and qualities so that the consumer has a variety of options to choose from. You can define the variations of a product that are already set up in Odoo17 by using the Add a Line buttons found under the Attributes & Variants page. Use the Configure option if you wish to add a new variant or attribute.
The Upsell & Cross-sell, Ecommerce Shop, Helpdesk, Point of Sale, Extra Product Media, and Sales Description can all be defined under the Sales tab. The Upsell and Cross-selling area offers clients suggestions for supplemental products, accessory products, and alternative products. Mention the Website, Website Categories, Website Sequence, and Ribbon attached to the product in the ECOMMERCE SHOP section.
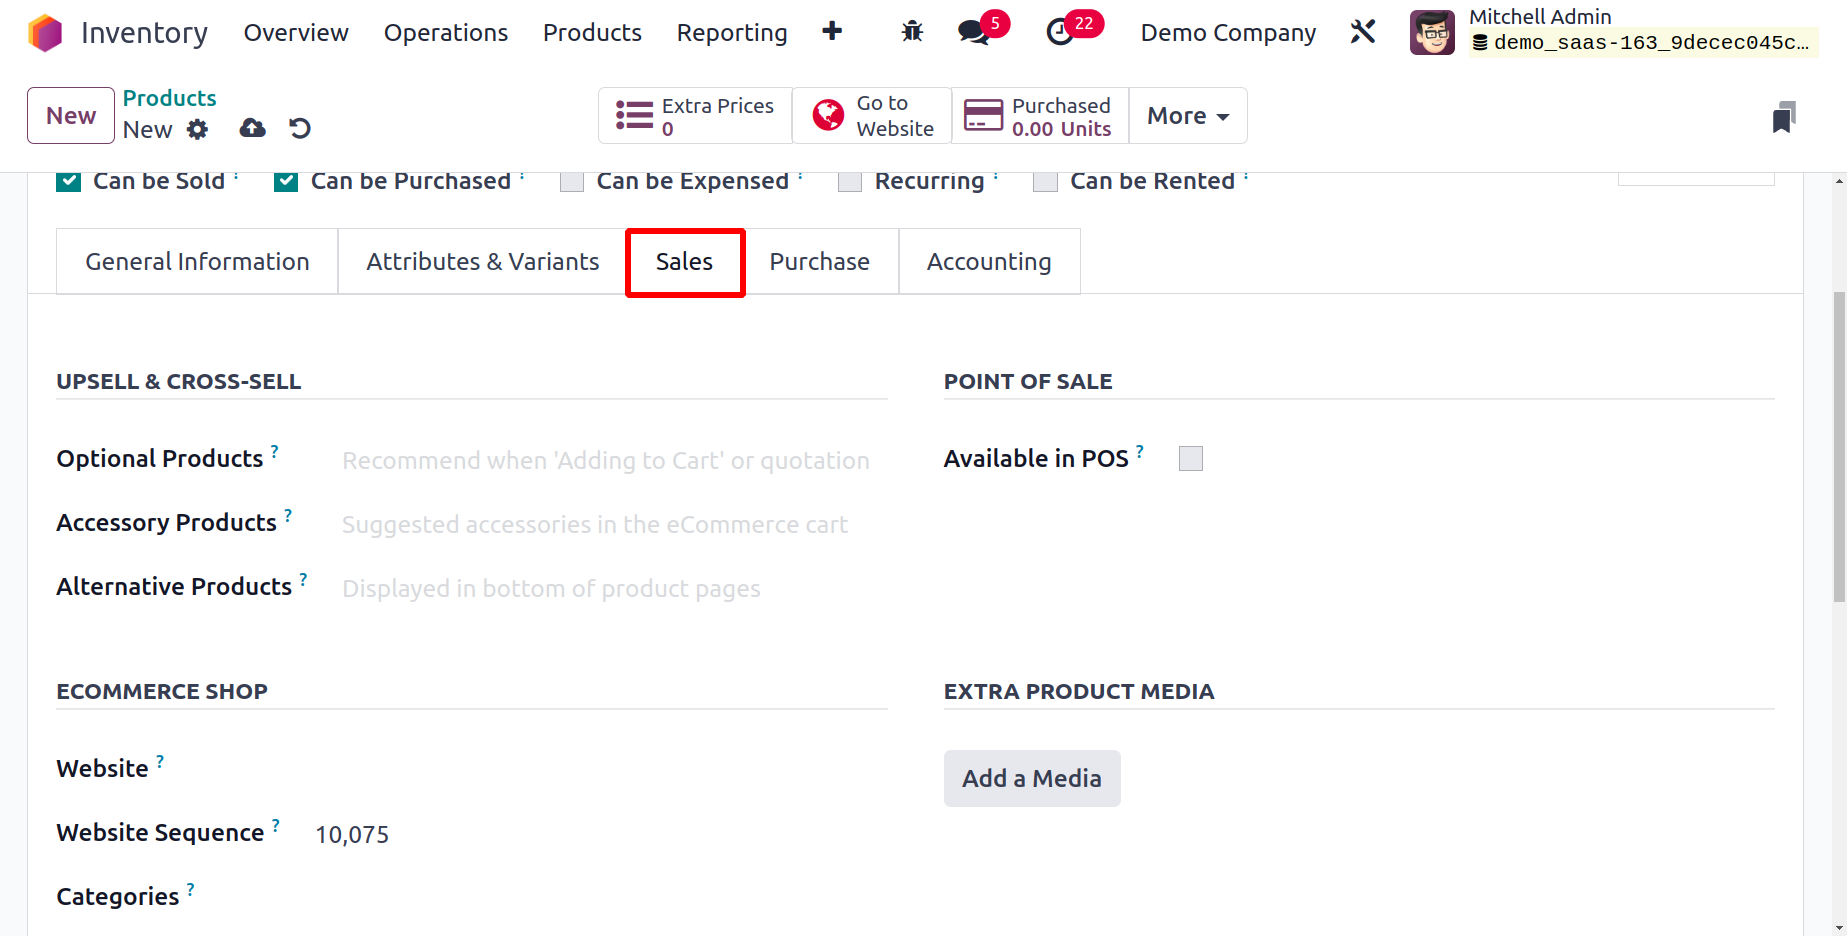
Odoo17 provides a variety of eCommerce techniques to increase online sales. You will have the choice to specify the upselling and cross-selling methods as a result on the Sales tab. When users click the Add to Cart button, products that are considered optional are presented to them. The cross-selling approach includes this. Using this functionality, Odoo17 will suggest complementary products that can be purchased along with the primary item. The cross-selling approach uses accessory products to propose additional items to customers when they review their shopping carts before checking out. The product you chose may have alternatives, as suggested by Alternative Products. This is one of the best up-selling techniques to increase online sales and will be visible at the bottom of the product page on the eCommerce website.
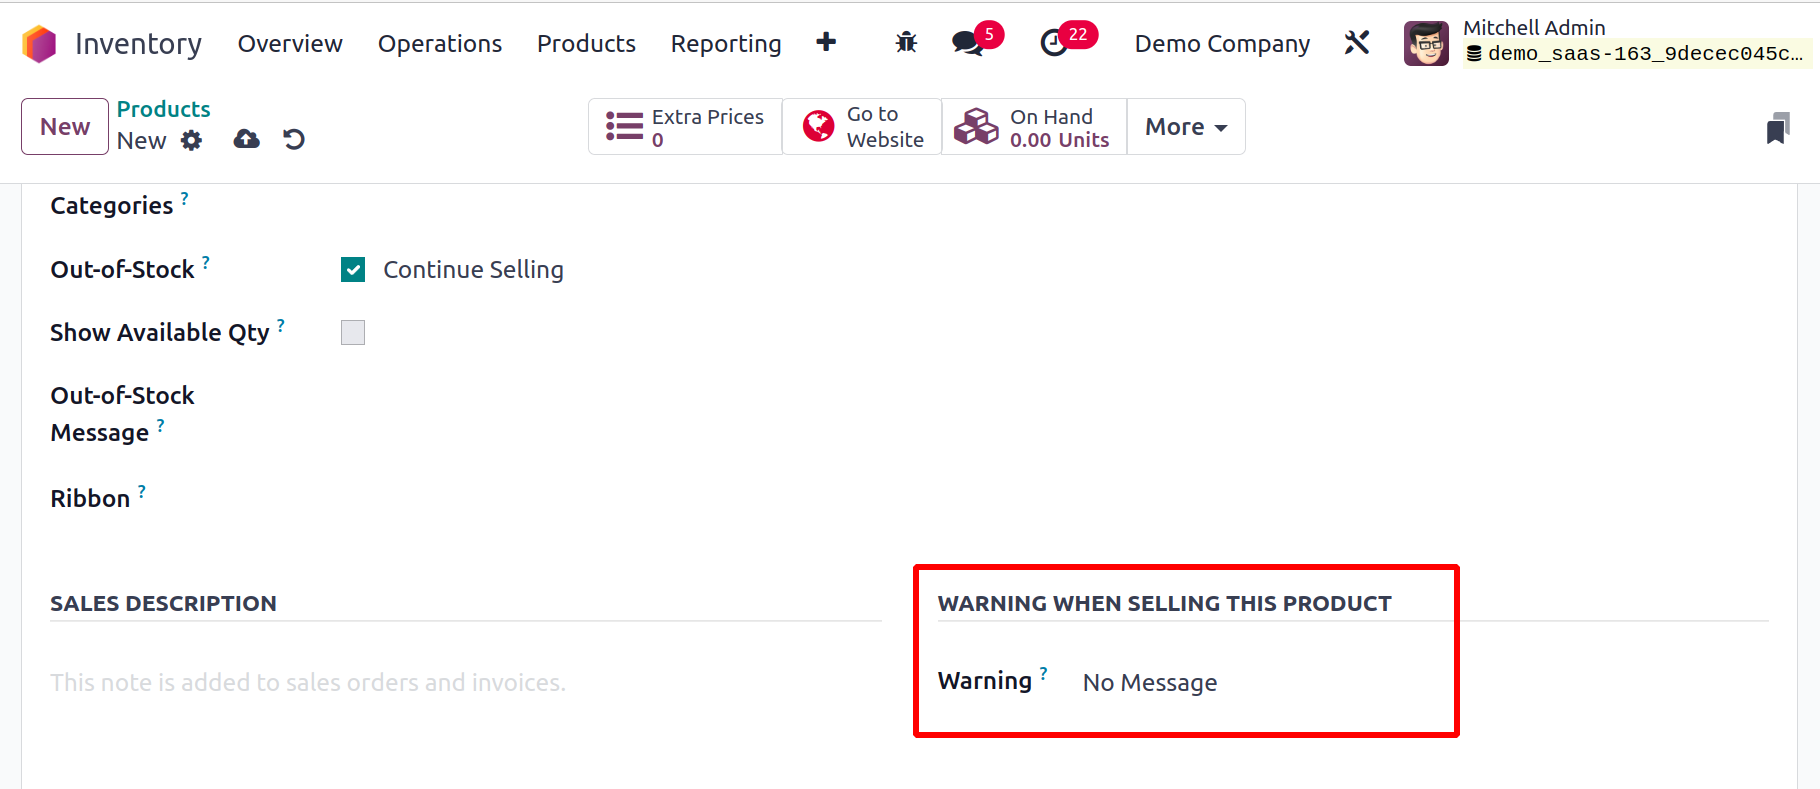
In the Warning field located under the Sales tab, as shown in the figure below, you can set warnings to appear while this product is being sold.
 By turning on the appropriate option in the Point of Sale field, you can make this product available in POS. You will be given the opportunity to enable the To Weight with Scale feature after selecting this option. If the product needs to be weighed using the hardware scale integration, you can turn on this option. In the Category section, enter the product's category for usage in the POS.You can enter the website, website sequence, categories, and ribbons for the product's eCommerce presentation in the Ecommerce Shop section. The sales order and invoice for this product will include the sales description that was written in the sales tab.
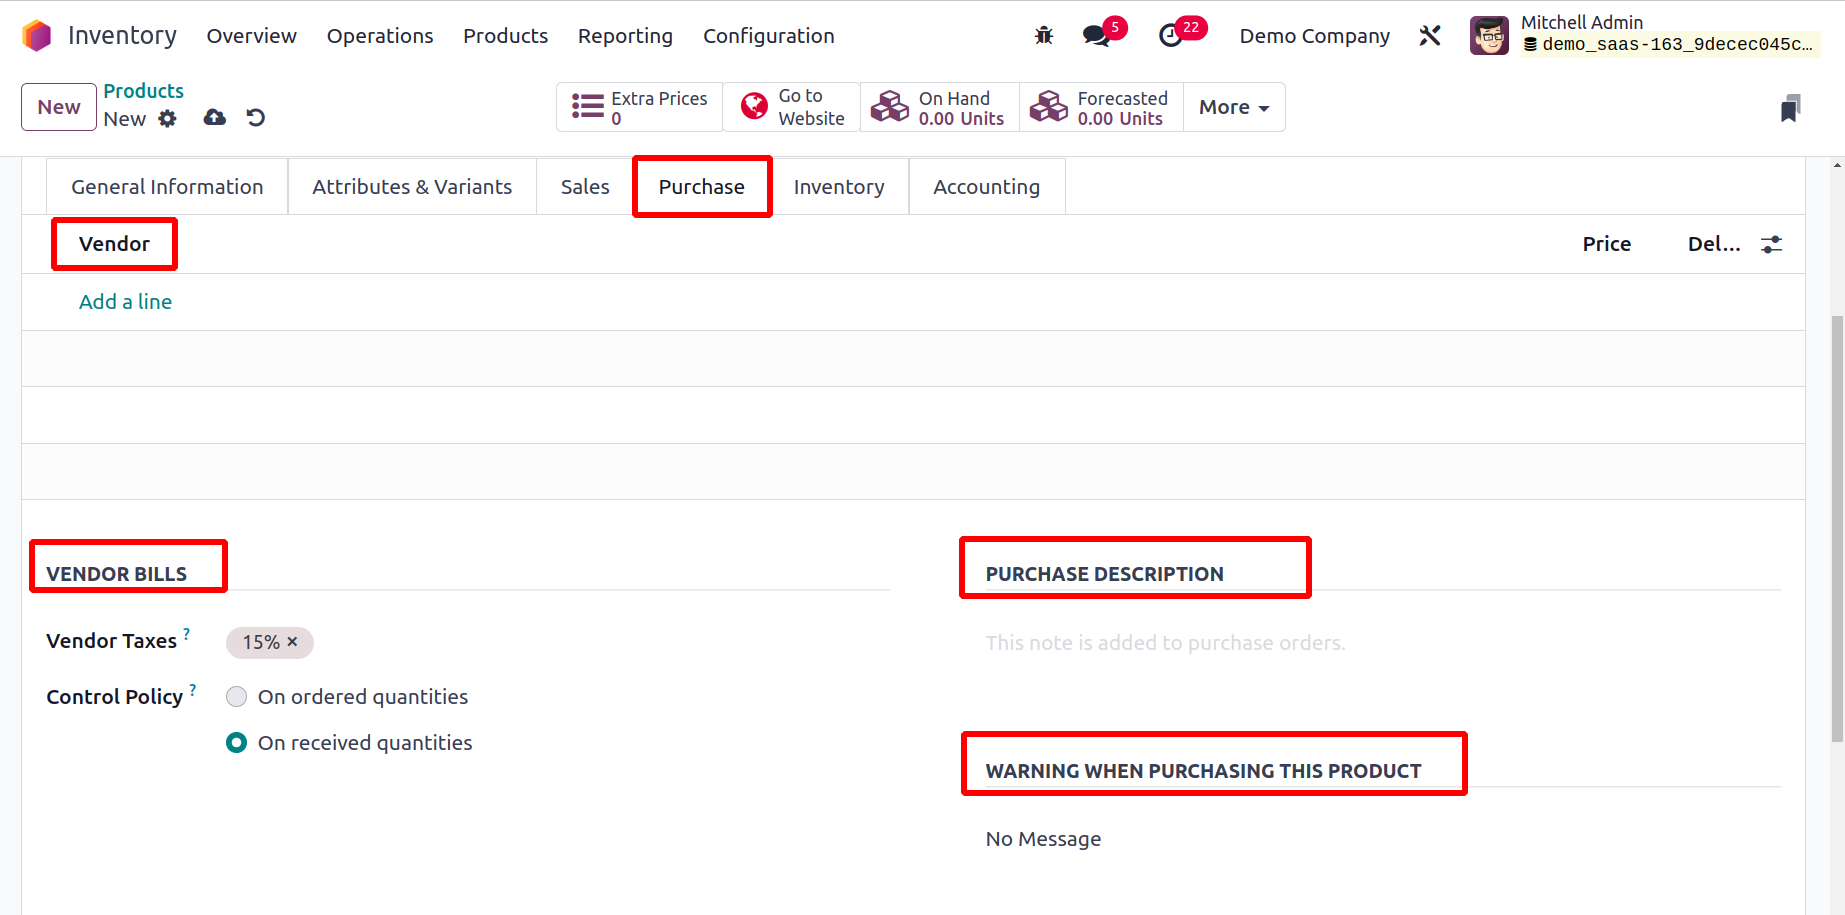 Under the Purchase tab, further information about the product's purchase can be provided. The Add a Line button can be used to list the suppliers of this product. You can turn on the Subcontractor field if you plan to subcontract this product with the chosen vendor.Enter the appropriate Currency in the field provided to purchase operations with the vendor. Additionally, you can provide in the appropriate boxes the Unit of Measure used for the purchase orders with this vendor, the Price to buy this product from the given vendor, and the Lead Time for Delivery. The delivery lead time is the number of days from the moment the vendor confirms the purchase order and the time the product is delivered to its final destination. In order to compare pricing and choose the best option for a purchase, Odoo enables you to set numerous vendors to a single product.You can configure the default vendor taxes used for this product's purchase activities under the Vendor Bills section. How to create vendor invoices for the goods will be outlined in the control policy. By changing the bill control policy to Ordered amounts, the bills can be created depending on the amounts that the client has ordered. You can create a control policy on Received Quantities if the consumer wants to pay the bill only after receiving the products. To add internal notes on the product's buying activities, use the buying Description tab.Let's go to the Product Configuration Window's Inventory tab now. This page allows you to specify the operations, logistics, traceability, and counterpart locations.
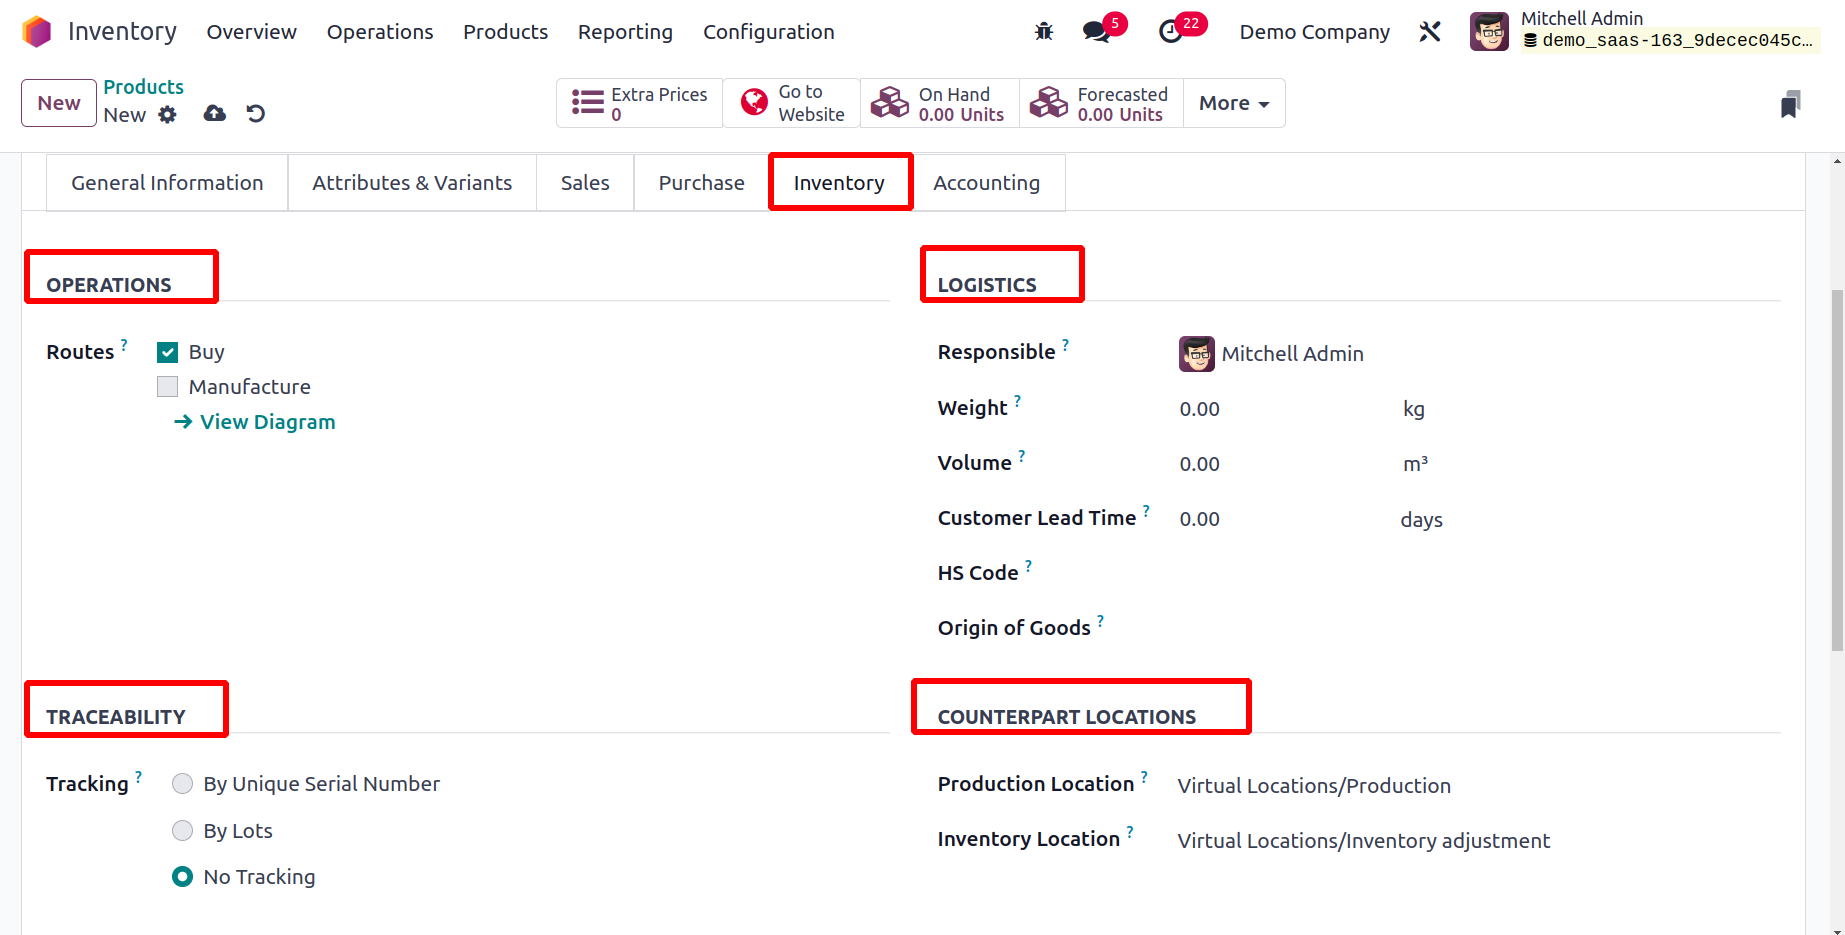 The Operations field will assist you in defining the Routes of the product in accordance with the modules that are installed in your Odoo17 database. Depending on your company's regulations, you can set the route of this product as Buy, Dropship Subcontractor on Order, Manufacture, Resupply Subcontractor on Order, and Dropship. For the storable goods in your warehouses, Odoo17 provides tracking tools that make it quick and easy to find the item in your inventory. The distinct serial numbers or lots assigned to each product can be used to track products. You can configure the Tracking based on Unique Serial Number or Lots in the Traceability box. You can choose the No Tracking option if you don't want to permit tracking for this product.Designate a Responsible employee to be in charge of the impending logistics-related tasks for this product in the Logistics area. This product's Weight and Volume can be specified in the corresponding fields.The number of days given to the customer for delivery following the confirmation of the sales order is known as the customer lead time. In the space provided, enter the HS Code that is used for international shipment and product declaration. You can also identify the country of origin of the goods, which indicates how and where they were made.You can define the Product Location under Counterpart Locations, which serves as the source location for stock moves brought on by manufacturing orders. When you perform an inventory, the provided Inventory Location will be taken into account as the originating location for the stock moves created.You will find a new option under the Inventory tab where you may describe the packaging of the products you have on hand. You must enable the Product Packaging feature from the module's Settings menu, as shown below, in order to access this option.
 The product packaging function will be accessible after you turn on this feature under the Inventory tab of the product setup window, as shown in the illustration below. Product packaging allows for the creation of product packets in predetermined quantities.
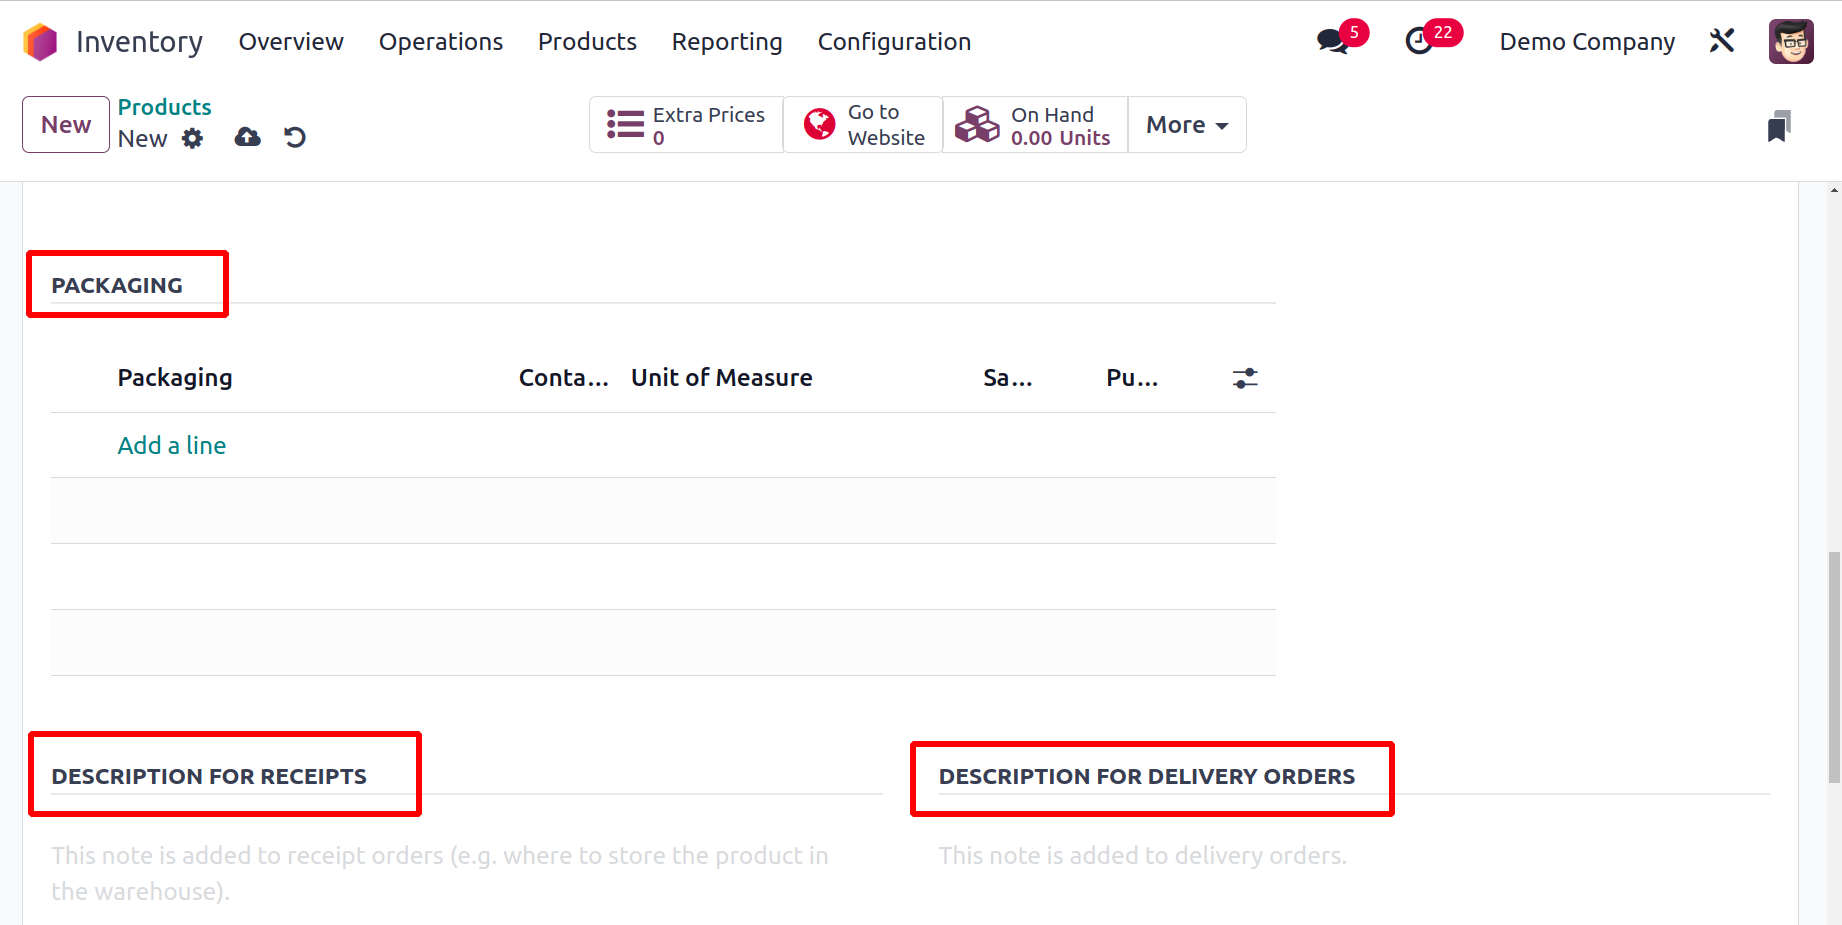 The packing, package type, amount of the product contained in the packaging, and unit of measurement can all be entered using the Add a Line button. You can choose the appropriate fields if you wish to use the package approach for sales and purchase orders.Additional notes for receipts and delivery orders can be added using the Description for Receipts and Description for Delivery Orders, respectively.You can specify the necessary information for the product's accounting activities under the Accounting tab of the Product Configuration window.
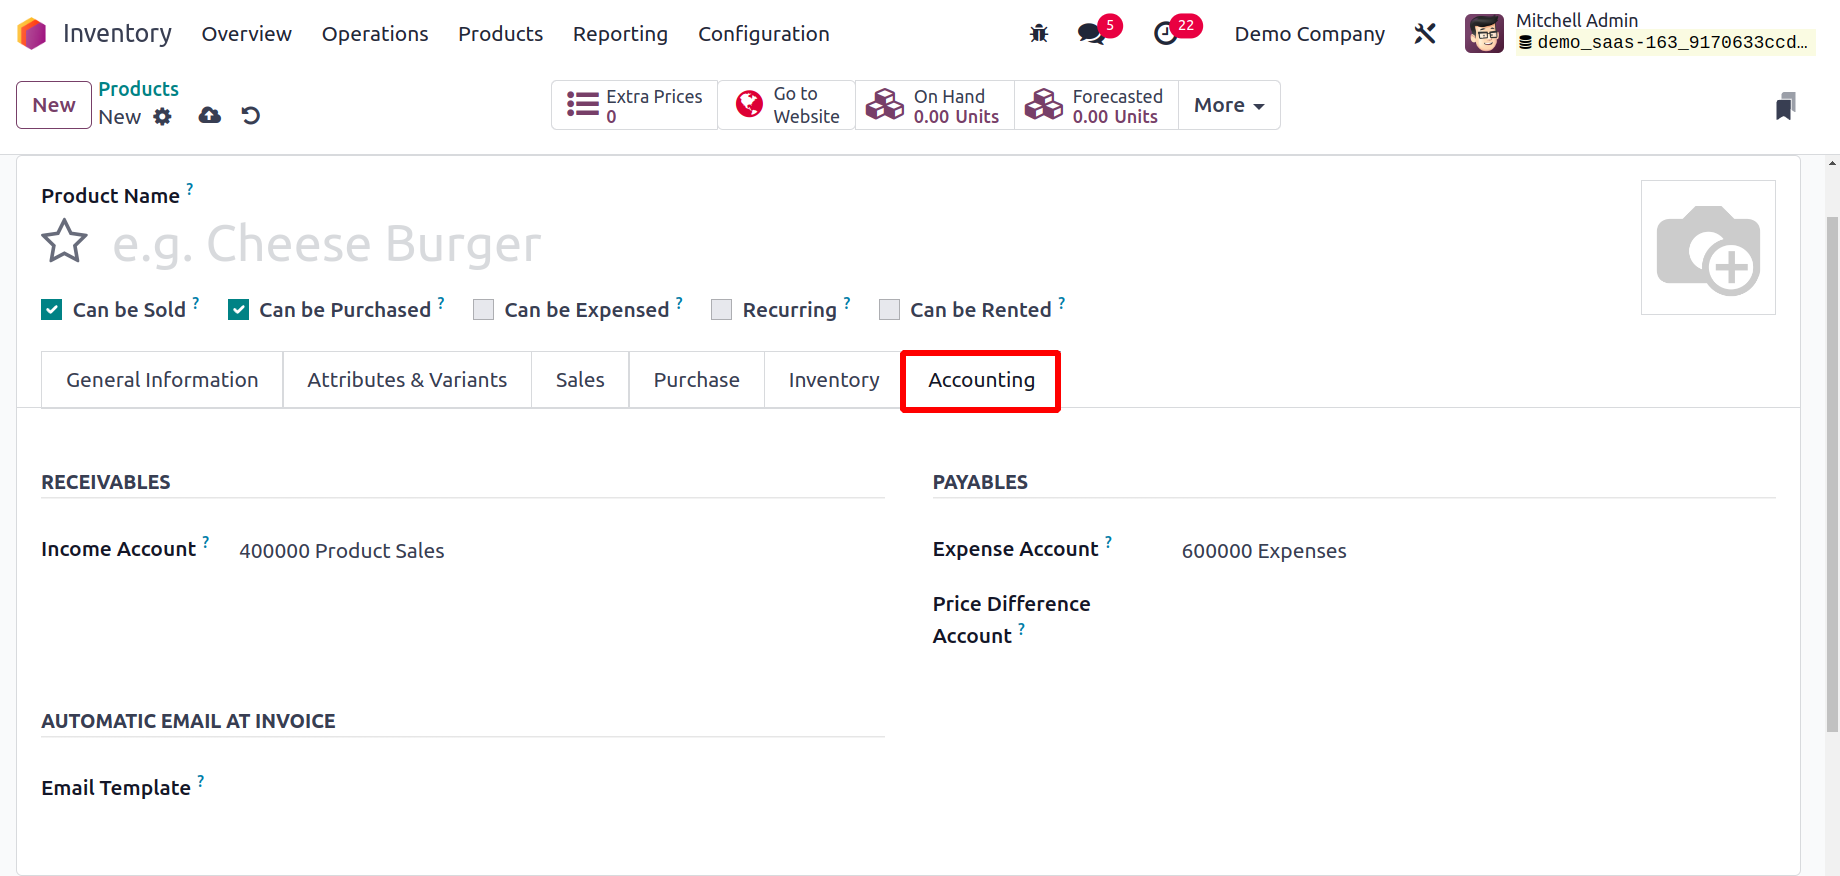 The Receivables area allows you to enter the Income Account, while the Payables field allows you to enter the Expense Account and Price difference account. When confirming vendor bills, this Price difference account is employed in automated inventory valuation to record the price difference between a cost and its associated vendor bill.Enter the Country of Origin and Commodity Code in the Intrastat field. If an Email Template is mentioned in the Automatic Email At Invoice field, Odoo will automatically send a product-specific email once the invoice has been validated.
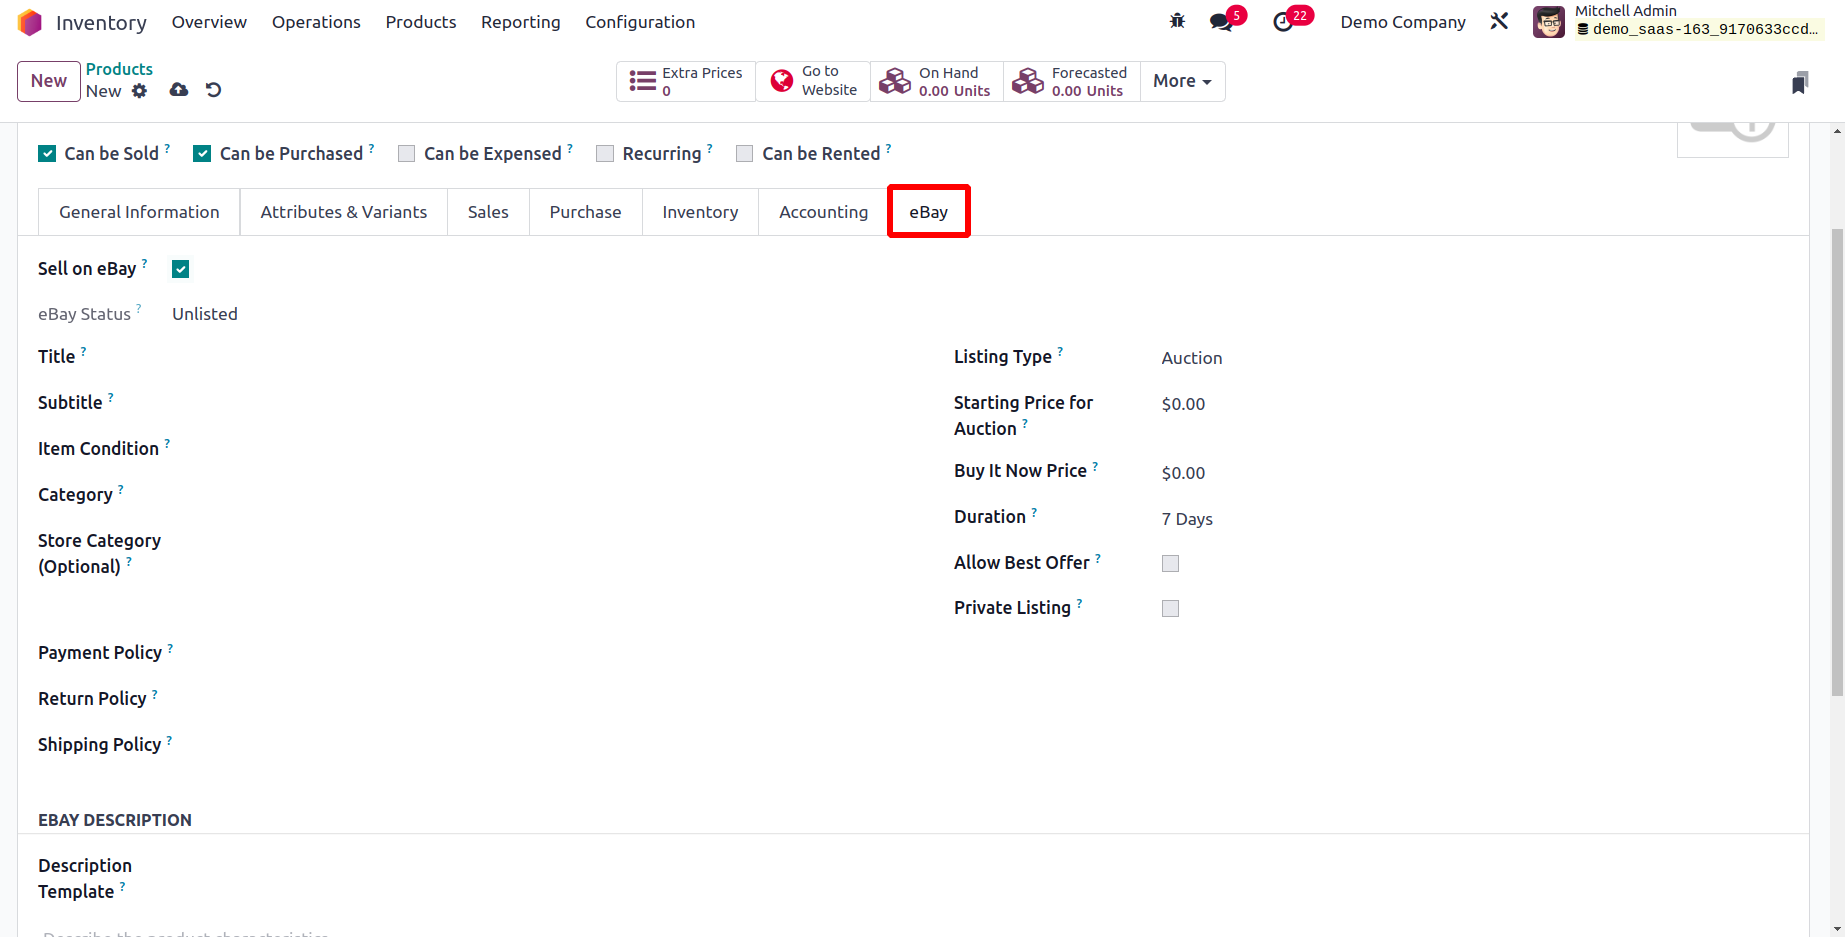 You can enable the Sell on eBay option under the eBay tab in order to sell this item on eBay. You will receive more fields to set as soon as you enable the eBay option, as indicated in the image above. Here, you can see the product's eBay status. For the product on eBay, you can enter a suitable Title, Subtitle, Item Condition, Category, and Store Category in the corresponding areas. There are two options for the listing type: fixed price or auction. You will be presented with an additional field to specify the price depending on the option you choose. The Duration parameter allows the eBay listing duration to be defined. You can make the best offers on eBay by turning on the Allow Best Offer setting. To enable private listing for this product on eBay, turn on the Private Listing option.We went over every tab that was there in the product configuration window.You may use certain operational tools on the screen after adding a new product to your Inventory module, including Print Labels, Update Quantity, and Replenish. Use the Print Label option to create labels for this product that may be placed on the parcels when they are delivered. As illustrated below, this will take you to a new wizard.
 The fields provided here allow you to enter the product's quantity, extra content, and label format. Labels for the chosen product will be printed after clicking the Confirm button. The example that follows.
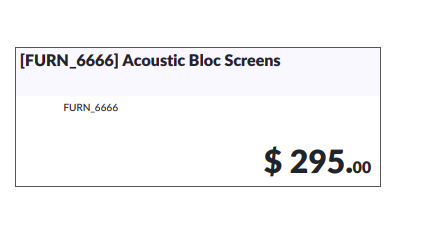 Now that we've covered the product configuration capability, let's talk about the configuration of product variants in the Inventory module.
Product Variants & Attributes
A good way to increase sales is to provide clients with various product variations. Similar to how we did in the Sales and Purchase module, Odoo17 lets you configure many product versions in the Inventory module. First, as shown below, ensure that the Variants option is turned on in the Inventory module's Settings menu.
 You may evaluate the Product Variants option from the Products menu of the Inventory module. The product variation has the same setup as the one we covered in the previous section.The list of variants set up in the Inventory module is displayed in the screenshot below. This window and the product window are comparable. The only distinction is that you can now see the associated goods' Variant Values.
 You can list a new product's variants in the Attributes & Variants tab while configuring it. You must mention the variant's Attributes and Values here.
 You can build a new variant value directly from this platform by using the Configure button. In addition, Odoo17 provides a different platform for configuring new product attributes and values. This platform is accessible through the Configuration menu.
 When you select the Attributes button from the Configuration tab, Odoo17 will direct you to a platform that contains a list of the attributes that have already been configured. The name of the attribute, the category, the display type, the variation creation mode, and the eCommerce filter visibility are displayed. You can use the search box to look for attributes. You can use the custom Filter and Group By options on this window to perform sorting operations. Use the New button to add new attributes.
 The Attribute Name box allows you to specify the appropriate title for the attribute. On the eCommerce comparison page, put comparable attributes under the same section by setting a category in the Category box. A product configurator attribute's Display Type can be changed to Radio, Pills, Select, Colour, or Multi-checkbox (option). Odoo 17 added a new feature called multi-checkbox. When the order line displays a new window with several product options, users can select multiple versions if the display type is Multi-checkbox. as seen in the picture down below.
 In addition, images to attributes is the second new feature added by Odoo 17. Only when the display type is Colour is this feasible. After that, the attribute values tab is where the photos can be added.
 You can choose the method for creating variants in the Variants Creation mode from the following options:Instantly: As soon as an attribute and its values are added to a product, all conceivable versions are immediately constructed.Dynamically: Every variant is only created when a sales order is updated with the relevant qualities and valuesNever: The qualities never have variants produced.Once the property has been used on at least one product, you cannot change the variant creation mode. By selecting the Visible option from the eCommerce Filter Visibility field, you can provide customers with an option to filter products based on their qualities. The attribute filters on the eCommerce page will be hidden if you choose the Hidden option. By utilizing the Add a Line button, you may list the Attribute Values one by one. When the Is Custom field is turned on, users can enter unique values for the attribute value.
 Using the smart button labeled Related Products, which is highlighted in the accompanying image, you may see the products that match this attribute.The products can have the generated attributes added to them. Therefore, users can add the created attributes to the products using the Attributes & Variant tab.
 By selecting the Configure button, which is positioned on the right side as seen in the image above, the properties can be changed. Clicking the Configure button will cause a new window to open. Each product variation was given along with its value, HTML color index, image, and additional cost.
 Users can specify the additional cost for the variant with this attribute's value on sales price in the Value Price Extra field by selecting each product. This tribute value is incompatible with other product values or some attribute values of optional or supplementary products due to the Excluded for field.

Product Categories
You can categorize your products by utilizing the Product Categories functionality found in the Odoo17 Inventory module. Product categories must be defined in Odoo17 in order to carry out various product operations. Odoo's ability to filter by product categories will make it simpler to find the products under different categories. The Configuration menu of the Inventory module, as seen in the menu bar below, will give the user access to the Product Categories window.
 From this window, you may access the pre-configured categories, including All, Consumable, Deliveries, Rental, Saleable, Internal, External, and many more. Let's use the New button to add a new product category.
 As seen in the screenshot below, Odoo17 will send you to a new window where you may configure a new product category.
 Along with the information about its Parent Category and Avatax Category, the name of the new category can be entered in the area provided. You can refer to the TaxCloud Category for this product category in the TaxCloud tab. It alludes to the taxability information codes that TaxCloud employs to determine certain tax rates for each category. When the TIC is not set on the product, this value is utilized. If no value is entered, the Invoicing Settings default value is applied. You can specify the routes of operation for this product category under the Logistics tab.You can specify a removal method for this product category in the Force Removal method field. The products falling under these categories will be taken out of stock using the Force Removal method. The removal strategies are First In- First Out, Last In, First Out, First Expiry- First Out, Closet location and Least packages. And it will be applied regardless of the originating location.You can choose between Reserve Only Full Packaging and Reserve Partial Packaging for the Reserve Packaging. By using this, the user can decide either the full quantity or the partial quantity in a package reserved. Reserve Only Full Packagings: This will only let you reserve the whole packaging. Only 1000 units will be reserved if a customer requests two pallets of 1000 units each but you only have 1600 on hand. Reserve Partial Packagings: Partial packaging can be reserved. If a customer requests two pallets, each containing 1000 units, and you only have 1600 available, 1600 will be reserved.
 You can enter the Income Account and Expense Account information in the corresponding fields in the Accounting Properties section. A client invoice will be validated using the income account. expense account, with the exception of Anglo-Saxon accounting, will be used for verifying a vendor bill.
 You can choose the Costing Method for this product category in the Inventory Valuation section. The costing techniques offered by Odoo 17 include:Standard Cost: Each product's standard cost is used to determine its worth.Average Cost (AVCO): Weighted average cost is used to value the goods.First in First out (FIFO): Products are evaluated under the assumption that they will depart the company first after entering it first.
 According to your needs, you can choose whether the product category's inventory valuation is done ‘Manual’ or ‘Automated’. The accounting records to value the inventory are not automatically posted when using manual inventory valuation. When a product enters or exits the business, an accounting record is automatically made as part of automated inventory valuation to value the inventory.Account Stock Properties will appear on the screen as an additional tab once you choose Automated Inventory Value. This tab containsStock Valuation Account: This account will be used to store the current worth of the products when automatic inventory valuation is enabled on a product.Stock Journal: This is the account journal that will automatically publish entries when stock moves are processed when performing automated inventory valuation.Stock Input Account: Unless a special valuation account is configured on the source site, counterpart journal items for all incoming stock changes will be posted in this account. The default setting for all items in this category is this. Additionally, it can be directly configured for each product.Stock Output Account: Unless a special valuation account is configured for the destination site, corresponding journal items for all outgoing stock moves will be posted in this account when performing automatic inventory valuation.The product category window's smart buttons, which are available, will provide information on the Products configured under this category and the Putaway rules, respectivelyLet's now examine the Packaging function provided by the Inventory module.
Product Packaging
The Odoo17 Inventory management solution allows you to easily pack and track your products. Making sure that things in inventory are transported and moved in a secure and comfortable manner would be advantageous. Products will be somewhat protected from damage by being placed in packages. As everyone is aware, it is a fundamental duty of all businesses to transport goods without any damage. With Odoo 17, you can construct delivery packages, numerous packs for a single product, and single packs for many products. Check out these packaging options in the Inventory module.
After turning on the Packaging options from the Settings menu, you will have access to them in the Inventory module. You must enable the Packages option from the Operations page.
 The Product packaging option from the Products menu is illustrated in the images below.
 You must be wondering why there are two bundle options. Packages and product Packaging have varied uses in Odoo 17. Packs are collections of various products. Using the Packages functionality, we can combine many things into a pack and track them.Product packaging, on the other hand, is used to package the same product in various quantities. It is a single pack containing numerous identical product units. Let's carefully examine each of these qualities.PackagesYou can locate the option under the Products menu of the Inventory module, as shown below, after turning on the Packages feature from the Settings module.
 This is the platform's Kanban view.
 You may access the Display Name, Package Type, Location, and Company information for the already defined packages from the list view. Using the New button, a new package can be made for a number of products.
 The Package Reference is visible in this window, as it is depicted above. You can choose a good type for your packages in the Package Type section. Later, we'll talk about the package type's settings. The Shipping Weight section allows you to enter the package's total weight. Put the Company's name and the product's location in the appropriate fields. The associated field will show the Pack Date. The Package Use setting has two options: Disposable Box and Reusable Box. Batch picking is done using reusable boxes, which are then emptied and reused. When a reusable box is scanned, the contents of the box are added to the barcode application. Reusable boxes are not used again. The contents of a disposable box are transferred when the barcode application scans it. You may view the Products that are a part of this package by clicking on the Content tab. The product list will be visible only once you utilize this package for stock movements. The Product Name, Lot/Serial Number, Quantity, and Unit of Measurement are all listed there.While confirming delivery orders, you can pack several items together. Using the smart button on the relevant sales order window, you can confirm the delivery order after confirming the sales order. You will receive the delivery order to validate, as shown below.
 The Put in Pack option is located here on the Operations tab. This button can be used to pack the items the consumer has requested. A new smart button will appear on the screen as soon as you select this option, as illustrated below.
 You can view the information about the package included in this delivery order by clicking the Packages button.
 As we previously mentioned, such produced packages can be seen in the Inventory module's Packages menu.Product PackagingThe Product Packaging window is accessible to the user via the Configuration menu of the Inventory module. This functionality enables you to package a product in many quantities.
 The window will display information about the product, packaging, package type, number of items in the package, unit of measurement, sales, and purchases.Select "New" from the menu. Odoo will present the window below for creating new product packaging.Here, you can fill in the relevant fields with information about the company, product, package type, contained quantity, and barcode used to identify the packing. If you want to use this product packaging in the buy and sales orders, you may enable the buy and Sales options.
 Additionally, the product configuration window allows you to define product packaging. This was already covered in the Inventory module's product configuration section. We will now examine package type configuration in the inventory module.Package TypeThe Inventory module's Configuration menu, as seen in the image below, contains the possibility to define several package types. You can set up a variety of package types for delivery operations using this platform.
 In this window, you can see all of the predefined package kinds as well as information on the carrier, package type, height, width, and length, maximum weight, and carrier code. Let's examine the process by which Odoo develops new package kinds for items. You can do this by pressing the New button.
 A suitable title for the package can be entered in the Package Type field. The Size of the package type should then be defined in the appropriate field. The Weight column can be expanded to include the package's total weight. The Max Weight parameter can be used to specify the heaviest weight that can be shipped using this package type. You can enter the barcode used for parcel identification in the barcode sections. You can enter the Carrier and Carrier Code utilized for this item after stating your Company.Let's move on to the product traceability feature after understanding the packaging function in Odoo 17.
Product Traceability
Odoo17's product traceability functionality makes it possible to trace and track any individual product component. To bring all activities under control, a product must be tracked at every stage of stock movement. Lots and serial numbers are crucial in ensuring effective stock movement monitoring. Product traceability will maintain a proper track from manufacturing processes to delivery operations, increasing the effectiveness of stock management. To lower the risk factors during a company's stock swings, proper monitoring is necessary. In the form of a traceability report, the Odoo ERP system will accurately track every stock movement of every component of a product that is in inventory. Using the lots and serial numbers, the user can view the entire production to the distribution process in the inventory.
There are some differences between lots and serial numbers. In order to distinguish a collection of identically-typed products, we frequently use a lot as a distinctive identification number. If the items are small or cannot be counted as distinct items, you can group them all together and assign a lot number. In the inventory, they are chosen in batches. Serial numbers can be assigned to certain products. It is believed that each product in the inventory may be identified by its serial number.
When managing their inventory, we assign product lots and serial numbers. When configuring the products in the Inventory module, you can assign lots and serial numbers to them so that you can later easily maintain the traceability report of the relevant products. This traceability capability is supported by the inventory management capabilities provided by Odoo 17 to enable efficient tracking activities. You must enable the Lots & Serial Numbers option from the Settings menu in order to access all of the traceability capabilities in the Inventory module.
 This feature will be accessible under the Traceability tab, as seen in the image above. You will see the Lots/Serial Numbers option under the Products menu once you have enabled this functionality.
 Lots and serial numbers that have already been configured can be seen here. In case it differs from the manufacturer's lots/serial numbers, it also includes the Internal Reference number, the Product, the Creation Date, and the Company. The NEW button makes it simple to give a product a new serial or lots number.
 In the space provided, you can start by mentioning a distinct lot or serial number. You can enter the Product, Quantity, Internal Reference, and Company in the relevant boxes. If the product has already been transferred, the serial number cannot be changed any longer. The Description tab allows for the specification of additional notes pertaining to this lot/serial number.
 The Properties option is now accessible on the Lot/Serial number as well, starting with Odoo 17. There's an Add Property option on the Action button.
 Subsequently, the displayed box selects the type of field, inserts data, and references the Label.
 You can choose whether the property field appears in the Calendar, Cards, and Calendar views using the Display Cards.
 Based on the actions carried out with this lot/serial number, the user will see some extra smart buttons on the interface. The Location and Traceability smart buttons will appear on the display as soon as you configure a new lot/serial number, as illustrated below.
 You may find out the product's precise location by clicking on the Location icon.
 Details about the Location, Product, Package, Lot/Serial Number, Owner, On Hand Quantity, Reserved Quantity, and Unit can be found in the Location History. You can access the product's movement history by pressing the History button here. Using the Replenishment button on this window, the product can be restocked.You can find out the product's tracking information by pressing the Traceability smart button. You may find information about each product movement here, including the Reference, Product, Date, Lot/Serial, From, To, and Quantity.
 You can specify the traceability of a new product while configuring it in the Odoo17 Inventory module. You have the option to specify the product's Traceability under the Inventory tab, as illustrated in the image below.
 From this box, you can specify the tracking of the product using the Unique Serial Number or the Lots. You can use the No Tracking option if you don't want to track the product.Products can have lots or serial numbers assigned to them as soon as they are received in the inventory. You can manage the lots and serial numbers for the products before you receive them after confirming a purchase order. Let's generate a new Receipt order and confirm it to better comprehend this.
 You can now use the Receipt window's option that is highlighted in the image above. Immediately after clicking this option, a new wizard will show up so you may specify the lots/serial number of the chosen product.
 Using the Add a Line button, you may enter the Lot/Serial number and Destination Package into the respective fields. Select "Confirm" from the menu. You can now verify the receipt and add the item to your inventory.The product details window for this recently acquired product will now include this lot/serial number. The smart button, which is indicated in the image below, is located on the product details window and can be used to check this.
 Here, you can see the recently assigned lot or serial number.
 By turning on the Display Lots & Serial Numbers on Delivery Slips option under the Traceability tab of the Settings menu, you may display lots and serial numbers on delivery slips. Similar to this, lots and serial numbers will appear on bills when the Display Lots & Serial Numbers on Invoice button is on.
 Let's now look at how to assign serial numbers and lots expiration dates.Expiration DateSetting expiration dates for the consumable or storable items in your inventory is an important job. On every product, you should unquestionably state the expiration date so that the buyer is aware of how long the product is safe to consume. Odoo17 controls product expiration dates by utilizing aspects related to lots and serial numbers. From the Inventory module's Settings menu, you can turn on this feature.
 You can activate the Expiration Dates option under the Traceability menu. In addition, the expiration dates can be shown on the delivery slips by turning on the option to display them there.You can add expiration dates to product lots or serial numbers after activating the expiration date function. You can do this by visiting the product configuration window. Pick the Inventory tab as per the example below.
 In this section, you can specify the tracking strategy using the Traceability field. You can activate the Expiration Date option after choosing the tracking method.Once enabled, this option will allow you to manage product expiration dates for both the product and the accompanying lots/serial numbers. As soon as you turn on this option, you'll see some extra fields where you can specify the below-listed crucial dates.Expiration Date: The number of days after the product is received that it may no longer be safe to use and should not be consumed. Based on the lot/serial number, it will be calculated.Best Before Date: The number of days prior to the expiration date when the items begin to decay but are still safe to use.Removal Date: The number of days before the product's expiration date that it must be taken out of stock.Alert Date:: The number of days prior to the expiration date after which a lot/serial number alarm shall be raised.You can check the lot and serial number window of the relevant product after entering the expiration date for a product to receive the expiration information automatically.
 The lot/serial number's expiration information is displayed on the Dates tab. If the serial number has expired or is close to doing so, you can see an expiration alert on it. You can acquire a precise list of expired lots and serial numbers with the help of the filter Expiration Alert.In this section, we went into detail about the product traceability function. Let's now talk about the inventory management options provided by Odoo 17.
Inventory Operations
The finest solution for the efficient management of all forms of inventory activities is the Odoo17 Inventory module. For a business to run smoothly, inventory management needs to have the appropriate support. You will be interested in the features Odoo17 has to offer when we discuss it as the ideal inventory management solution. This section will go into detail about how Odoo17's dedicated Inventory module manages inventory operations. The Inventory module's Overview window provides a clear understanding of all the processes that the module may manage.

Based on the activities set up in the module, you can handle receipts, internal transfers, delivery orders, returns, manufacturing, resupply subcontractor, POS orders, dropship, dropship subcontractor, and a lot more from the Kanban view of the Inventory Overview window.
You will have unique choices to control each of these actions separately in the Inventory module's menu bar. However, this platform will enable you to quickly see a summary of all processes. You may access more options to handle each of these processes by clicking the three vertical dots in the top right corner of each operation tab.

The inventory operations of all the firms set up in your system will be included in the overview if the database is operating in a multi-company environment.
Creating new operation types
With the aid of the specialized tools included in the module, you can easily develop new operation types in the Odoo 17 Inventory module. As seen below, the Configuration menu leads to the Operation Types menu.

When this option is selected, a new window containing information about the currently set-up operation is displayed. By choosing them from the provided list, you can alter the operation kinds that are available. Here, we'll make a brand-new Operation Type. Therefore, press the New button.

In this window, you can create a new operation type. In the relevant field, you can describe the operation type. In the appropriate fields, include the Reference Sequence, Code, Barcode, Reservation Method, and Company.

The Reservation Method will determine how the goods in transfers of this operation type should be preserved. It may be done manually, at confirmation, or prior to the scheduled date. By choosing the option ‘Ask’ in the Create Backorder field while validating a transfer, you can prompt your customers to decide whether they wish to place a backorder for the unsold items. Odoo17 will automatically establish a backorder for the remaining products if the ‘Always’ option is used. The remaining products will be canceled if the ‘Never’ option is chosen. Check the Show Detailed Operation option if you wish to display a thorough stock operation in the picking lines.
The corresponding fields under the Locations tab allow you to specify the Default Source Location and Default Destination Location of the transfers of this operation type.

The type of operation can be internal transfer, manufacturing, delivery, or receipt. The remaining fields will only slightly alter depending on the Type of Operation you choose. There are various setup choices for each Type of Operation. The additional fields that display on the screen, for instance, if you choose receipt as the kind of operation, are noted below.

Suppose you want to receive an automatic reception report at the moment of validation in the event of a receipt. In that case, you can activate the Show Reception Report at the Validation function. Only the reception report will appear after the receipt has been validated, if Show Reception Report at the Validation is enabled.
You can choose the operation type that is best for product returns by entering it in the Operation Type for Returns area. Odoo17 will automatically fill in the relevant goods, locations, and lot/serial numbers in the detailed operations.
You can produce new lots/serial numbers for the products in the transfers of this operation type by turning on the produce New Lots/Serial Numbers option from the Traceability tab in Odoo 17. By selecting the Use Existing Lots/Serial Numbers option, you can also use the current lots/serial numbers for product transfers. You can choose which full packages to relocate by ticking the relocate full Packages box on the Packages tab.

Odoo17's product traceability functionality makes it possible to trace and track any individual product component. To bring all activities under control, a product must be tracked at every stage of stock movement.
Transfers
Businesses with numerous warehouses must control the movement of goods from one place to another. In some circumstances, the businesses may have various branches in various cities, making it very difficult to efficiently coordinate product transfers. Companies frequently handle such circumstances by designating primary warehouses and secondary warehouses for product delivery. The handling of product transfers from one location to another is made simple with Odoo17's Transfers feature.
Transfers of inventory include the movement of goods inside and outside of warehouses. Internal transfers are also included for the movement of goods within the company's warehouses. The management and configuration of warehouses are supported by the Odoo17 ERP system, which we shall cover in the following section. You may control the product transfer between the configured warehouses and locations by using the Transfers option found under the Operations menu after defining the company's warehouses and locations in detail.
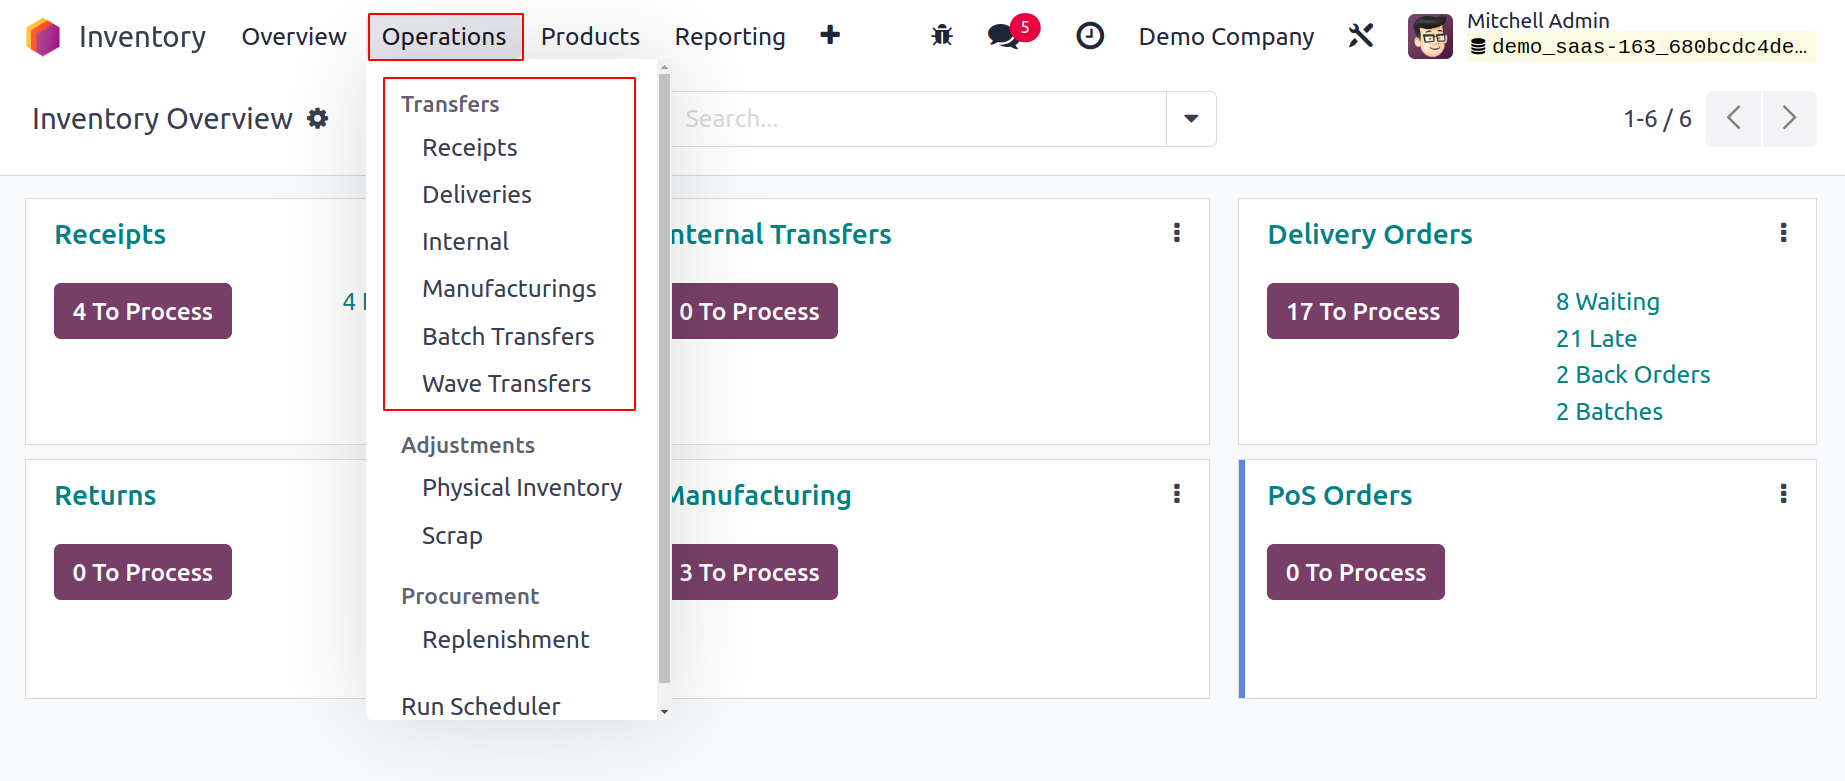
You will find transfers like Receipt, Deliveries, Internal, Manufacturing, Batch Transfer, and Wave Transfer under the Transfers option, as shown in the image above. You will find information about the Reference, From, To, Contact, Scheduled Date, Source Document, Batch Transfer, Company, and Status of the preconfigured transfers here, as shown in the image below.
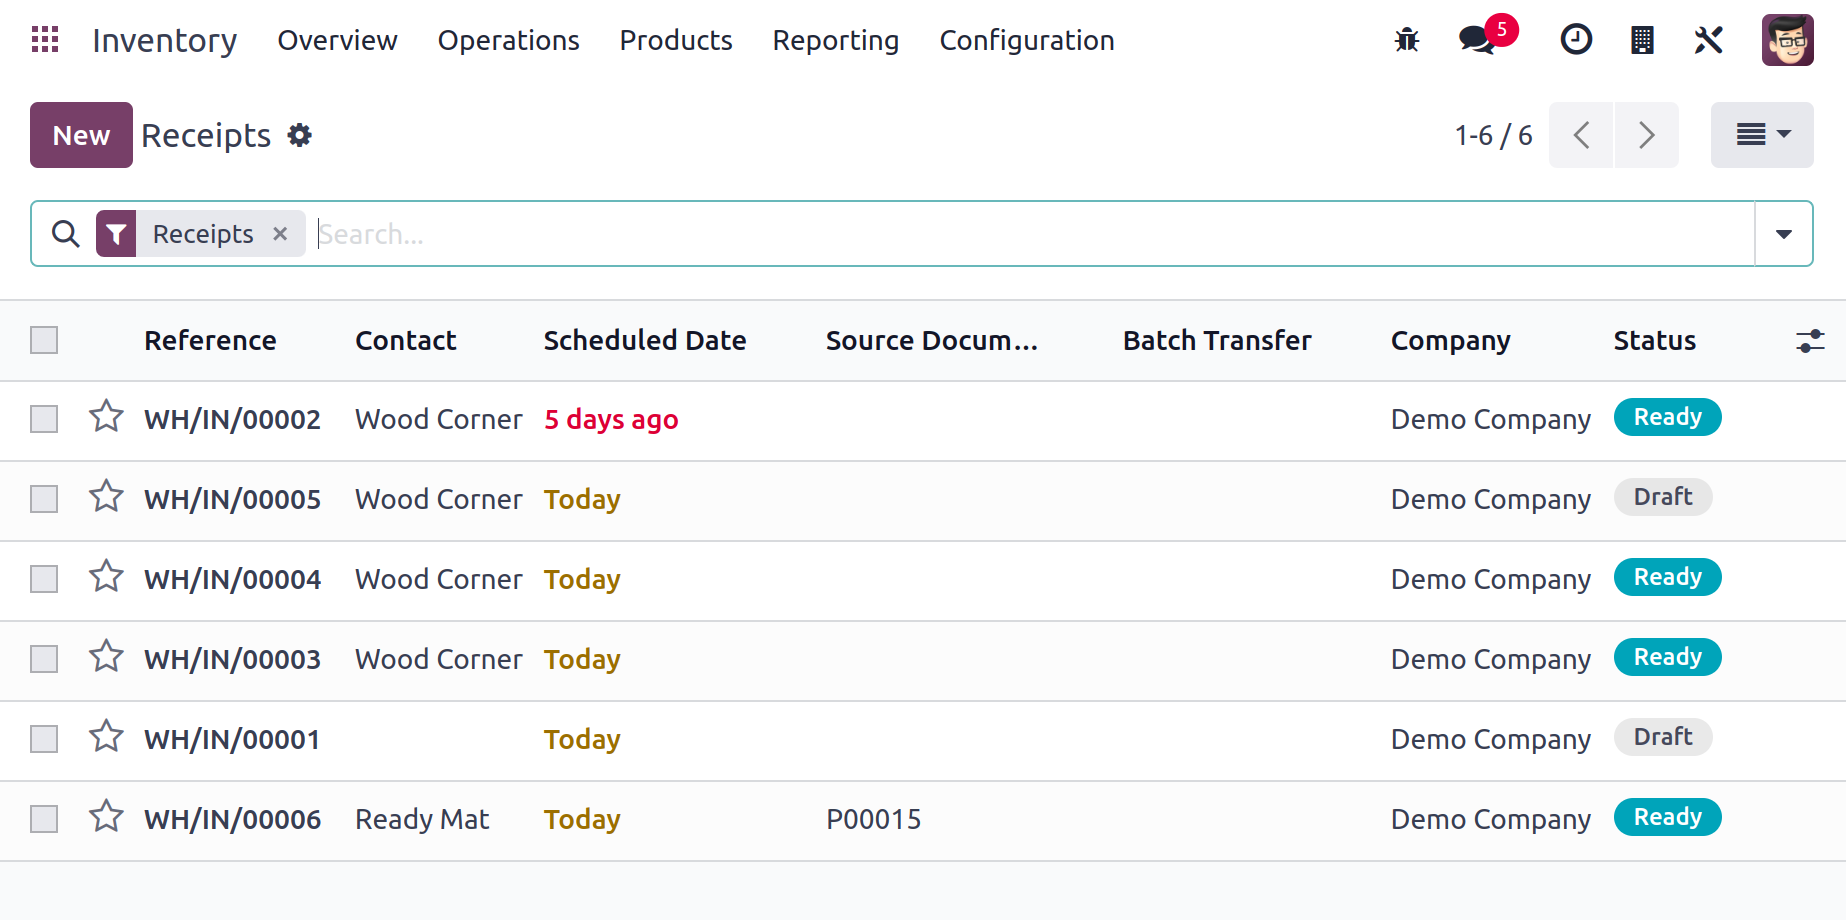 You can easily complete the sorting tasks by using the Group By and Filters options. For this platform, you will also receive Kanban, Calendar, and Location views. Let's now examine how Odoo17 enables you to establish a new transfer for the transportation of goods between two locations. Click the New button to do this.
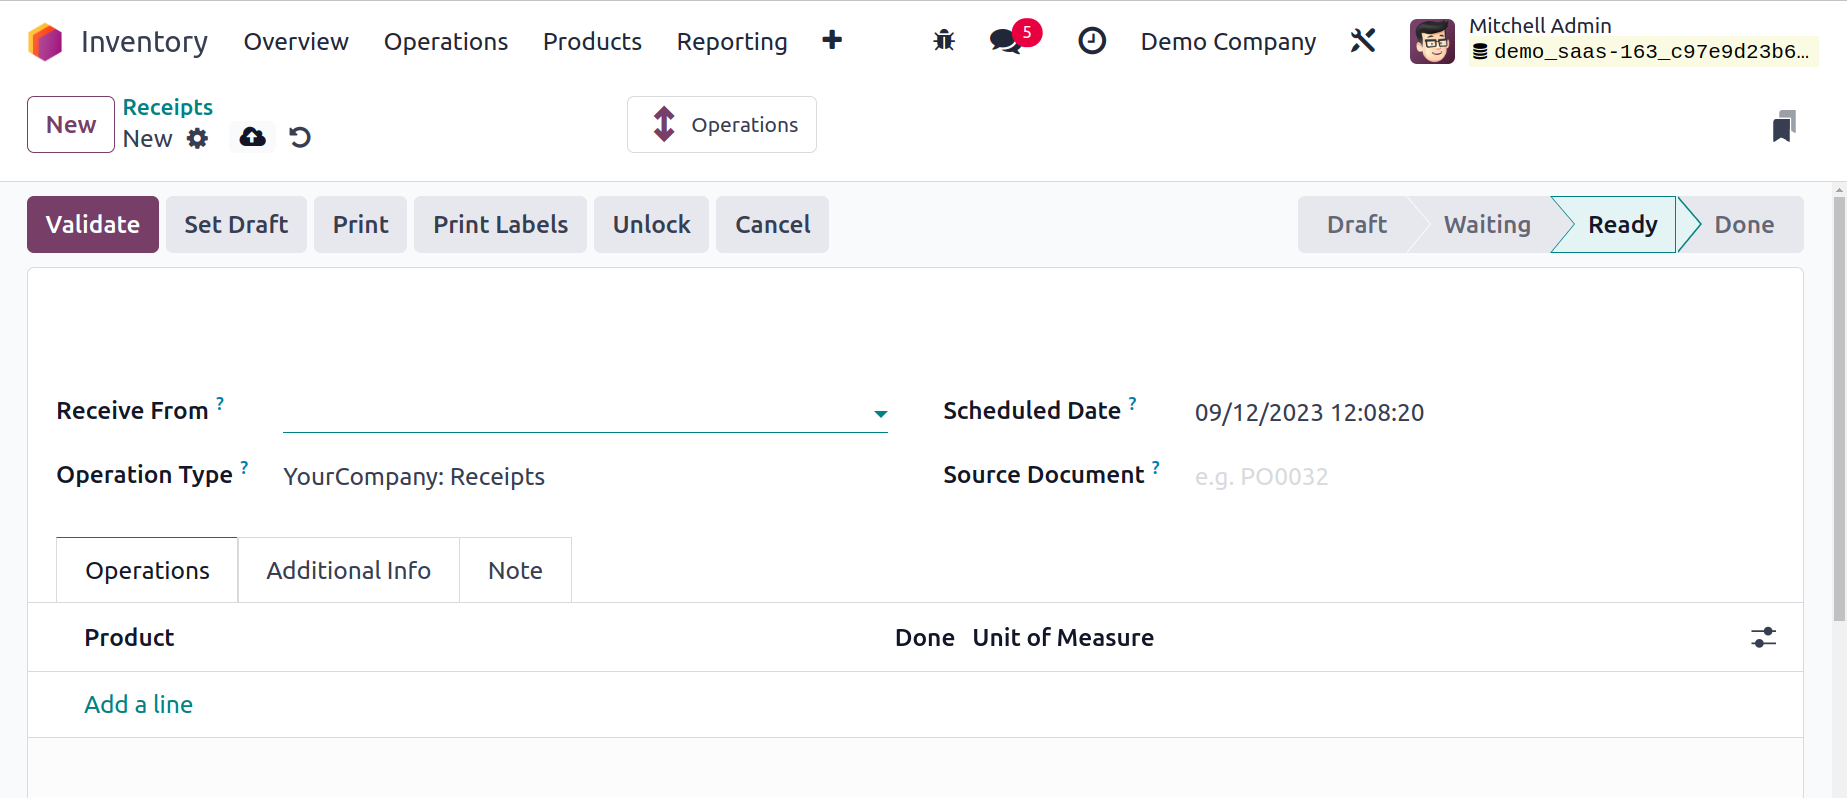 The partner id can be entered in the Contact area of the new transfer creation window. Various transfer kinds can be managed using this platform. Receipt, Internal Transfer, Delivery Orders, Returns, Manufacturing, Resupply Subcontractor, POS Orders, Dropship, and Manufacturing are a few of them. In the Operation Type area, you can choose the transfer type you want for your product movement. Odoo17 provides a separate platform in the Configuration menu, which we shall cover already, to create various kinds of operation. You can specify the product's source location and destination location after choosing an appropriate Operation Type. The Scheduled Date feature can be used to indicate the anticipated date of stock movement. You can include a reference to the document pertaining to this product transfer in the Source Document area. You can use the Add a Line button on the Operations page to list each item that is part of this transfer individually. You can describe the products' names, packaging, demand, and UoM in addition to their names. The quantity of the product that is intended to be transferred is referred to as the demand.Under the Additional Info tab, you may add the Shipping Information.
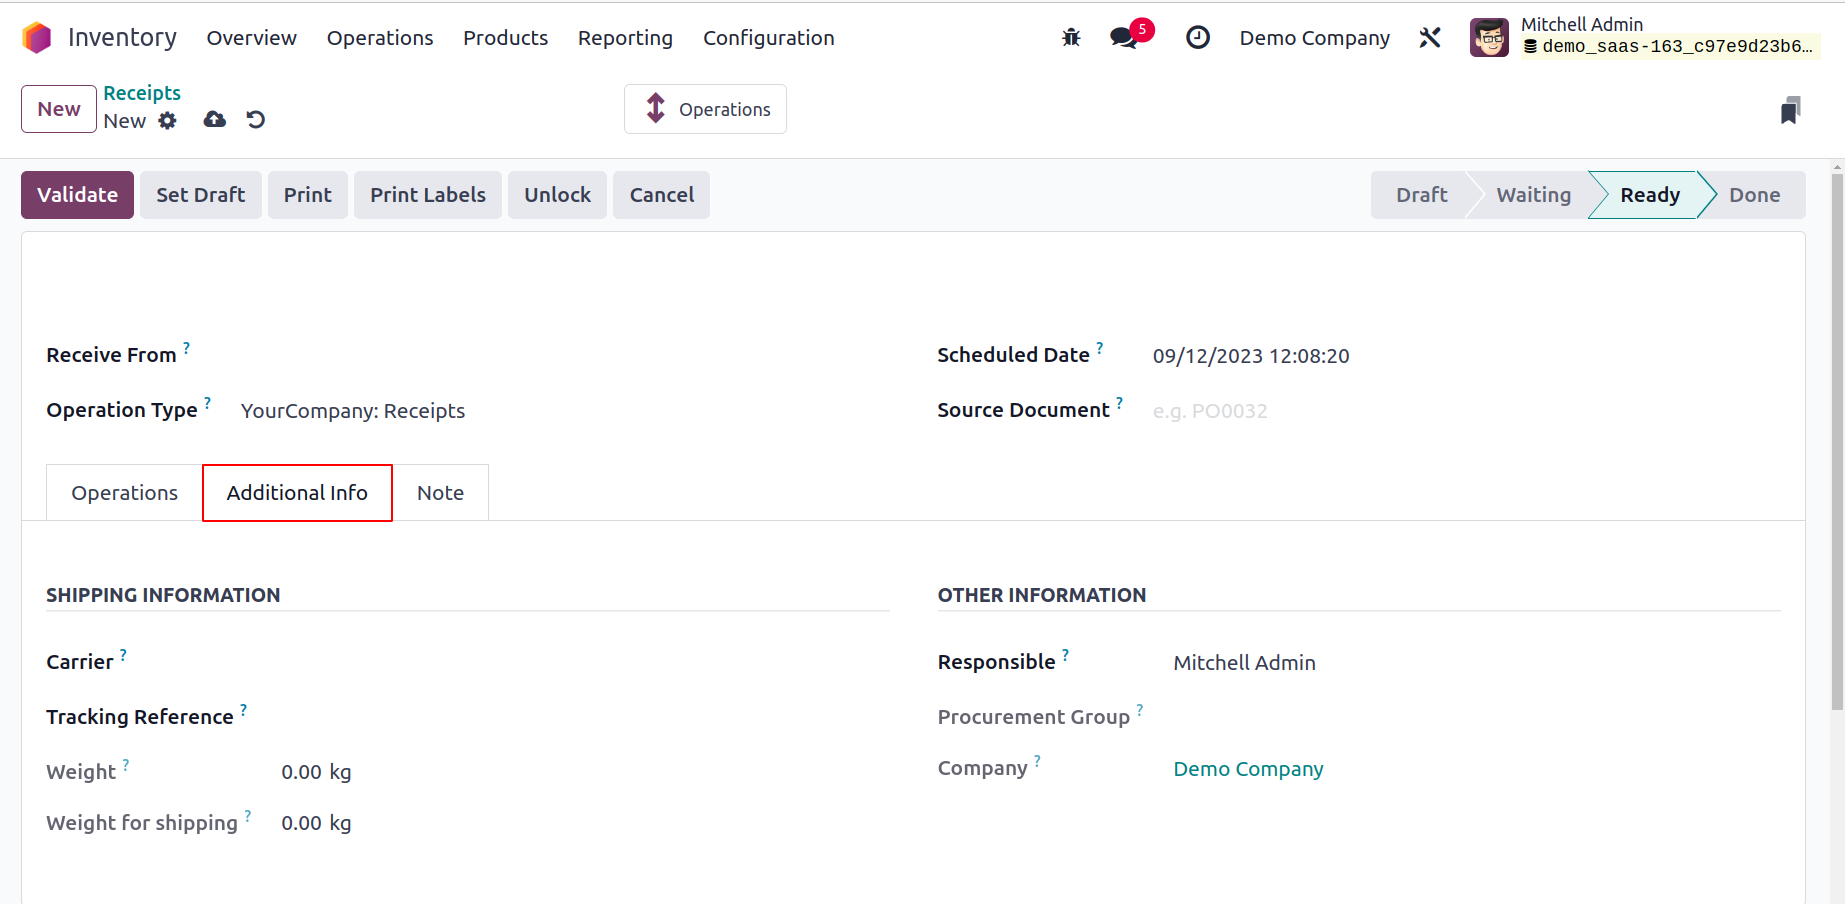 The Carrier Details, Tracking Reference, Weight, and Weight for Shipping of the goods involved in this transfer can all be added here. You can configure the transfer's shipping policy in the Other Information section. Depending on your company's policy, you can set it to "As soon as possible" or "When all products are ready." You can also designate a Responsible employee to be in charge of the transfer's future activities. Finally, fill in the respective fields with the Procurement and Company information. You can add internal notes about this transfer on the Notes tab. The transfer will be saved after the Save button is pressed.
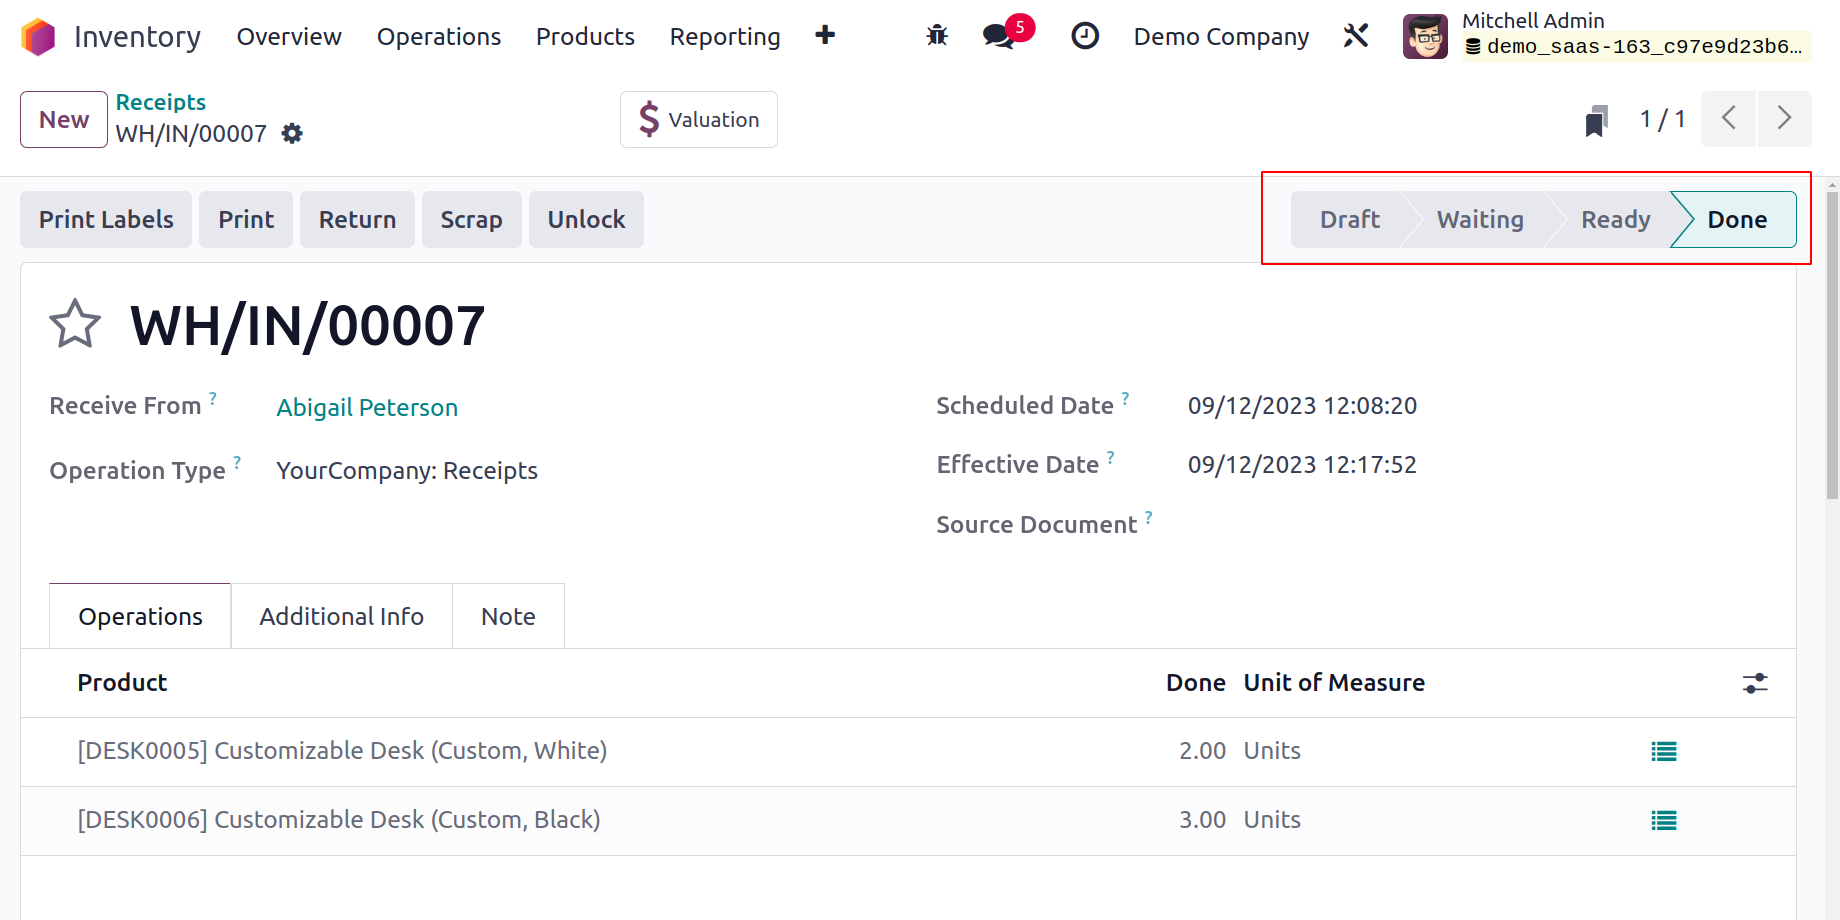 The transfer is initially in the Draft phase. When a transfer is in the Waiting stage, it means that some products are not yet available. The transfer can be seen in the Ready state if it is prepared to be processed. To advance the transfer to the Ready stage, click the Mark as Do button. Click the Validate button once the transfer process is finished. The transfer process is now complete.
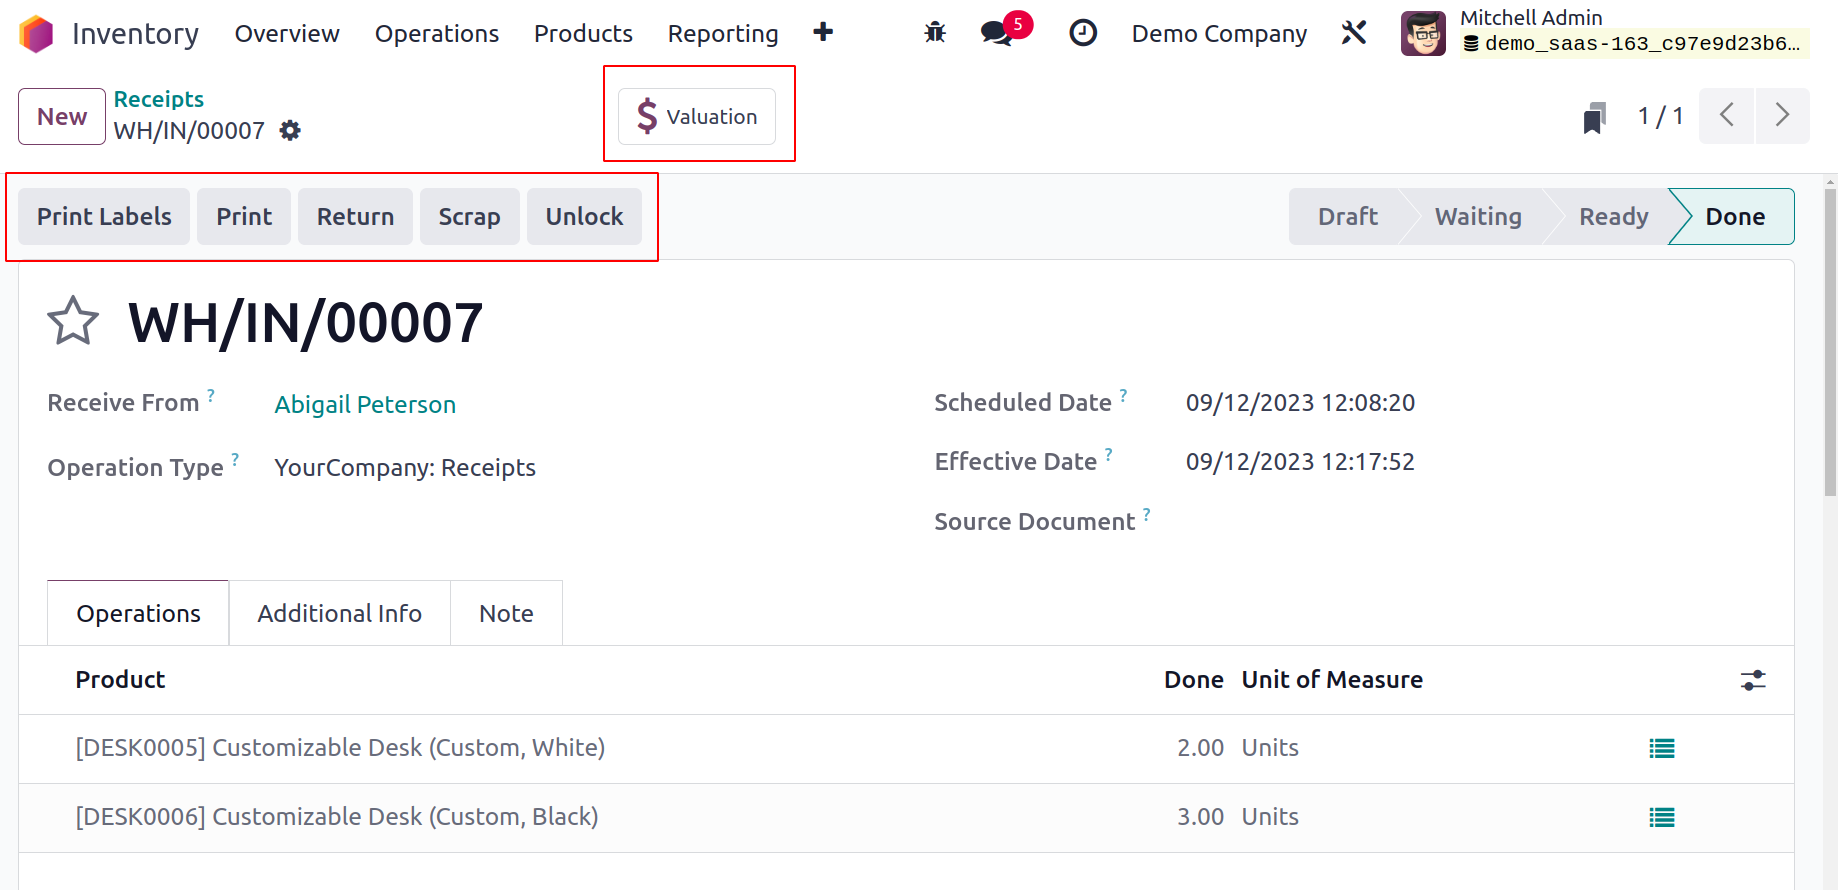
The Print Label button can be used to produce labels for the recently transferred products. You can print off the transfer's delivery slip using the Print button. The Return button allows you to send the items back to the previous place. The freshly transferred products can be sent to scrap using the Scrap button if you discover any flaws in them. Using the smart button labeled Valuation located in the window, as seen in the above image, you can obtain the stock valuation report for this transfer.
Batch Transfer
With the aid of the Batch Transfer tool in Odoo17, you are able to execute several transfers simultaneously. You can utilize this tool to carry out group transfers, which will help you save time and effort. All transfers added to the batch are performed simultaneously when transferring in batches. The challenges associated with managing bulk transfers can be reduced by employing this technique.
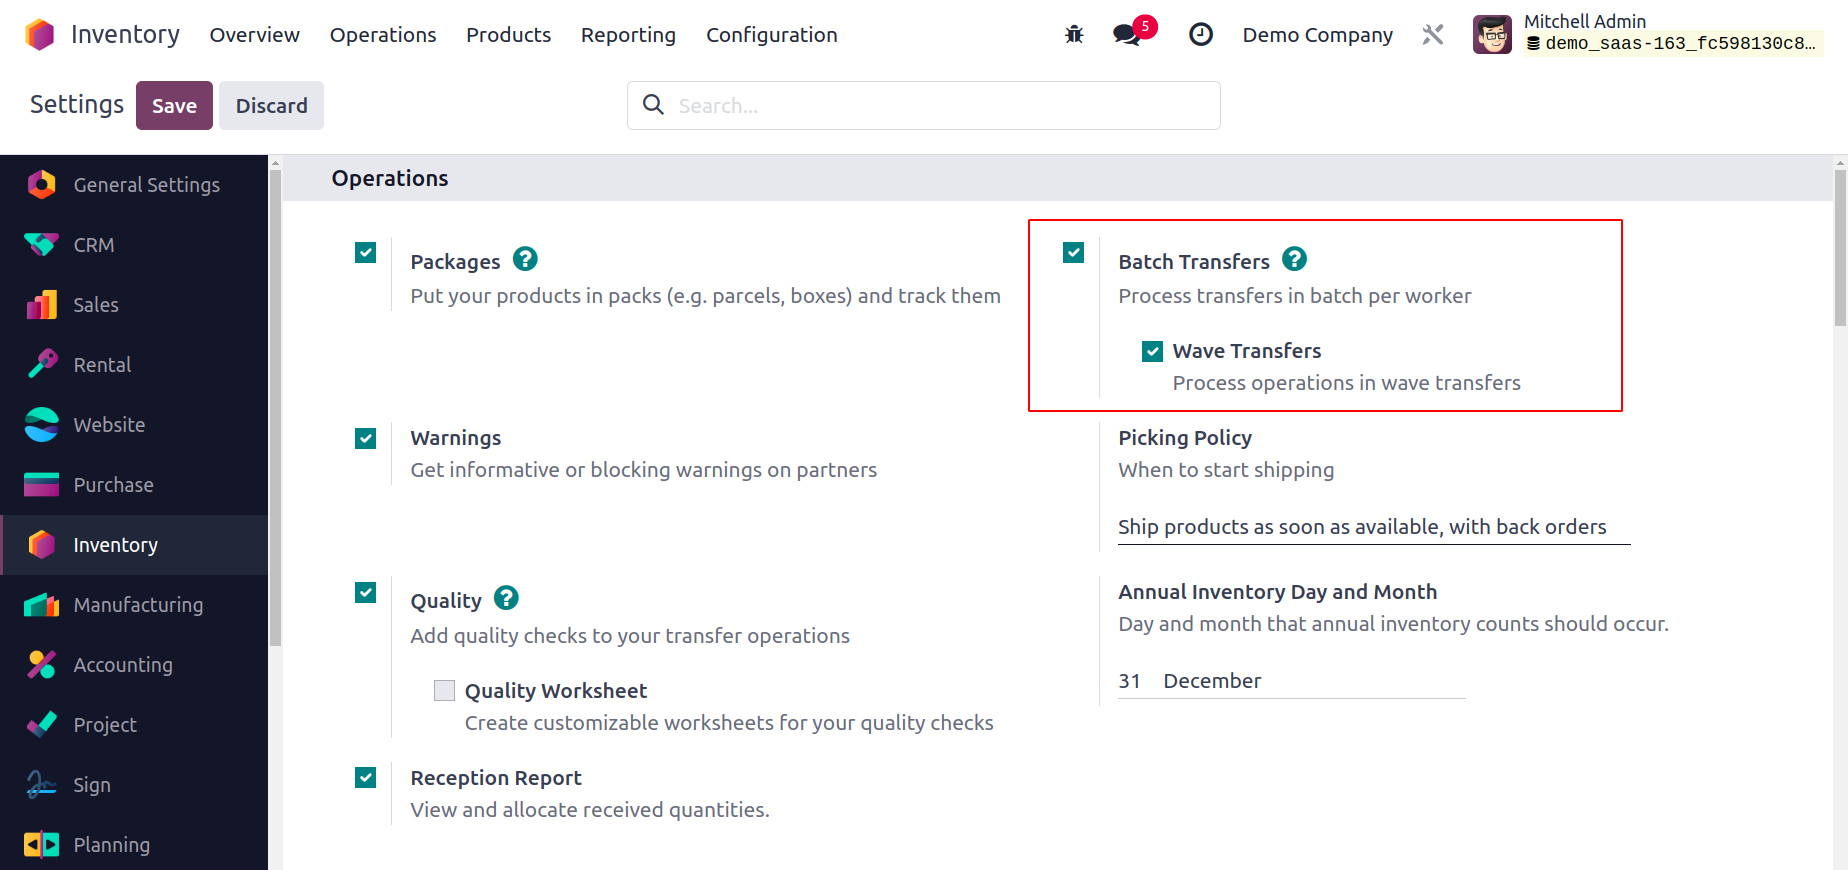
As seen in the image below, the Settings menu of the Inventory module allows you to easily activate the Batch Transfer option.
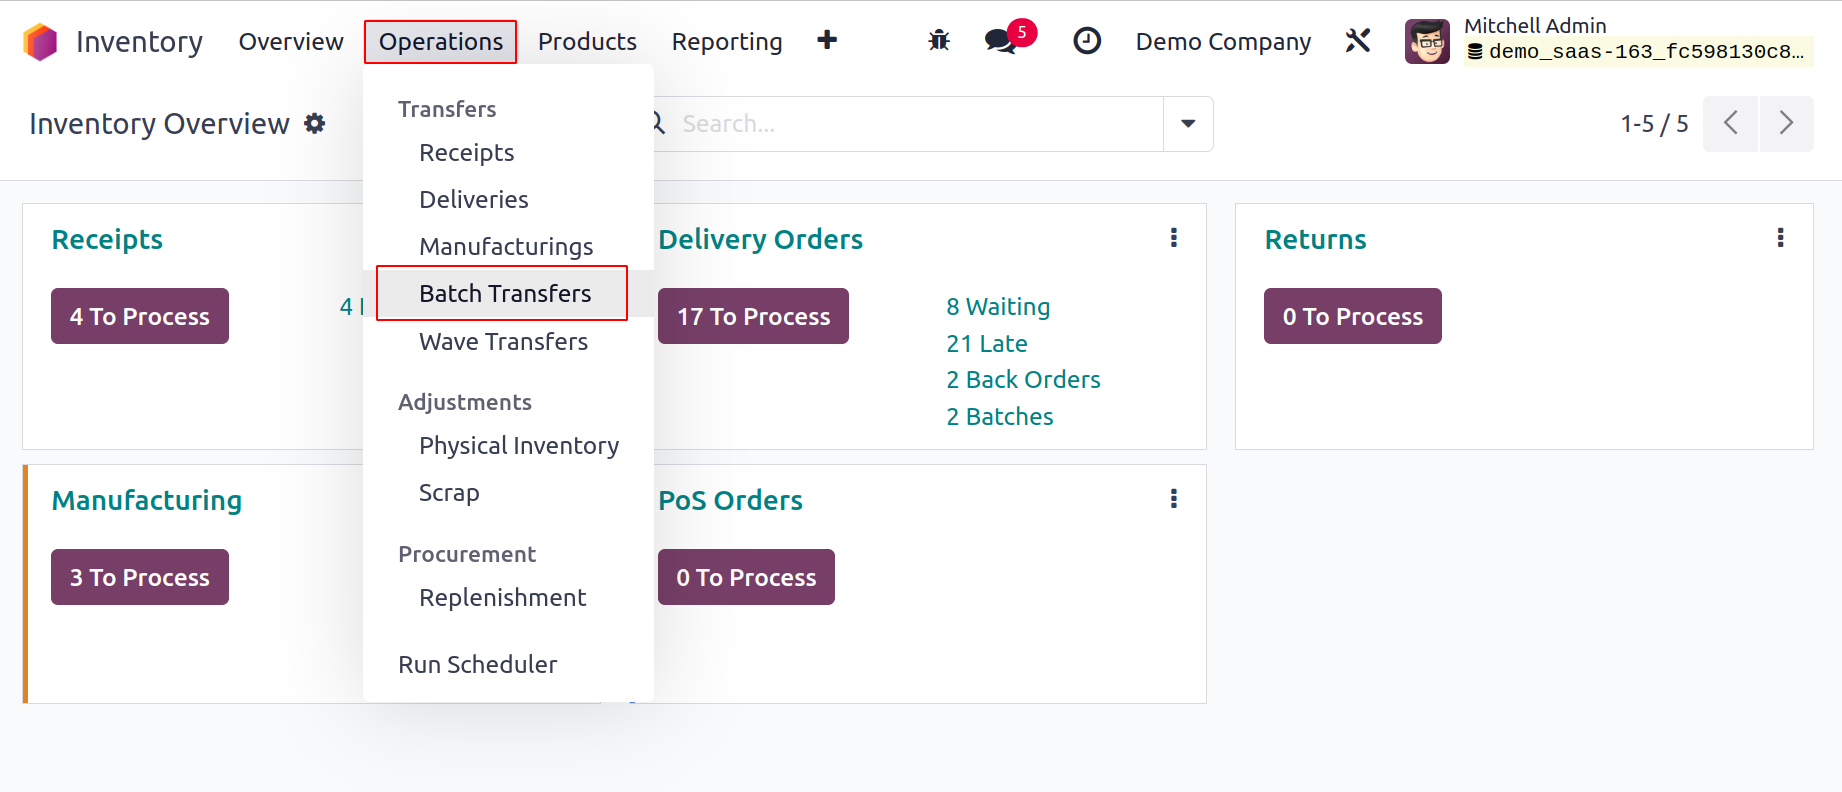
To save the new modifications after choosing the Batch Transfer option, click the Save button. From the platform accessible under the Operations menu, as illustrated below, you can now handle batch transfers.
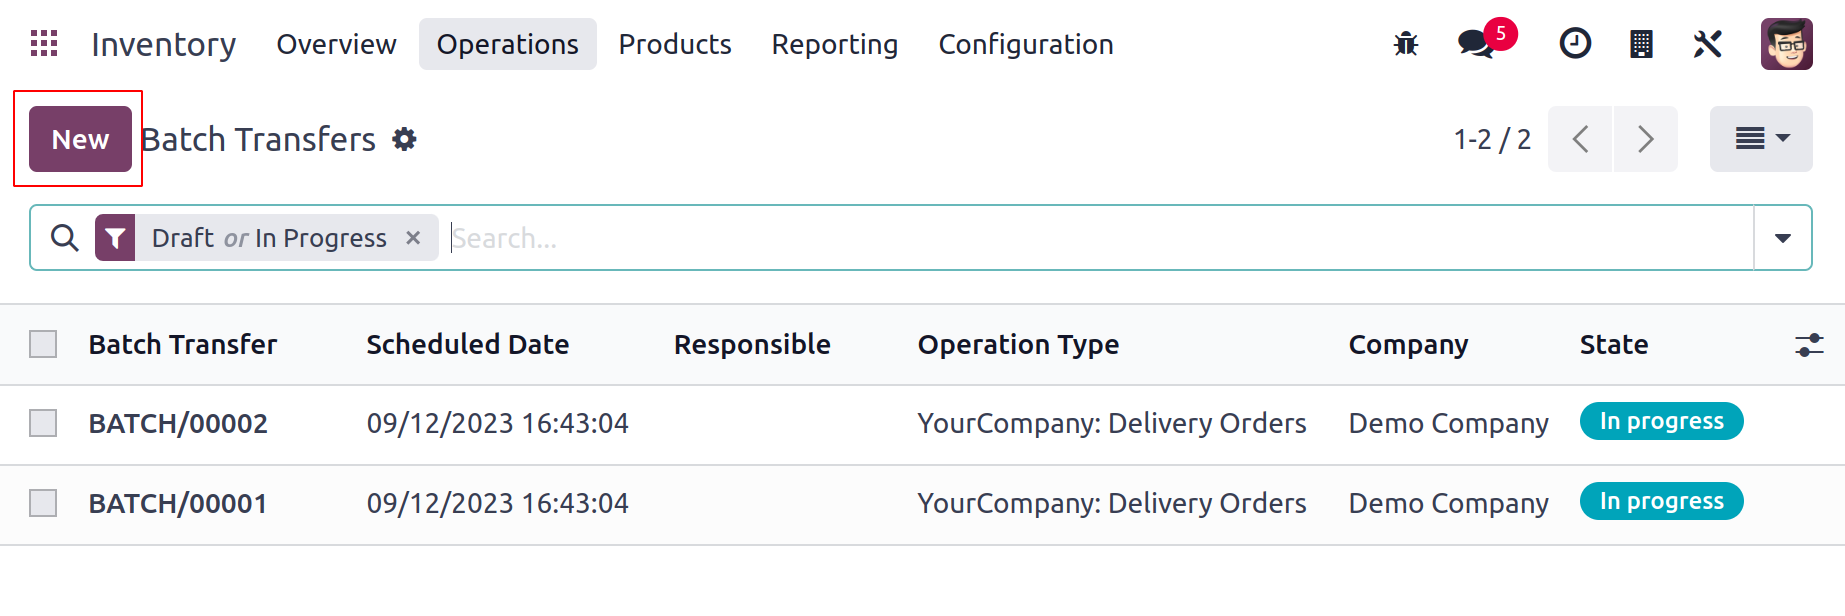
Here, you can see a list of already-created batches as well as information on Batch Transfer, Scheduled Date, Responsible, Operation Type, Company, and State. You can also change the platform's perspective to a Kanban one. Use the New button to start a fresh batch transfer.
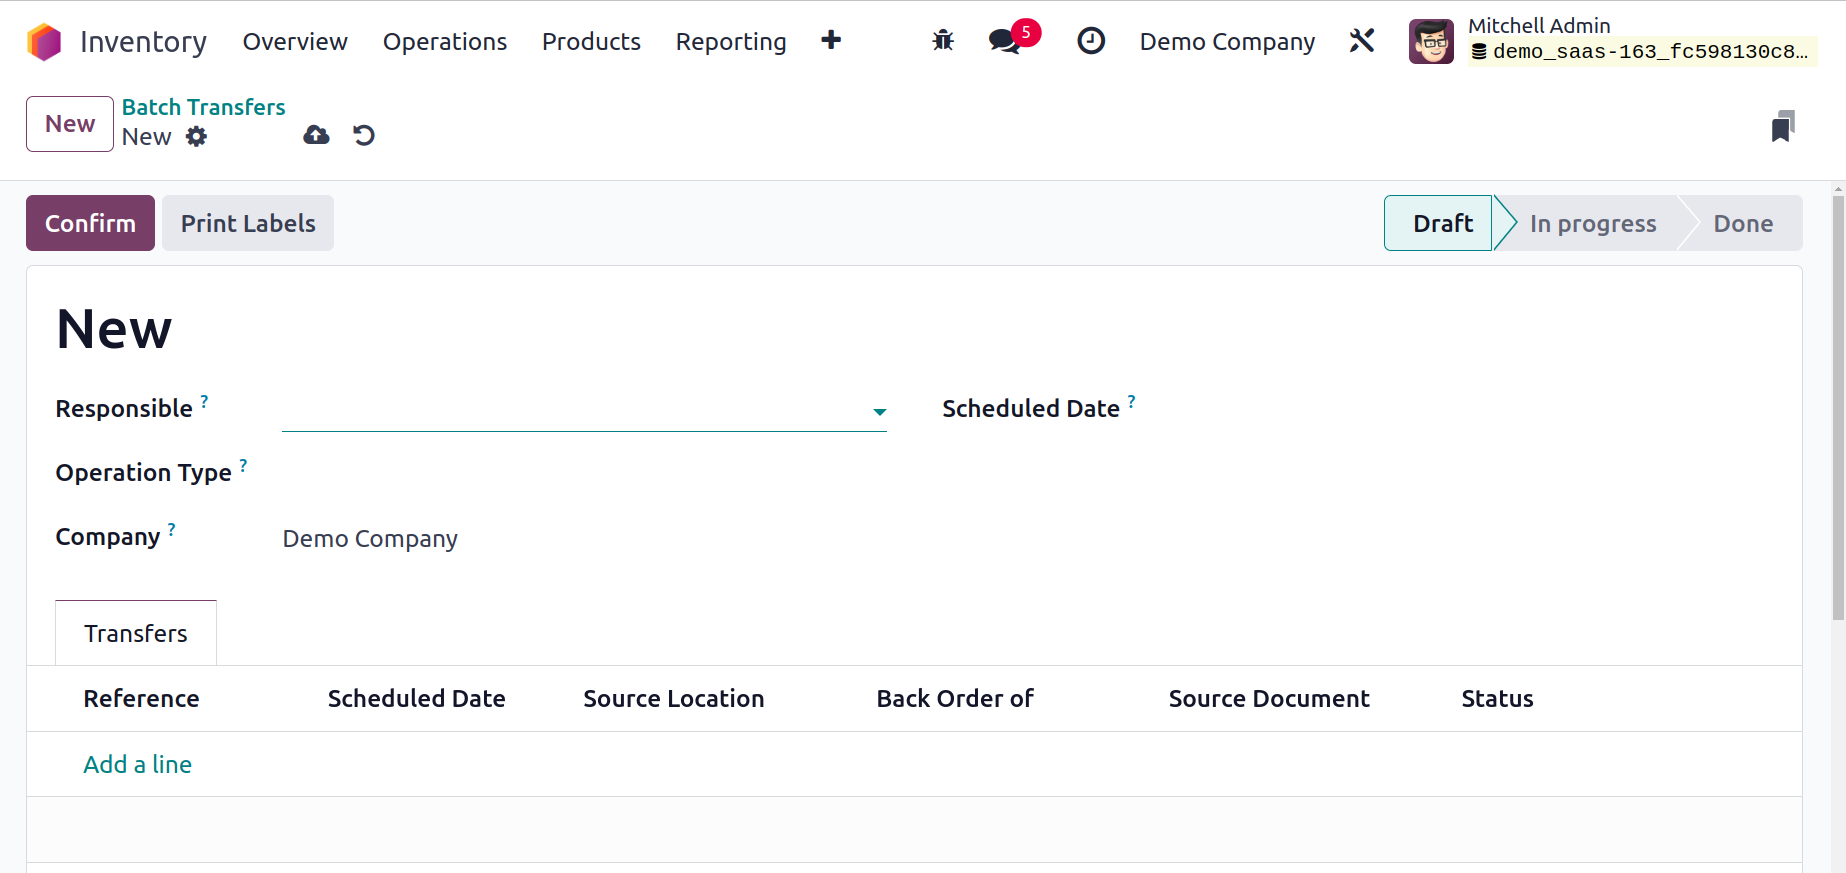
You can designate a worker to handle this batch transfer's impending tasks in the Responsible box. Fill in the blanks for Operation Type and Company. Odoo17 enables you to include transfers with this operation type to this batch by providing the Operation Type. You can manually plan the transfer's anticipated date in the Scheduled Date column. If the scheduled date for this transfer is not manually defined, Odoo17 will use the earliest scheduled date of the transfer that is part of the batch.
You can now add transfers one at a time to this batch using the Add a Line option in the Transfer tab.
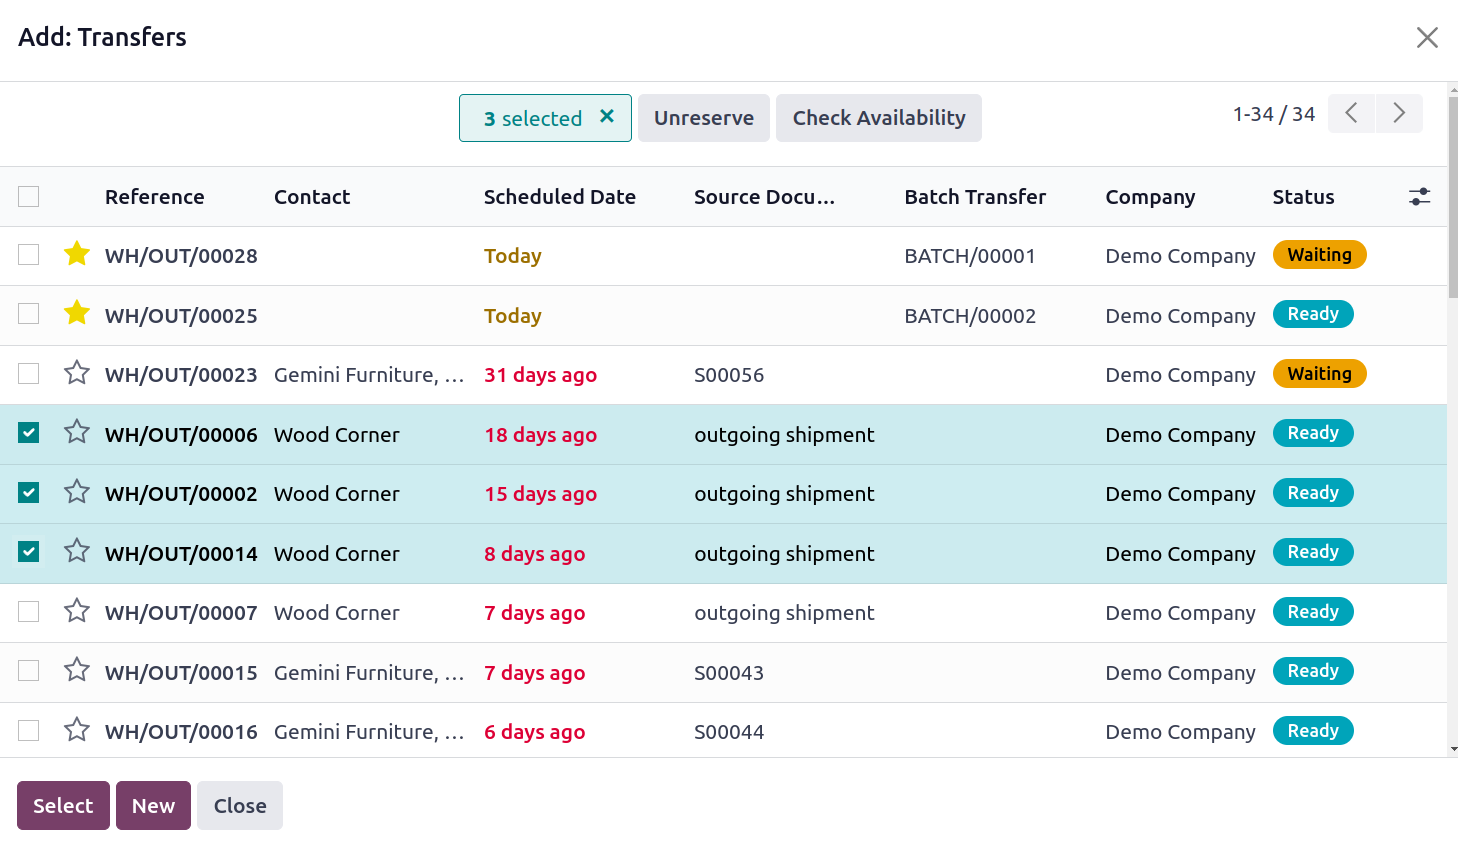
A new pop-up window will open as soon as you click the Add a Line button, allowing you to choose the transfers for this batch. A list of various transfers for the chosen operation type in various phases will be presented to you. The transfers are available for selection from the list. Choose transfers from the same stage either in waiting or ready state, if possible. You can use the Select button to add them to the batch.
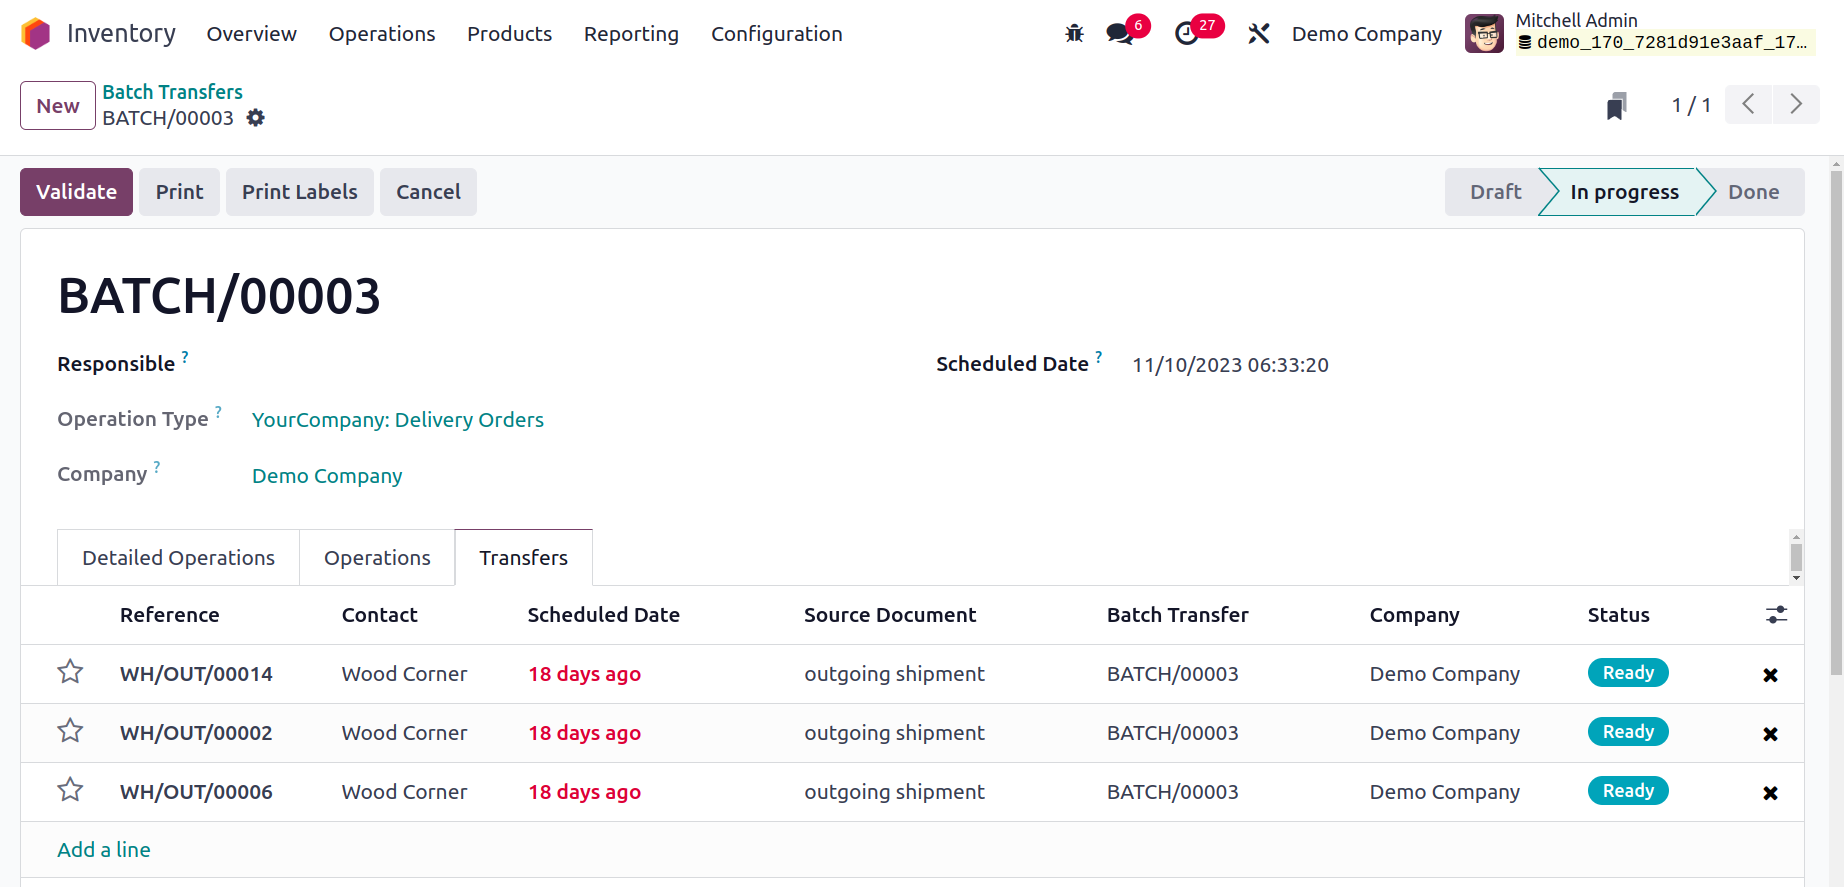
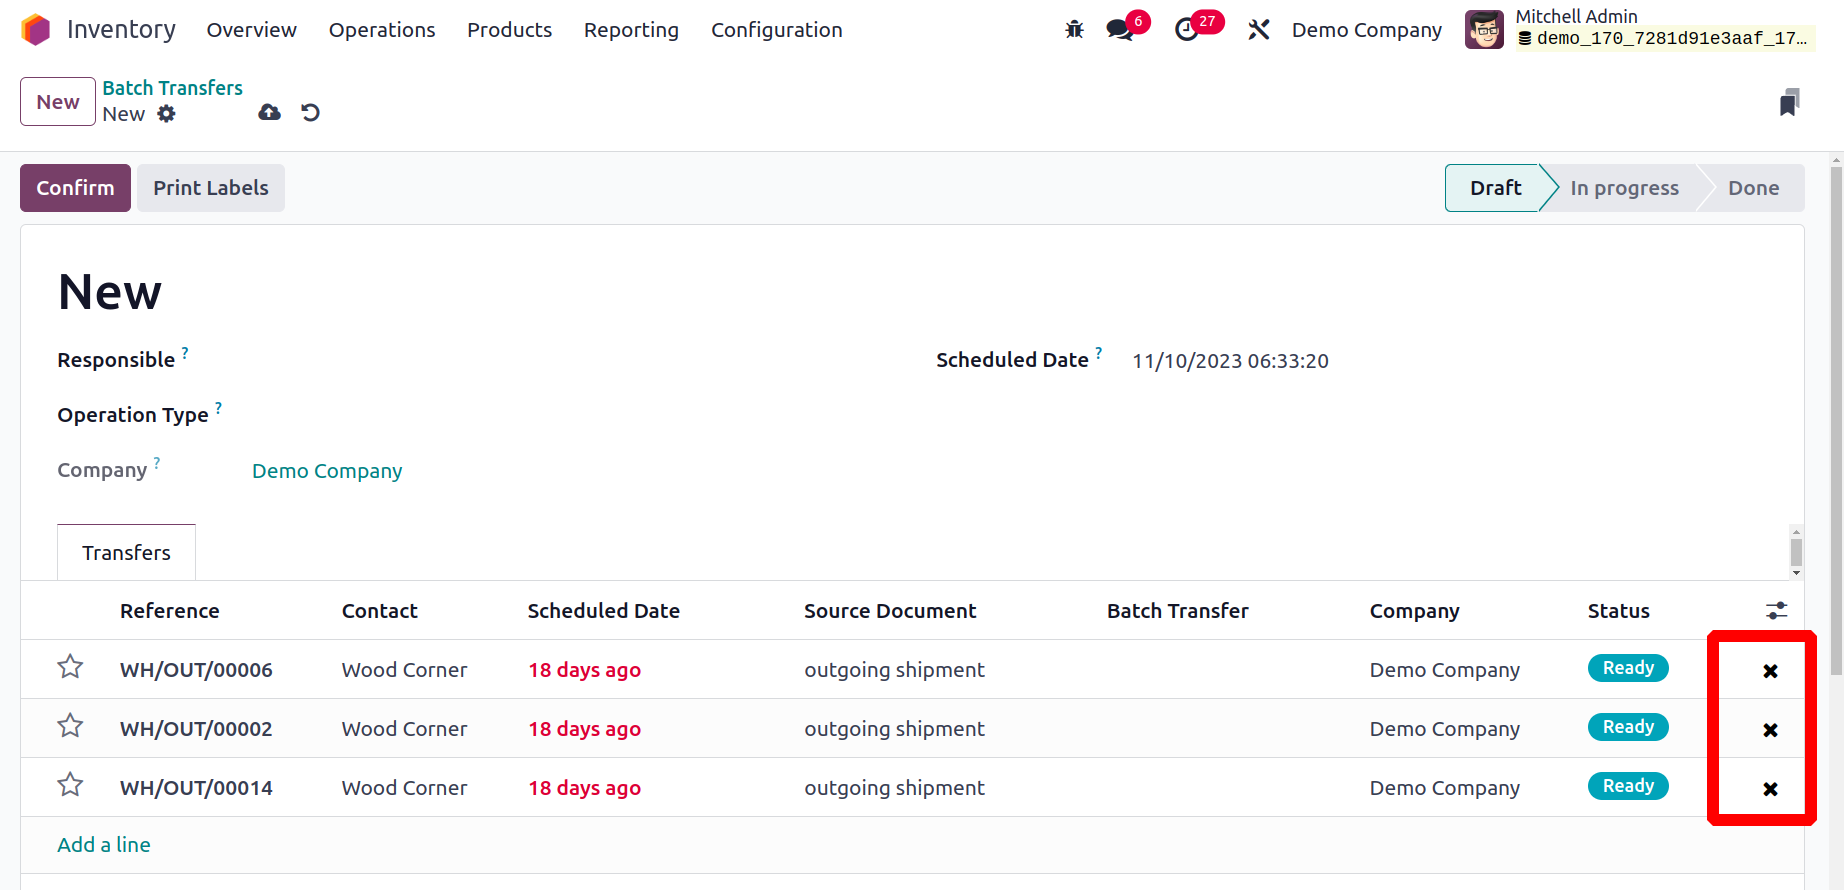
The list of chosen transfers will be automatically included in the batch, as seen in the figure above. The icon ❌ shown in the following screenshot can be used to remove any of the transfers from the batch. Utilizing the Confirm button after confirming availability, you may finalize the transfer. Finally, you can finish the batch transfer operation by clicking the Validate option.
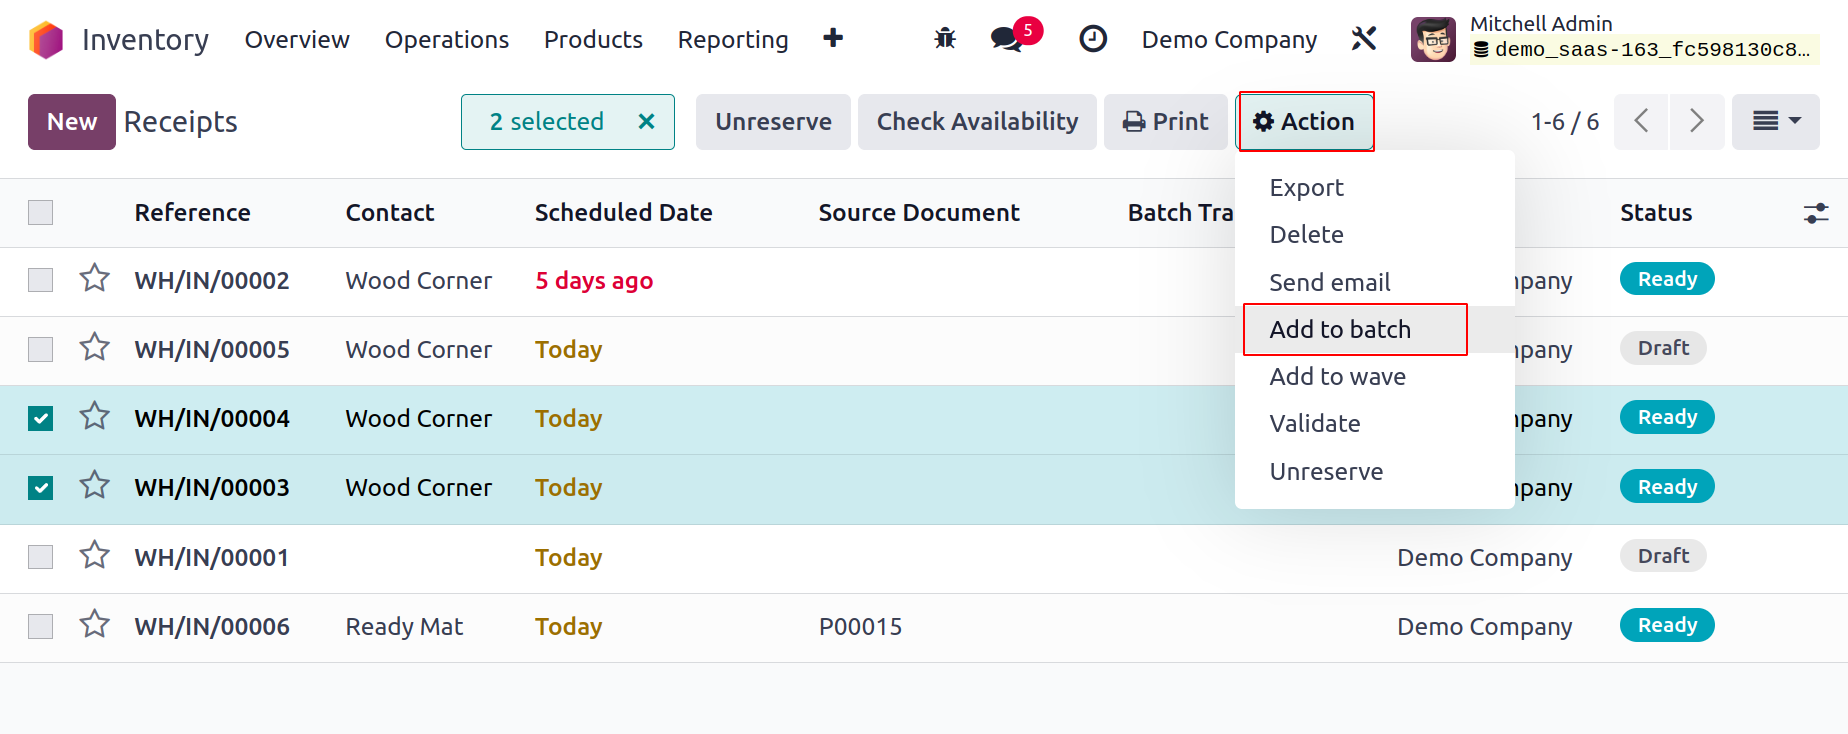
From the Transfers option, you can also make fresh batches of transfers. You can do this by going to the Operations menu's Transfers platform. You can choose the transfers you want to include in a batch from the list of available transfers. Remember that the chosen transfers must have the same status and operation type. After choosing the necessary transfers, an Action button will appear.
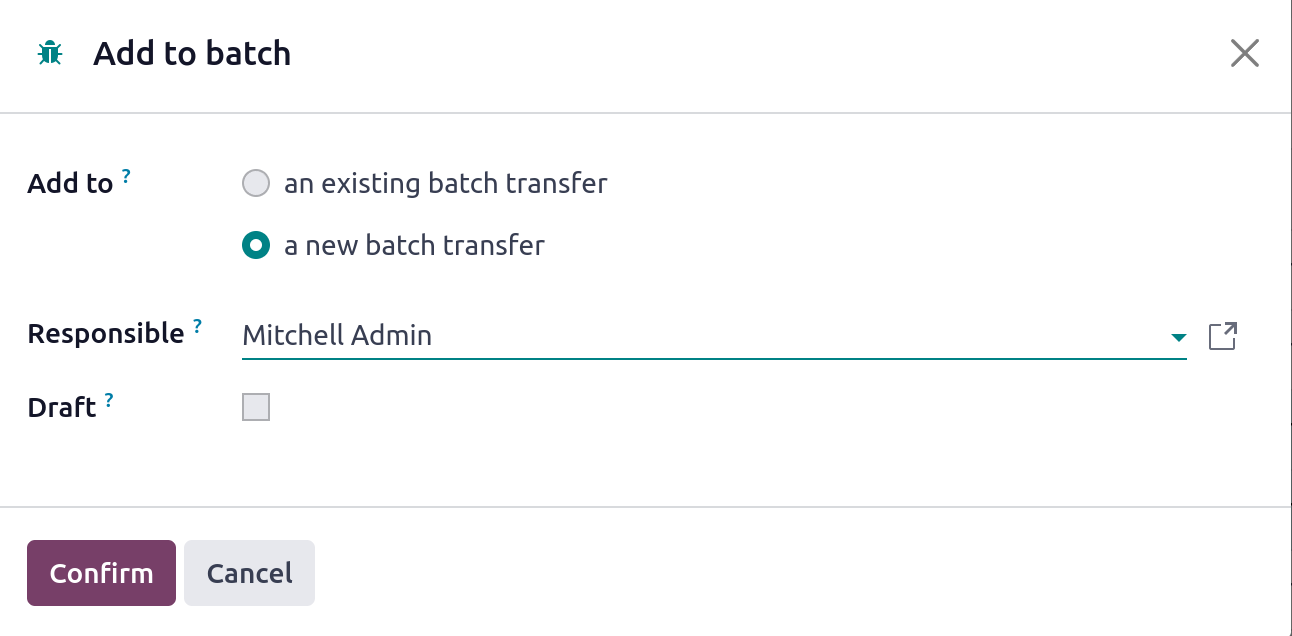
You have the choice to include the chosen transfers in a batch from the Action button. Click on the Add to Batch button. As seen here, a wizard will appear.
The chosen transfers can be added to an already-existing or a brand-new batch transfer. You can indicate the Responsible employee in the provided field for a new batch transfer. Activate the Draft option to produce the new batch in the draft state. A new batch transfer will be created in the Inventory module after pressing the Confirm button. You may monitor and control the new batch transfer from the Batch Transfer portal.
Wave Transfer
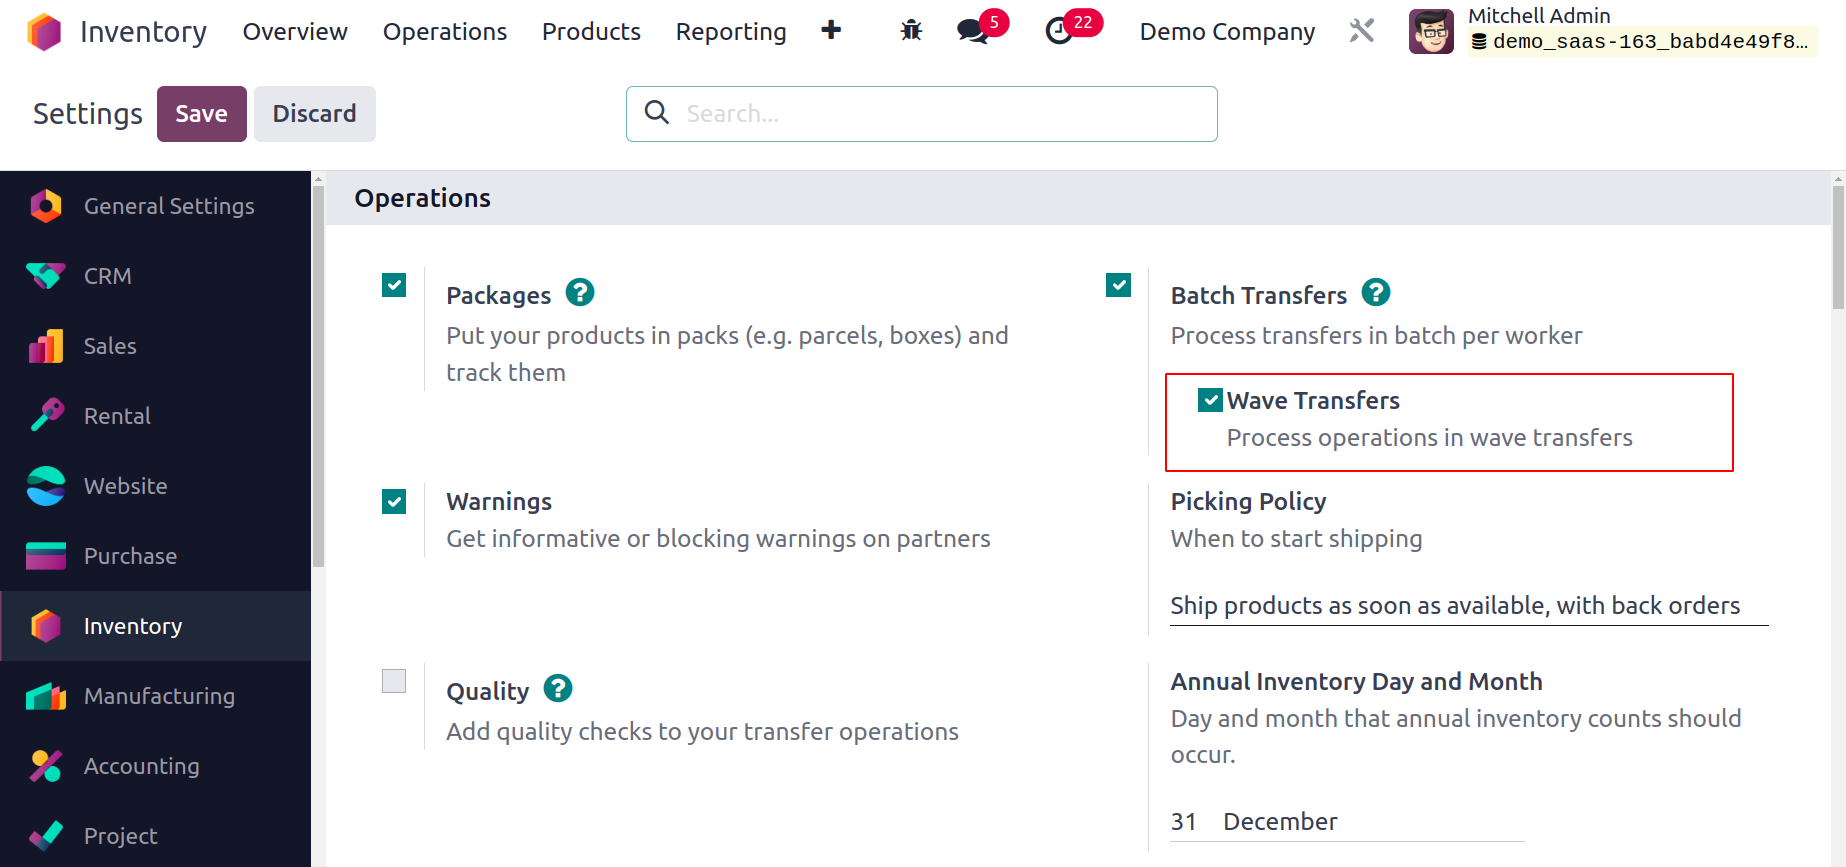
The Wave Transfer technique serves the same function as the Batch Transfer choice. You can move a lot of goods from one place to another with this technique. However, once a transfer has been added to a wave transfer, it cannot be taken out of the wave. Compared to batch transfers, the wave transfer approach is more sophisticated. Be sure to activate it from the Settings menu in order to get this feature in the Odoo17 Inventory module.
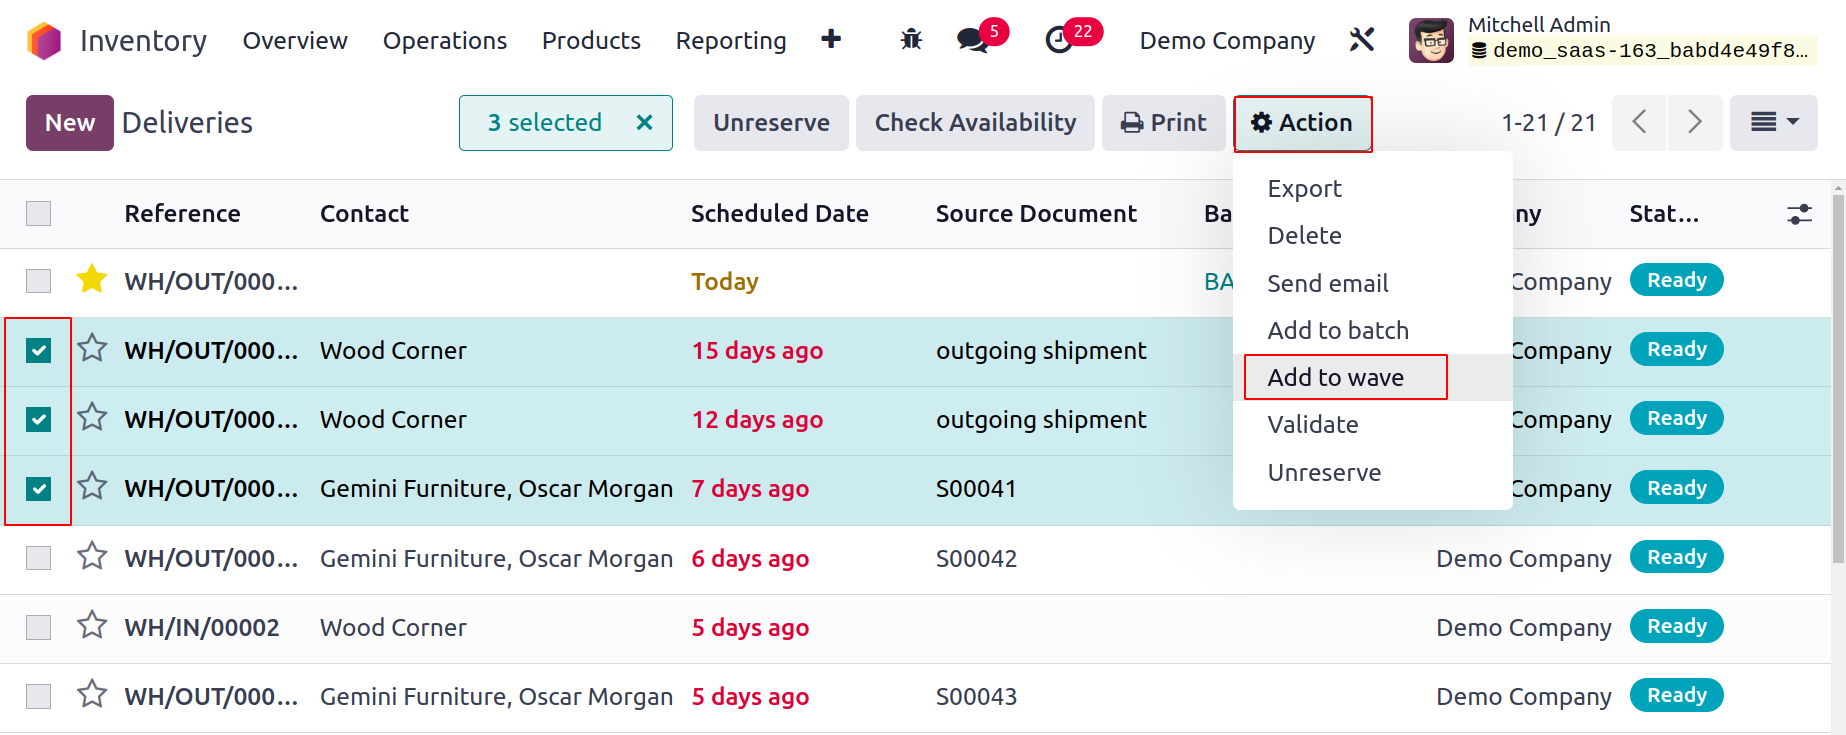
You can access the Transfers platform after the Wave Transfer feature has been enabled. To include transfers in a wave transfer, choose the transfers from the Transfers window that share the same status and operation type.
As soon as you choose the necessary transfers, the Action button will appear on the screen, where you may choose the Add to Wave option. A new pop-up will appear on the screenshot after clicking this button.
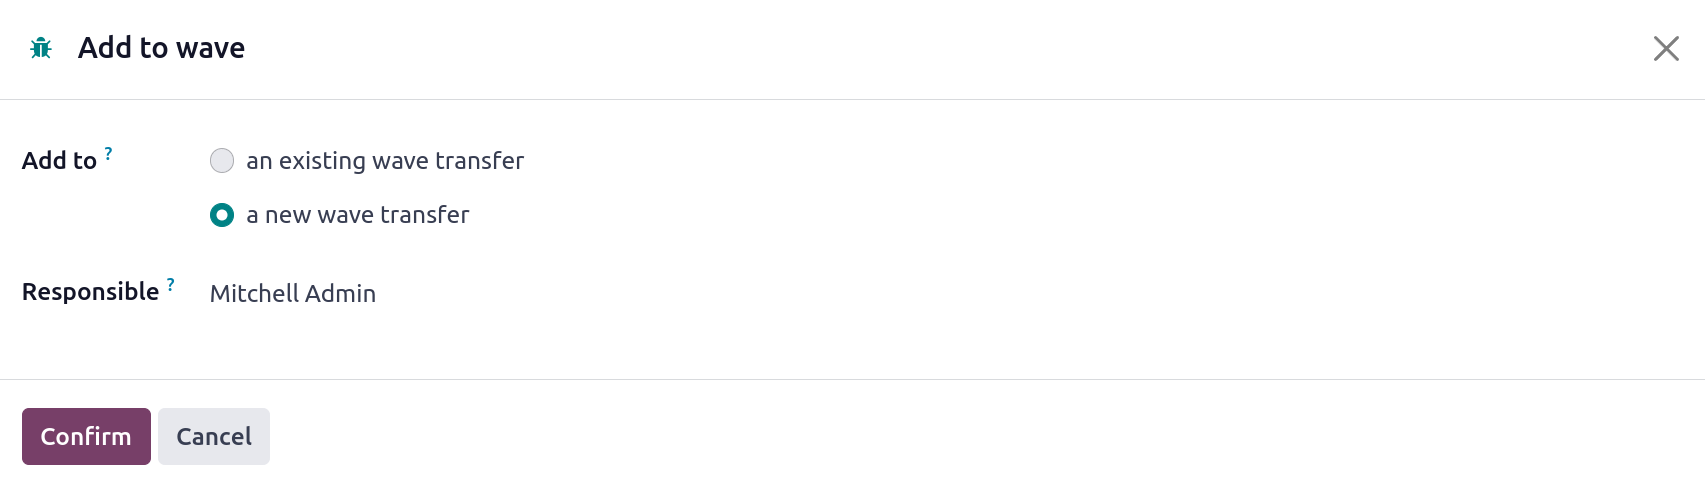
A fresh transfer or an existing wave transfer may both include the chosen transfers. You must identify an officer in the Responsible field for a new wave transfer. Click the Confirm button to finish.
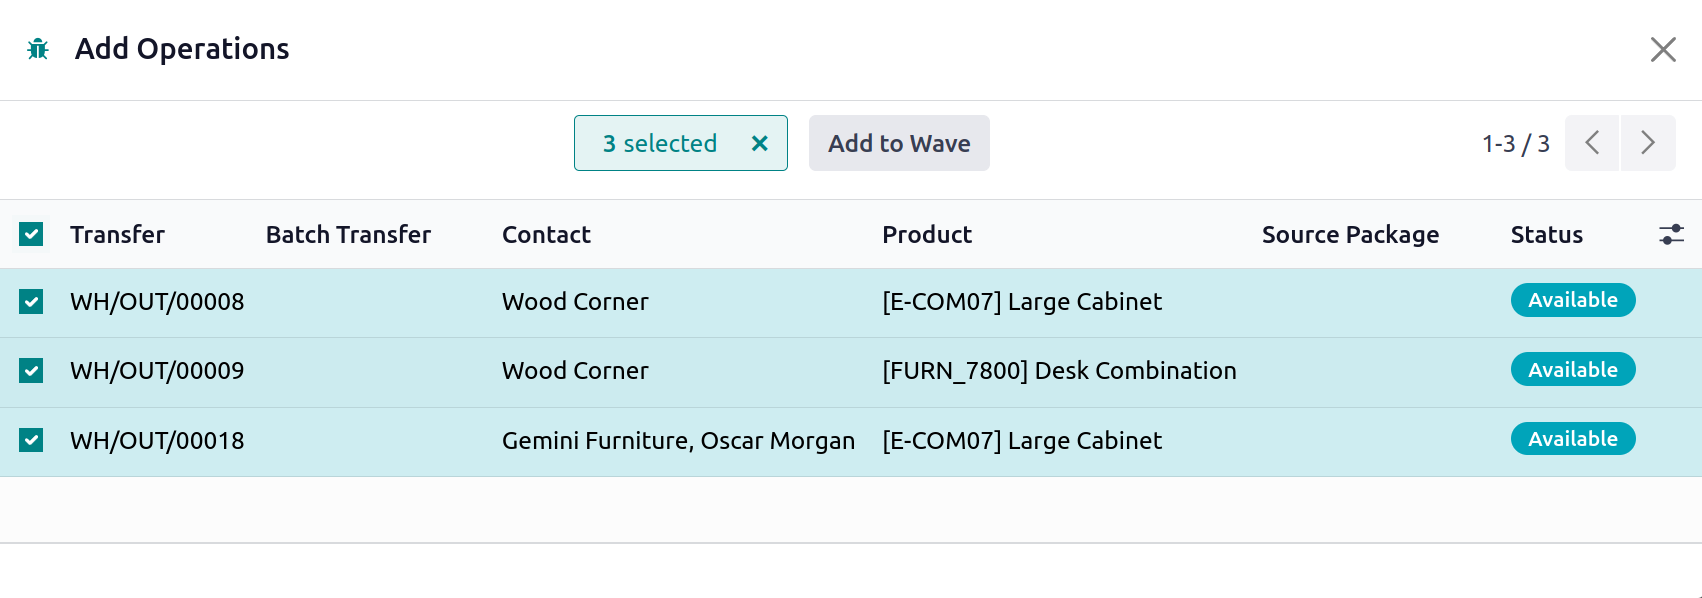
All orders from the selected transfers will show up on your screen as soon as you confirm the transfer. From the list, choose the necessary orders, then click the Add to Wave option.
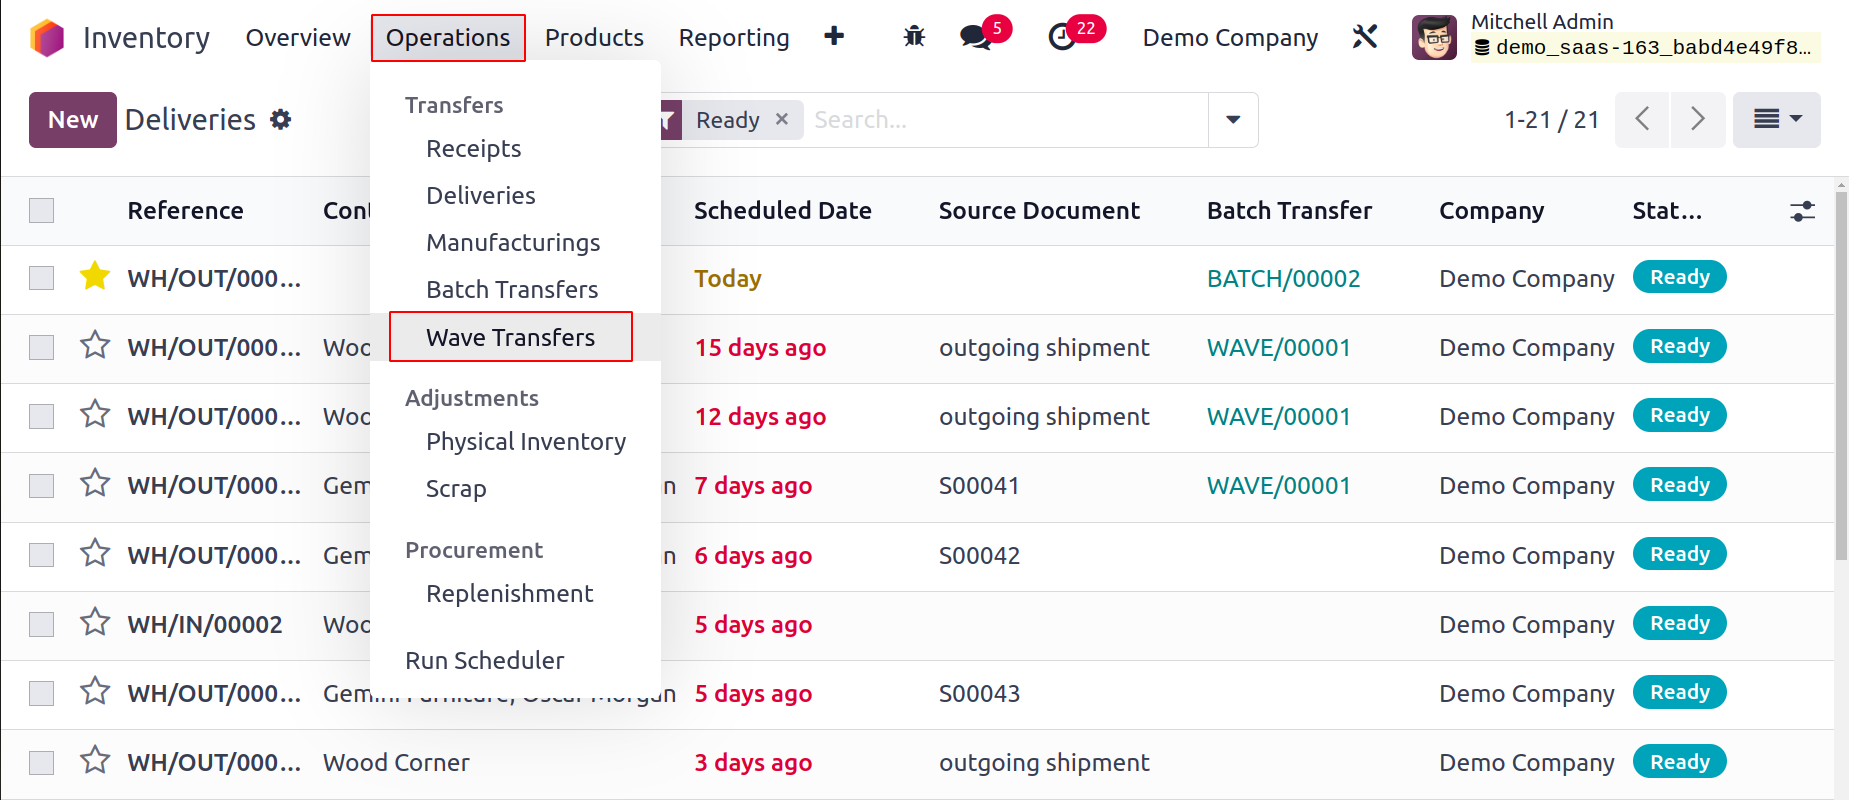
The brand-new wave transfer has already been made, and you can view it from the Operations menu's Wave Transfer platform.
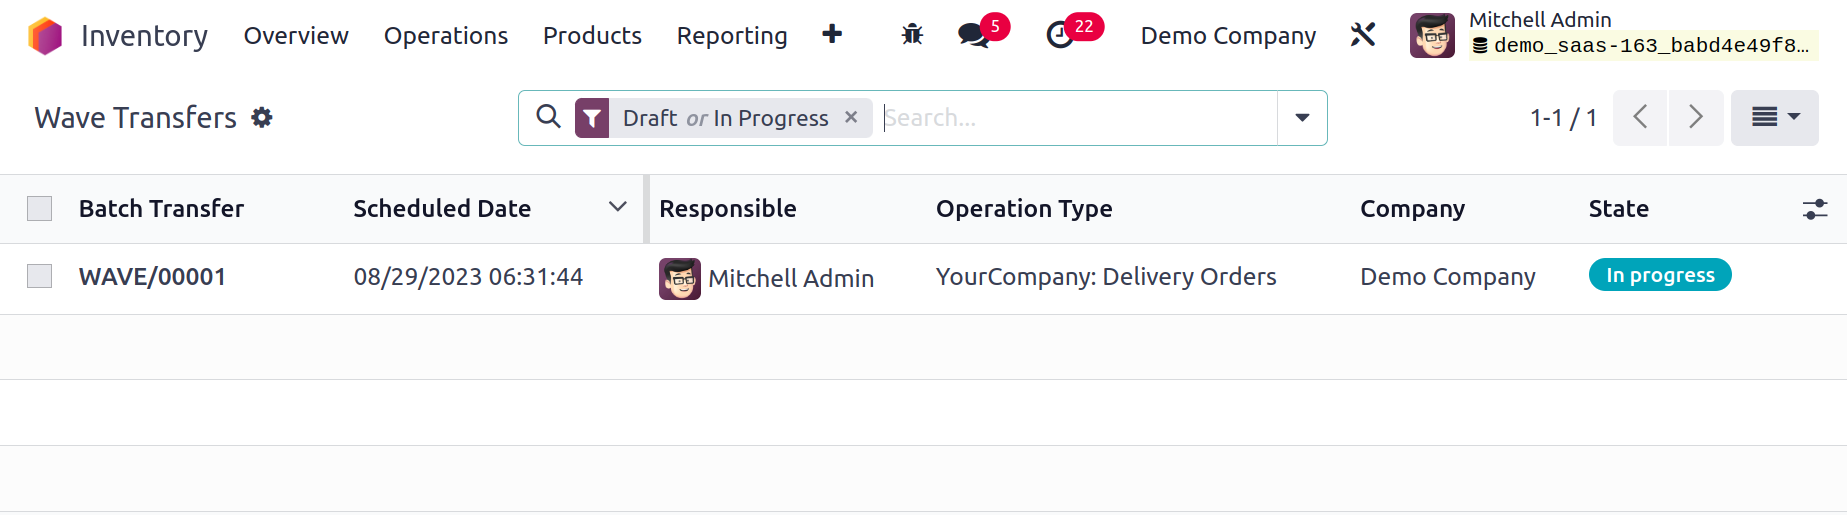
The specifics of the Wave Transfer, Scheduled Date, Responsible, Operation Type, Company, and State will be displayed in the list's preview. A new window will pop up when you click on the Wave transfer to verify the transfer.
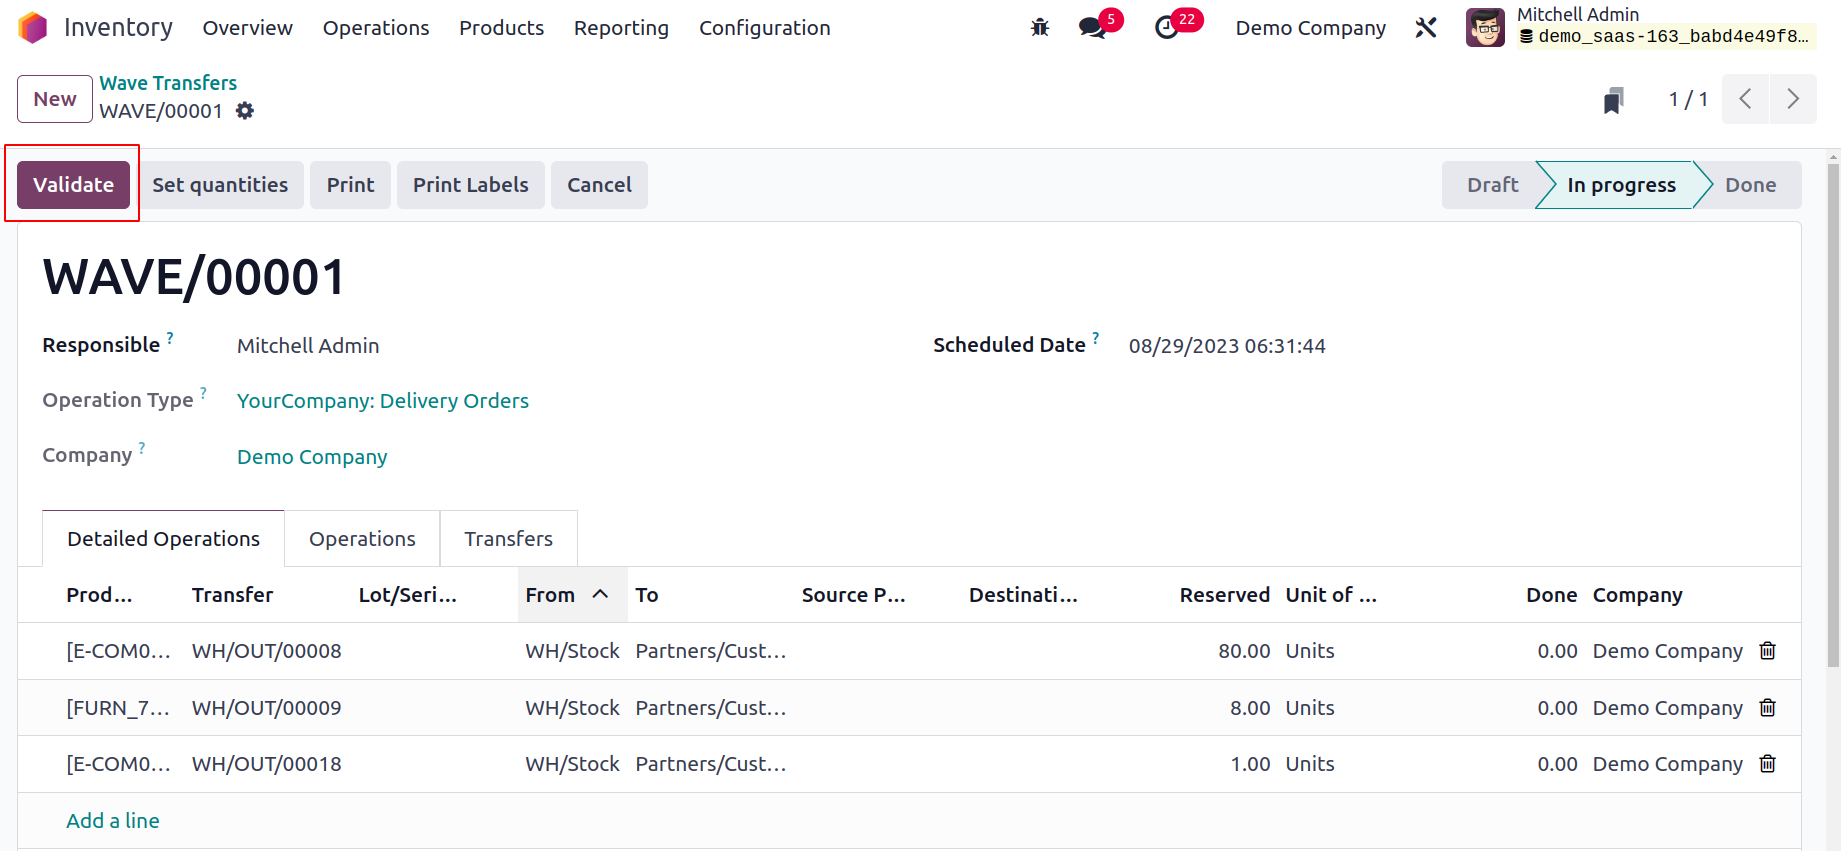
To finish the transfer, click the Validate button.
Let's look at warehouse management in Odoo17 now that we are clear on the product transfer capability in the Inventory module.
Warehouse Management
One of the primary tasks in a company's inventory operations is warehouse management. A company's warehouses need to be adequately maintained and supervised to ensure efficient stock operations and transfers. Odoo17, a fantastic inventory management helper, may provide you with platforms specifically designed to efficiently manage company warehouses. Using the capabilities provided by Odoo17, you may manage several warehouses at once. Depending on the kind of business it operates, a corporation will own a different number of warehouses. No matter how big or how many warehouses a business has, Odoo17 will always make sure to streamline the process.
Advanced features including Warehouse, Locations, Routes, Rules, Operation Types, Storage Categories, Storage Category Capacity, and Putaway Rules are available in the Warehouse Management tab of the Odoo17 Inventory module's Configuration menu.
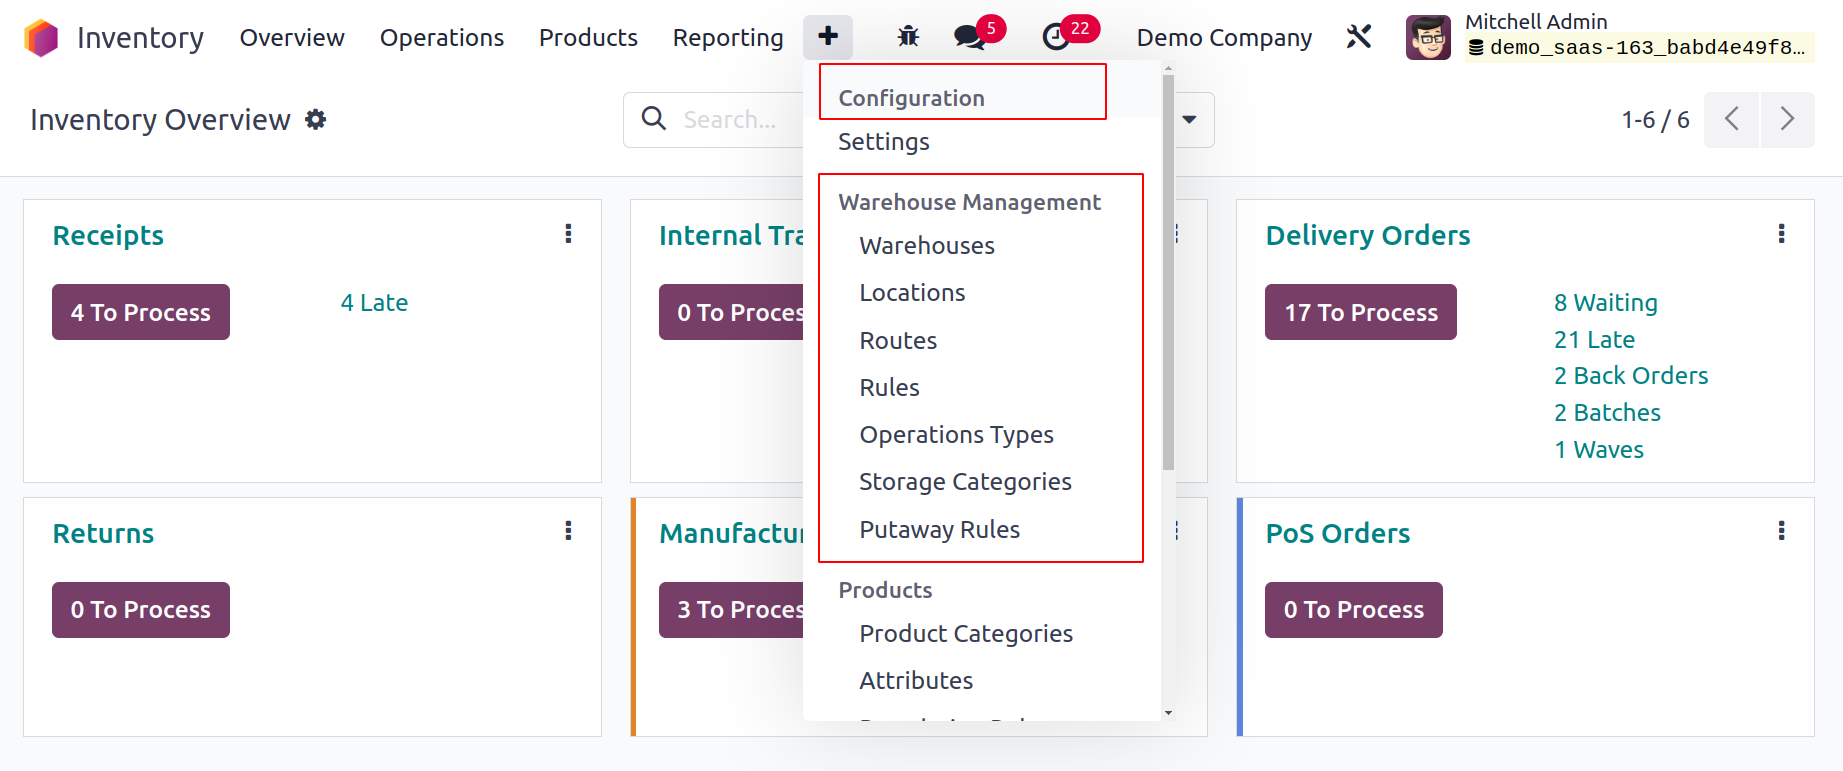
Warehouse
You can do various warehouse management tasks with the help of these solutions. Let's start by looking at the warehouse settings in the Odoo 17 Inventory module. You can do this by choosing the Warehouses option under Configuration.
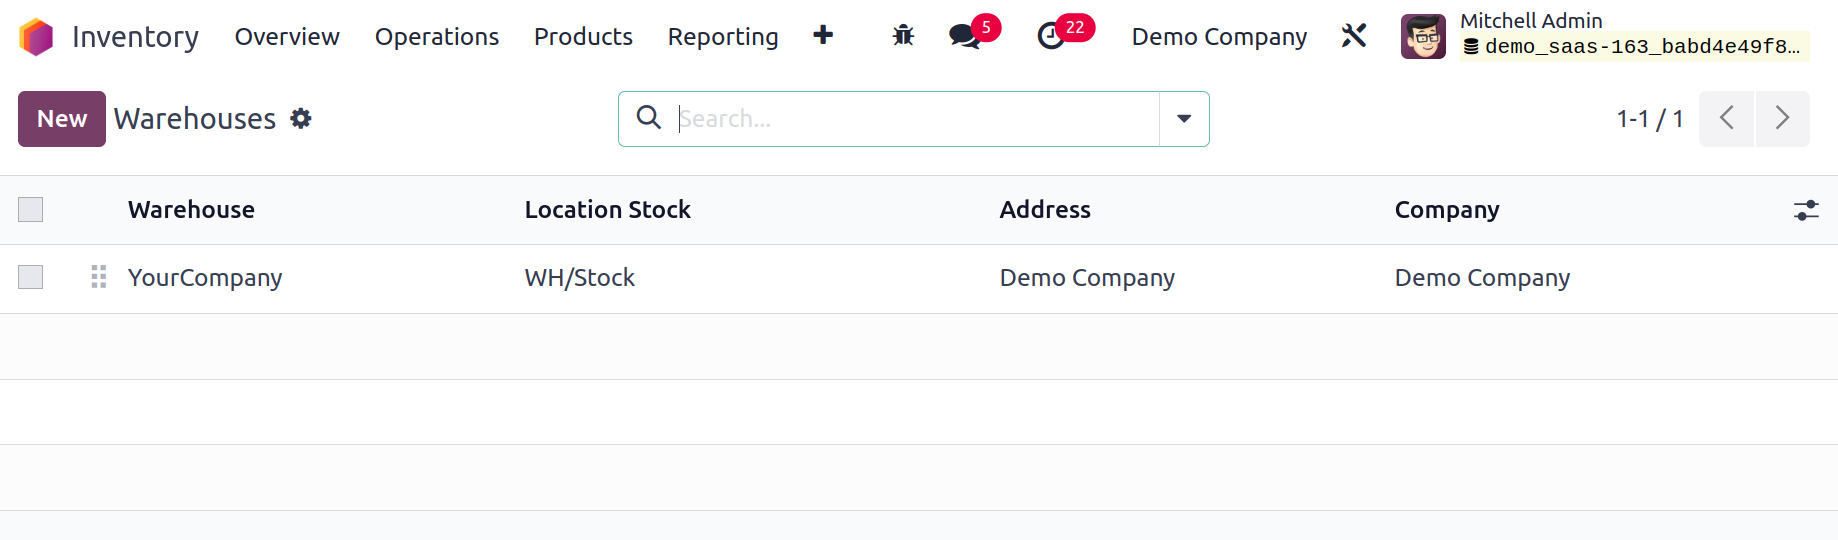
The warehouse platform's list view is depicted in the screenshot above. From this view, you can obtain information about the Warehouse, Location Stock, Address, and Company. Let's configure the information for a new warehouse to the Odoo Inventory module using the New button.
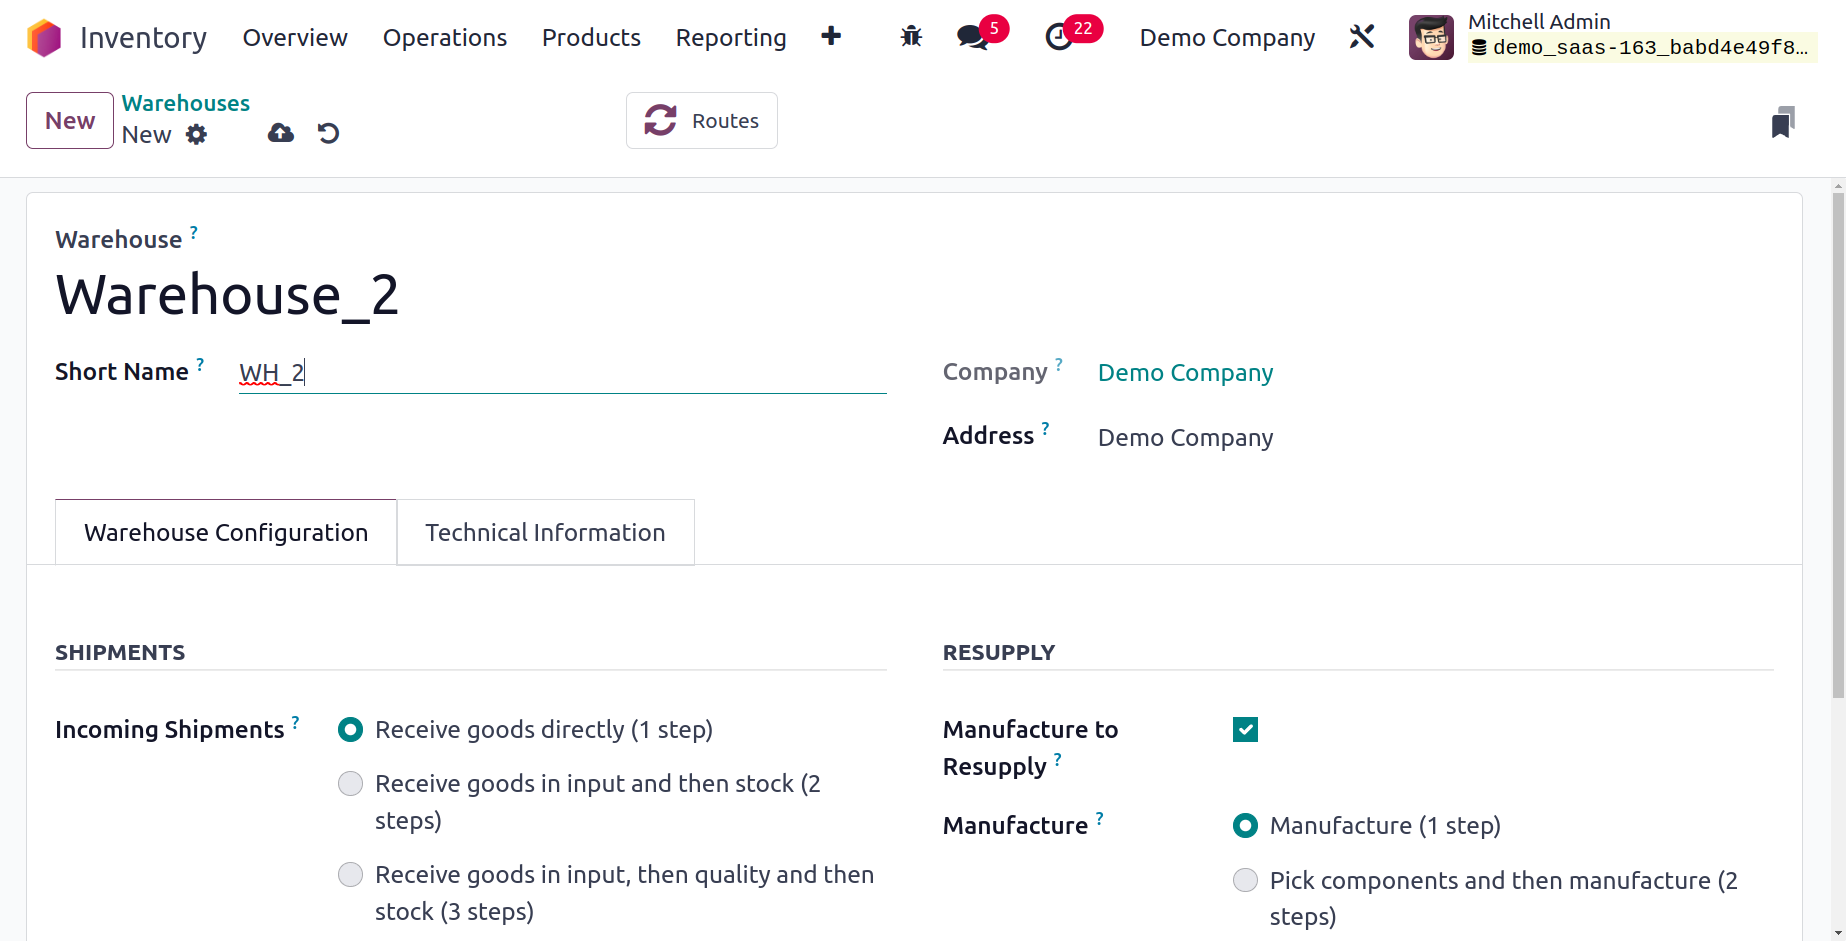
You can enter the Warehouse, Short Name of the Warehouse, Company, Address, and Intrastat Region in the corresponding fields of this window. You must provide information about your shipments and resupply in the Warehouse Configuration tab.
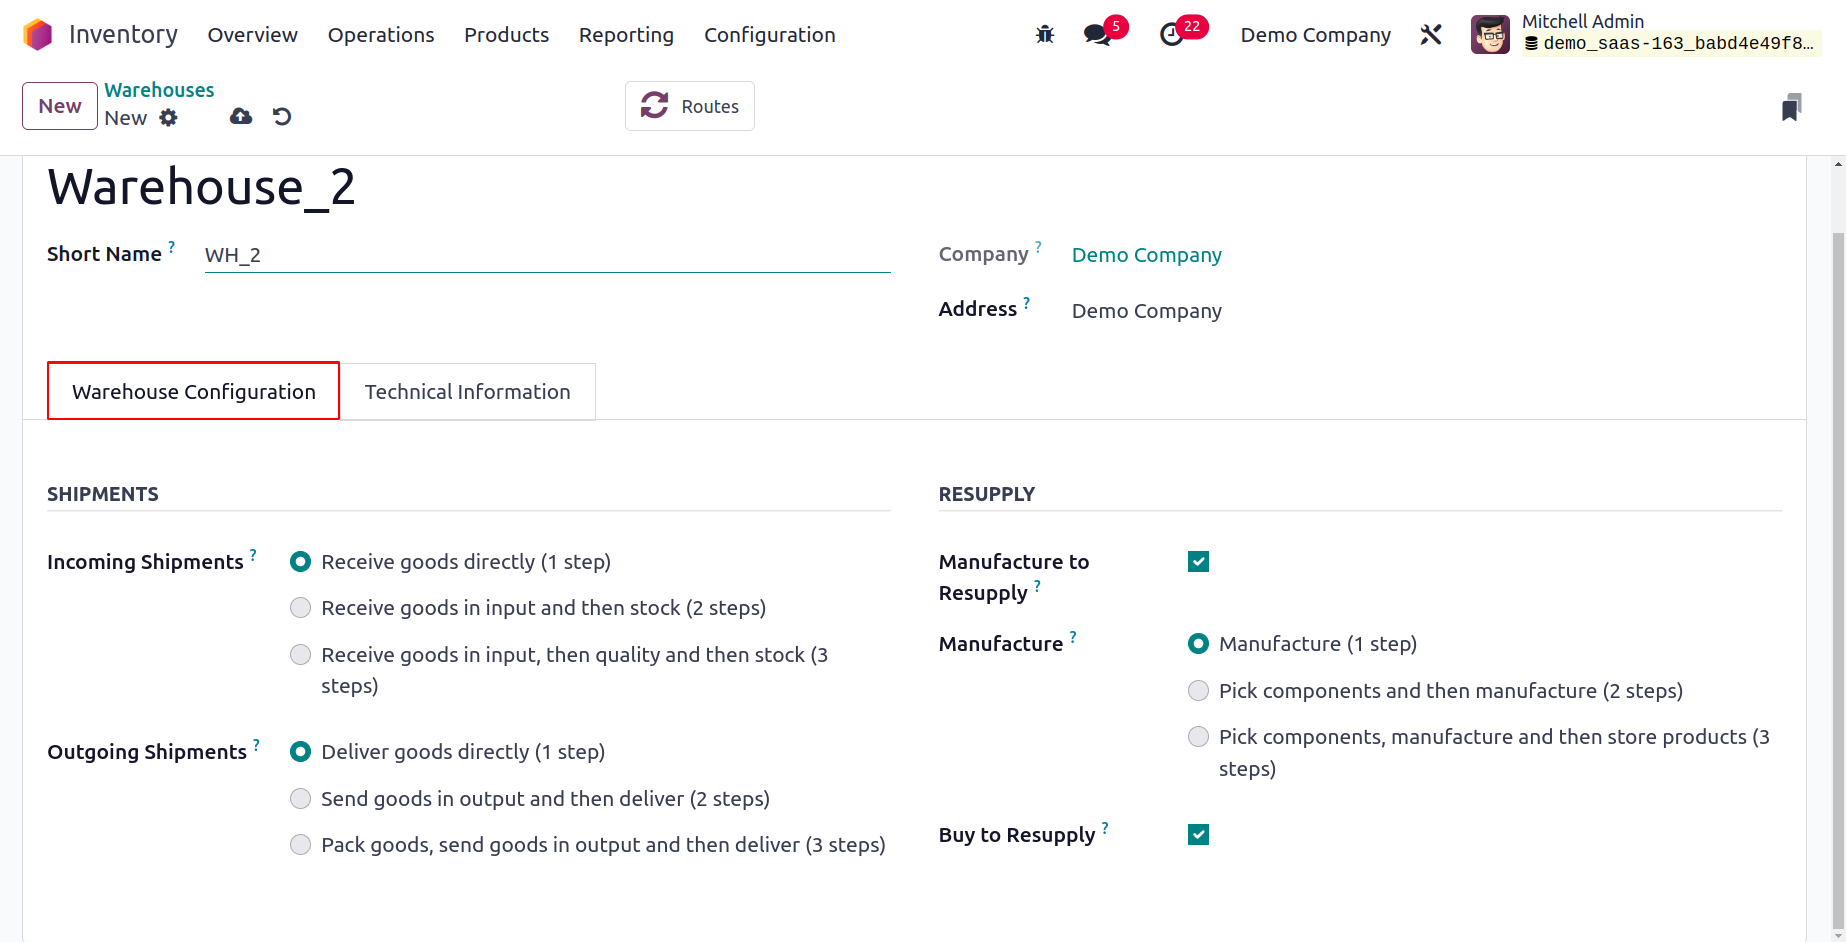
You can choose how to handle the product's incoming shipment under the Incoming Shipment section. You can receive products straight to the warehouse by choosing the Receive goods directly option. The incoming shipment contains two steps when using the Receive products in input and then stock technique. The products will be obtained initially and then relocated to the stock in this two-step process. Use the Receive goods in input, then quality, and then stock method of incoming shipment to apply quality checks after receiving the items before stocking. Similar alternatives will be accessible for Outgoing Shipments as well, and you can choose the best one for this warehouse's shipping needs. You can activate advanced features under the Resupply tab.
You can dropship subcontractors with components by turning on the Dropship Subcontractors functionality. The components can be resupplied to subcontractors using the Resupply Subcontractors. This will make it easier for the manufacturer to provide the necessary materials to the subcontractors. You can utilize these features to restock components from one warehouse to another. When raw materials are needed, it is simple to replenish them in warehouses. By turning on the Manufacture restock option when a product is out of stock, you can create it in the warehouse for restock. Three ways to describe manufacturing processes are provided. You can move the components directly to the production area and begin the manufacturing process by choosing the Manufacture option. The Pick components and manufacturing technique has two steps that you must adhere to. Prior to moving to the production area for manufacture, you must first unload the stock's components at the input point. The option Pick components, make, and then store items allow you to choose the components, create the products, and then store them in the warehouse. You can buy raw materials to replenish and keep them in this warehouse by turning on the Buy to replenish feature in Odoo 17. The information about the newly configured warehouse will be saved when you click the Save button.
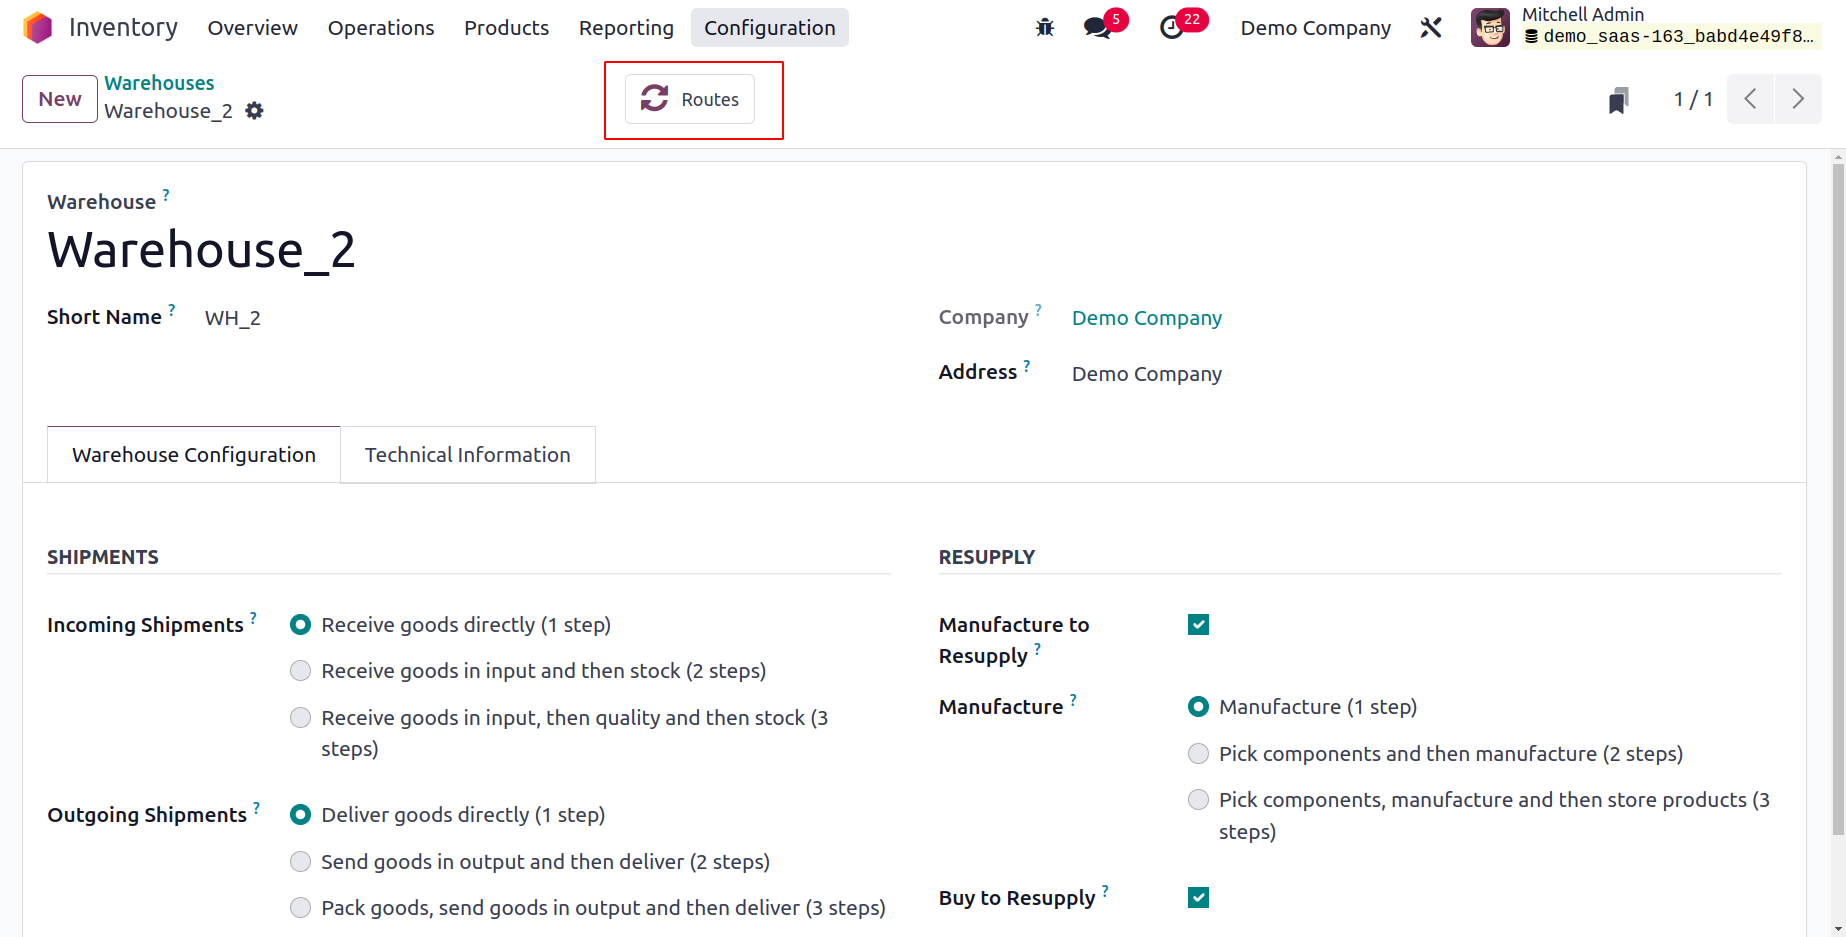
The window's top-right smart button, Routes, provides access to the routes management window for this warehouse's activities.
We will go into depth about how to set up several locations for stock management in the following section.
Locations
You can specify the areas in your warehouses where the products are stocked by using the platform to configure and manage various locations available in the Odoo17 Inventory module. You can manage many stock locations inside a single warehouse. You may enable the Storage Location function, which will help you track product location in your warehouse, from the Settings menu of the Inventory module.
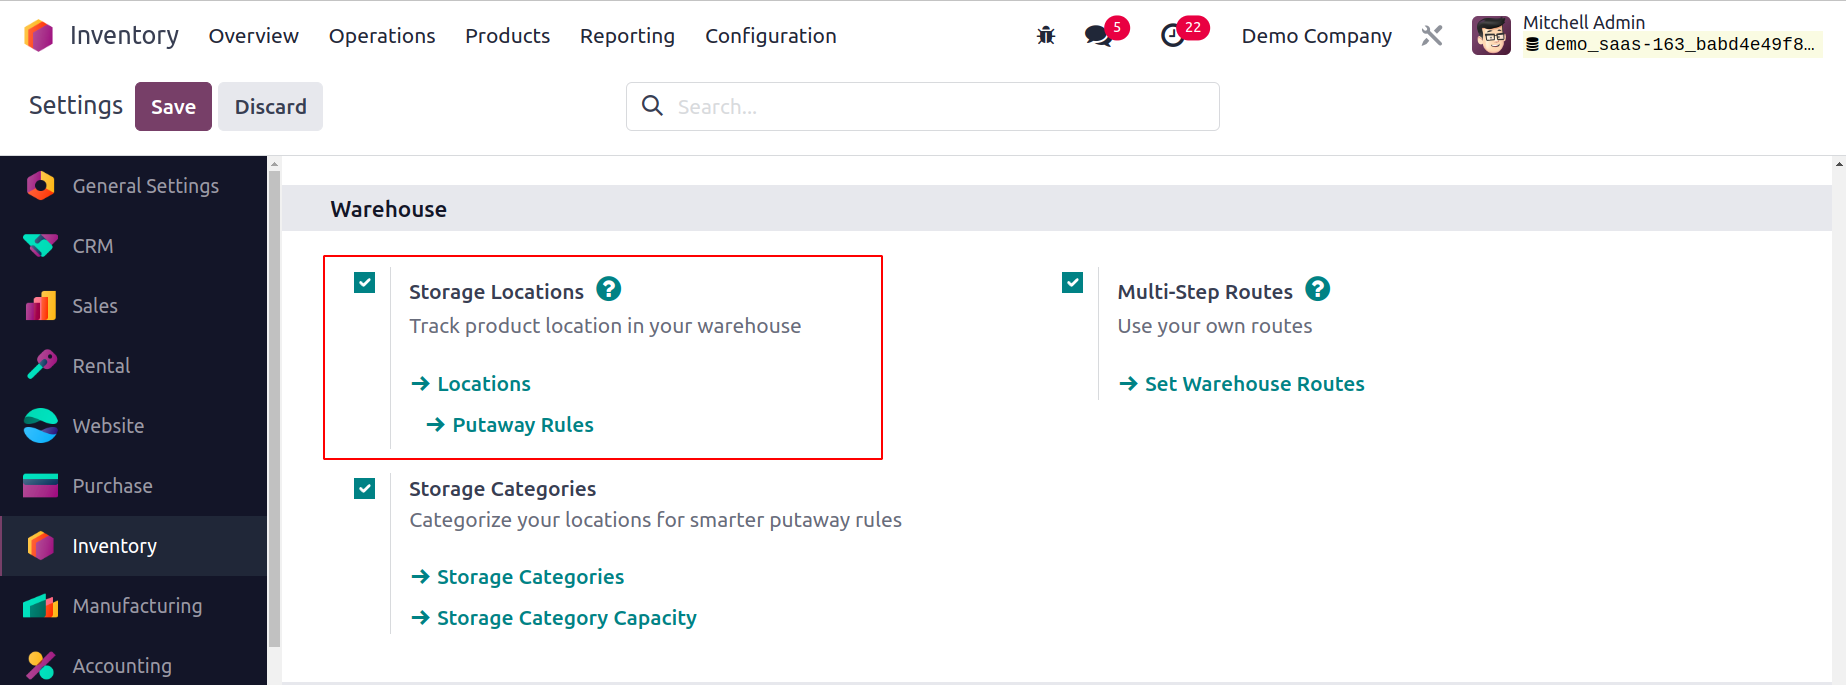
Now, as seen below, the Inventory module's Configuration menu has an option for configuring Locations.
Details about the Locations, Location Type, Storage Category, and Company are provided in this platform's list view. While talking about how to set up a new location in Odoo 17, we will go through each of these options in more detail. You can do this by selecting the New button.
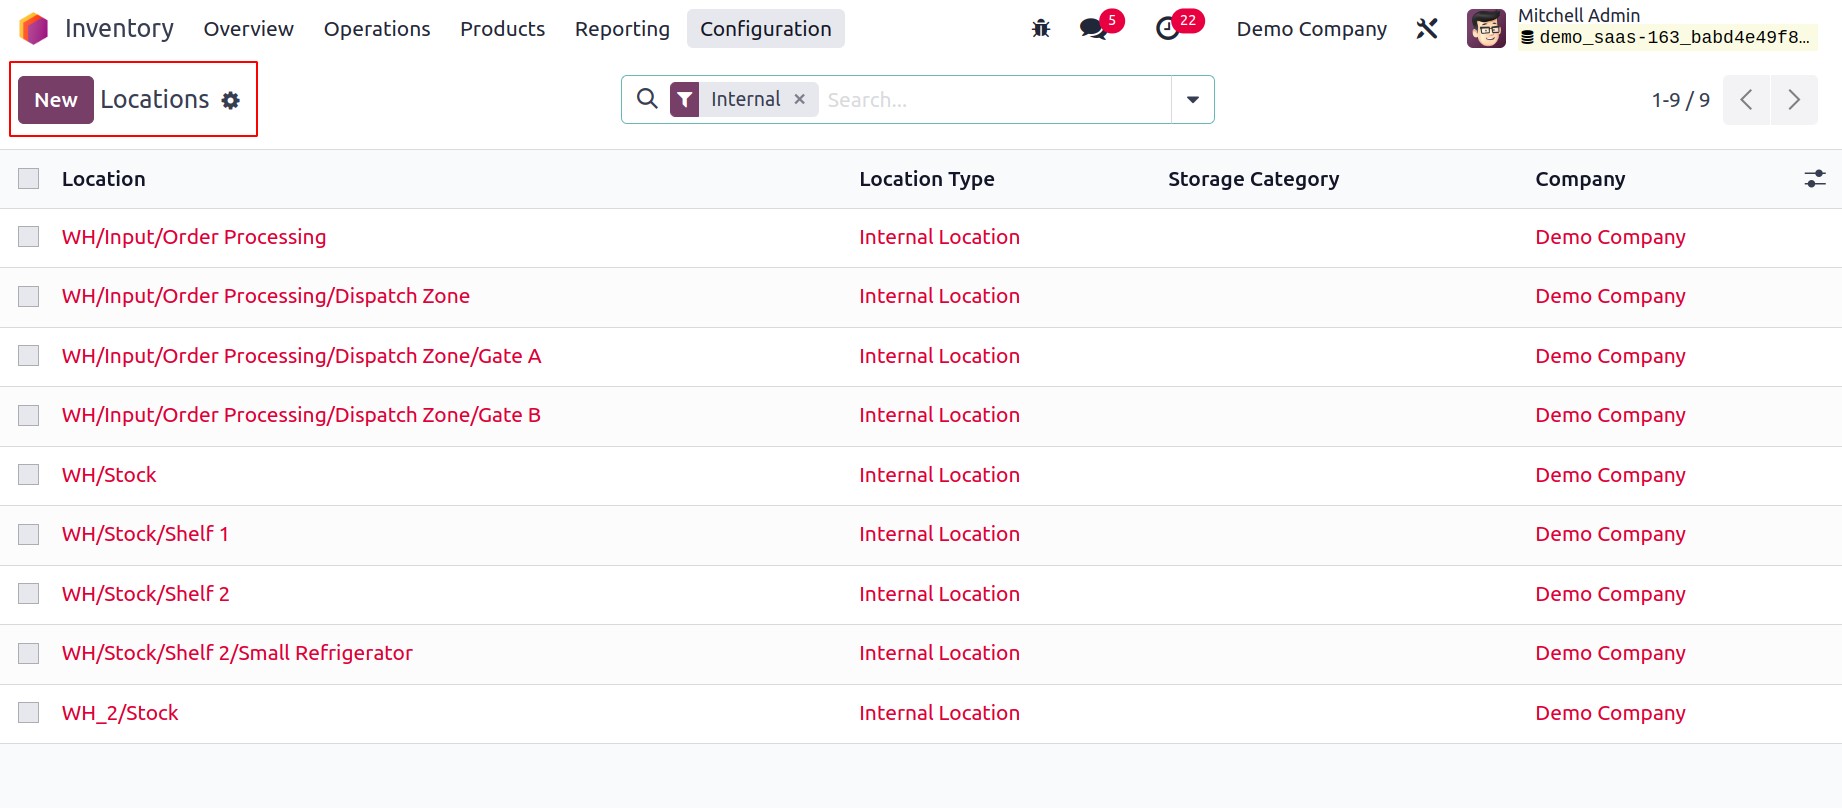
The window for creating a new location is displayed above. You can enter the location name in the field provided here. The Parent Location option allows you to specify the parent location that contains this location. From the drop-down menu, you can choose the parent location. You can define the tabs for Additional information, Logistics, and Cyclic Counting. The inventory count for the products kept at this location will be automatically set at the specified frequency if it differs from zero. You can choose Location Type for the new one from the available options.
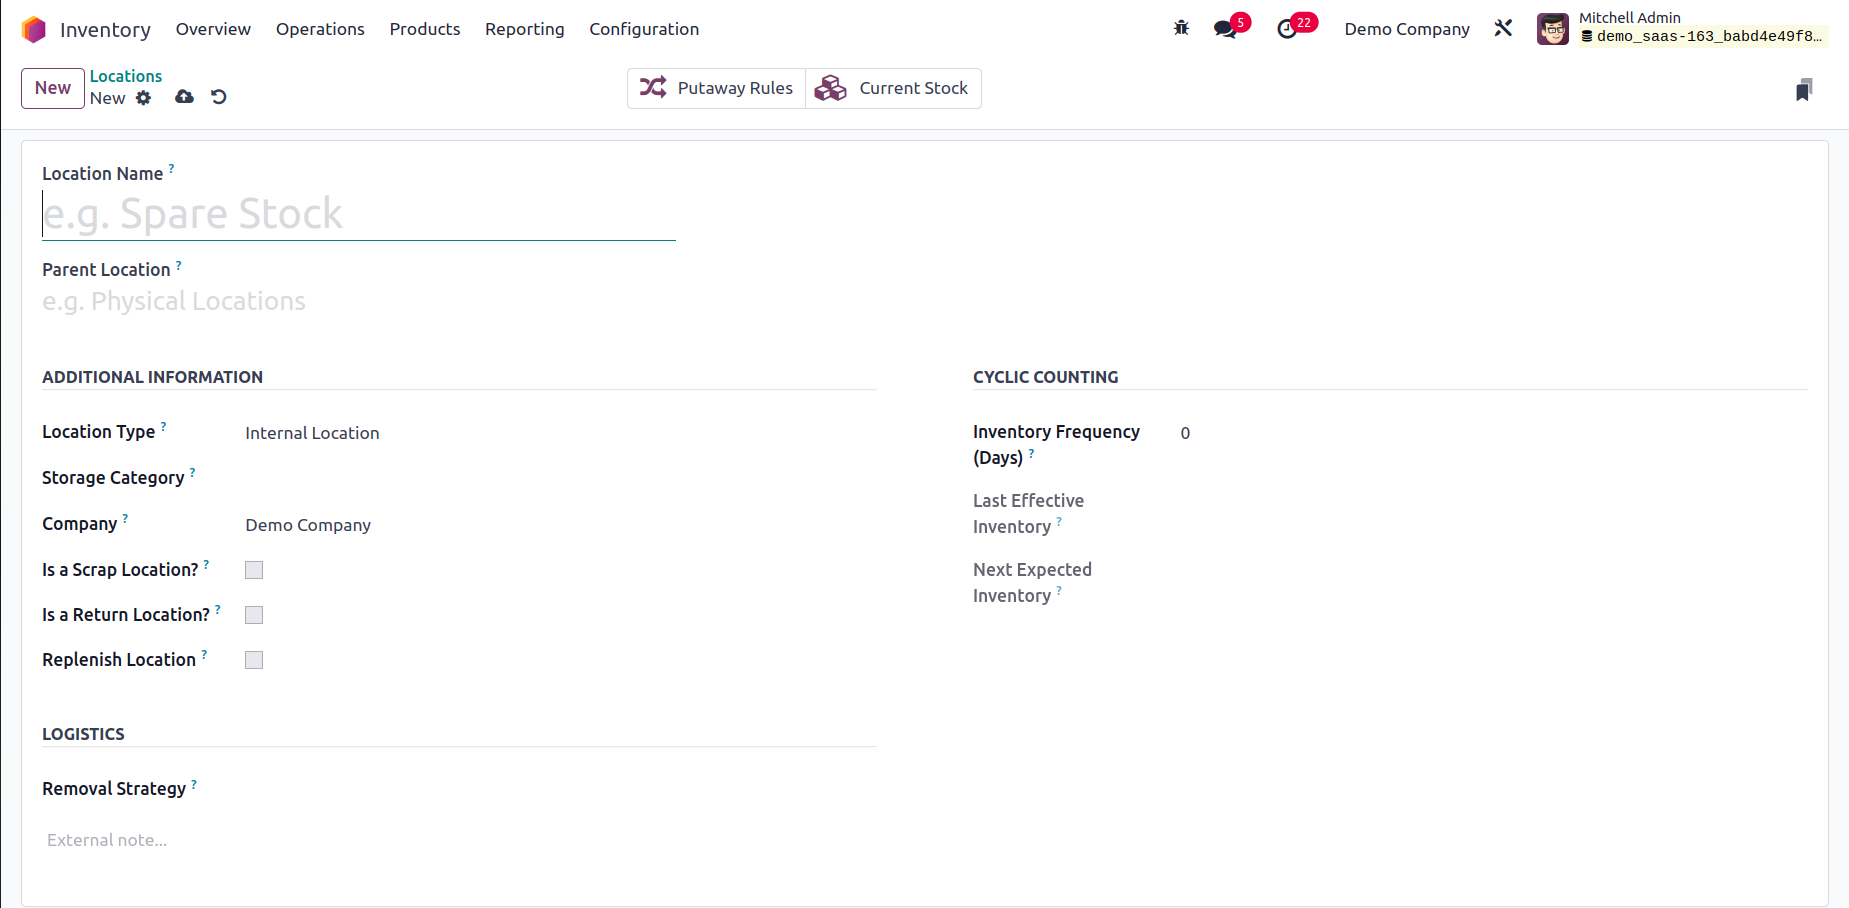
The location types that are available are,
Vendor Location: A vendor location is a virtual location that depicts the place where the goods that are sold by your merchants are made.
View: View is another type of virtual location that is used to organize your warehouse in a hierarchical fashion. They are unable to physically store goods.
Internal Location: Your warehouse's actual, physical locations are known as internal Locations.
Customer Location: A virtual location that depicts the places where the goods you send to your consumers will end up.
Inventory Loss: This virtual area also functions as a counterpart for inventory activities needed to adjust stock levels.
Production: Activities related to production are carried out in this virtual counterpart place. This location's components can be consumed to create finished goods.
Transit Location: In intercompany or inter-warehouse activities, the Transit Location should be used as a counterpart location.
You can indicate the storage grouping that is being used in this location by filling out the Storage Category section. If multiple companies share this location, you can leave the Company box blank. By turning on the Is a Scrap Location? option, you can approve the placement of scrap and damaged products here. By turning on the Is a Return place? option, this place can be utilized as a return location to hold returned goods. For this business, a new specialized subcontracting location may be created by activating the Is a Subcontracting Location. The Barcode field allows you to enter the barcode that is used at this site. To have all amounts replenished at this place, use the Replenish Location function.
Add a line to the Cyclic Counting tab that says "Inventory Frequency" in days. The inventory count date for the items kept at this location will be automatically set at the specified frequency when the difference is greater than zero. The date of the most recent inventory at this location will be displayed in the Last Effective Inventory column. The Next Expected Inventory field will display the date of the following scheduled inventory based on a cyclic timetable.
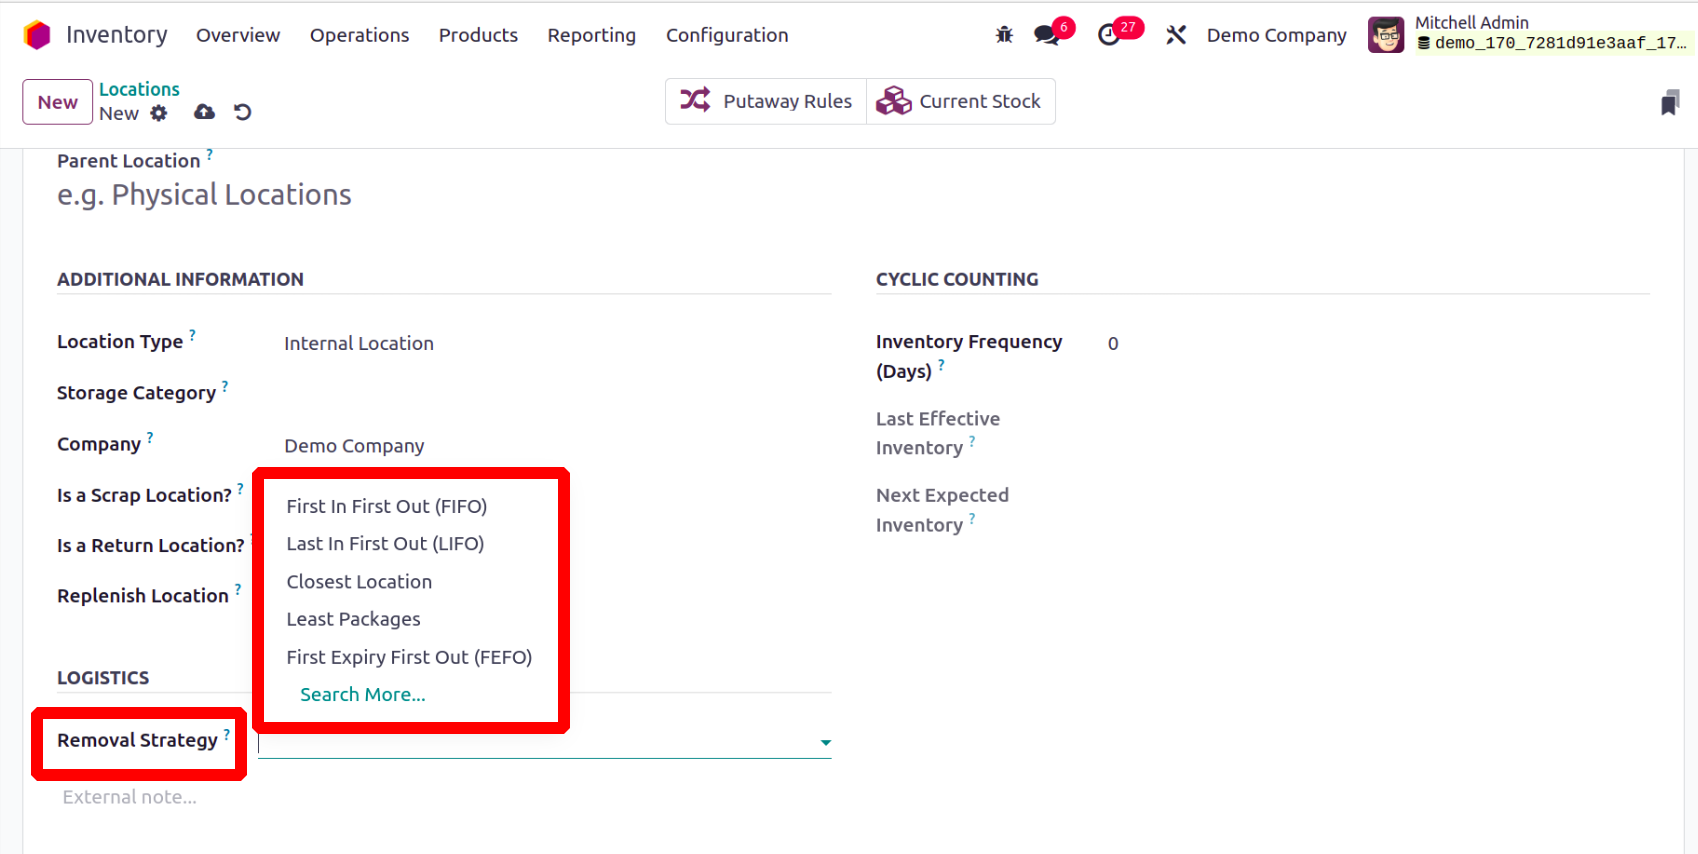
It outlines the standard procedure for recommending the precise location, the lot, etc., to take the products from for this location. If no parent locations are given here, a fallback is performed to the product category level, where this technique can be enforced. The available Removal Strategies are,
FIFO: The items or lots that were initially stocked will be removed first.
LIFO: Products or lots that were last stocked will be removed first.
Closest Location: The items or lots that are closest to the desired location will be transported out first.
FEFO: Products/lots with the earliest possible removal date will be removed first.
Least Packaging: Products can be added to packages. So the small package will be removed from the stock first.
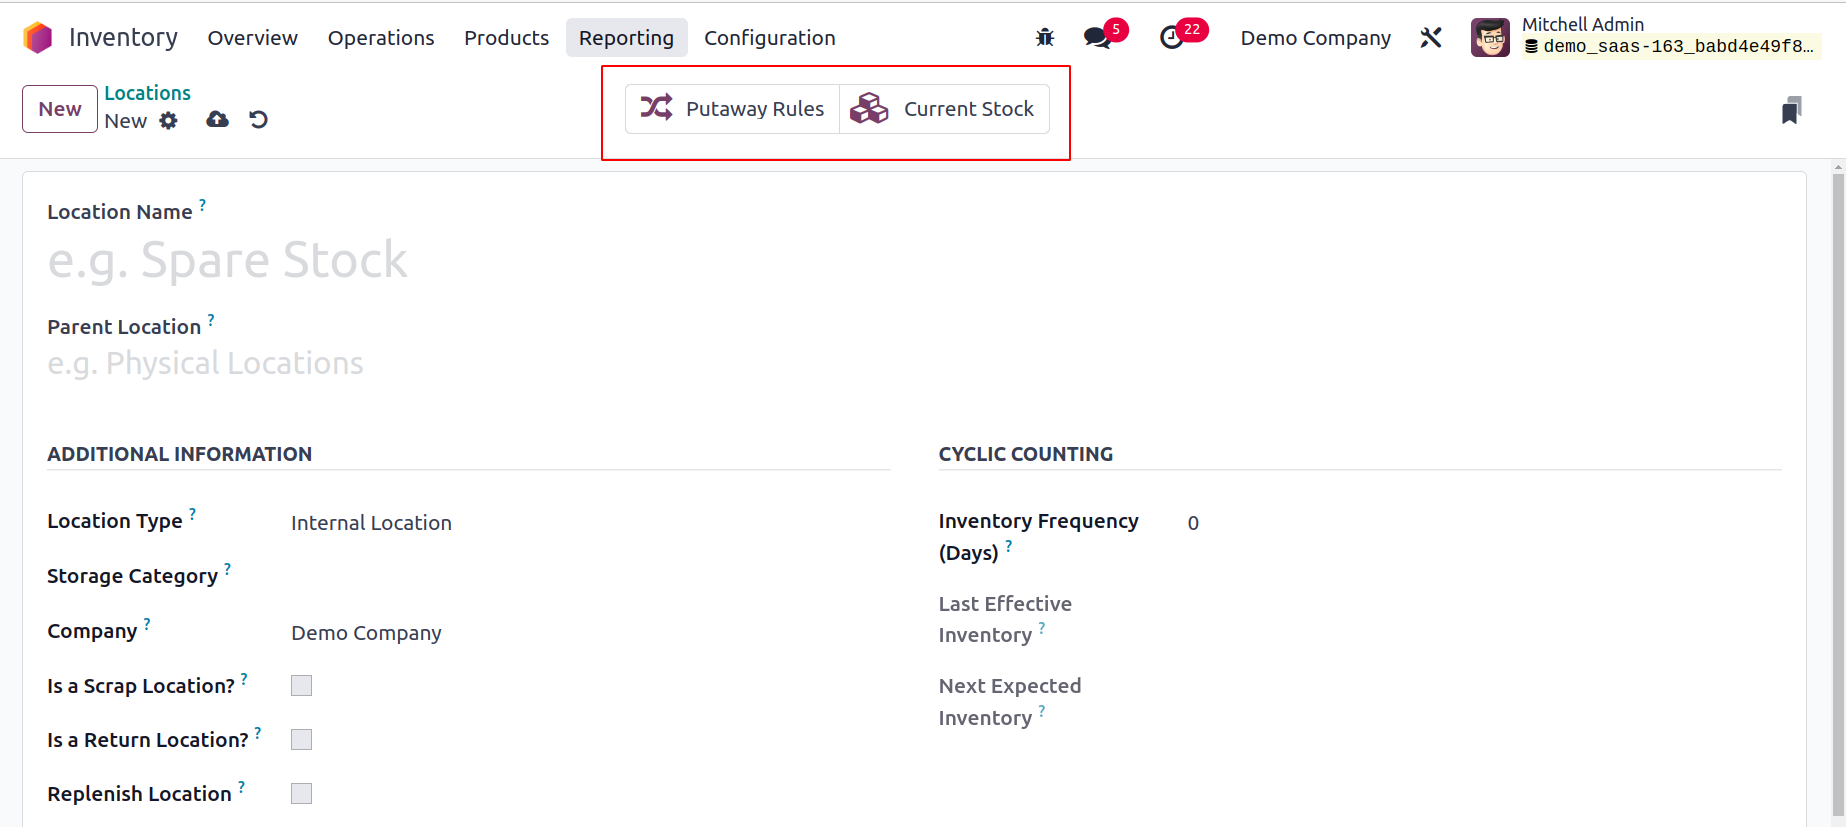
Additionally, in the location window, there are special smart buttons for things like stocks and putaway rules. The Putaway Rules button will open a window with instructions for moving products from one place to another, and the Current Stocks button will provide information on this location's most recent stock updates.
Locations
You can specify the areas in your warehouses where the products are stocked by using the platform to configure and manage various locations available in the Odoo17 Inventory module. You can manage many stock locations inside a single warehouse. You may enable the Storage Location function, which will help you track product location in your warehouse, from the Settings menu of the Inventory module.
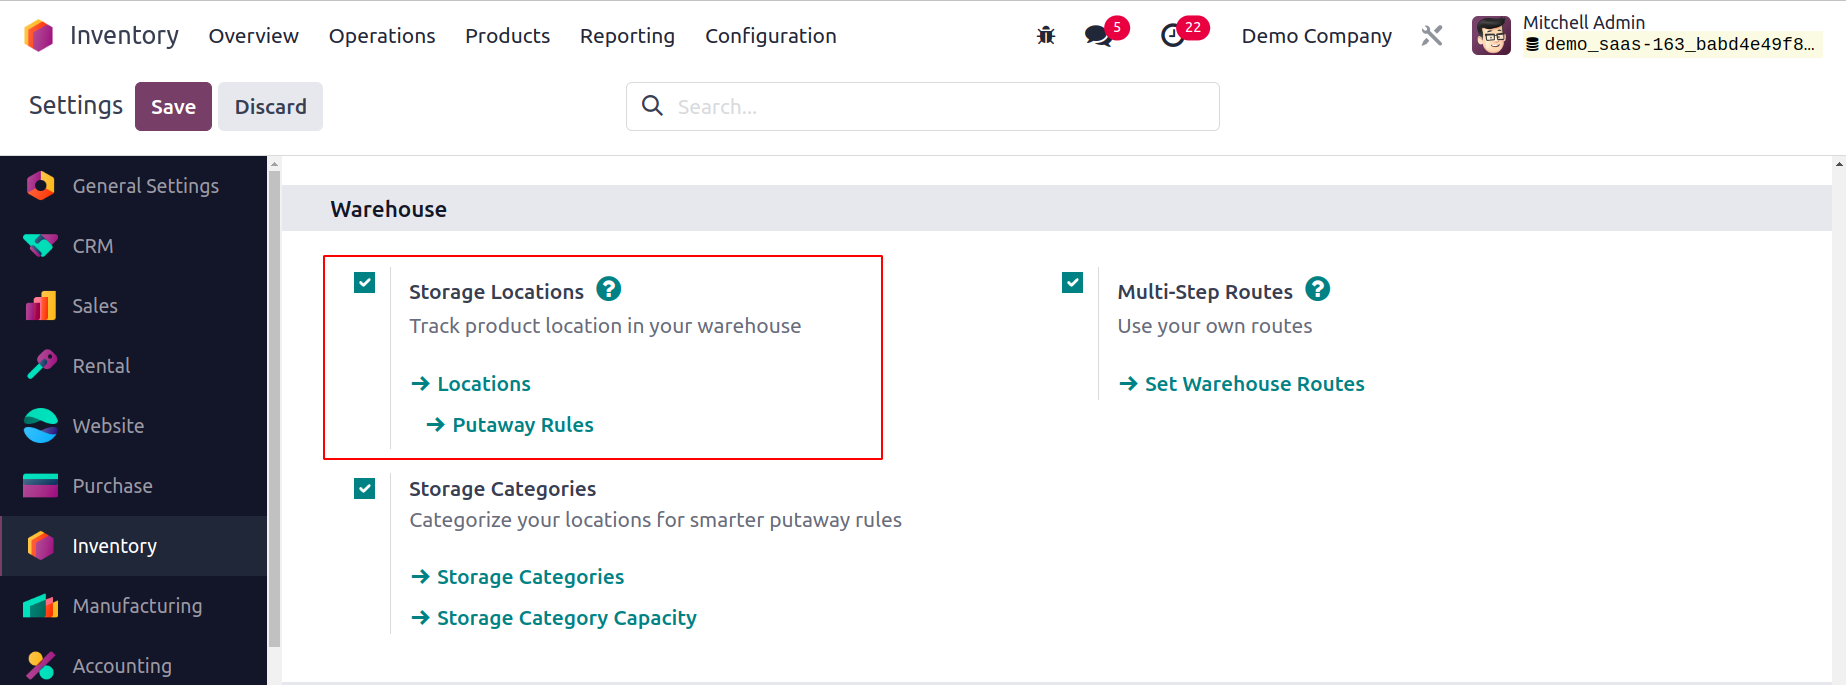
Now, as seen below, the Inventory module's Configuration menu has an option for configuring Locations.
Details about the Locations, Location Type, Storage Category, and Company are provided in this platform's list view. While talking about how to set up a new location in Odoo 17, we will go through each of these options in more detail. You can do this by selecting the New button.
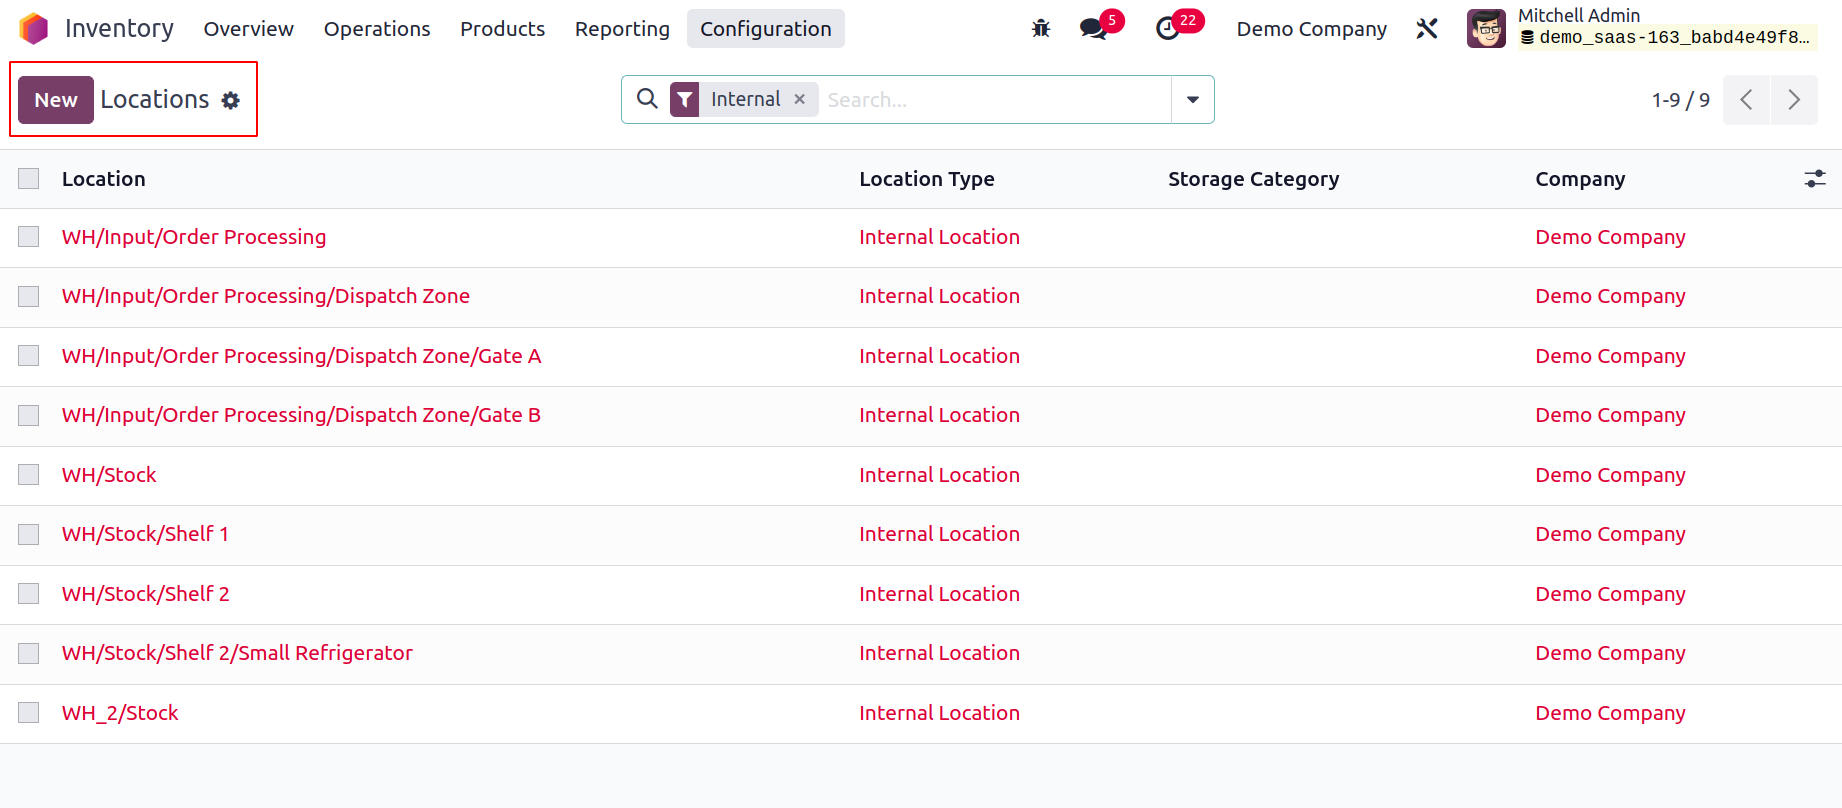
The window for creating a new location is displayed above. You can enter the location name in the field provided here. The Parent Location option allows you to specify the parent location that contains this location. From the drop-down menu, you can choose the parent location. You can define the tabs for Additional information, Logistics, and Cyclic Counting. The inventory count for the products kept at this location will be automatically set at the specified frequency if it differs from zero. You can choose Location Type for the new one from the available options.
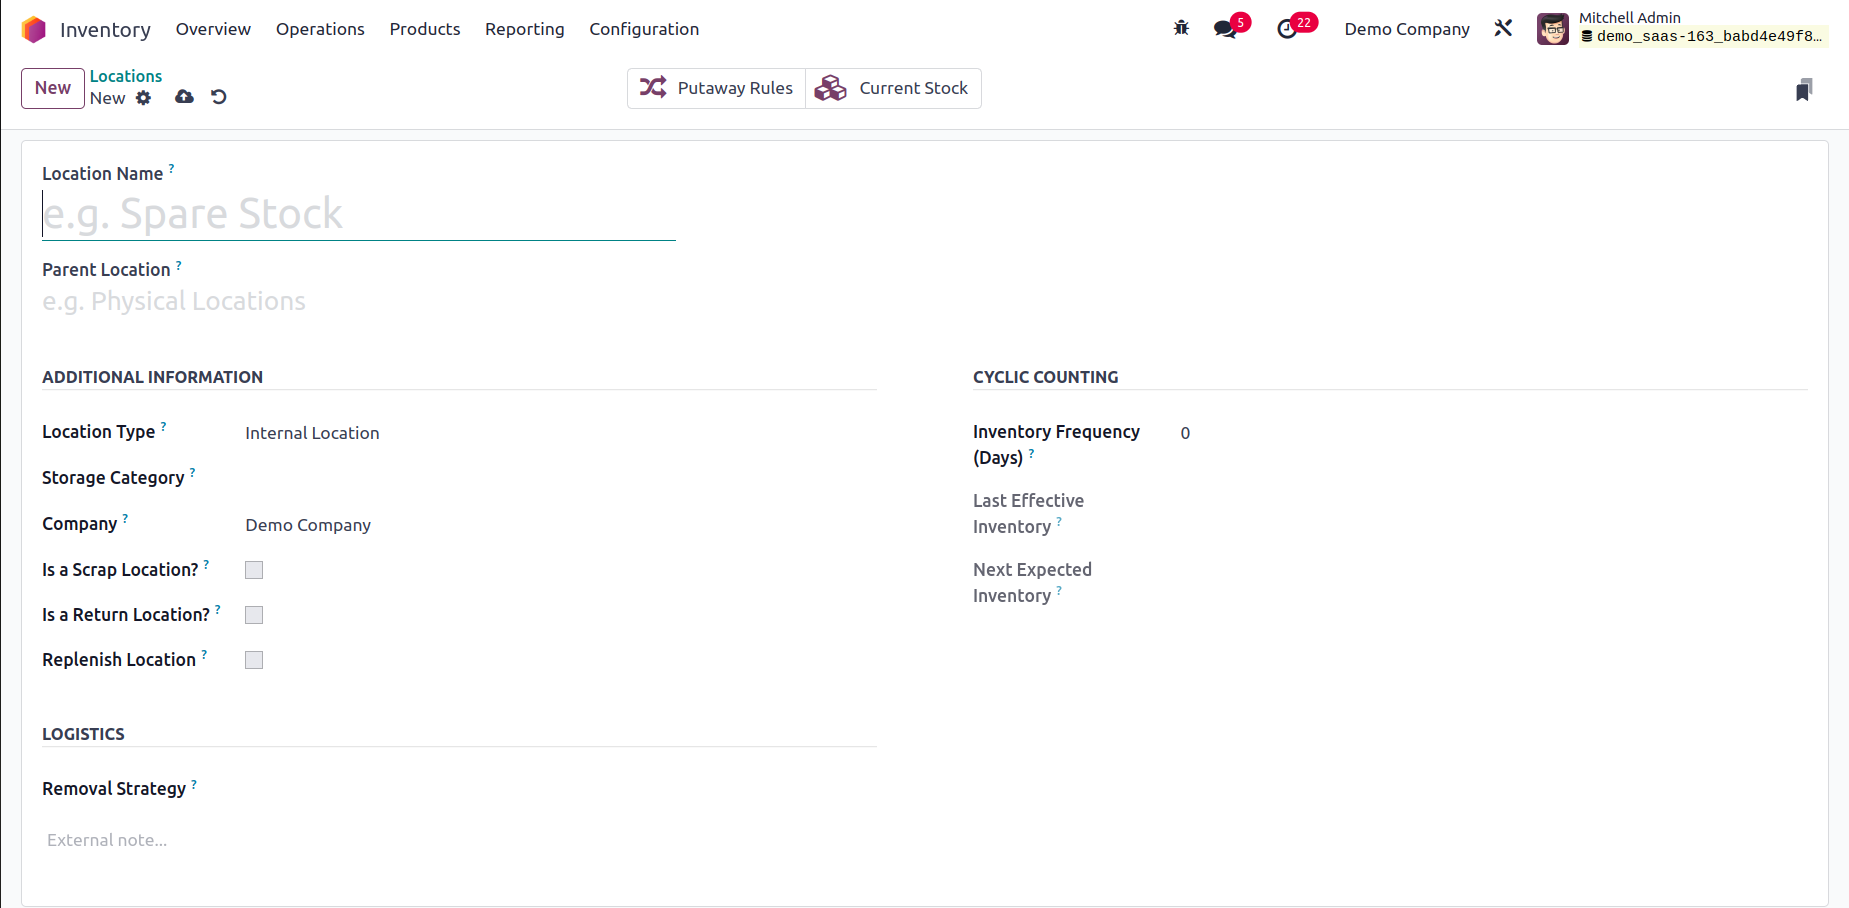
The location types that are available are,
Vendor Location: A vendor location is a virtual location that depicts the place where the goods that are sold by your merchants are made.
View: View is another type of virtual location that is used to organize your warehouse in a hierarchical fashion. They are unable to physically store goods.
Internal Location: Your warehouse's actual, physical locations are known as internal Locations.
Customer Location: A virtual location that depicts the places where the goods you send to your consumers will end up.
Inventory Loss: This virtual area also functions as a counterpart for inventory activities needed to adjust stock levels.
Production: Activities related to production are carried out in this virtual counterpart place. This location's components can be consumed to create finished goods.
Transit Location: In intercompany or inter-warehouse activities, the Transit Location should be used as a counterpart location.
You can indicate the storage grouping that is being used in this location by filling out the Storage Category section. If multiple companies share this location, you can leave the Company box blank. By turning on the Is a Scrap Location? option, you can approve the placement of scrap and damaged products here. By turning on the Is a Return place? option, this place can be utilized as a return location to hold returned goods. For this business, a new specialized subcontracting location may be created by activating the Is a Subcontracting Location. The Barcode field allows you to enter the barcode that is used at this site. To have all amounts replenished at this place, use the Replenish Location function.
Add a line to the Cyclic Counting tab that says "Inventory Frequency" in days. The inventory count date for the items kept at this location will be automatically set at the specified frequency when the difference is greater than zero. The date of the most recent inventory at this location will be displayed in the Last Effective Inventory column. The Next Expected Inventory field will display the date of the following scheduled inventory based on a cyclic timetable.
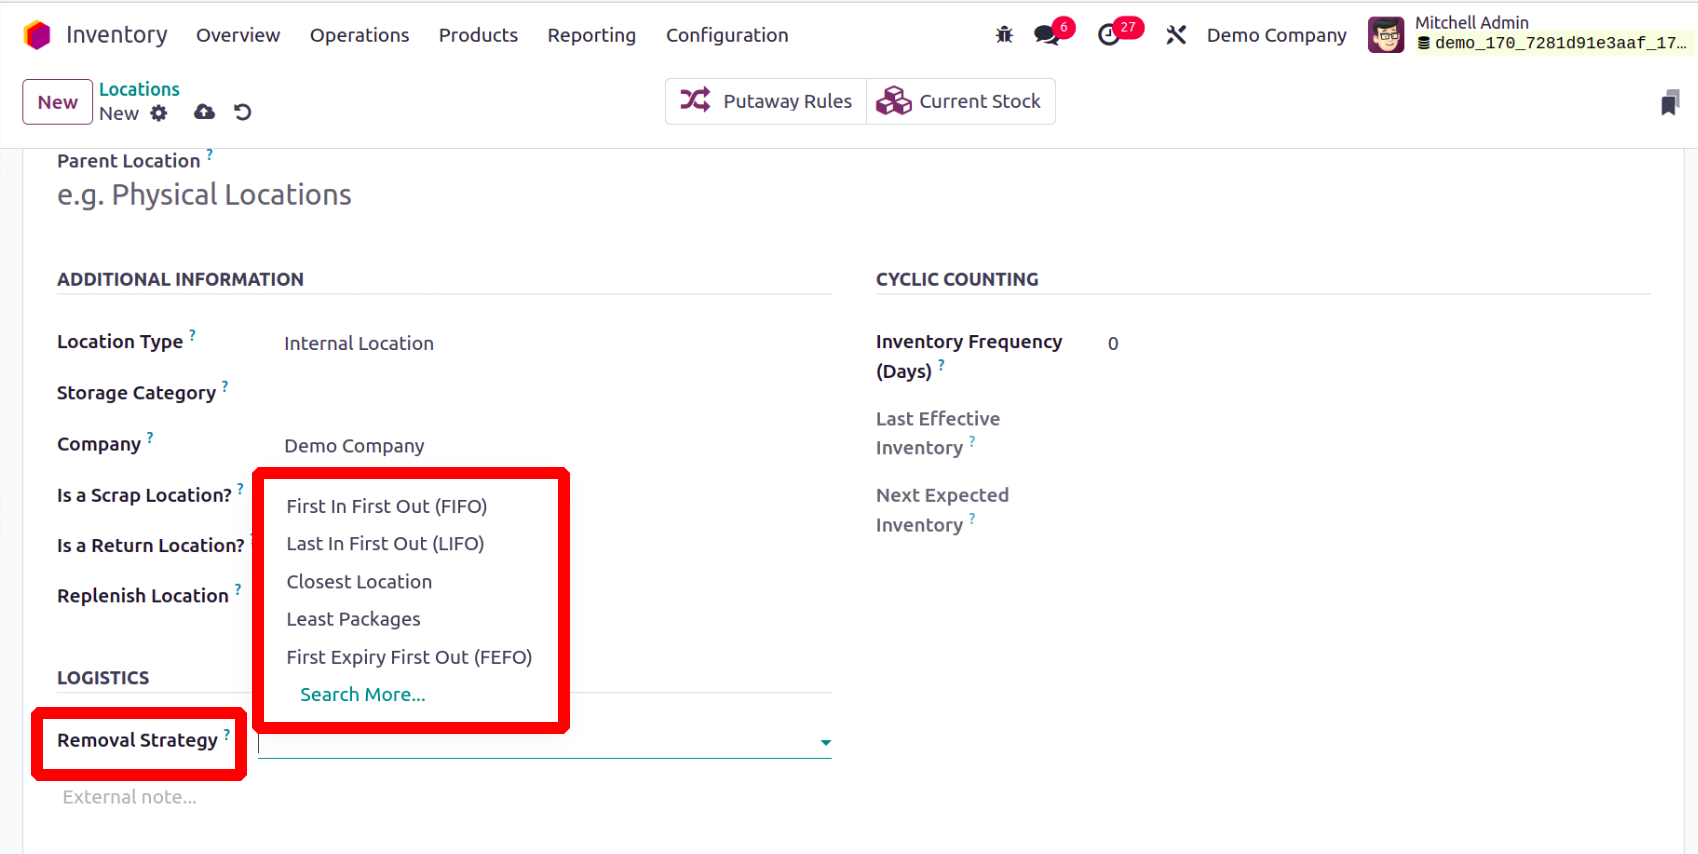
It outlines the standard procedure for recommending the precise location, the lot, etc., to take the products from for this location. If no parent locations are given here, a fallback is performed to the product category level, where this technique can be enforced. The available Removal Strategies are,
FIFO: The items or lots that were initially stocked will be removed first.
LIFO: Products or lots that were last stocked will be removed first.
Closest Location: The items or lots that are closest to the desired location will be transported out first.
FEFO: Products/lots with the earliest possible removal date will be removed first.
Least Packaging: Products can be added to packages. So the small package will be removed from the stock first.
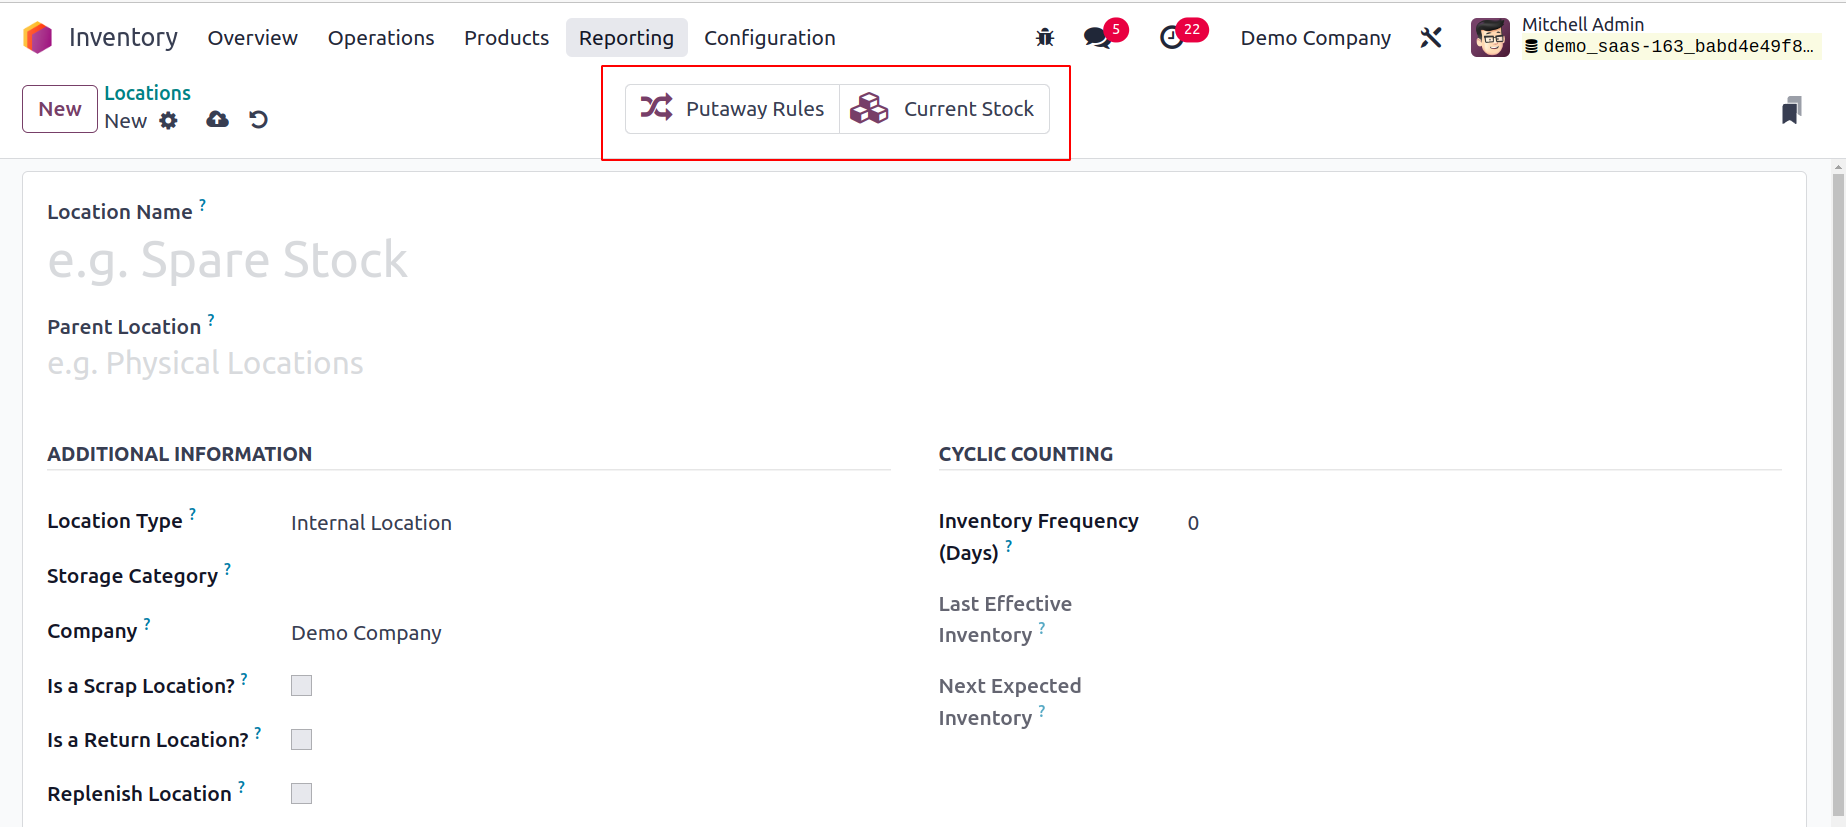
Additionally, in the location window, there are special smart buttons for things like stocks and putaway rules. The Putaway Rules button will open a window with instructions for moving products from one place to another, and the Current Stocks button will provide information on this location's most recent stock updates.
Rules and Routes
You can comprehend and follow each movement of a product by using the routes that have been set for it. It is the operational path or track utilized for moving inventory. It is challenging to track and manage the inventory movements of a business without a good strategy. You can establish specific operational rules to specify the product movements in inventory based on your company's policies. Using these rules, you may set up many operation paths for the products using Odoo 17. This will guarantee that your business is managing its inventory properly.
Users will have access to various platforms to set appropriate rules and routes for stock transfers in the Odoo 17 Inventory module. Before defining routes for inventory, make sure to configure the storage locations and warehouse operations that the routes in Odoo17 are related to. You must enable this option from the module's Settings menu in order to build up new routes in Odoo 17. The Multi-Step Routes can be activated from the Warehouse tab, which is located where it is illustrated below.

Due to their interdependence, when this option is selected, the Storage Location feature will also be active automatically. We already covered how to set up locations and warehouses for inventory management. Let's now examine how a company's product movement rules are set up.
Creating Rules
From the Configuration menu of the Inventory module, the user can choose to set up new rules for inventory moves. A new window with the list view of the already specified Rules is opened by selecting the Rules option under the Warehouse Management menu, as shown below.

You can see the Action, Source Location, Destination Location, Route, and Company information for each Rule from this preview. Like any other platform, Odoo ensures that the basic and customizable GroupBy and Filters options are available to make searching easier. You can immediately click the New button to learn the procedures for configuring a new rule in Odoo 17.

You can include a suitable title for the new rule in the Name area. The Action for the new rule needs to be defined next. Here, a drop-down menu will allow you to choose the appropriate course of action.

Pull From: When products are required at the destination location, you can configure this action to "pull from." It may come from a manufacturing order or a sales order. Odoo17 will produce a picking operation type from the source location to fulfill the need when a product demand occurs in the destination location.
Push To: This rule allows you to move a product to a different location. This action allows you to transport items to another area after they arrive at the originating location. To send them to the destination location in this scenario, Odoo17 will generate a pickup operation type.
Push & Pull: Both of the aforementioned scenarios can be handled by this action. A picking is produced from the source area to meet the need when products are required in the destination place. This necessitates product specifications at the point of origin. Products are pushed to the destination site to meet the needs of the destination location once the source location has satisfied the requirement.
Manufacture: With the help of this action, you can create manufacturing orders directly in order to meet the demands of the source location.
Buy: With the aid of this action, Odoo will produce a request for quotation to acquire the goods in order to satisfy the need when products are required at the destination site.
You can specify the operation type, source location, and destination location in the following areas. You can specify the Route, Warehouse, Company, and Sequence on which this rule is applicable in the Applicability tab. You can select Empty, Fixed, or Propagate for the Propagation of Procurement Group under the Propagation tab. The move generated by this rule is canceled, together with the subsequent move, by turning on the Cancel Next Move option. You can specify a warehouse other than the warehouse this rule is for in the Warehouse to Propagate field for a newly established move or procurement.
Let's now examine how to set up routes in the Odoo17 Inventory utilizing these rules.
Creating Routes
The Configuration menu of the Inventory module's Warehouse Management tools provides access to the platform for managing and creating various operational routes. Here, the user can view the predefined list of routes together with information about the company and the routes' names.

To build a fresh route for inventory moves, click the New button.

The Route field allows you to specify the route's name. The Sequence, Supplied Warehouse, and Company can also be specified in the corresponding fields. If this route is shared by all the companies configured in your database, you can omit the Company field. You can choose the locations where this route can be selected in the APPLICABLE ON tab. According to your company's policies, you can choose from the Product Categories, Products, Packaging, Warehouse, and Sales Order Lines available here.

Using the Add a Line button located under the Rules tab, you may describe the rules applied to this path of operation. By taking the actions we covered in the earlier section, you can configure new rules for this route. Don't forget to click the Save button at the end to save the modifications.
While configuring each product in the database, you can provide a specific path of operation for each one in Odoo 17. To choose the best path for a product's inventory movement, you may locate a specific field in the Inventory tab of the products management window, as shown below.

This field lets you specify a product's route based on the module you installed in your Odoo 17 database. Depending on the path you take, it can be purchased, produced, supplied on demand, etc. In Odoo17 Inventory, we define product movement routes in a similar manner.
Storage Categories
You can combine numerous storage sites under one category using Odoo17's Storage Categories feature. The Odoo17 Inventory module allows you to build a variety of these categories, which will help you carry out put-away tasks more intelligently. You must set the storage locations that are available in your inventory before establishing the Storage Categories. After that, you can put them all in a single category. You may build and manage every storage location in your business by turning on the Storage Location feature in the Settings module. As soon as you turn on this option, a new field named Storage Categories will appear, allowing you to specify different categories for the storage that is already available.
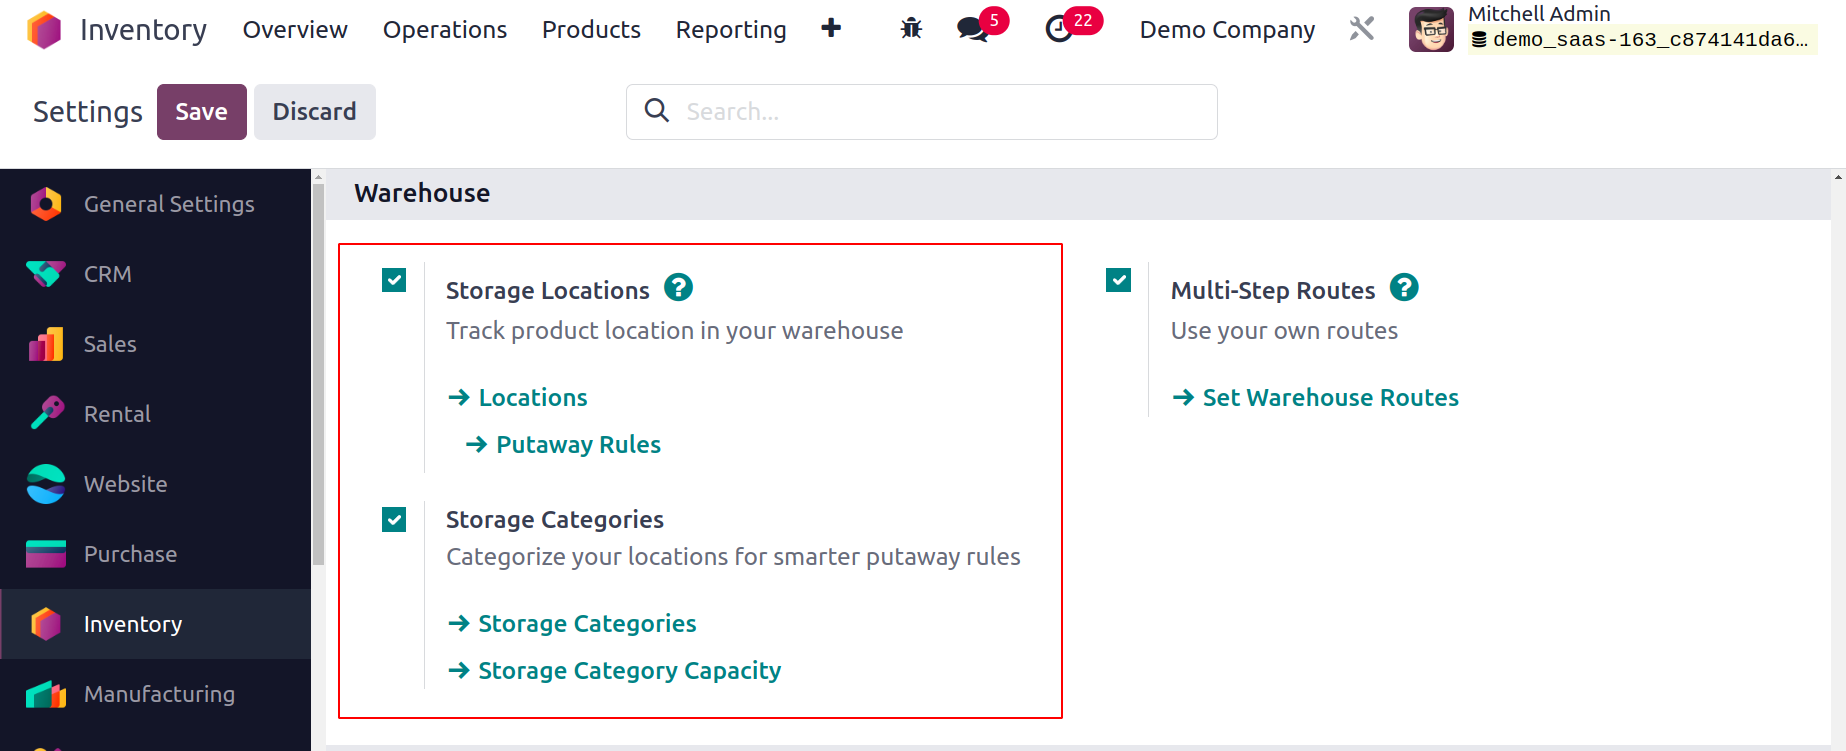
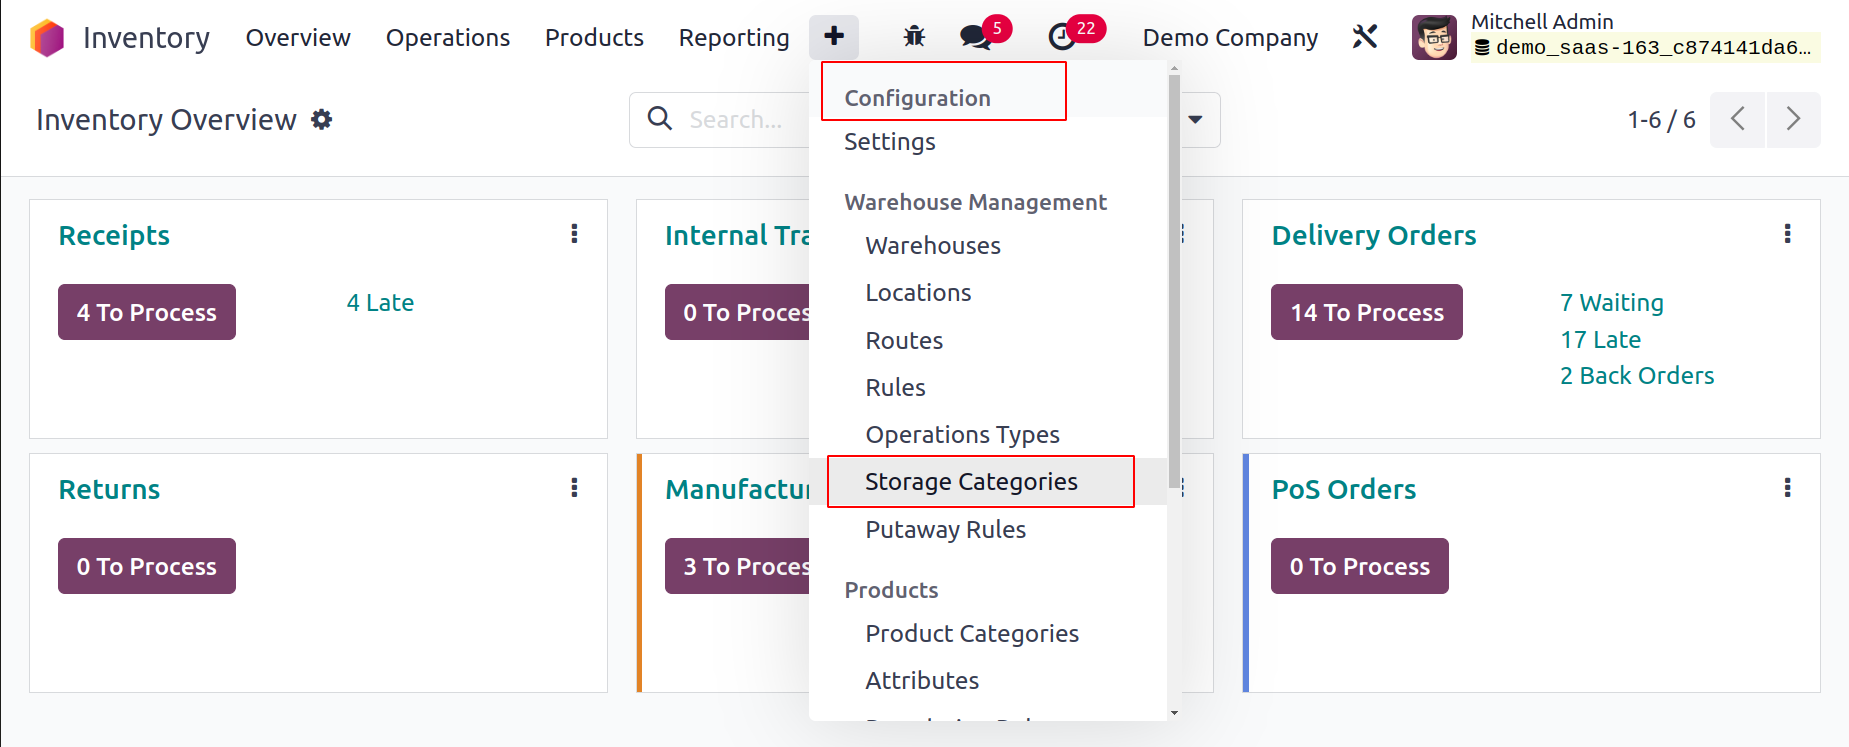
You may now access the Storage Categories platform by going to the module's Configuration menu.
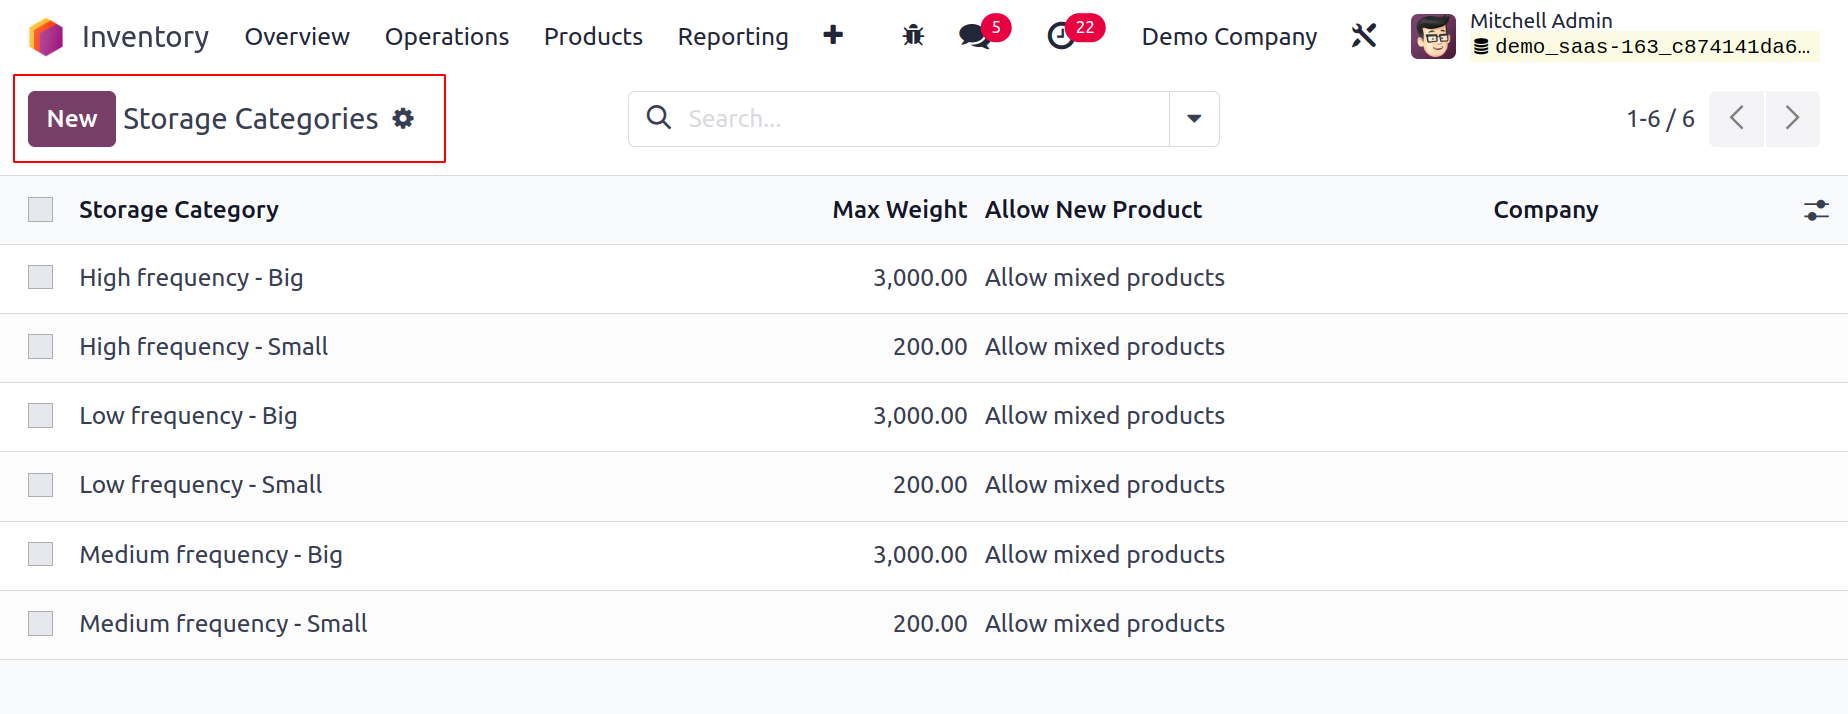
Details about the available Storage Categories, Max Weight, Allow New Product, and Company are displayed in this window's list view. We can utilize the New button to add a new storage category.
The given space can be used to mention the name of the new storage category. Additionally, you can set the maximum weight that can be kept in this type of storage. In the Allow New Product section, you can specify the circumstances under which new products may be brought into the locations that fall under this category. If the location is vacant, if all the products are the same, or if you want to allow mixed products.
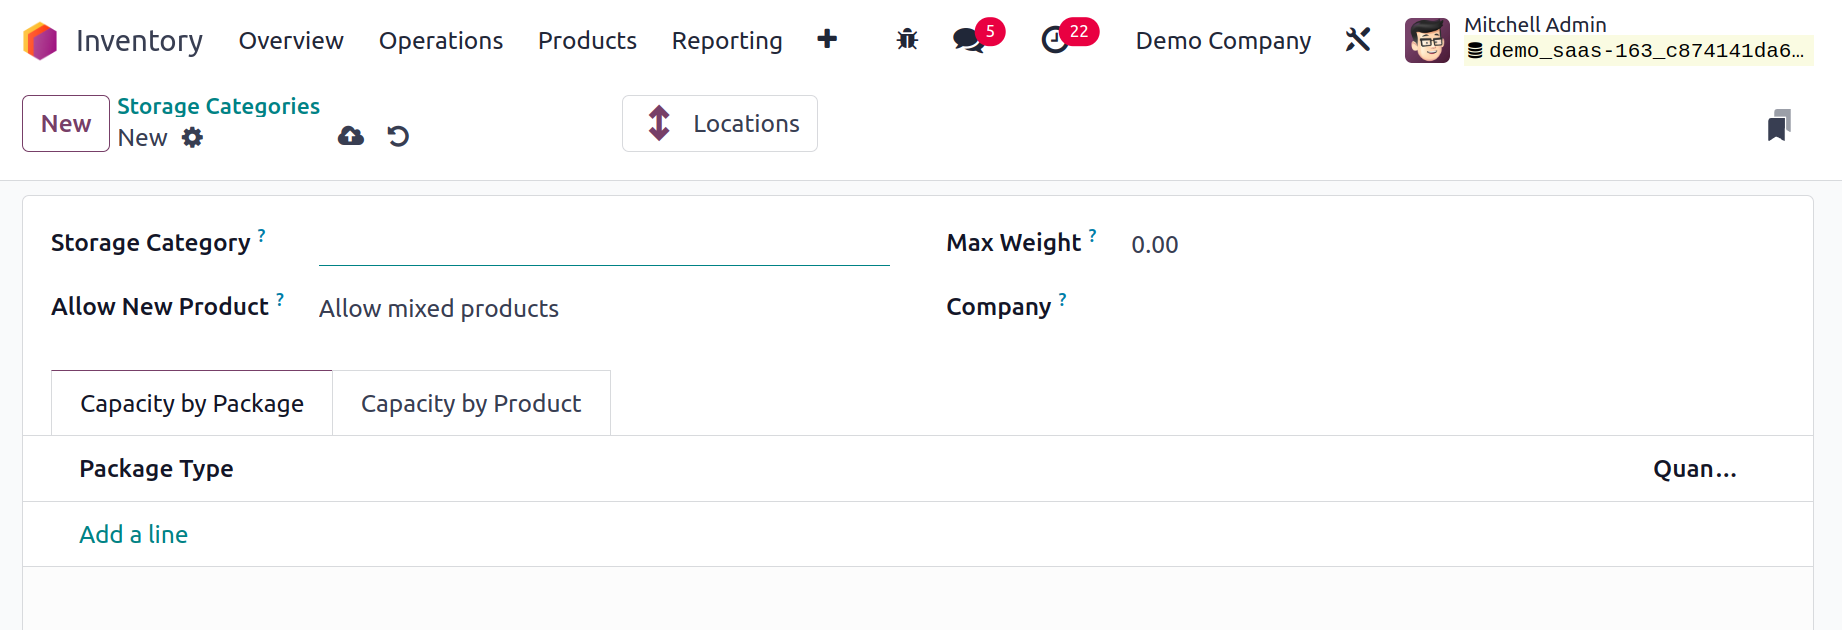
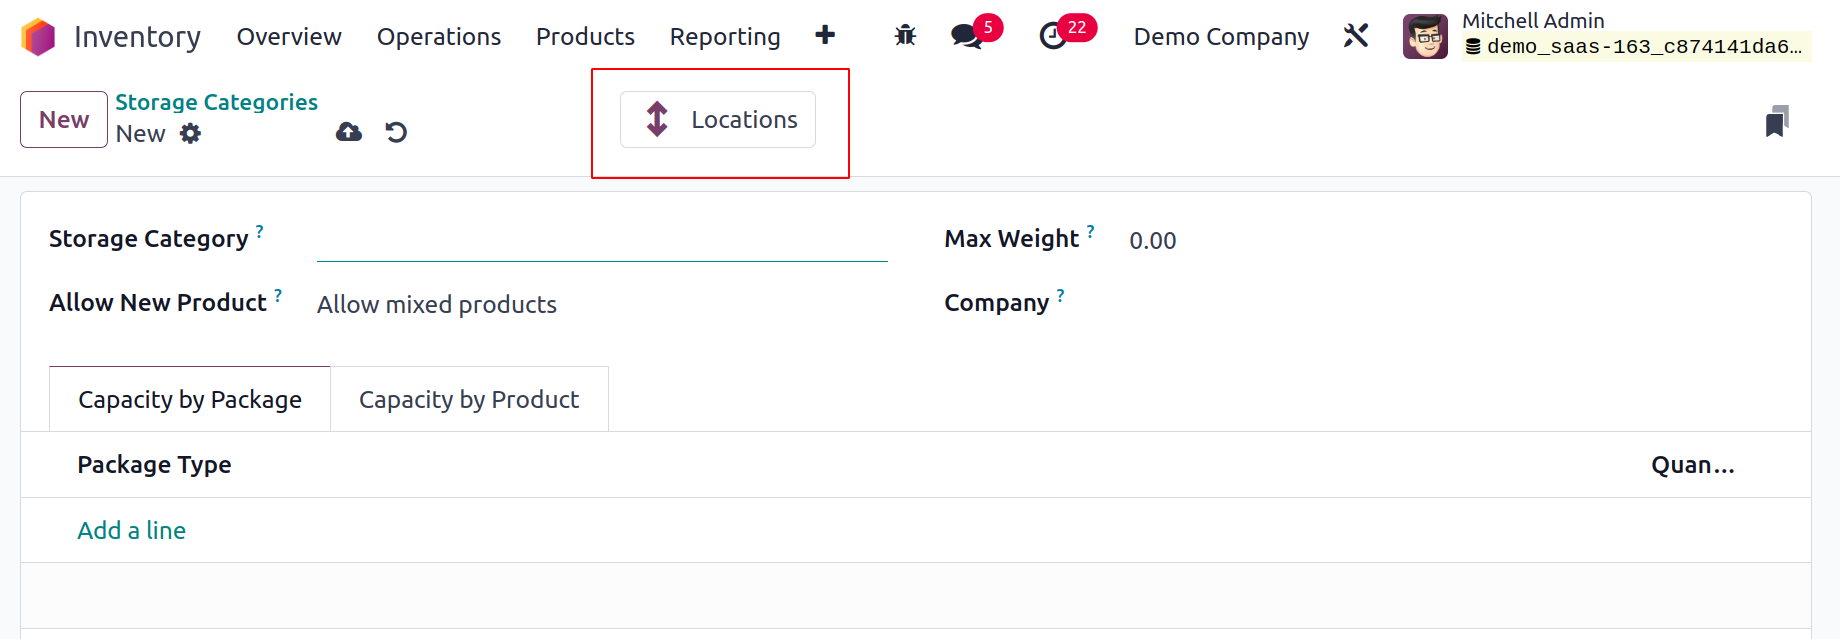
Using the Add a line button that can be found in this category, you can choose the Package Type and its Quantity under the Capacity by Package box. The Capacity by Products tab allows you to specify the products that can be added to this storage category. Your inventory will receive a new storage category when you click the Save button. The information about the location added under this specific category will be provided by the smart button Location.
Let's now discuss the putaway regulations included in the Odoo17 Inventory module.
Putaway Rules
Products are positioned correctly in the warehouse thanks to a good warehouse management system. In order to prevent contact with other items, you should manage hazardous and dangerous commodities properly by designating a separate space to keep them. The Odoo17 Inventory module introduces the Putaway Rules, which will assist you in moving products to the appropriate areas, to conduct these activities automatically. This functionality will prevent products from being incorrectly stored in your inventory. You can move products from the receiving locations to the best spot inside the warehouse by using the putaway rules.
The module's Configuration menu provides access to the Putaway Rules. The list of putaway rules that are already set up is displayed in the screenshot below. You may learn more about the Product, Product Category, Package Type, Store to Sublocation, Having Category, and Company data here.

In Odoo 17, adding new putaway rules is simple. A new line will be added to the available list when you click the New button. The product name, product category, and package type can all be mentioned here in the appropriate areas. The When product comes in field allows users to specify the product's receiving location. You can enter the place to which you wish to transport the item after it reaches the receiving location in the Store to Sublocation section. In the Having Category field, the sublocation's category can be entered. Once the the Company has been mentioned. the receiving location provided here will automatically move the product from the chosen product category and packaging type to the selected sublocation of the business.

You can configure putaway rules for that place by clicking a smart button in the place management window of the Inventory module.
To relocate things to another location, you can configure new putaway rules for this location.
We will now talk about the replenishment function included in the Odoo 17 Inventory module.
Replenishment
A vital inventory process that helps you keep a suitable amount of items in your inventory is replenishment. You need to restock the inventory in accordance with demand to guarantee a constant flow of items. The Odoo17 ERP System offers immediate assistance to a company's replenishment processes. There are two ways that replenishment can be done. Both the product management window and the Inventory module's replenishment module can be used to restock products.
Let's start by taking a look at the product replenishment from the product management window.
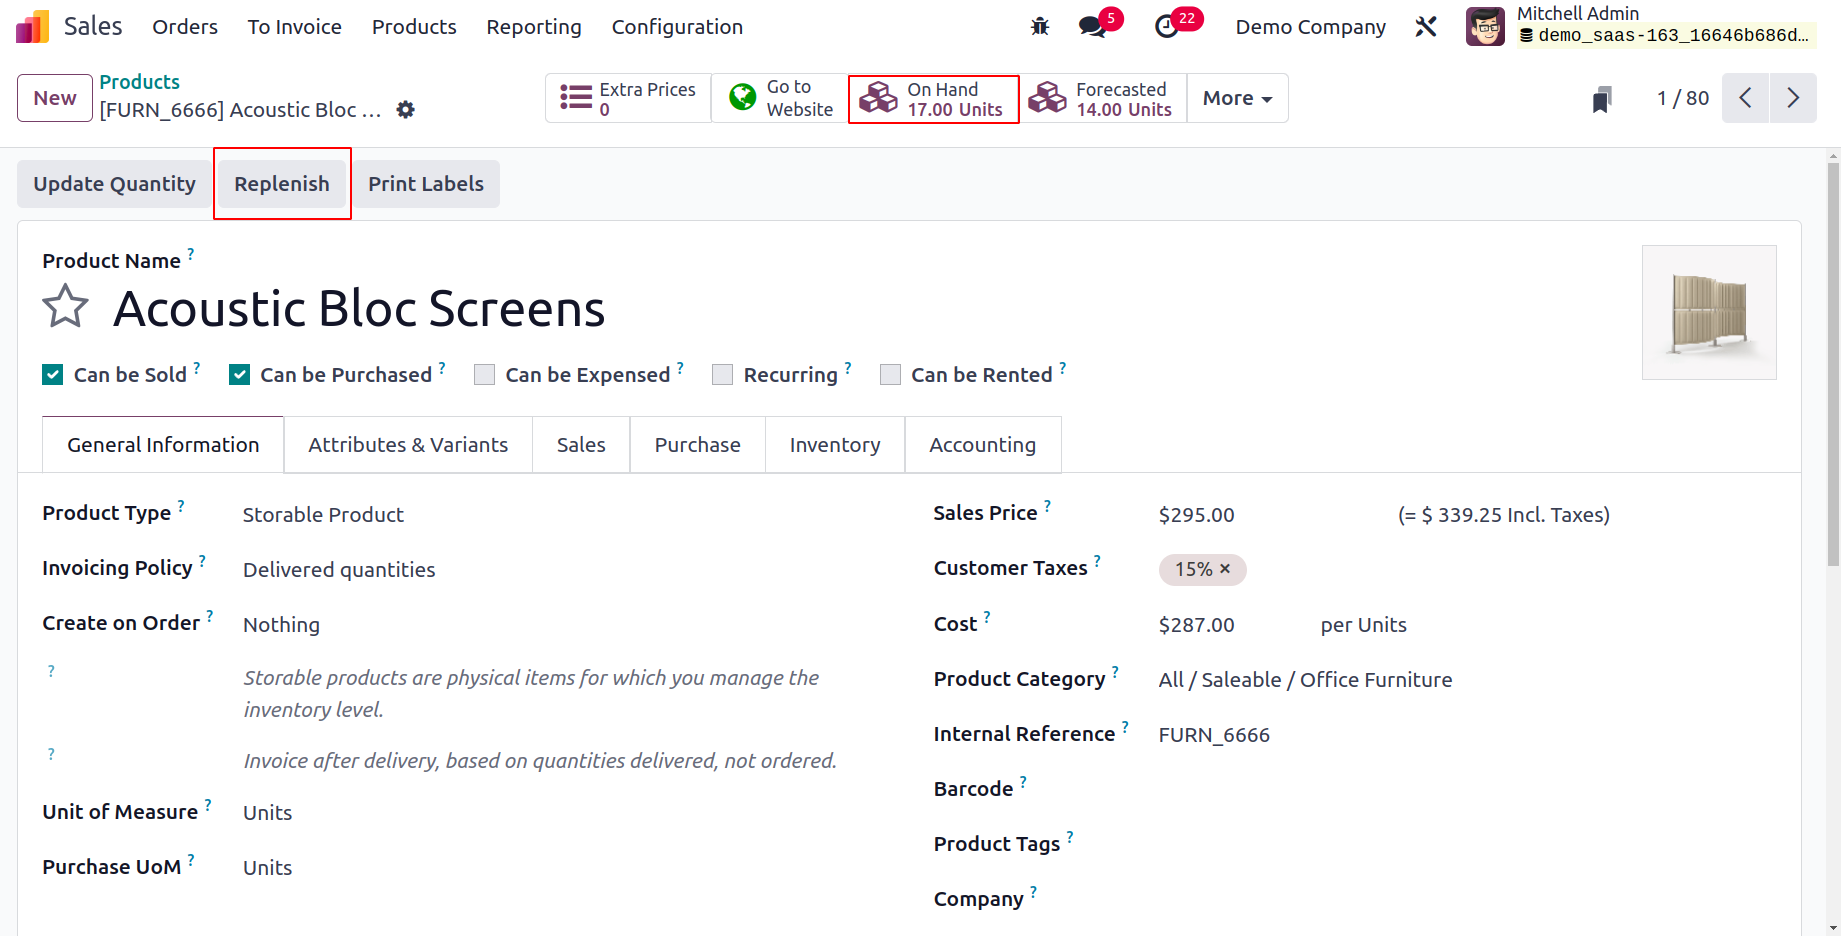
You can see that there are 17 available quantities here. By selecting the Replenish button, you can restock the product.
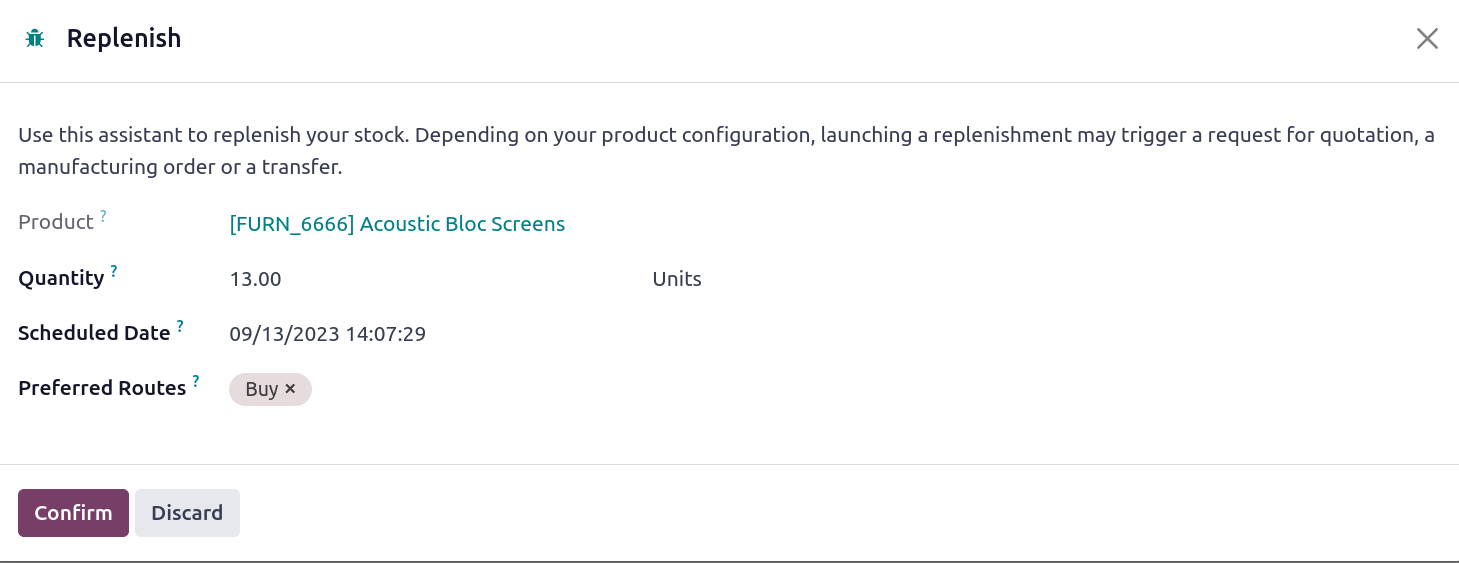
You can specify the quantity of the product you wish to replenish in the pop-up window that appears as shown above. Here, we asked for the commodity to be replenished in 13 quantities. You can choose a time for when the refill is to occur. You can also choose your favorite route for refilling. A manufacturing order, transfer, or a request for quotation for the purchase of this product will be started when you click the Confirm button. Based on the preferred path, the the replenishment action will be carried out.
Odoo17 will automatically produce a quotation for purchase based on the product settings if you have chosen Buy as the preferred route. The quotation may be verified, and the purchasing process can be finished.
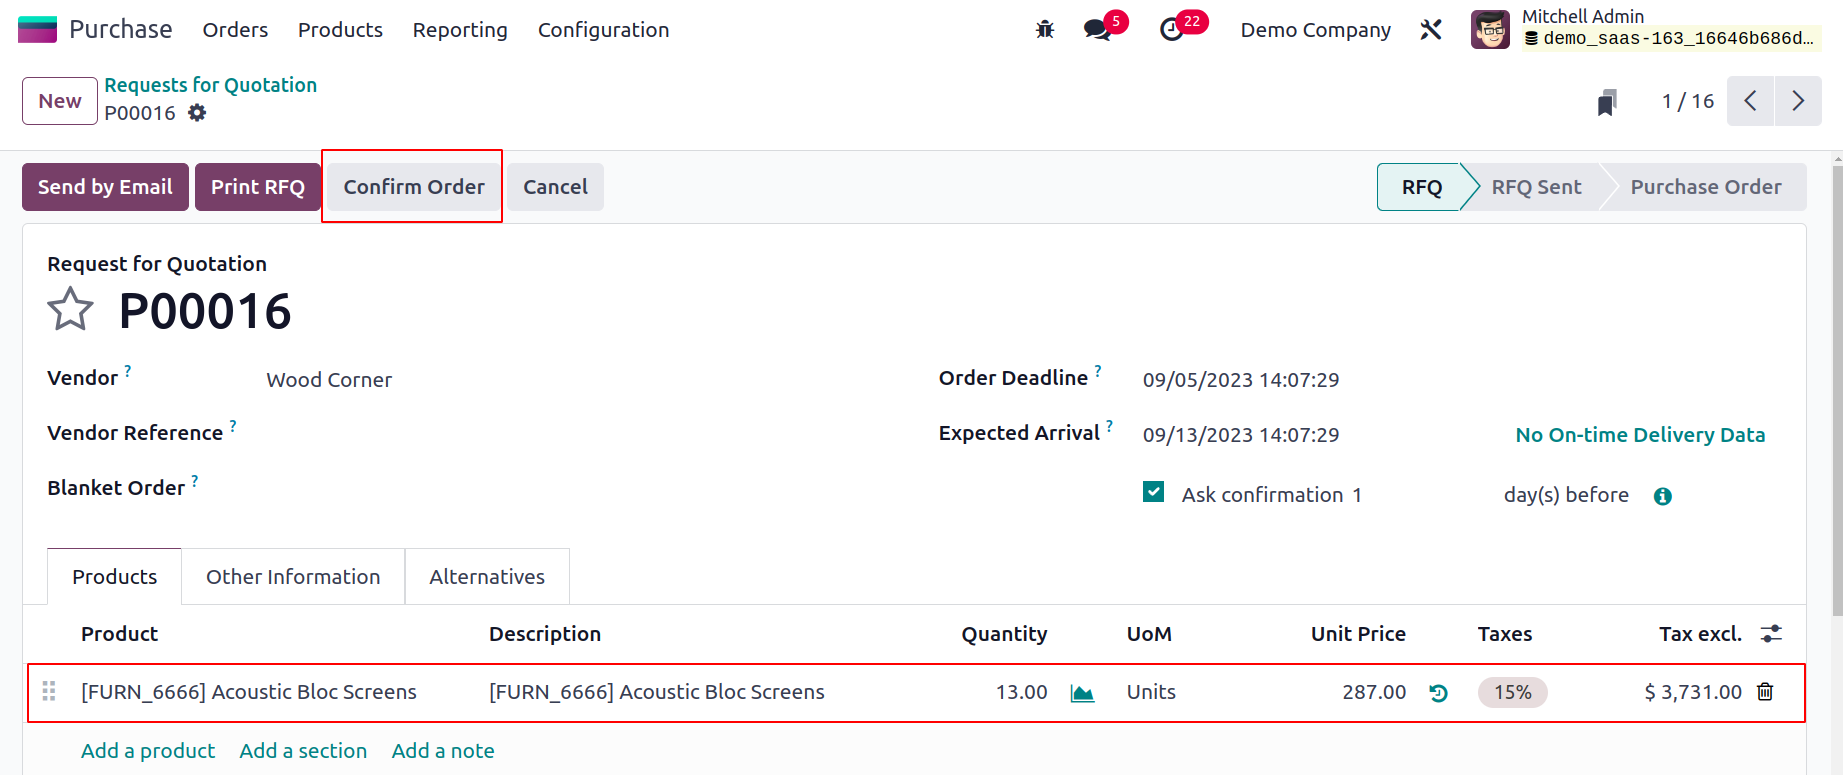
The 13 units of the product's purchase order are available in the Purchase module. You can add the items to your inventory by selecting the Receive Products option.
You may now check the number of products that are currently in stock.
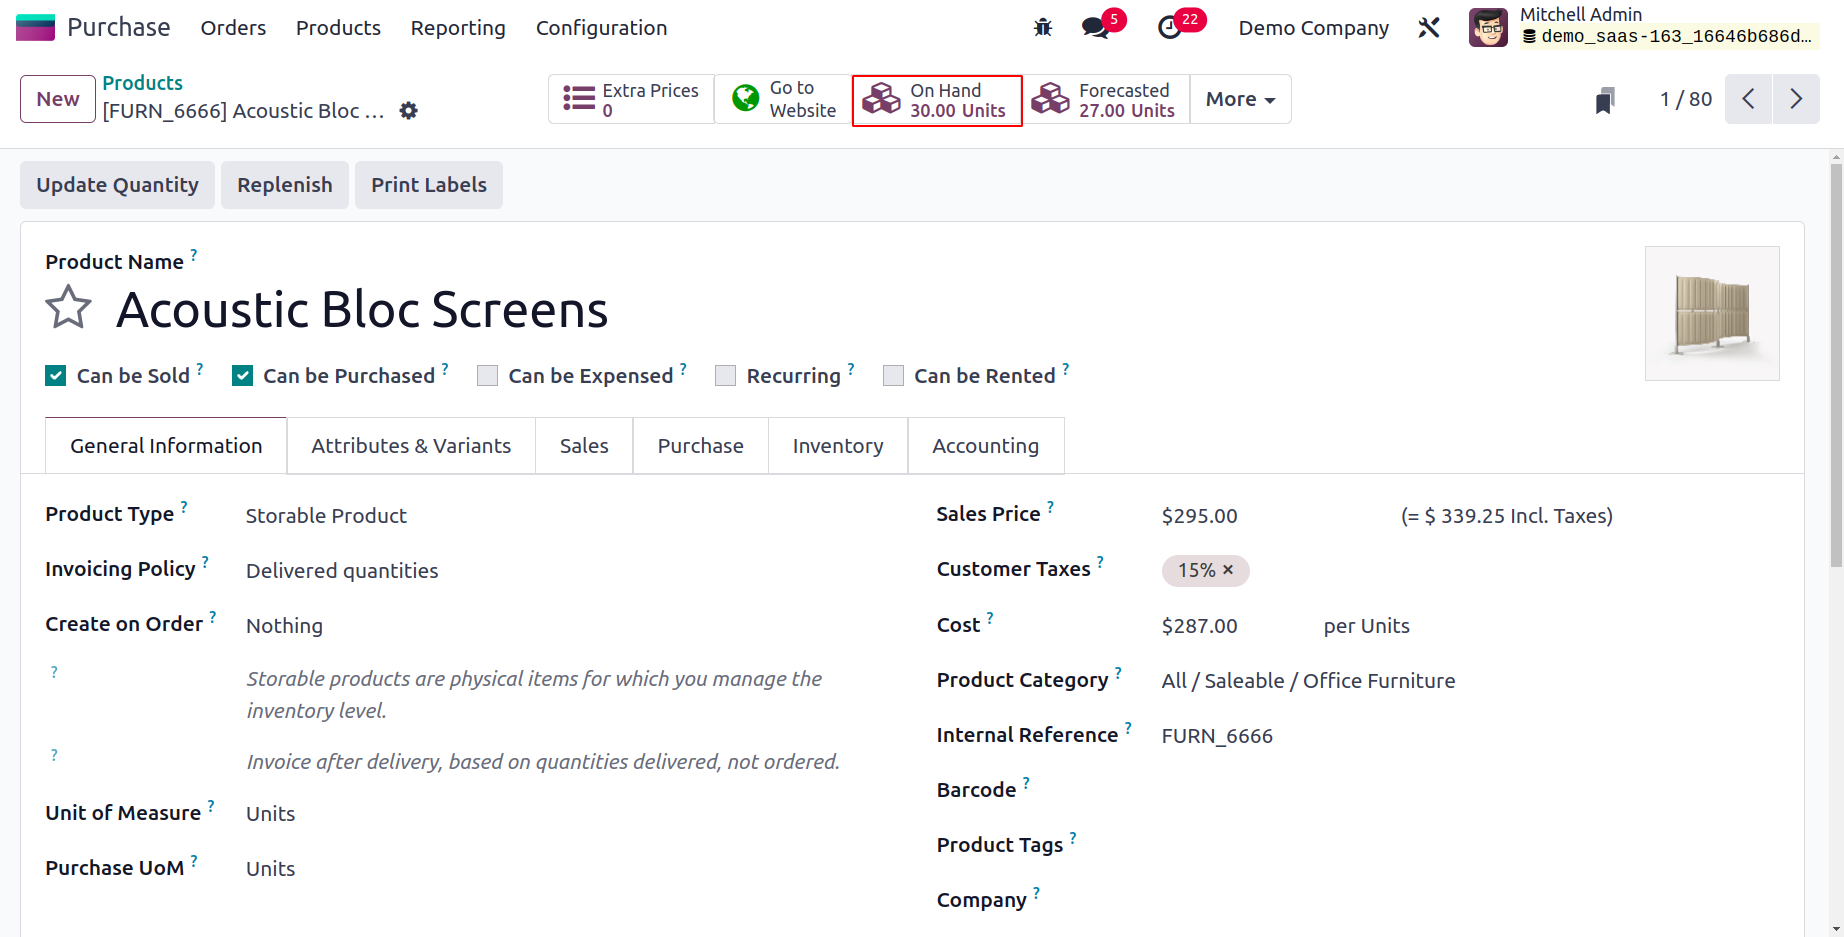
Earlier, it was 17 and now it has changed to 30 which means that 13 quantities of the product are replenished.
The Operations window in the Odoo 17 Inventory module gives you access to the Replenishment management window. There is a list of preloaded replenishment orders on this sophisticated platform.
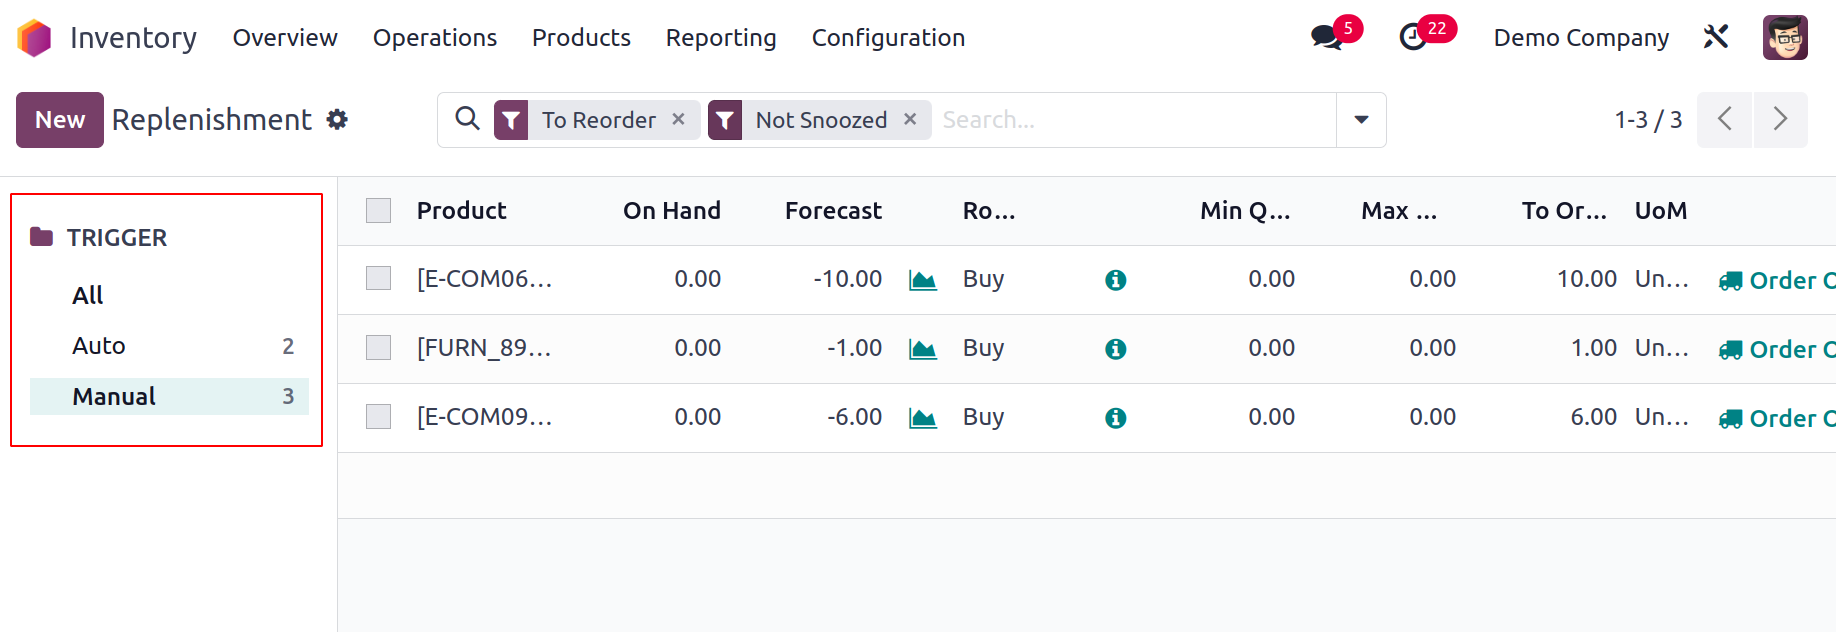
Using the search bar, you can look for individual replenishment orders. The Filters provide pre-set and programmable options that make it simple to retrieve the needed data. With the aid of the Group By option, you may organize the orders according to their Location, Product, and Category. You will find a special sorting panel on the left side of the window that will let you arrange the information according to Locations.
You can distinguish between all replenishment requests and manual replenishment using the Trigger option.
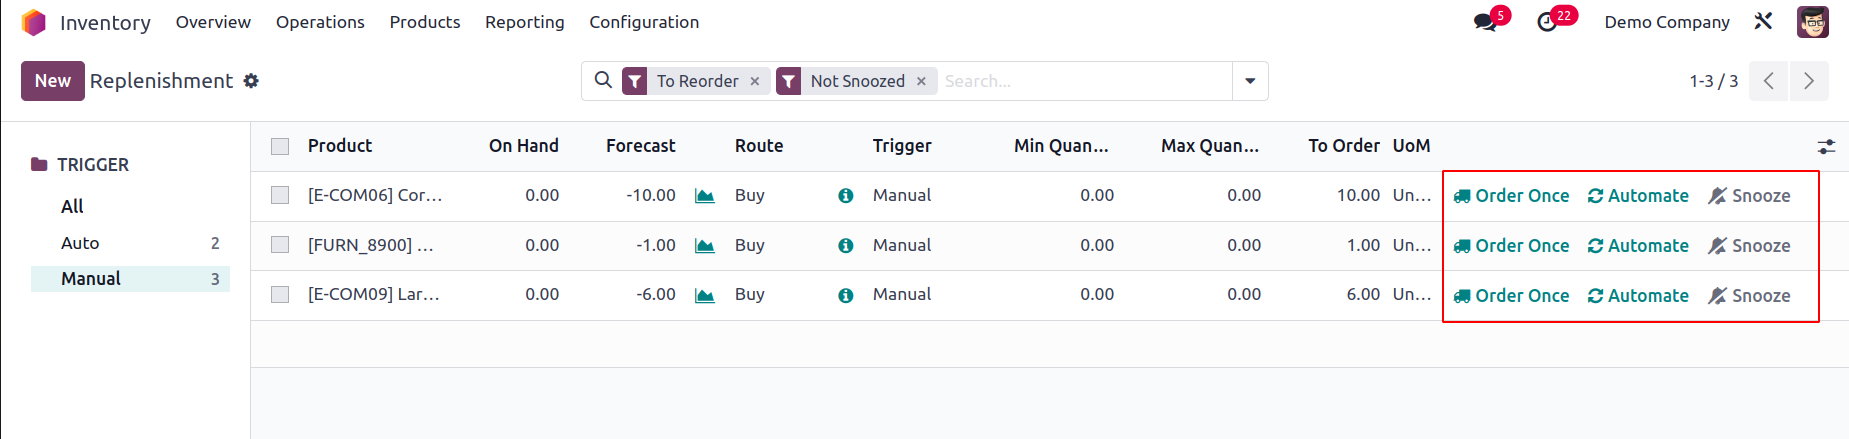
The names of the Products, Location, On Hand, Forecast, Preferred Route, Vendor, Minimum Quantity, Maximum Quantity, To Order, and UoM are all included in the list's preview. Using the New button, you can manually build a new refill. A new line will appear with information about the specifics of a product's refill.
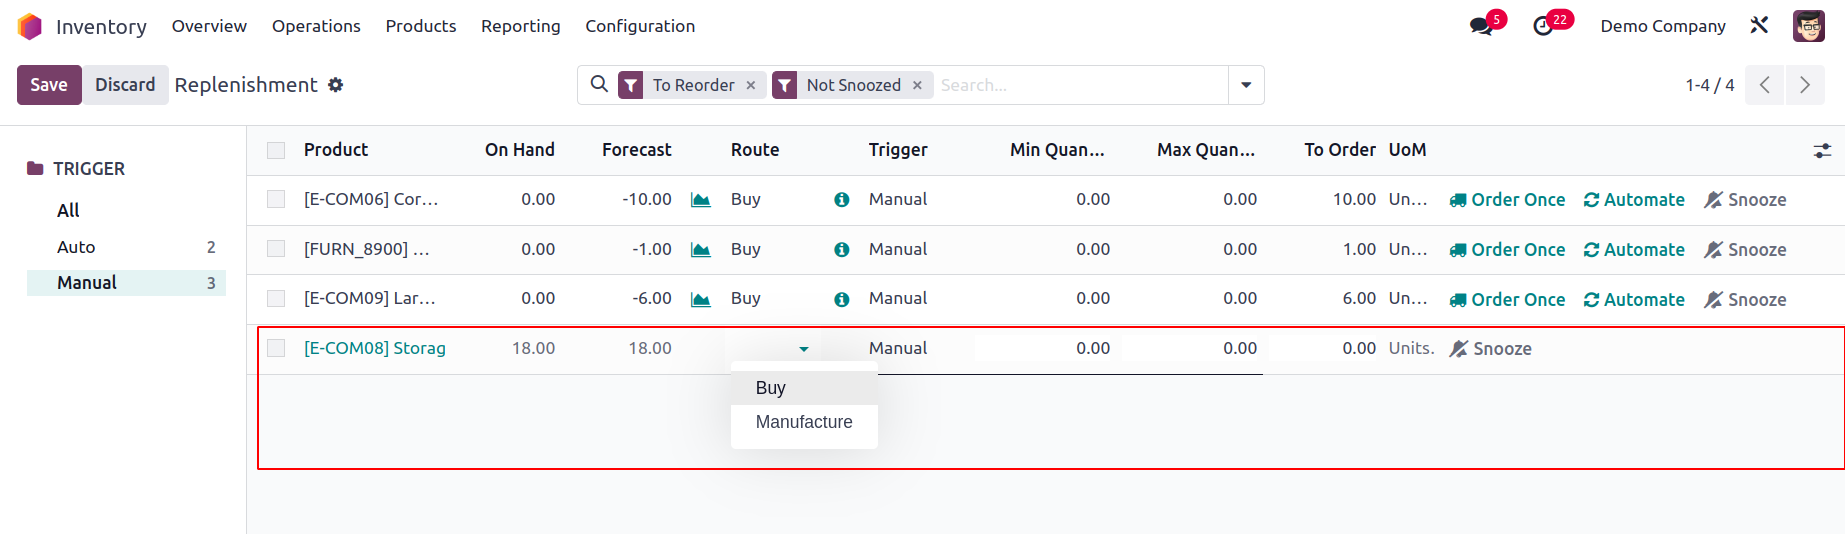
The Location, On Hand, and Forecast details of the product will automatically appear on the corresponding fields when you specify the product name in the designated field. The drop-down menu that is provided allows you to choose the Preferred Route.
The minimum and maximum quantities of the product that must be replaced should then be mentioned. You will be given two options to order the product, such as Order Once and Automatic Orders, as soon as you state the To Order quantity. You can quickly create replenishment by generating a request for quotation by selecting the Order Once button. The replenishment orders will be handled automatically once the Automatic Orders button is clicked. Using the Snooze option, you can postpone the procedure for a specific amount of time.
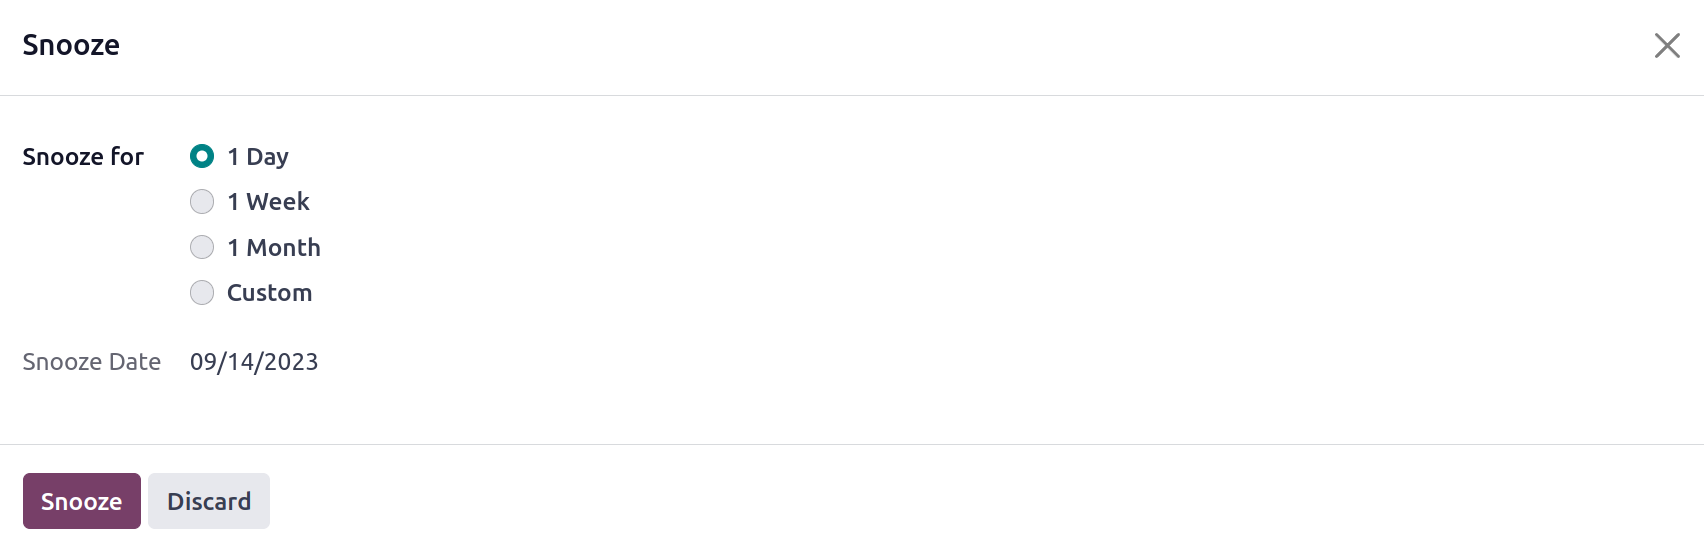
With this option, you can postpone the procedure for 1 Day, 1 Week, 1 Month, or a Custom amount of time. On this pop-up window, a Snooze Date can also be entered.
Let's now examine the Inventory Module's Inventory Adjustment features.
Inventory Adjustment
Based on the physical inventories that are now accessible in your firm, there may be instances where specific alterations to the inventory are necessary. The modifications made to the inventory should also be reflected in the inventory records in order to maintain effective inventory management. You may make adjustments to the inventory records in Odoo17 based on the physical stock availability, thanks to the Physical Adjustment platform.
With Odoo17, you can quickly update your inventory right from the product description window. You will find the Update number button on each product, as seen in the image below, in order to accurately record the number on hand at your business's warehouses.
 You can get this page's information on the amounts On Hand by clicking the smart button, which is highlighted in the image. By selecting the Update Quantity button, you can change the product's quantity.
 Using the Apply option, you can now update the records with this inventory modification. You can notice that the On Hand quantity has been updated based on the new inventory changes by looking at the product description window.You may locate a unique platform, referred to as Physical Inventory, to handle all these inventory adjustments within the Operations menu of the Odoo17 Inventory module.
 On this platform, it is possible to view the records of every inventory modification. This window allows you to simultaneously update the quantity of several different goods.
 From this window, you can get information about the Location, Product, Lot/Serial Number, Package, Owner, On Hand Quantity, UoM, Counted Quantity, Difference, Scheduled Date, and User.You can modify the quantity in accordance with the stock on hand by clicking the New button. Here, you must fill in the appropriate field with the Counted Quantities for the specified lot/serial number. Odoo17 will immediately display the difference between the On Hand Quantity and the Counted Quantity as soon as you mention the Counted Quantity.
 Using the Apply option, you can now update the records with this inven tory modification. You can select the Clear option if no inventory modifications are required. The History button allows users to view the history of inventory changes made to a product. You will receive some extra buttons to control the available inventory adjustments by choosing them from this window. To apply the chosen modification together with the others, click the Apply button. You can undo all of the selected settings at once by using the Clear button.
 Click the Apply button, as displayed in the image, to apply the revised inventory changes to the appropriate products.The Request a Count button allows you to ask for a count for the selected inventory modifications. You can choose a date in a pop-up window to receive the inventory on that day. You can either leave the Count field blank or change the current value to suit your needs. Select "Confirm" from the menu. In Odoo 17, we handle inventory modifications in a similar manner.
 A new feature in Odoo 17 called the "Relocate" option makes it easier to move products from one place to another. You can add To Location, To Package, and specify the rationale for the relocation in the popup window. Next, Verify.
 You can specify the Day and Month on which the annual inventory counts shall take place in the module's Settings menu.
 You can define the day and month that yearly inventory should be counted using the yearly Inventory Day and Month option, as seen in the illustration.
Scrap Management
Inventory that is deemed scrap is made up of damaged or unusable goods. Products with expiration dates may also be included in scraps. There is a potential that damaged or expired goods will be discovered while maintaining the inventory. We need to get rid of these products as quickly as possible because we cannot sell damaged or outdated goods. Most of the time, products with minor damage are employed in repair procedures. The recyclable components of scraps can be utilized during recycling procedures. You can save money and, most importantly, the environment by using a smarter scrap management system. The scraper that was taken from the inventory can be taken to a site for scrap.
You can designate a spot for scrap from among the storage spaces available in the warehouse. Let's see how managing the location of scrap in your storage is made easier by Odoo17. The management and configuration of storage locations in the Odoo17 Inventory have already been covered. You can configure a location for scrap using the same procedure. You can do this by accessing the Locations menu found under the Configuration menu. The opening of a new window is depicted below.
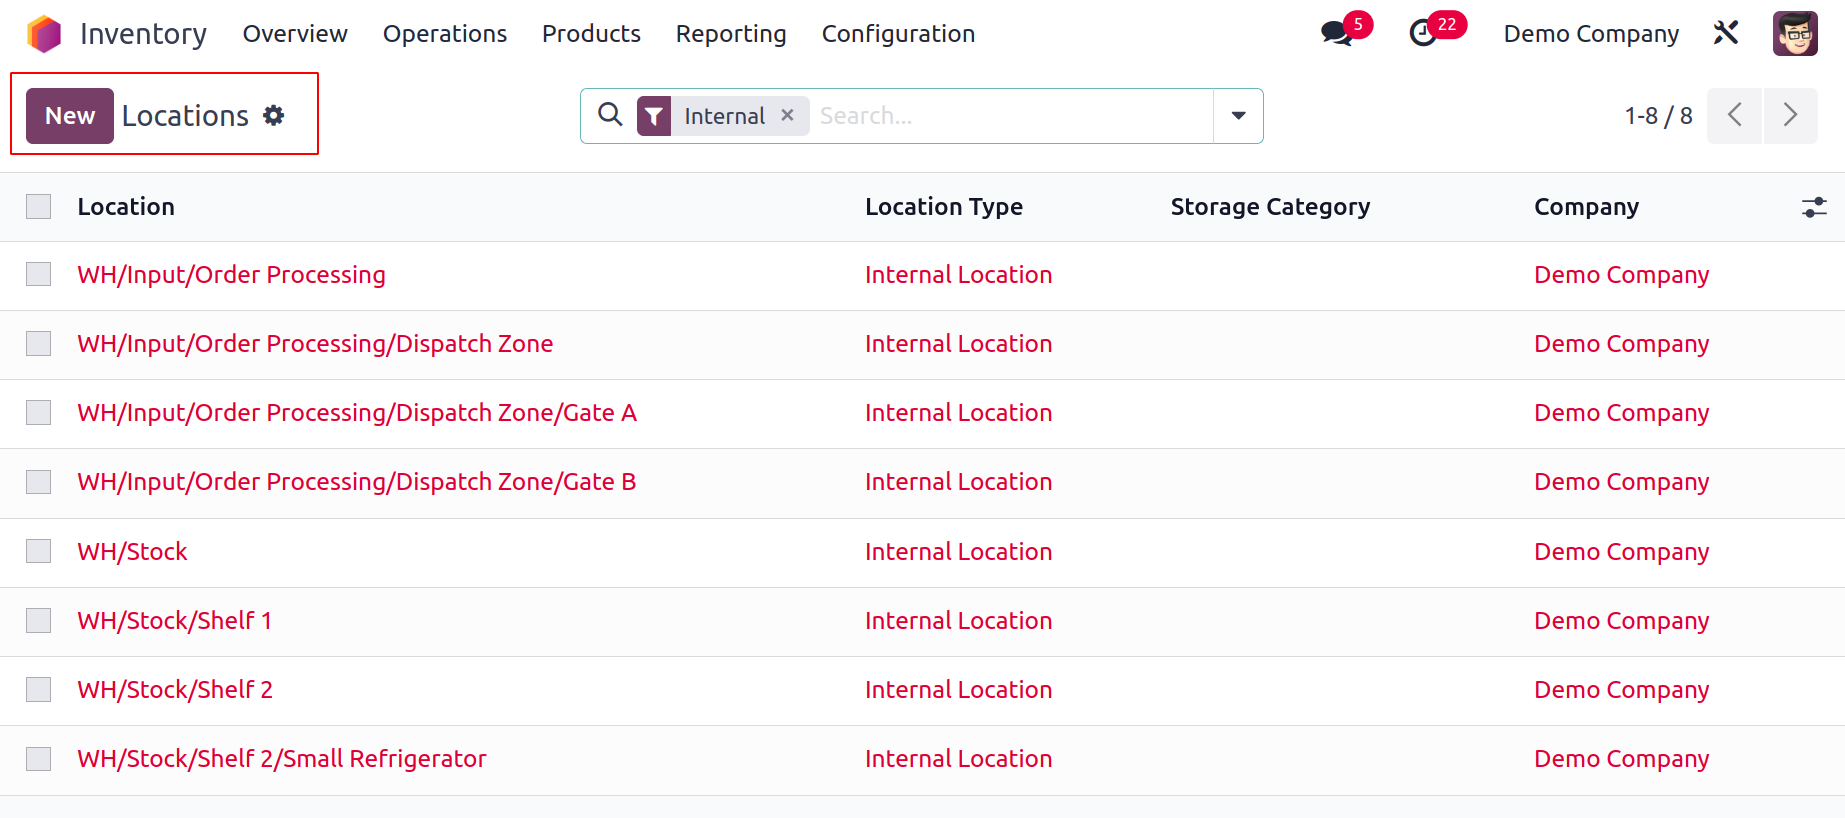 To establish a brand-new spot for scrap, click the New button.
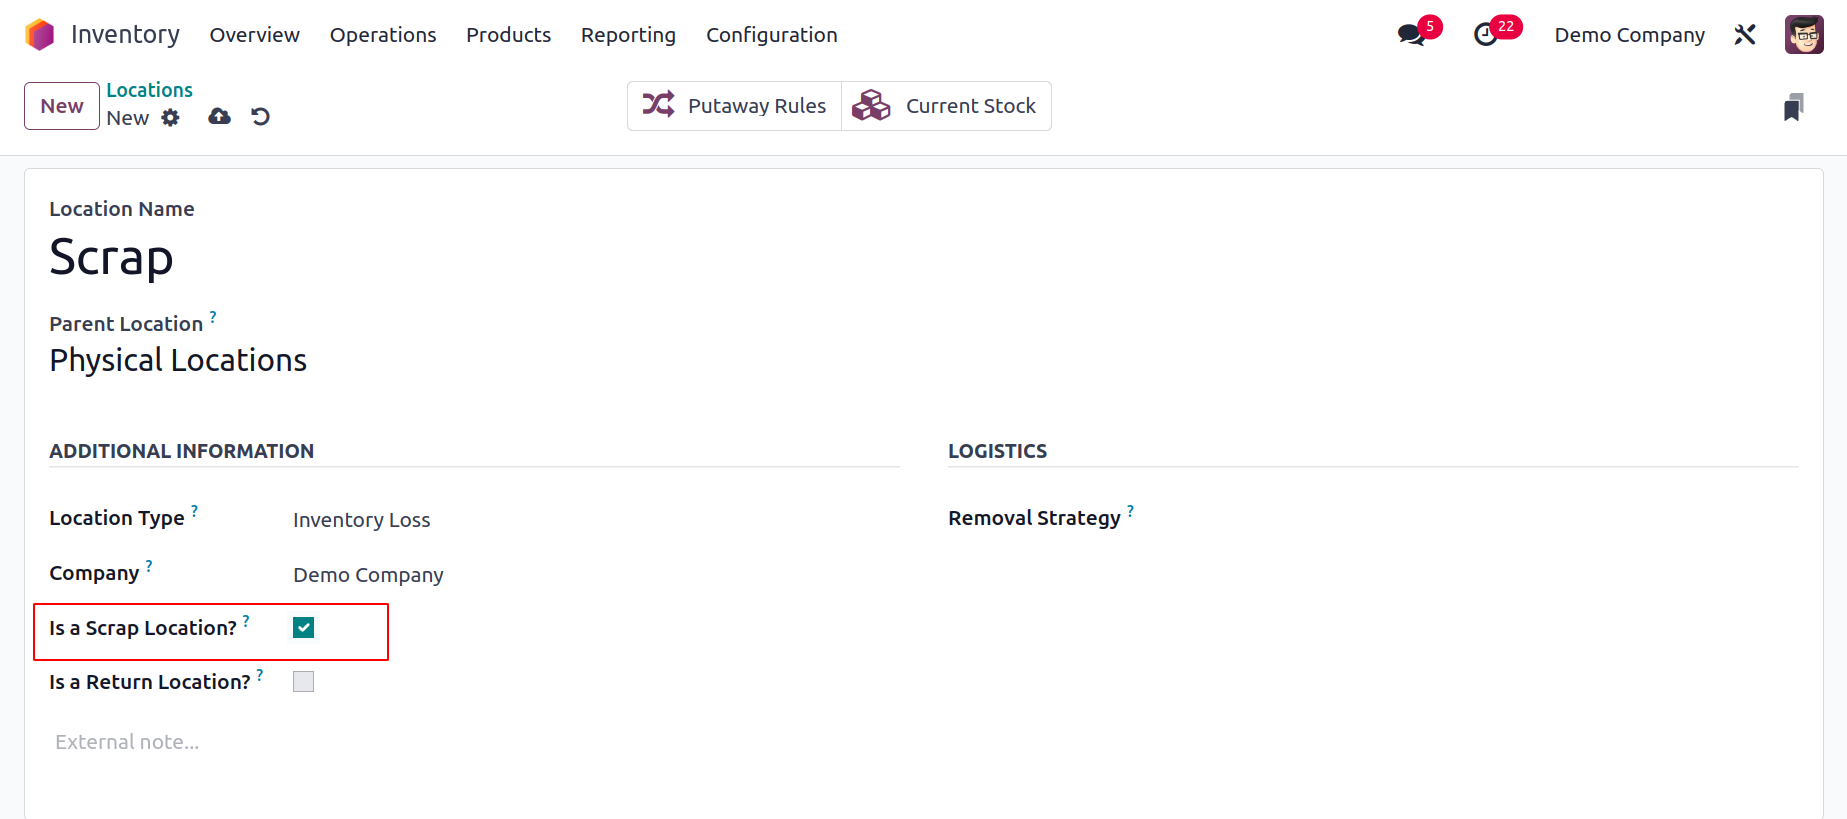 You can enter the location's name in the field provided in the window for creating a new place. Here, the location is referred to as Scrap Location. The remaining stages are the same as those we outlined in the prior Location configuration section. The most crucial step is to turn on the Is a Scarp Location field in order to treat this place as a scrap location. You can click the Save button once you have entered all relevant information. In the storeroom, we've finished designating a spot for scrap. By using this technique, more scrap sites can be created.Let's now examine how to add items to the scrap location. The majority of processes in the Odoo17 inventory management system, including receipts, delivery orders, internal transfers, manufacturing orders, point-of-sale orders, and many more, give you the option to add to scrap. We took a delivery order for the demo at this point.
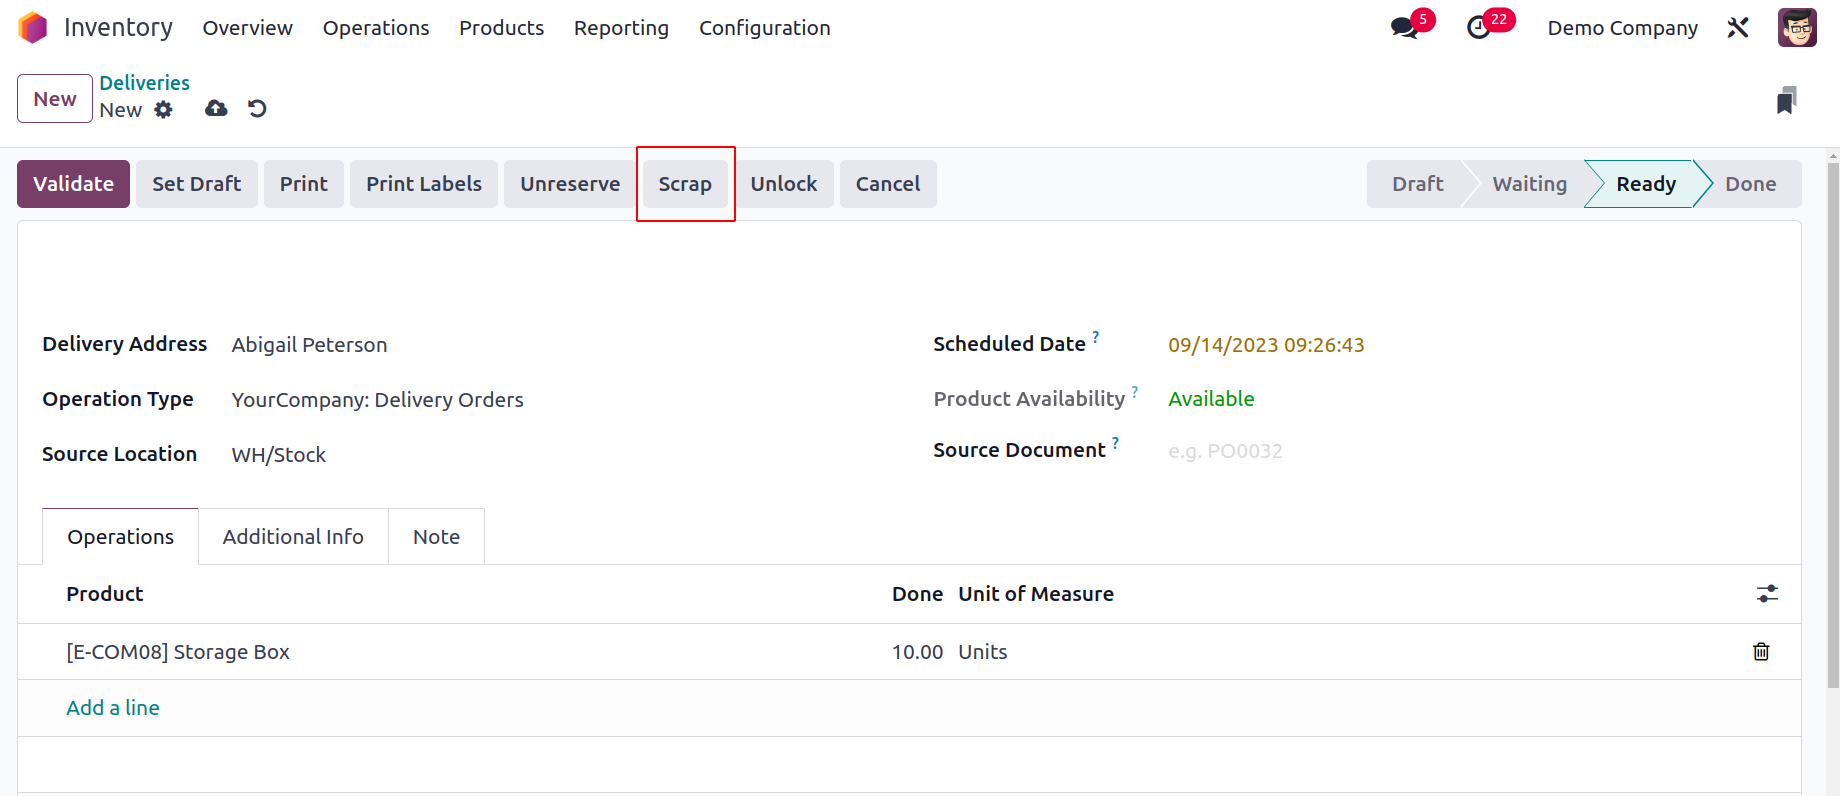 As seen in the screenshot above, the Scrap button is located on the delivery orders. Clicking this button will add any delivery order items that are broken or past their expiration date to the scrap pile.
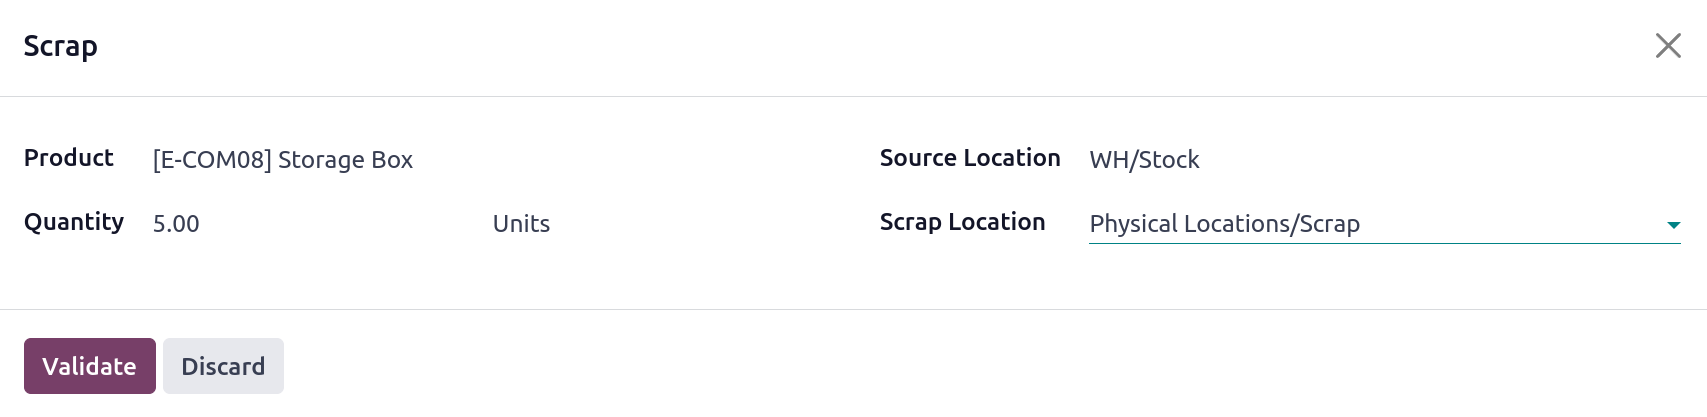 The fields for the scrap product's name, quantity, package, and owner are all available here. This window will display the product's Source Location. You can choose the scrap location from the drop-down menu in the Scrap Location field if you want to move broken or expired goods there. The item will be moved to the designated scrap location when you click the Validate button. The delivery orders will be reduced by the amount of the scrap product.You will find a separate platform to manage all of these scrap orders under the Operation menu of the Inventory module, as seen below.
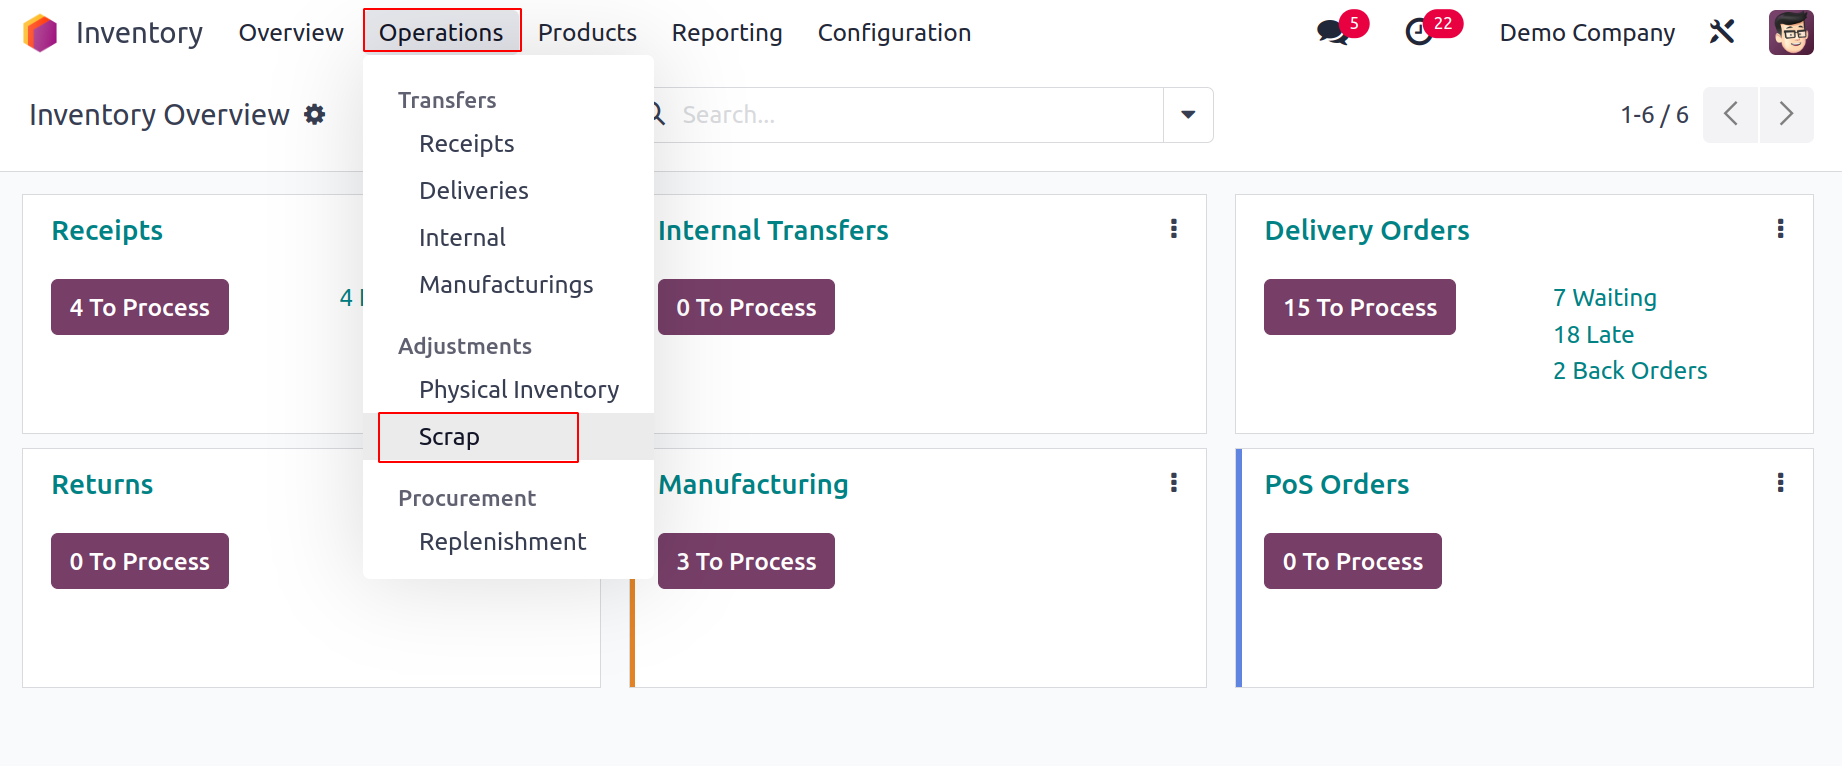 On this platform, the user can access List, Kanban, Pivot, and Graphical views. The Reference, Date, Product, Quantity, Unit of Measure, Source Location, Scrap Location, Company, and Status details of the Scrap Orders are available from the List view. Using the Create button in this window, you may also create a new scrap order.
 For sorting purposes, you can use the pre-set and programmable choices under the Filters and Group By features.Let's now discuss the Inventory module's Landed Cost functionality.
Landed Cost
The additional cost of a product that the company must pay at the moment of purchase is known as the "landed cost." This covers shipping, handling fees, customs tariffs, and many other expenses. These extra expenses are added to the product's real price to determine the selling price. Different firms will use different methods to determine the landing cost depending on their corporate policy. You may determine the landing cost and divide it among each quantity of the goods in the Odoo17 Inventory module to update the selling price.
To turn on the Landed Costs option as indicated in the image below, navigate to the Settings menu.
 By turning on this functionality, you may add customized landing charges to your products. You can first construct a buy order for a few items from the same product categories and confirm the order in order to get a better understanding of how the landed cost works. For products with an AVCO or FIFO costing technique set up, you can set landing costs. Such products' inventory valuation ought to be Automated. This is the prerequisite for the landed cost that you must consider when customizing it.Under the Products line, you can see the unit costs of the products as you purchase them. Your purchase will be confirmed once you click the Confirm Order button. When you select the Receive Products button, these items will be added to your inventory records.
 You can now get the items in your inventory. By selecting the Validate button, you may verify that the products were successfully transferred. The items that were purchased are now stocked in the area designated on the receipt. When selling these things, you can include landed costs in the price.
 Consider spending some money on the transfers to get these goods to the desired area. You can add your misplaced funds from transfers as an extra fee to the merchandise. You are able to apply charges for the products using the landed cost option in Odoo 17 Inventory.To do this, access the Inventory module's Operations menu. As seen in the graphic below, the Landed Costs platform is there.
 You can get the specifics of the previously created landed charges from this window. You can add a new landed cost by selecting the New button.You will find the creation date in the appropriate field here. On manufacturing orders or transfers, you can set the new landed cost. Since we want to add landing expenses for transfers, we can choose Transfers in the Apply On field. In the Transfers area, you can give the receipt ID that we produced earlier. The relevant fields allow you to specify the goods' Journal, Company, and Vendor Bill. Using the Add a Line button, you can indicate the additional expenses under the Additional Costs tab.
 Here, we included transport as a separate expense. Remember to save Transportation as a service product when configuring Transportation as an additional fee, as indicated in the figure below.
 You can choose the appropriate Split Method once you've mentioned the Product, Description, and Account information.
 How this landing cost is allocated to the products listed in the transfer receipt will be determined by the Split Method. According to your company's policy, it can be configured as Equal, By Quantity, By Current Cost, By Weight, and By Volume. In this situation, we might choose the Equal split approach. Click on the Compute button to compute the landed cost.Using the Validate button, you can now verify the landing cost.
 The value information for the landed cost will be provided by the smart button Valuation. The landing cost is allocated equally among the products listed in the specific receipt, as can be seen in the screenshot below.
 The selling price of the goods will include this expense. You can establish landed expenses for your products using this technique, which can boost your sales profit.
Run Scheduler
According to the operation rules that have been applied to them, Odoo17 will let you schedule inventory activities both manually and automatically. You can utilize the Run Scheduler function in the activities menu of the Odoo17 Inventory module to automate inventory activities on products. According to the rules written on the products, the procedures shall be carried out. From the Inventory module, you may manually launch the scheduler. You must enable the developer mode in your database in order to use this functionality.
 The Run Scheduler button will cause a pop-up to appear as seen below.
 You can select the Run Scheduler button to launch the scheduler. You can cancel the action with the help of the Cancel button.
Run Scheduler
According to the operation rules that have been applied to them, Odoo17 will let you schedule inventory activities both manually and automatically. You can utilize the Run Scheduler function in the activities menu of the Odoo17 Inventory module to automate inventory activities on products. According to the rules written on the products, the procedures shall be carried out. From the Inventory module, you may manually launch the scheduler. You must enable the developer mode in your database in order to use this functionality.
The Run Scheduler button will cause a pop-up to appear as seen below.
Reordering Rules
You may put up a series of rules to ensure that the stock will never run out in the Odoo17 Inventory module. Using the reordering rules, Odoo17 will make an effort to keep your inventory at least as full as necessary. Let's examine how this function functions in Odoo 17. You can choose a storable product for this from your inventory module.
 You may see that the unit in your hands is "0." By selecting the smart Reordering Rules button indicated in the above screenshot, you can set the reordering rules for this product. This will open a new window for you. Here, you may specify a minimum stock requirement so that Odoo17 will automatically generate confirmed production orders or requests for quotes to replenish your stock.
 As seen in the screenshot above, as soon as you click the New button, the name of the Product, Location, On-hand, and Forecast details are automatically filled in. You can specify the route to use when reordering the product in the Preferred Route section. Replenish on Order, Buy, Manufacture, or Resupply/Subcontractor on Order are all possible options. In this case, we chose Buy as the preferred option. Put the vendor's name in the appropriate field.The Min Quantity option allows you to specify the minimal amount of the product that has to be kept on hand. Odoo17 will automatically submit a Purchase Order to the appropriate vendor to restock the stock quantity when the product quantity falls below the specified Minimum Quantity. The product's maximum quantity that is kept in stock is known as the maximum quantity. The smallest quantity that should be bought from a vendor is known as to order. The number we specify in the purchase order will therefore always be a multiple of the quantity To Order.
 By turning on the Trigger field from the additional fields, as seen in the above image, you may add it to the list view. The reordering rules can be started manually or automatically. You can set the trigger to Manual and access the Run Scheduler function under the Operations menu to manually trigger.
 By hitting the Run Schedule button, the stock will be set aside for operations waiting for availability, and the reordering will start.You may find the replenishment order by looking at the Replenishment menu.
 The vendor will receive an RFQ when you click the Order Once button. The Purchase module's RFQ for the product is displayed as follows.
 From the Odoo Purchase module, you may confirm the Purchase Order and Receive the Product. To add the item to your inventory, click the Receive Product button.
 You may see that the quantity on hand has changed in accordance with the reordering rule when you examine the product detail form.
 The minimum and maximum quantities of the product that need to be kept on hand in the inventory can also be seen.
 You may handle all reordering rules in one location by selecting the Reordering Rules option from the Configuration menu of the Inventory module.
 Utilizing the construct button, you can construct Reordering Rules for products right from this panel.
Barcode Scanner
Barcode scanning is supported in Odoo17 to better manage product inventory operations. The barcode scanning technique can be used to track down and locate specific items in your inventory. Make sure to install the Barcode module from the Odoo AppStore in order to use the barcode scanner's features for your inventory management in Odoo17. After the installation is finished, you may access the Inventory module's Settings menu.
 The Barcode Scanner option is located under the Barcode tab, as seen in the image above. This function can be turned on. You can choose a suitable set of guidelines for the barcode's development in the Barcode Nomenclature section. You can assign barcodes to products by selecting Configure Product Barcode when this functionality has been activated.
 Odoo17 will direct you to a new platform where you can access a list of the goods in your database that are already configured. By selecting the Barcode field for each product, you can quickly add a barcode to it. Save it once a barcode has been added to the product. By using this technique, you can allocate barcodes to every product. With the use of a barcode scanner, you can use this barcode to locate products throughout various inventory processes.A barcode for a storage place can also be made. You can set the location barcode in the Barcode field when configuring locations in Odoo17, as seen in the image below.
 The Barcode Nomenclature function of the Odoo17 ERP system allows you to establish certain guidelines for the generation of barcodes. You must switch on developer mode in order to configure the barcode nomenclature in the Odoo17 Inventory module. The Barcode Nomenclature option may be found in the Inventory module's Configuration menu once you switch to developer mode, as seen below.
 Let's start by creating a new Barcode Nomenclature using the Create button.
 You can provide a name for this barcode nomenclature's internal identification in the Barcode Nomenclature box. Depending on your needs, you can set the UPC/EAN Conversion to Always, EAN-13 to UPC-A, UPC-A to EAN-13, or Never. UPC codes can be transformed into EAN by adding a zero before them. When trying to match a rule with the other encoding, this setting specifies whether a UPC/EAN barcode should be automatically transformed in one direction or another. Only GS1-128 encoding rules are accepted in this type of nomenclature, which is made possible by turning on the Is GS1 Nomenclature feature.
 How barcodes are recognized and categorized is determined by barcode nomenclatures. A barcode's scanning produces a matching pattern that is connected to the first rule. A barcode is matched if the regular expression matches a prefix of the barcode. The pattern syntax is that of a regular expression. Patterns can also specify how a barcode can be encoded with numerical data like weight or price. Where the Ns specify where the number's digits are encoded, they are denoted by the string "NNN". The decimals denoted with a D, such as NNNDD, are likewise supported as floating-point numbers. In certain circumstances, the related records' barcode field must display these digits as zeros.You may add additional rules to this nomenclature by clicking the Add a Line button. As seen below, a pop-up will open where you can individually specify each rule.
 A rule's name, sequence (used to rank rules such that those with smaller sequences match first), type, encoding, and barcode pattern can all be specified here. By using this technique, different rules can be added to the nomenclature.You can specify which nomenclature should be used for creating barcodes in the Inventory module from the Settings menu after defining the Barcode Nomenclature.
 You can choose the appropriate barcode nomenclature for your operations from a drop-down menu in this area.Let's now turn to the Inventory module's Shipping Method setup.
Shipping Method
Similar to what we covered in the Sales module, configuring and controlling delivery methods is simple in the Inventory module. Products can be shipped directly to customers, or you can use a third-party shipping service. In both situations, Odoo17 guarantees safe and simple shipping management. In the Inventory module's Settings module, you can turn on the shipping functionality.
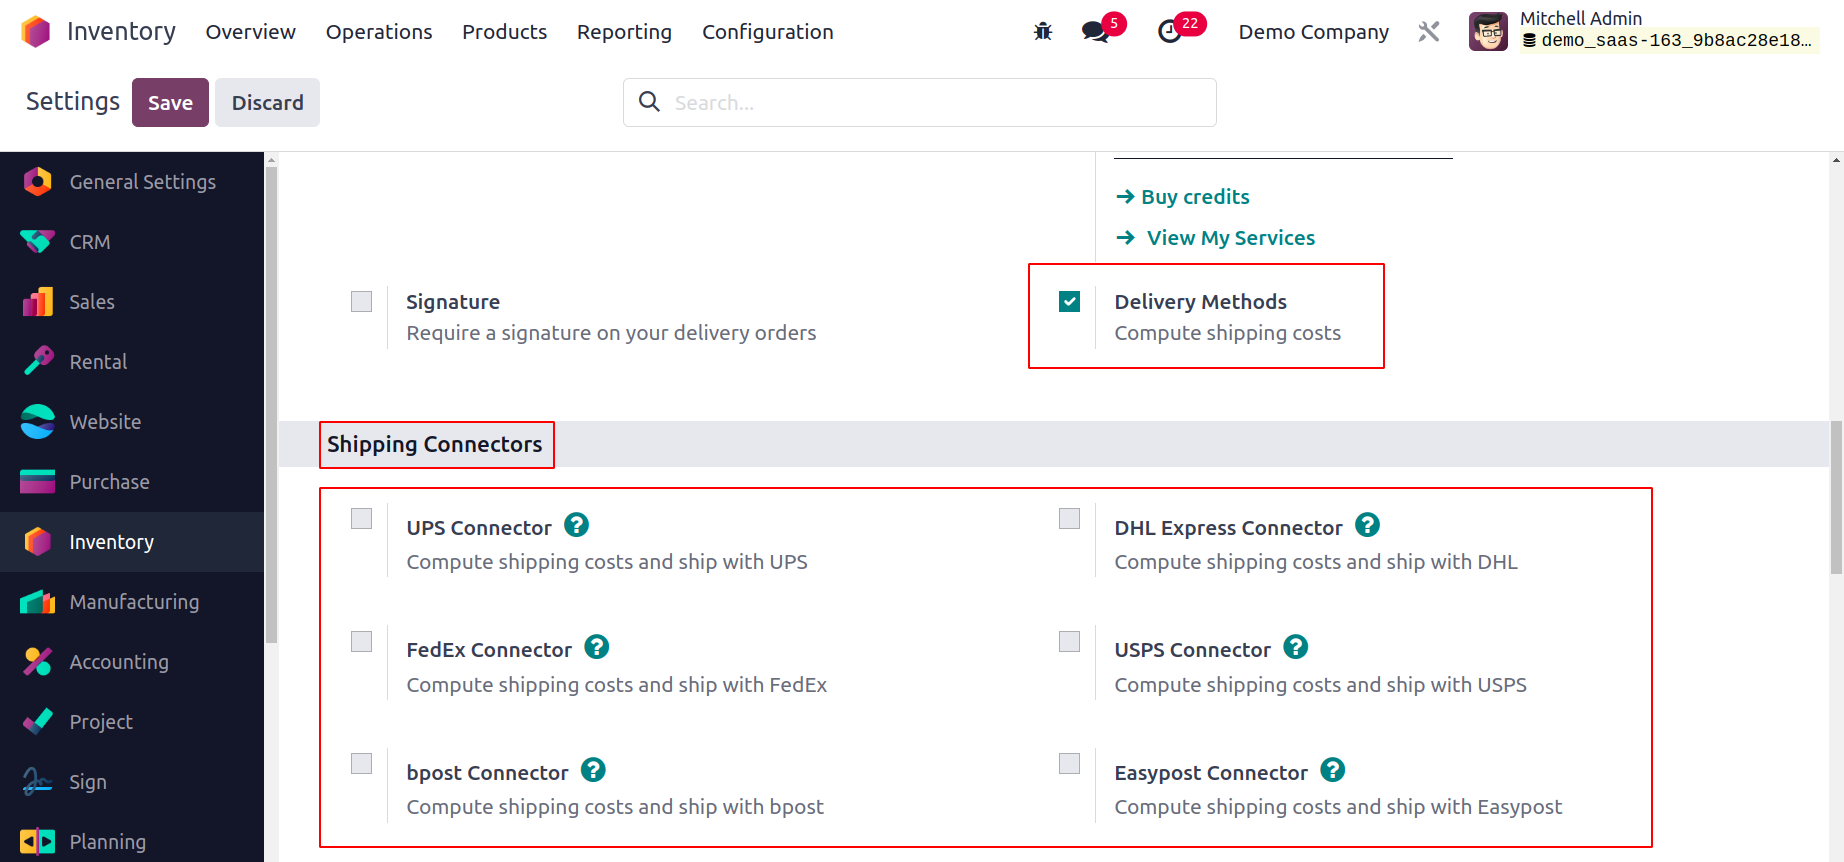 Your ability to estimate delivery costs will be aided by activating the Delivery Methods. Additionally, you can activate the available shipping connectors to use them in your delivery operations as third-party shippers. UPS Connector, FedEx Connector, bpost Connector, Sendcloud Connector, DHL Express Connector, USPS Connector, and Easypost Connector are all available here.
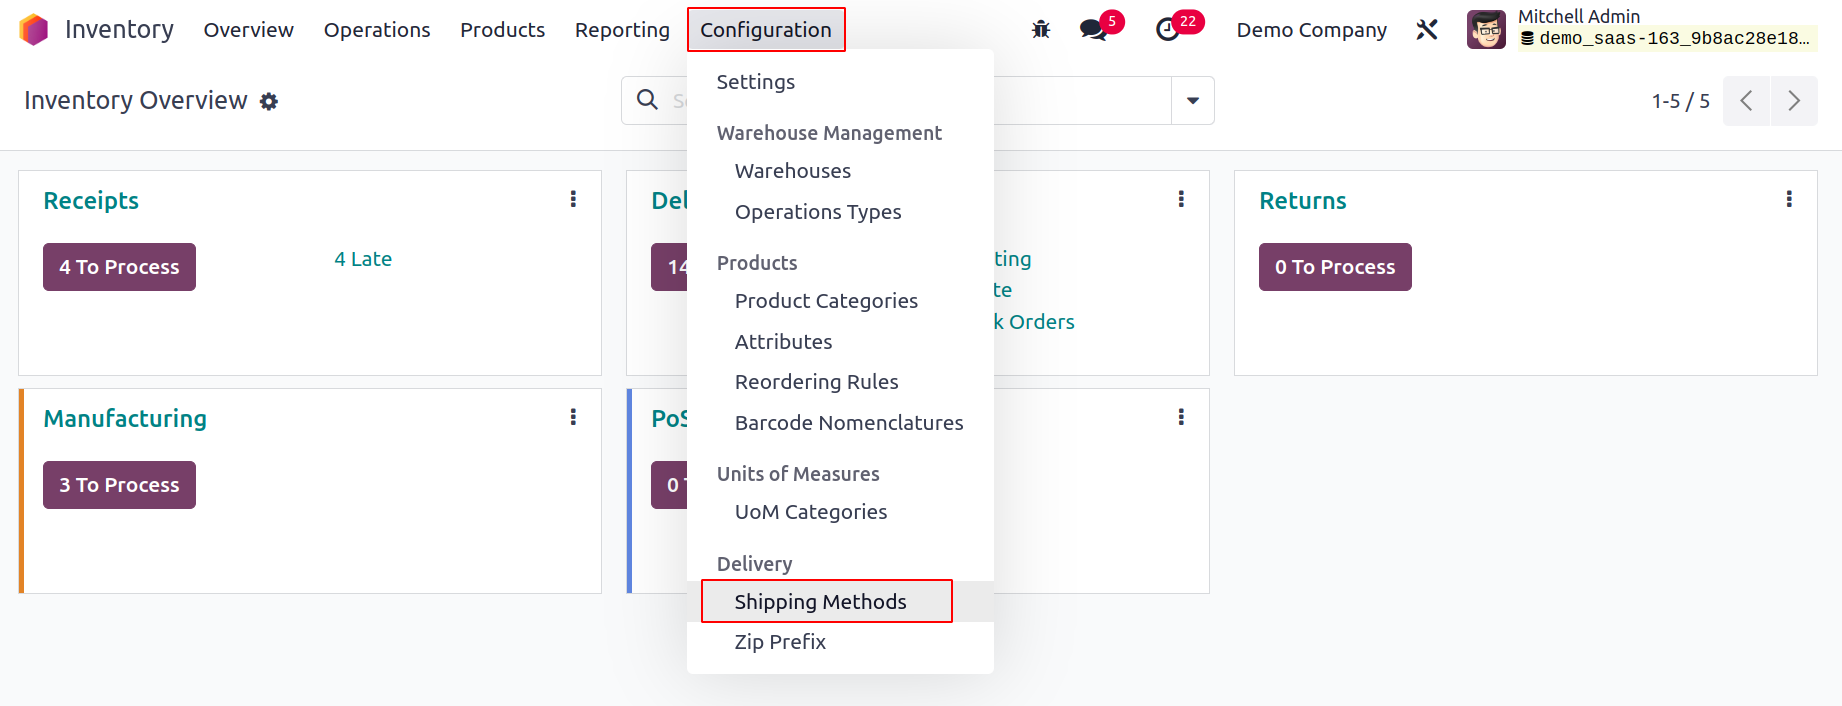 By selecting the Shipping Methods option found under the Configuration menu, you can now set up a new shipping method for your delivery activities. The information on the Delivery Method, Provider, Is Published, Website, and Company will be displayed in the list of already set shipping methods.
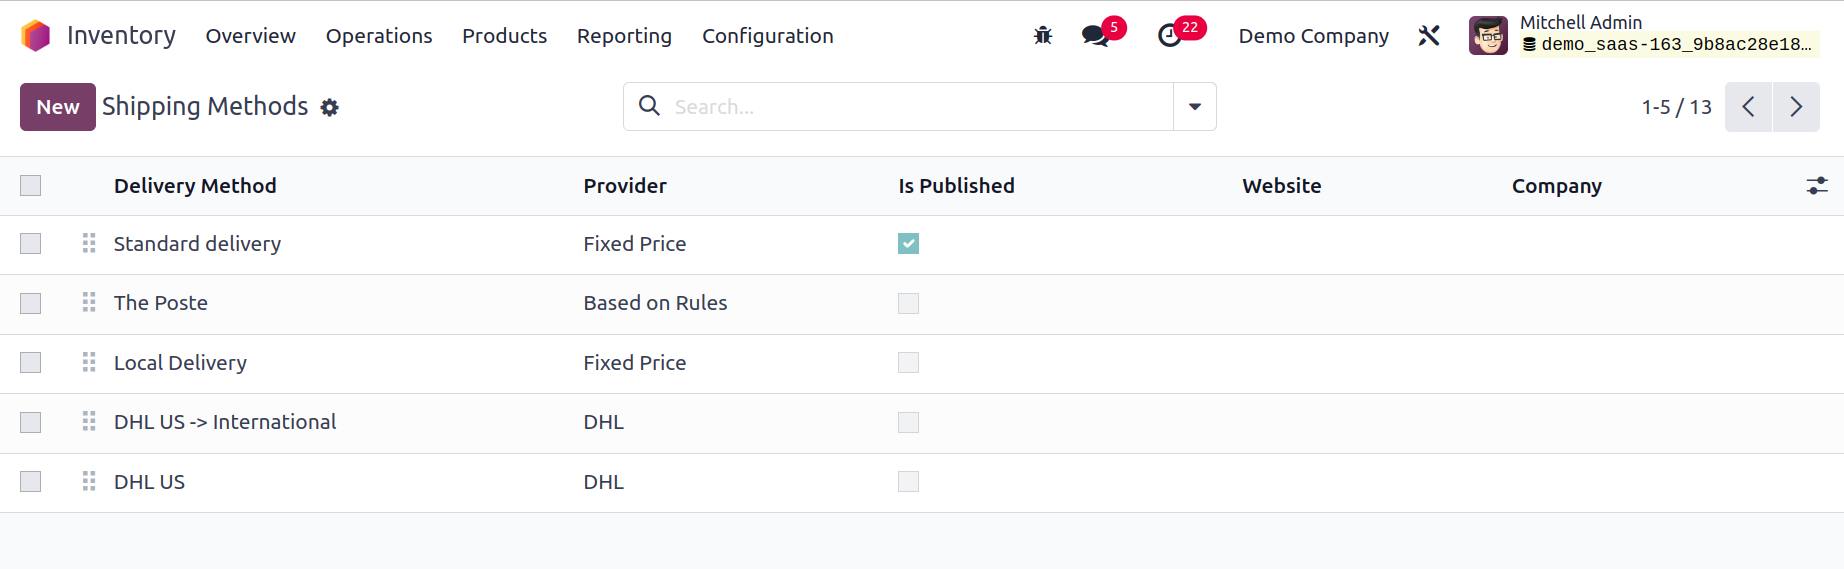 You may set up a new shipment method by clicking the New button. In the provided field, you can enter the name of the shipping method. Mention the Website so that your e-commerce website can offer this delivery. You can choose an appropriate shipping service for your delivery from the service field.
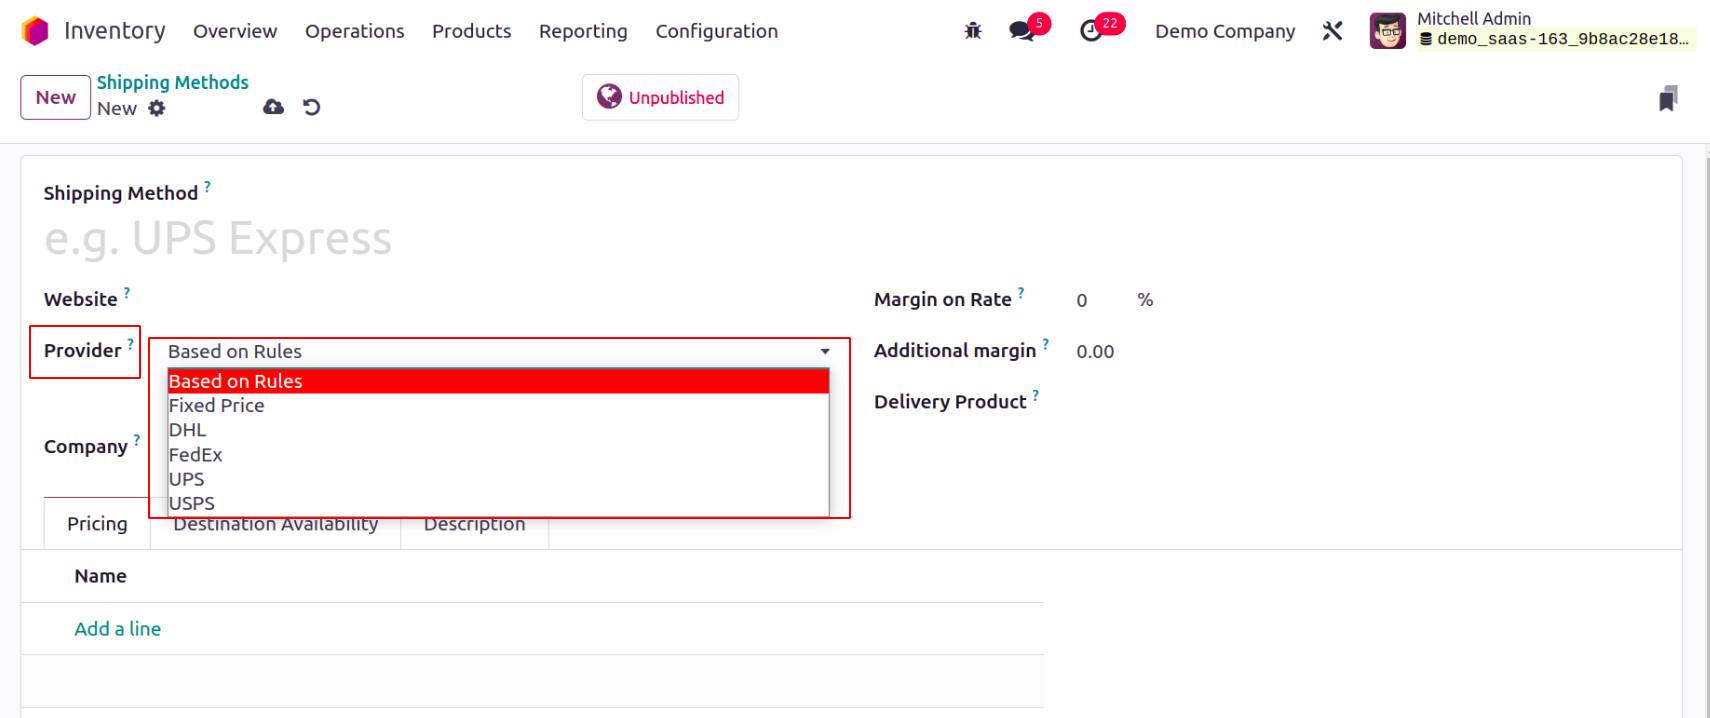 Alternatively, you can use the equivalent option to install more providers. You can enter a company name and a delivery product in the corresponding fields after choosing a provider. The shipping fee will be increased by the percentage specified in the Margin on Rate field.
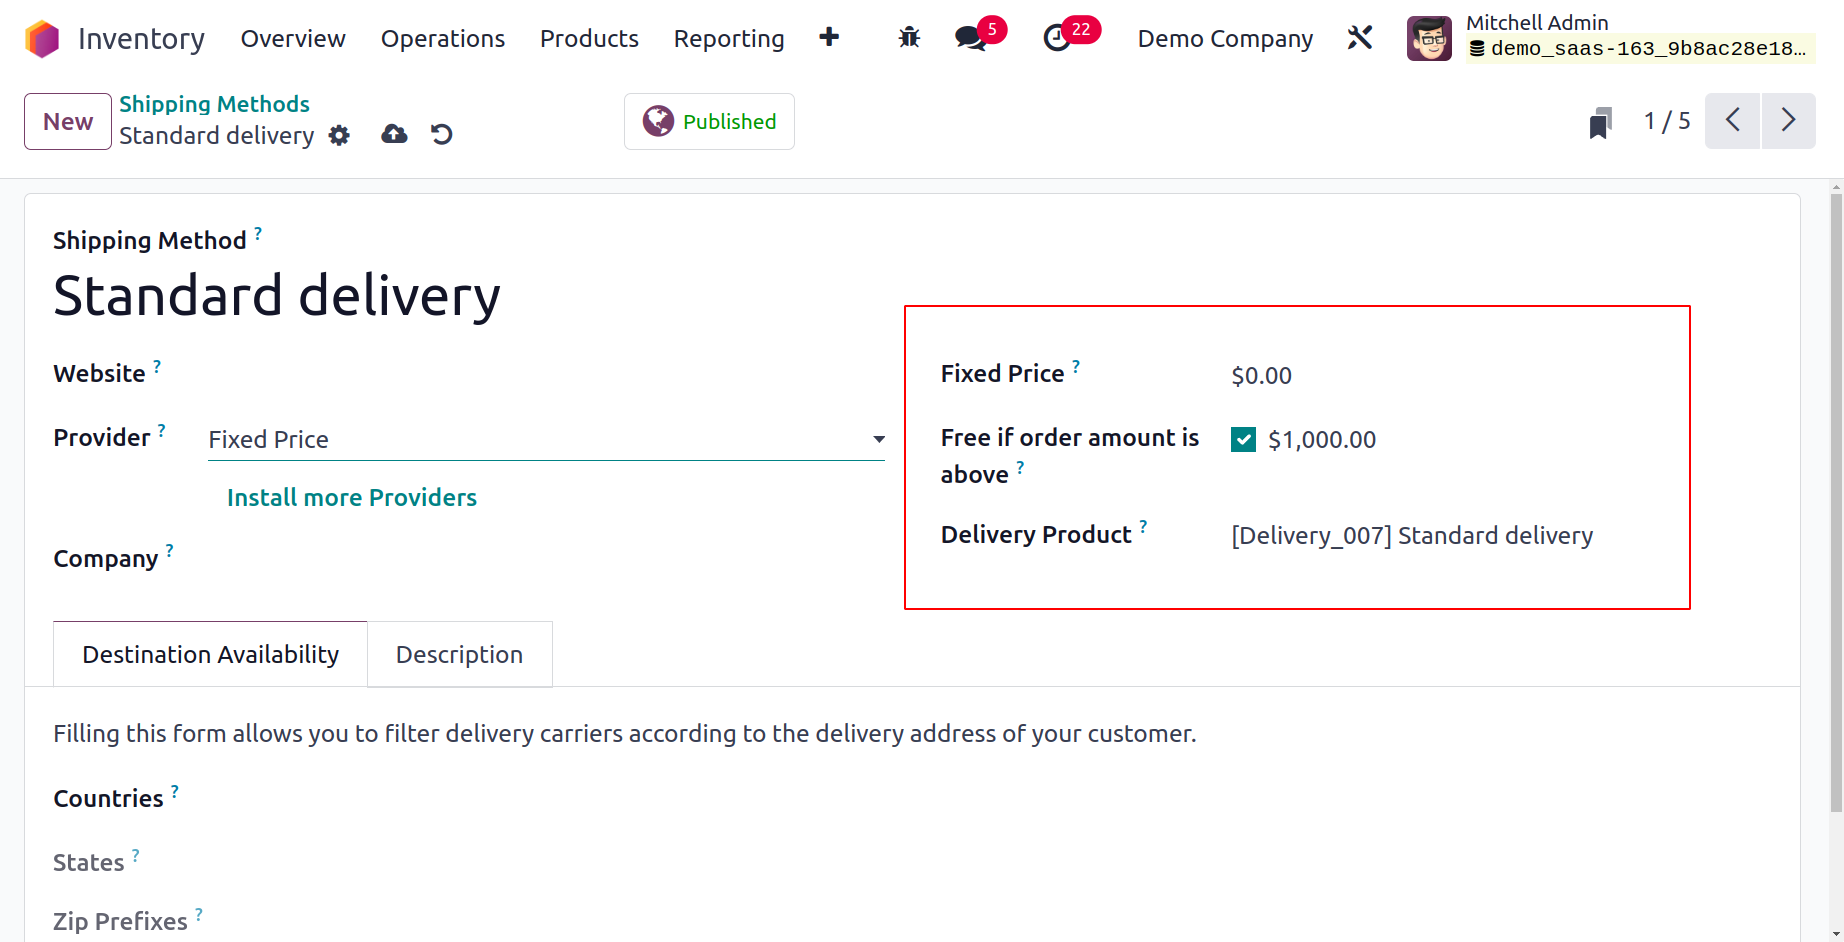 If you want to offer free delivery for purchases with an amount equal to or greater than the amount indicated in the Amount field, turn on the Free if the order amount is above the field. Depending on the Provider you choose, a different tab will be available in this box. Here, we decide to go with a Fixed Price. As a result, a tab called Pricing will appear, allowing you to specify the Fixed Price of this shipping type.You can choose the locations where this shipping option is available by navigating to the Destination Availability tab. In the relevant fields, you can enter the Countries, States, and Zip Prefixes. You can give any additional notes for the shipping method in the Description field. You can employ a delivery method you've created once you've confirmed a sales order.
 You can select the Add Shipping button from the Order Lines after finalizing the sales order.
 To choose a shipping method for the items in this sales order, a new wizard will appear. When you choose a shipping method, the shipping cost will be calculated automatically.An automatic confirmation email and SMS can be sent to the consumer after the delivery orders are completed. From the Settings menu of the Odoo Inventory module, you can turn on the Email Confirmation and SMS Confirmation functionalities. You will receive a new area where you may set the SMS Template, which is the default SMS template.
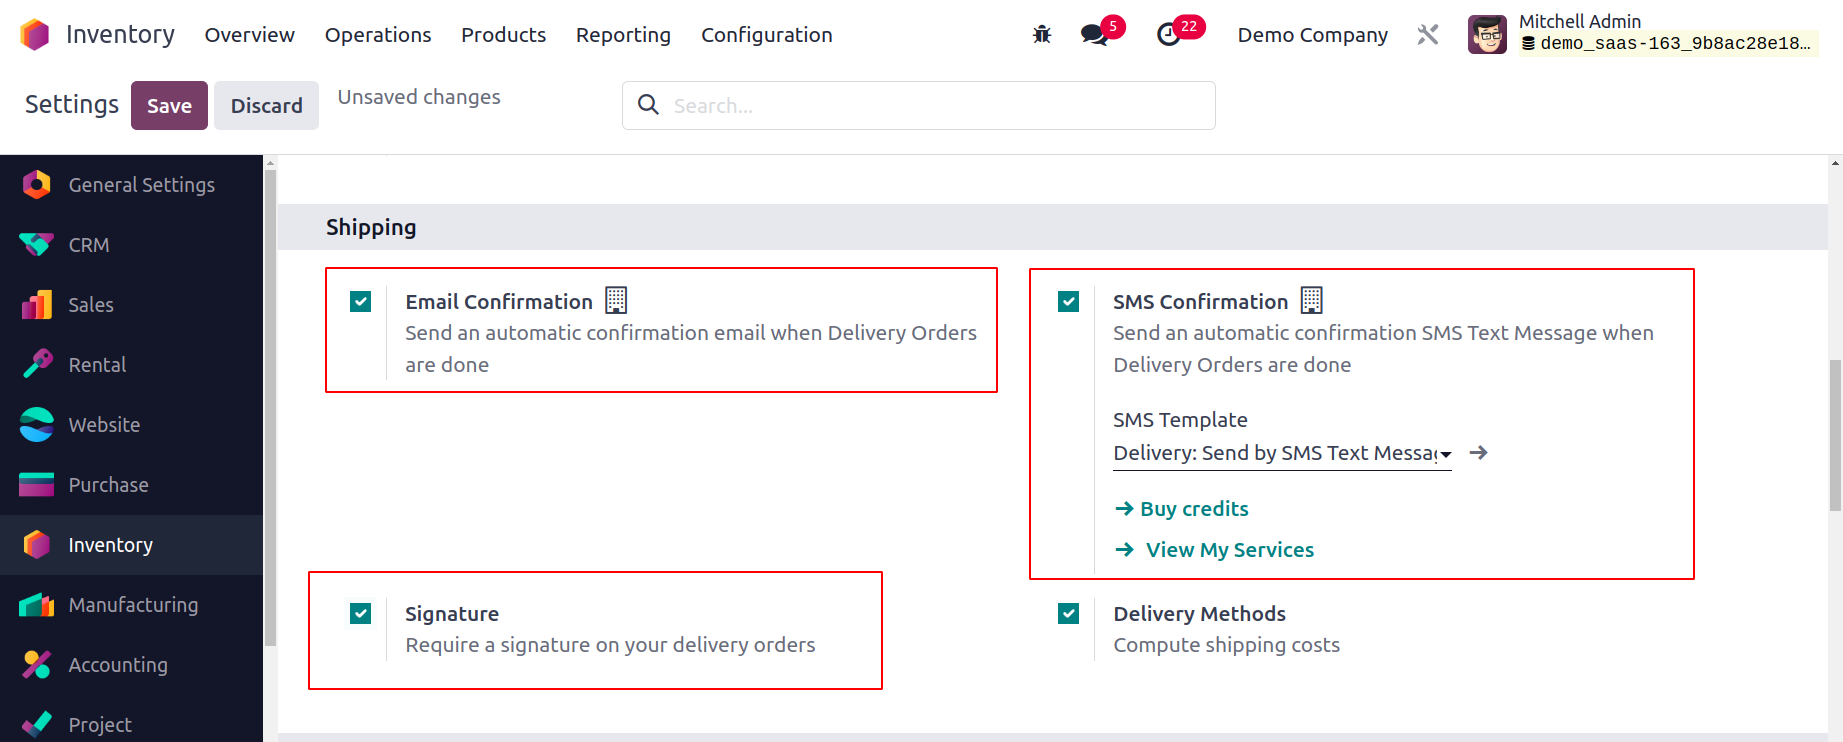 To verify delivery, you can ask for the customer's signature. To enable the opportunity to sign on delivery confirmation, activate the Signature option under the Shipping tab. You can find a Sign option in the Validated Delivery Order when this feature has been activated. The customer can sign and validate the delivery using this button.Shipping ConnectorsOdoo 17 is capable of managing a number of delivery options, including outside carriers. The tracking system used by the transportation industry can be integrated with Odoo. You'll be able to control the transportation provider, the actual cost, and the final destination.From the settings, the shipping connectors can be configured for the system. Proceed to the Configuration and select the Settings option. The connectors can be enabled from there by going to the Shipping Connectors section. Next, save the modified setup.
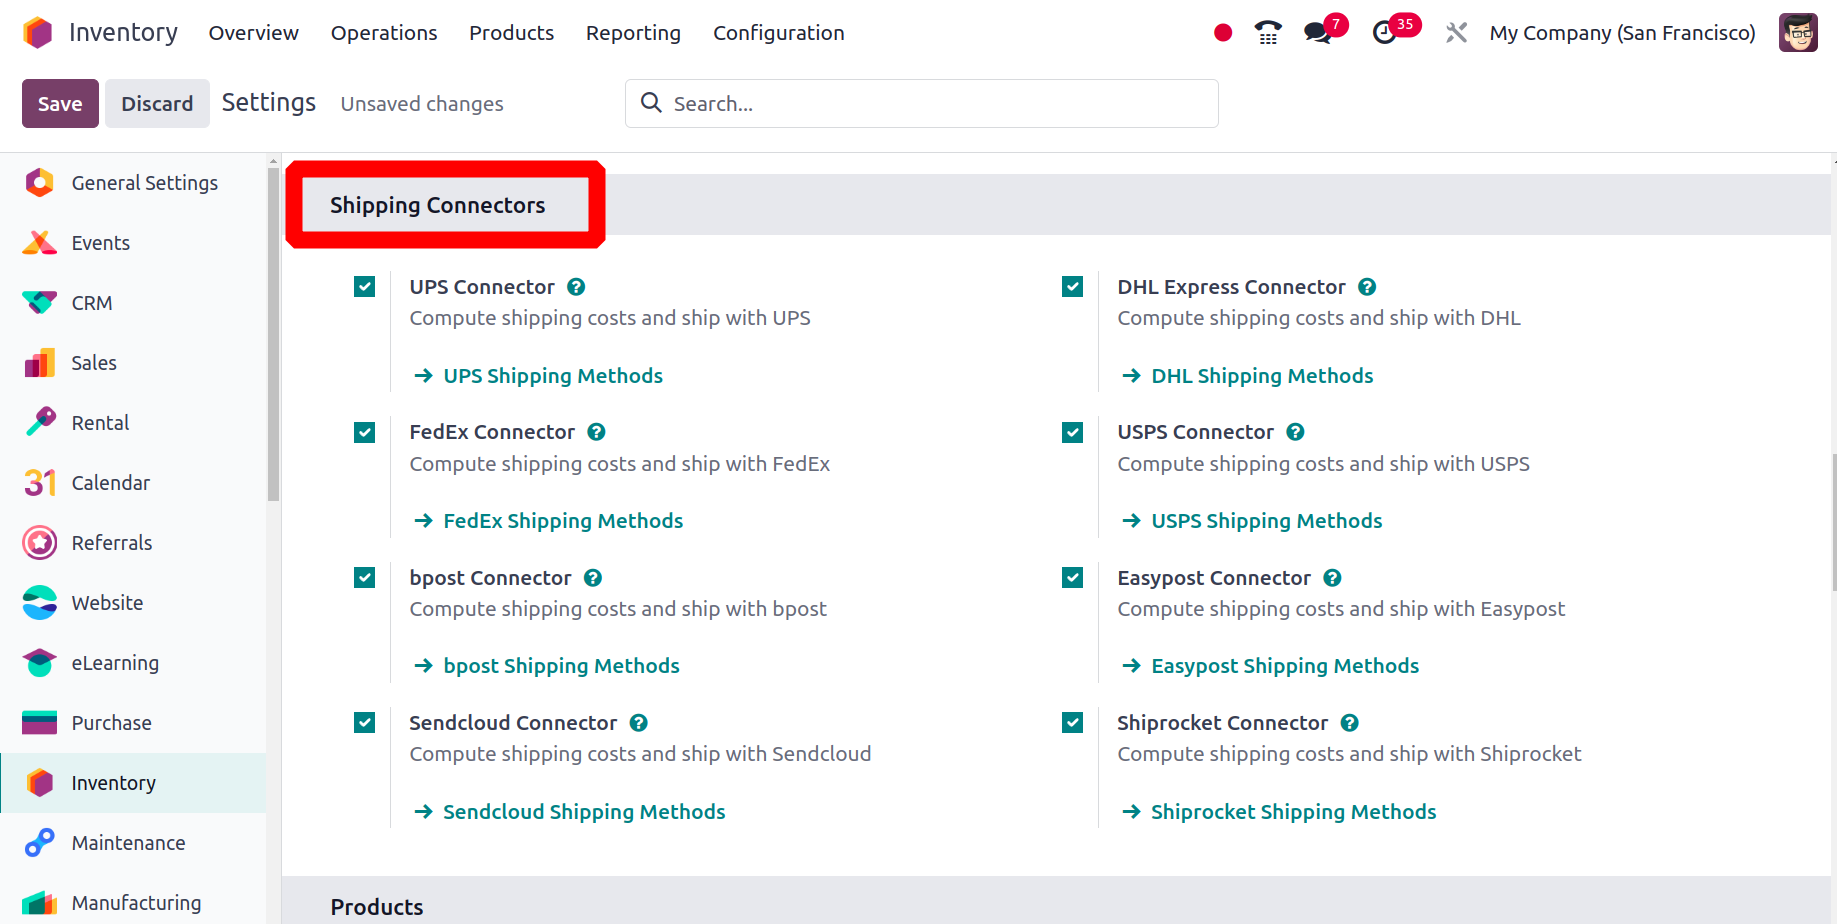 Next, as previously mentioned, select the distribution method from the Configuration menu to set it. The delivery routes for the selected shippers have already been generated automatically. The same service will typically offer two delivery options: one for domestic shipping and one for overseas shipment.
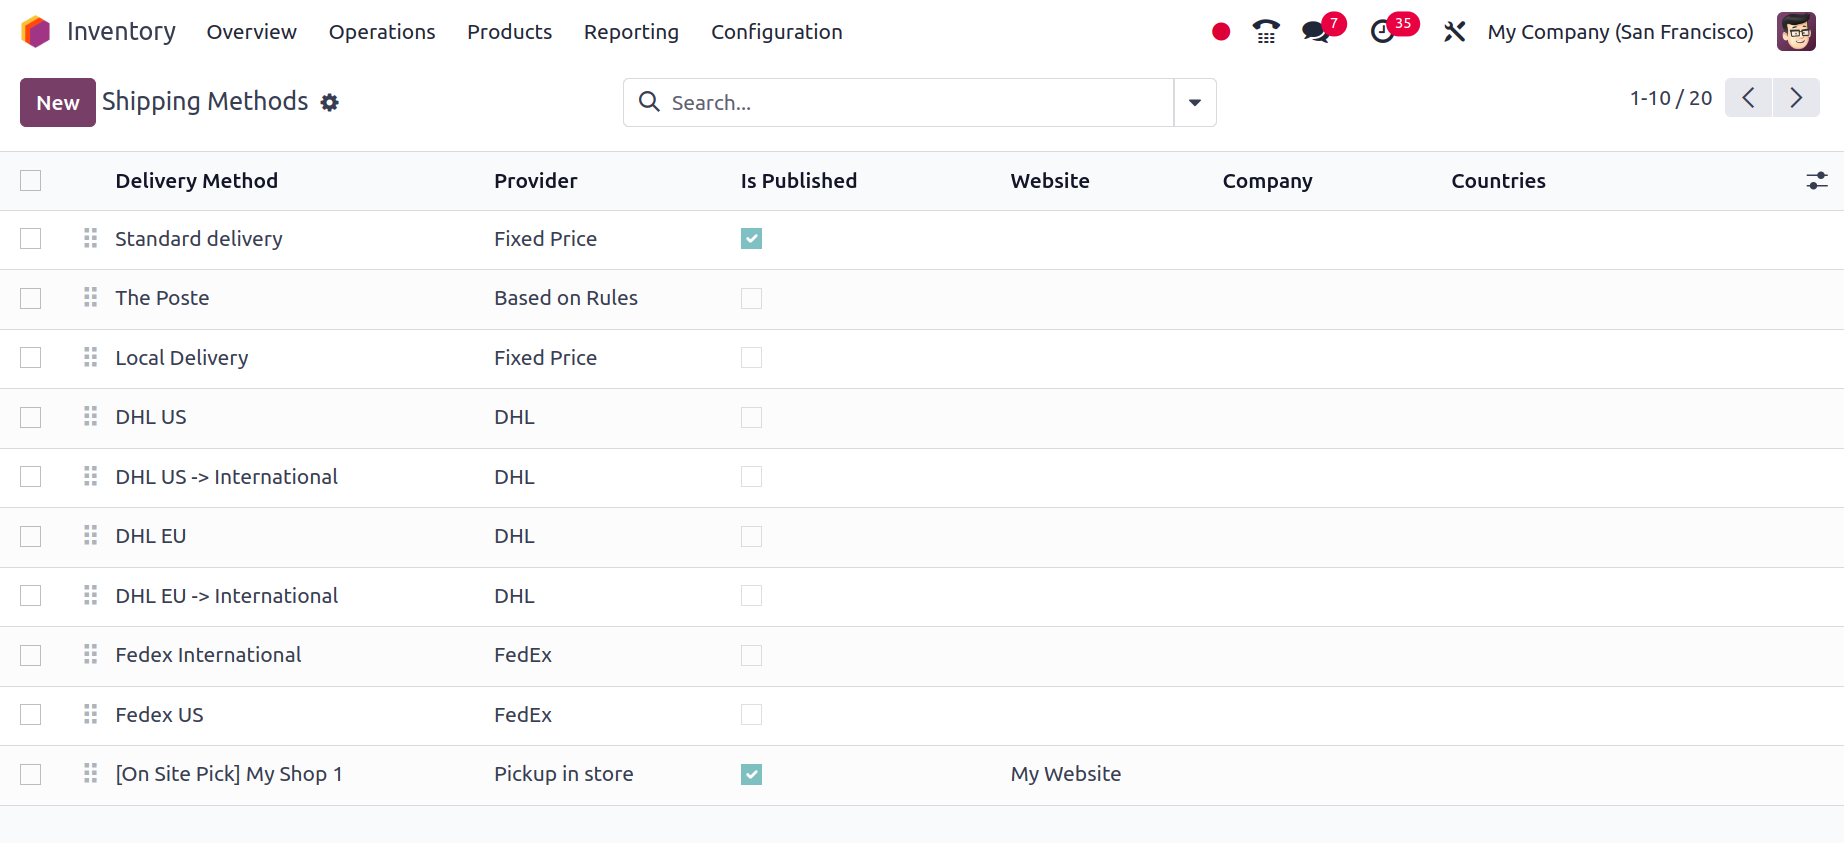 The name of the delivery method can be changed. This is the name that will be used by your online store. When validating delivery orders, the Integration Level field can be assigned to an action. The shipping cost will be increased by the Margin on Rate percentage rate. The fixed sum that is added to the shipping cost is called additional margin. There are two options for the invoicing policy: estimated cost and real cost.Estimated cost: The estimated cost of shipping will be charged to the client.Real Cost: Following delivery, the shipping cost will be updated on the SO, and the buyer will receive an invoice for the actual cost of shipping.
 A service called shipping insurance may be able to compensate senders whose packages are misplaced, stolen, or harmed during transit. Therefore, the Insurance Percentage field can contain the Insurance Percentage amount.
 There are two columns in the shipper configuration: The first one (password, developer key, etc.) is connected to your account. The provider determines how the second column is different. You have options for the kind of packaging, the kind of service, and the weight unit.
 Lastly, you can restrict the distribution method to a certain group of locations. It might be restricted to specific states, nations, or even zip codes. The list of nations on your e-commerce website is restricted by this function. For domestic providers, it is helpful. USPS US, for instance, exclusively makes deliveries within the United States.To determine the appropriate cost, the supplier needs details about your business. Verify the accurate encoding of your phone number and address.The shipper businesses require the product's weight in order to calculate the shipping cost. Consequently, enter the product's weight under the Inventory tab.
 Next, make a new sales order and select the shipment method by clicking on the Add Shipping method link underneath the sale order.
 To obtain the shipping cost, select your preferred shipping method and click the "Get rate" button. The chosen shipping method can then be added by clicking the Add button.
 Next, verify the sale order. You can select the delivery option from the smart tab. There is an Additional Info page on the delivery. The SHIPPING INFORMATION part is located on this tab. Where the weight, shipping weight, tracking reference, and carrier are visible.
 After the delivery is confirmed, the tracking reference will be updated, and a new smart tab called "Tracking" will appear. To view your delivery history on the provider's website, click the Tracking button.
 You can find the label to attach to your package in the history below: The treeview, as displayed below, can be used to obtain the shipping label. The user has the option to download it.
 The label resembles the image seen below.
 Odoo employs third-party shipping methods in this manner.
Reception Report
In Odoo17, you can use the Reception Reports to view and distribute received quantities. From the Inventory module's Settings menu, this feature can be turned on.
 You can create a new purchase order in the Purchase module after turning on this option. You can click the Receive Product button to get the merchandise once you've verified the purchase order.
 The Reception Report will be displayed on the screen through a new smart button called Allocation. Select Allocation from the menu.
 The screen will display the reception report as seen in the aforementioned picture. Allocated products will be displayed. Here, the product's anticipated Delivery can be seen.
 Utilizing the Assign button, you can assign products. You can click the Unassign button to revoke the allocation. The Print Label button will be available to print labels for the product's assigned quantity.
Consignment
You can set the owner of stored items in your inventory using the Consignment option found under the Settings menu. Although the product will be offered by the shop, the supplier will really own the item up until it is purchased by a customer. This strategy makes it simple to return unsold goods to the vendors. In the case of consignment, the retailers are not required to maintain a continuous inventory.
 You can enable the Consignment option under the Settings module's Traceability tab. You can use this feature to give each item you receive an owner when you add it to your inventory. Let's make a receipt for the stock that was consigned and give it a new owner.You can include the consignee's name in the Assign Owner area while creating the receipt. Using the Add a Line button in the Operations page, you can specify the consignment stock and its quantity. Here, Anita Oliver has been designated as the product's consignee. Anita Oliver received 35 units of the product from us. Clicking the Validate button is an option. The Customizable Desk in 35 units has been delivered to Anita Oliver.
 There are now 78 quantities of the product on hand, as shown by the Stock report under the Reporting menu.
 The Moves History report and consignment information can be viewed in detail. The consignee's name will appear in the From Owner column. We may deduce from this information that Anita Oliver oversees the management of 35 quantities of the product. Odoo17 allocates owners to accepted products in this manner.Advanced SchedulingOdoo17 provides an Advanced Scheduling option in the Inventory module, which can be accessible from the Settings menu, for scheduling various tasks. You can use this feature to make sure you have adequate time to prepare tasks relating to the product.
 By turning on the Security Lead Time for Sales option, deliveries can be scheduled earlier to avoid delays. Here, you can choose a margin that will be used on the anticipated delivery date. To account for unanticipated supply chain delays, the product will be scheduled for procurement and delivery a certain number of days before the actual promised delivery date. To avoid delays, you can schedule requests for quotations sooner by turning on the Security Lead Time for Purchase option. Set the margin, and the vendor lead time will reflect it. To account for an unforeseen vendor delay, buy orders for restocking products will be generated by the system and scheduled for particular days before the days specified in the margin.You can specify the number of days that must pass before a purchase order is confirmed in the Days to Purchase box.


Reporting
You can simply analyze and comprehend the workflow for managing the inventory with the aid of careful monitoring of the inventory operations. Odoo can provide you with a platform specifically designed for producing reports for the inventory activities carried out in your business with precise data representation in graphical and tabular representations.
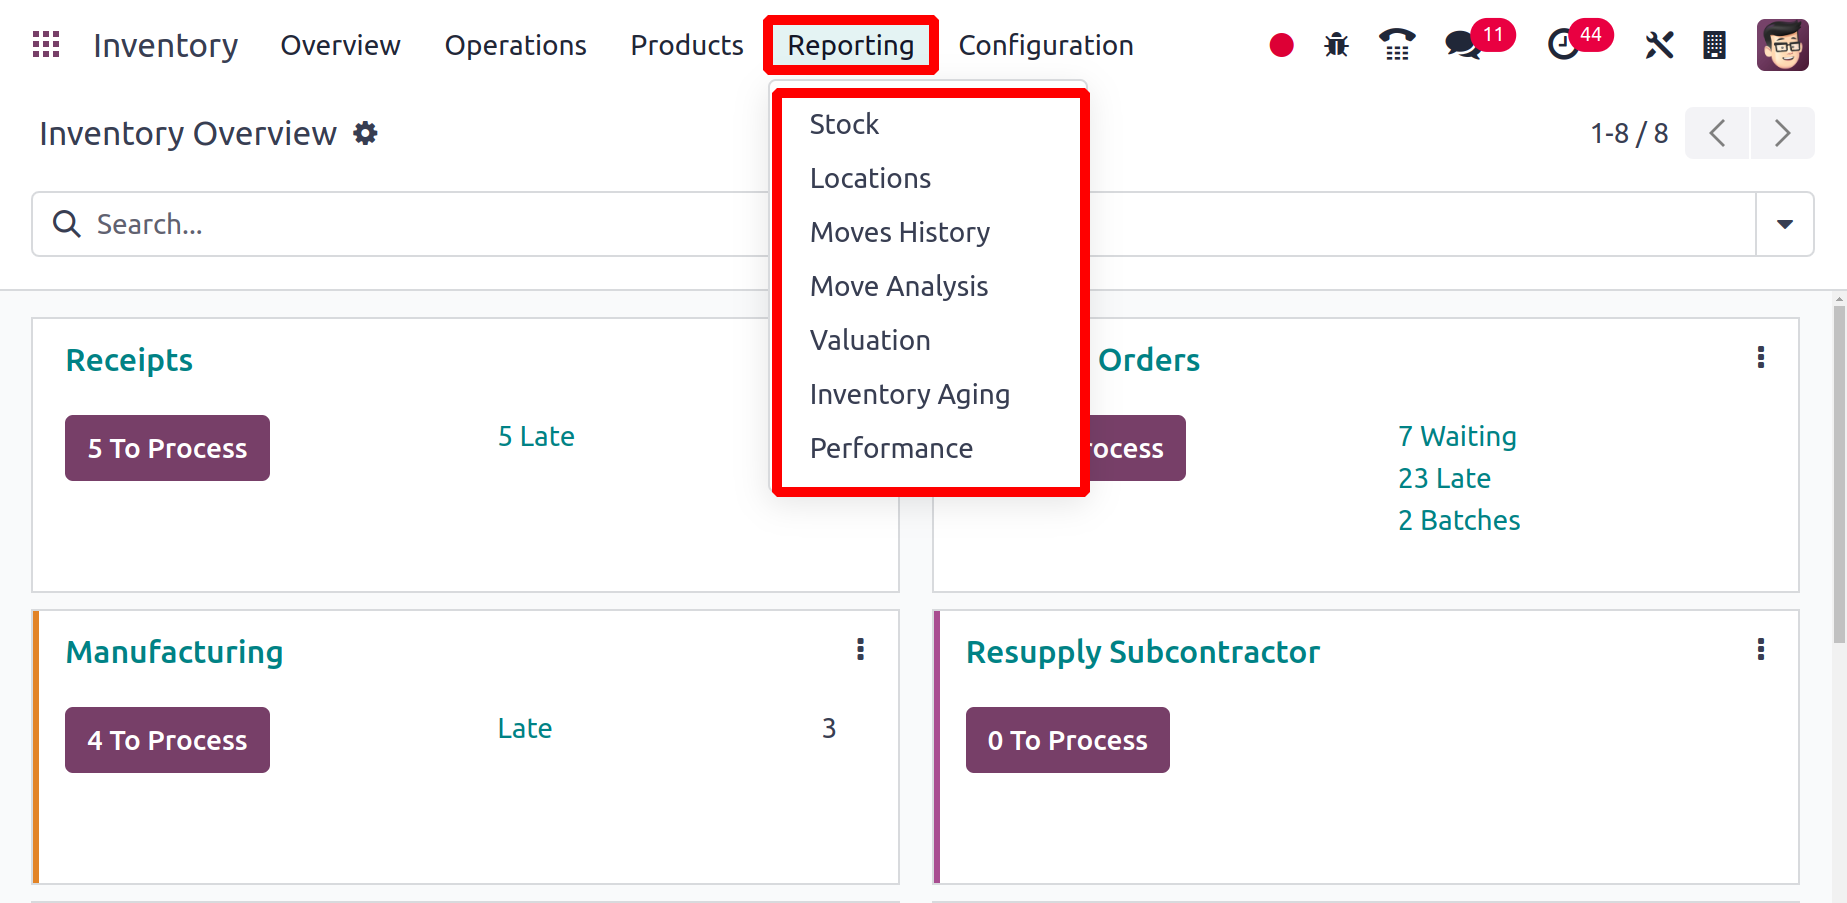
To acquire thorough reports that meet your needs, you can real-time customize your reports. You may get the reports for Stocks, Locations, Moves History, Stock Moves, Valuation, and Performance under the Odoo Inventory module's Reporting menu. Let's look more closely at each of these reporting platforms.
Stocks
All of the stocks that are currently in your inventory are listed in the Stocks platform under the Reporting menu. Details on the Product, Unit Cost, Total Value, On Hand, Free to Use, Incoming, and Outgoing Quantity will be provided to you.
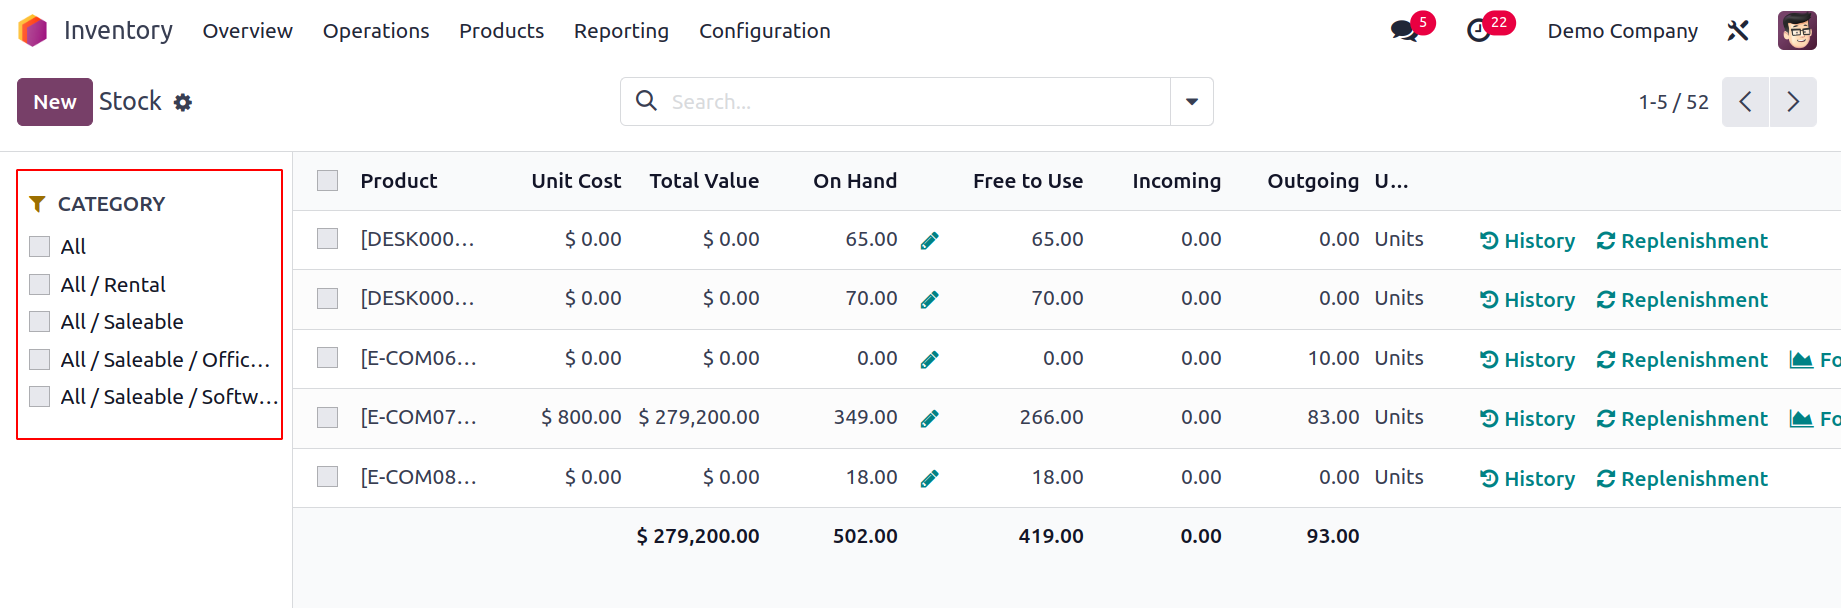
Using the available categories displayed on the left side of the screen as highlighted in the figure, you can categorize the stock list according to the product category. You can use the search box at any moment to make the search process easier.
The stocks can be filtered using the built-in default filters as Services, Products, Published, Available in PoS, Can be Sold, Can be Purchased, Can be Recurring, Can be Rented, Can be Subcontracted, Can be Expensed, Favourites, Warnings, Archived, Available Products, and Negative Forecasted Quantity. The Add Custom Filter button can let you create custom filters. The default Group By options are Product Type, Product Category, and PoS Product Category. To create a custom group by option, click the Add Custom Group button.
You may view the product's Inventory Adjustment information by clicking on the tiny icon next to the On Hand field.
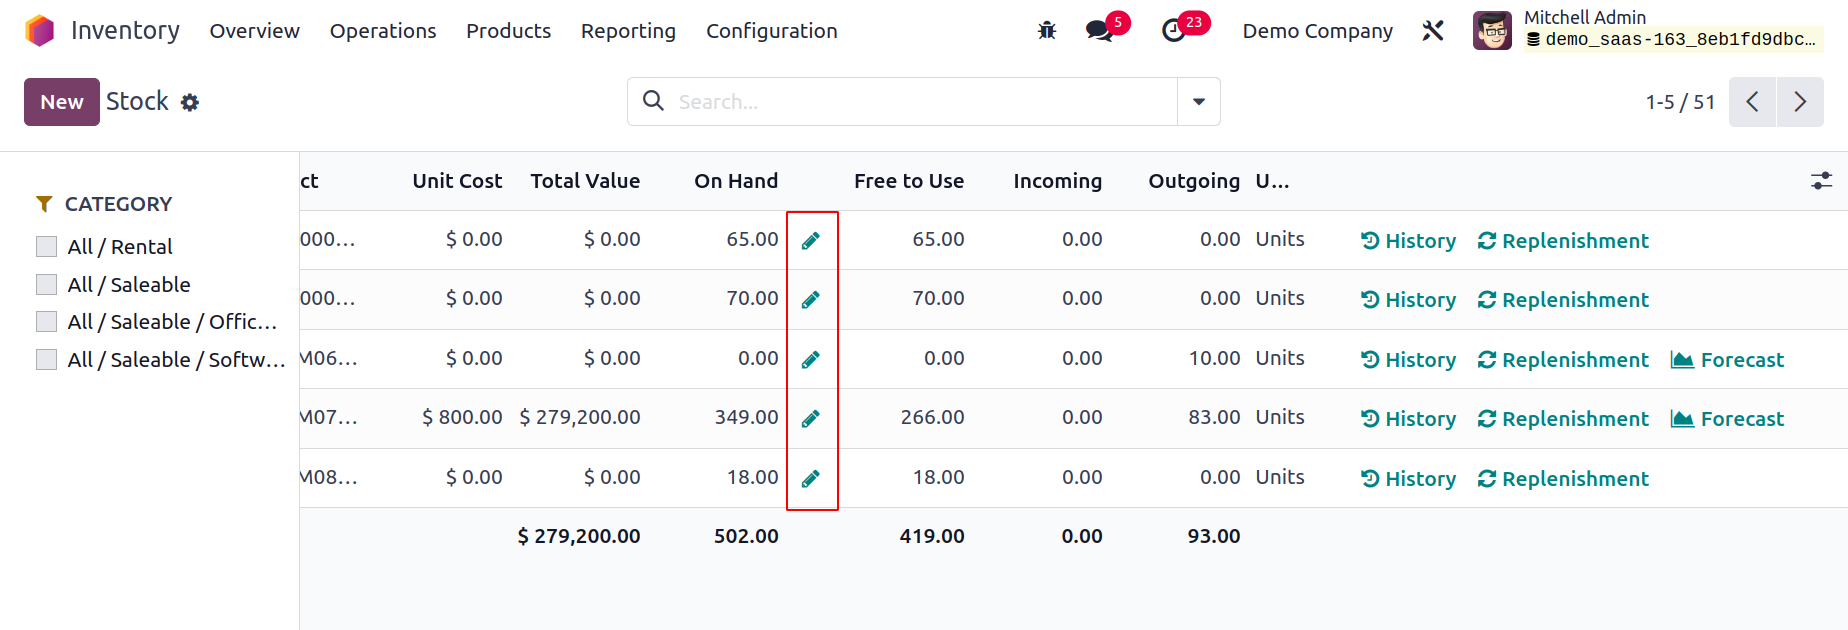
The Inventory Adjustment part of this chapter has already covered how the inventory adjustment platform functions.
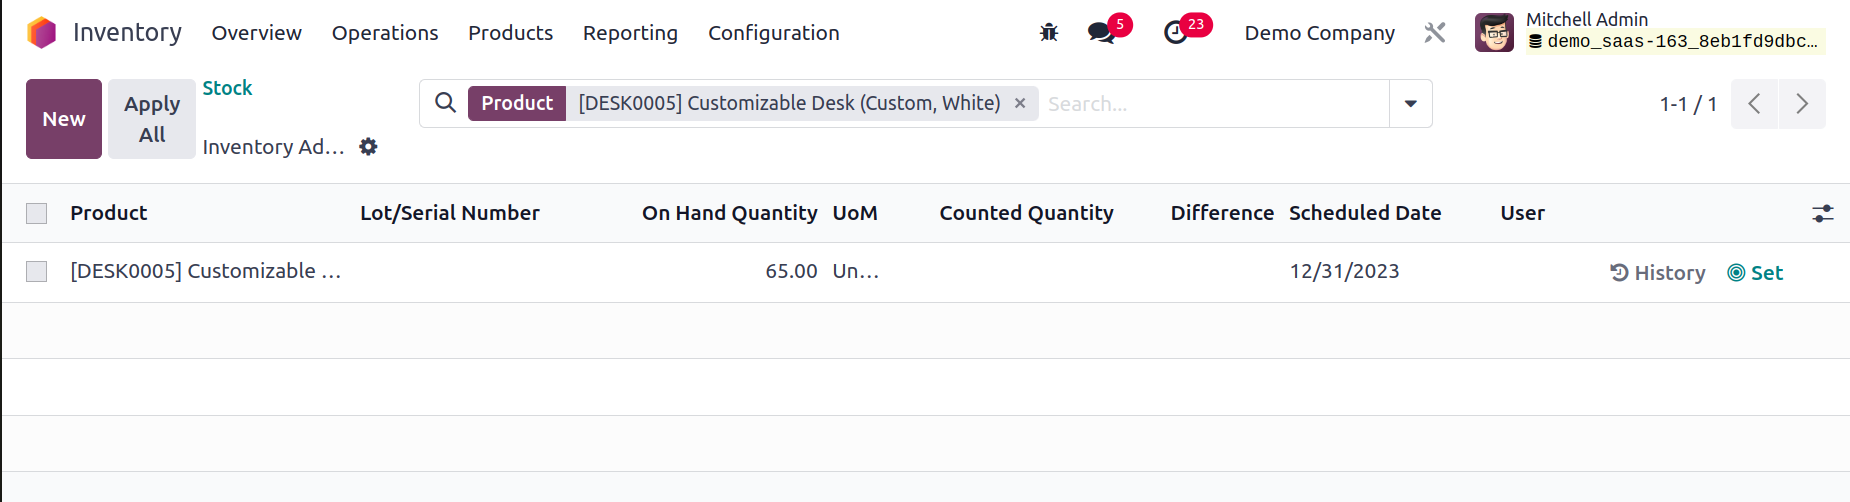
You can click on the History button located in the stock pane, as shown in the illustration, to view the movement history of any product.
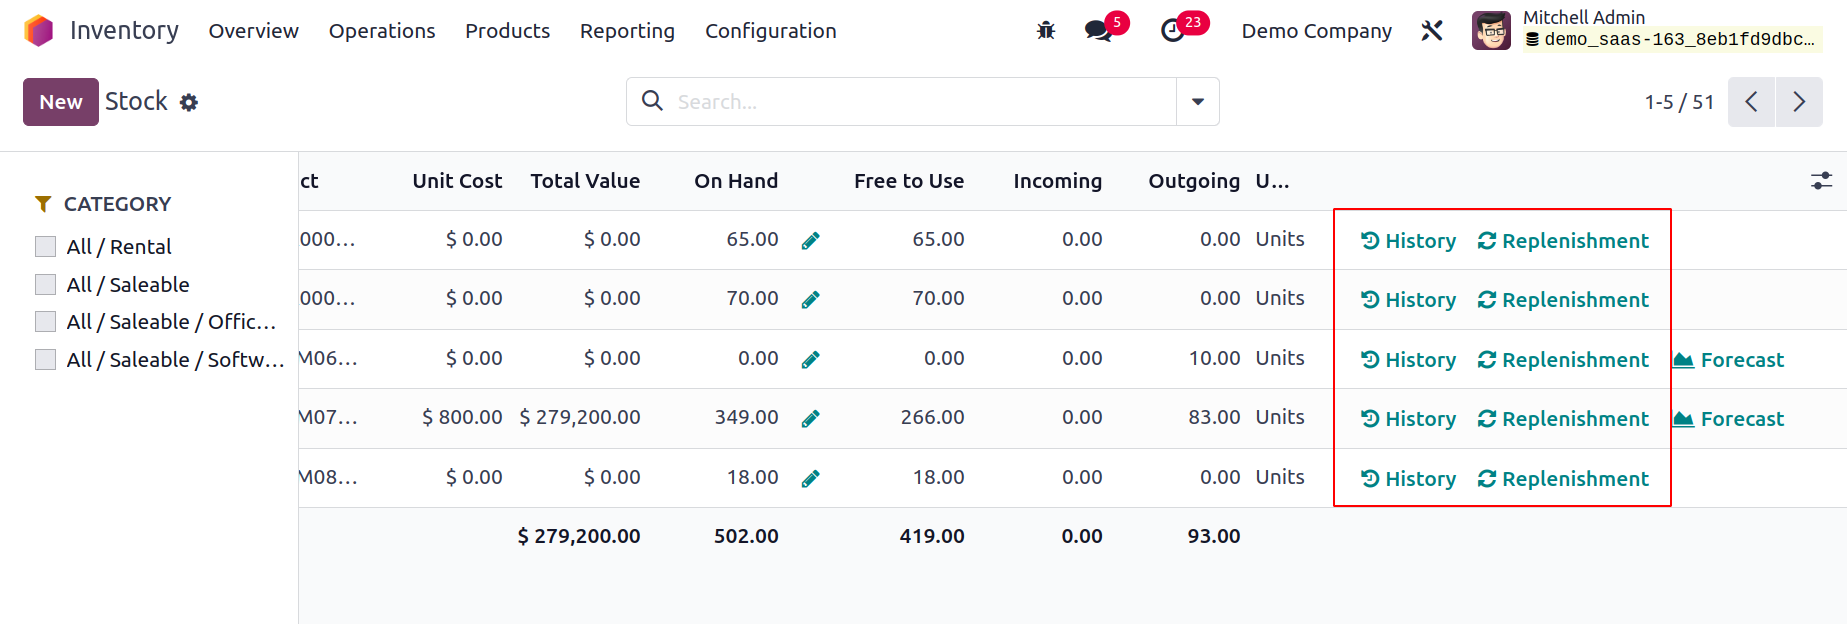
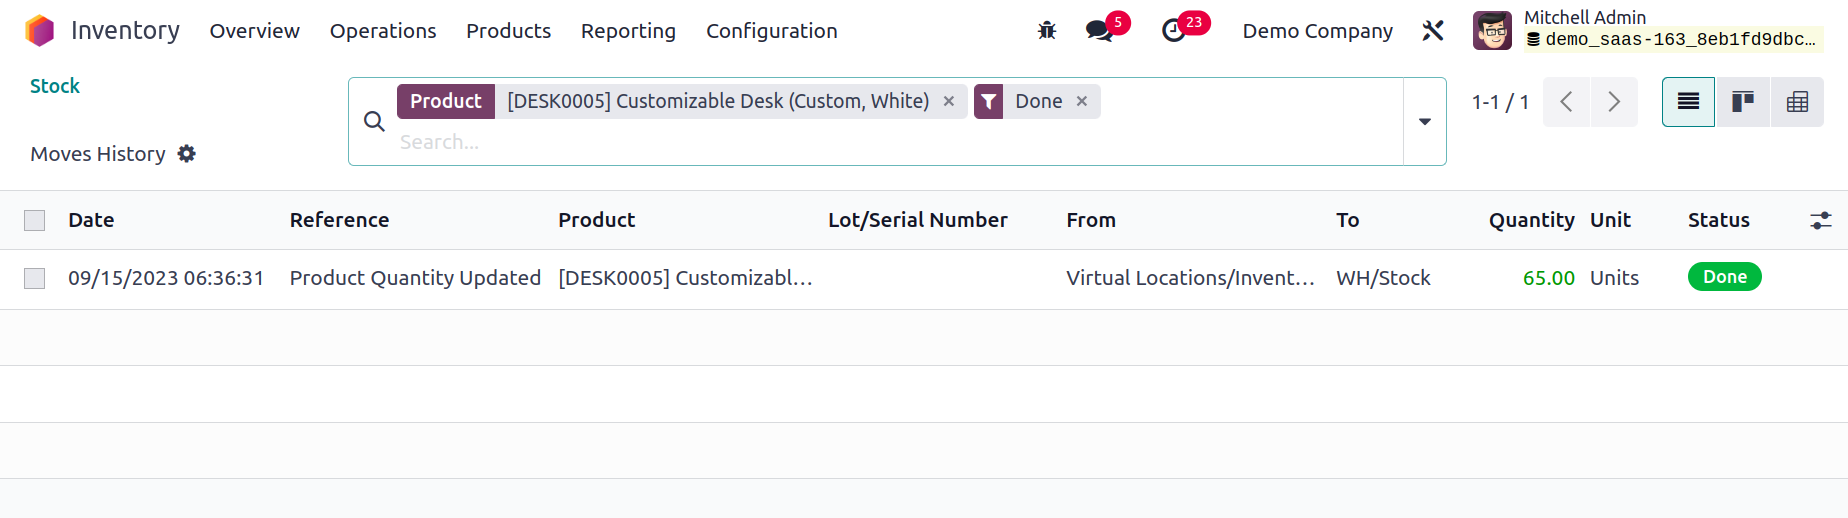
In accordance with the reordering regulations, the product can be replenished by clicking the Replenishment button on the screen. The Location button will display a product's whereabouts in your inventory.
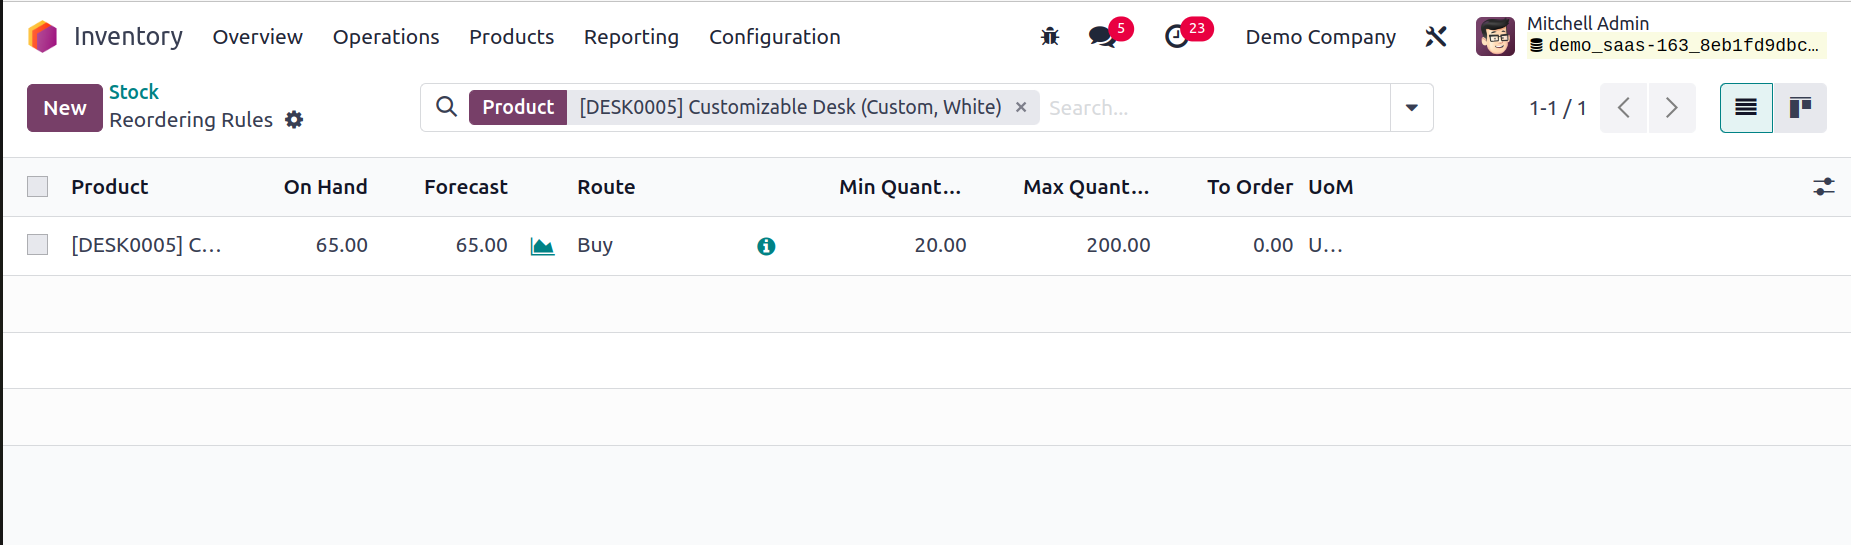
You can obtain a product's forecast report by using the Forcast button.
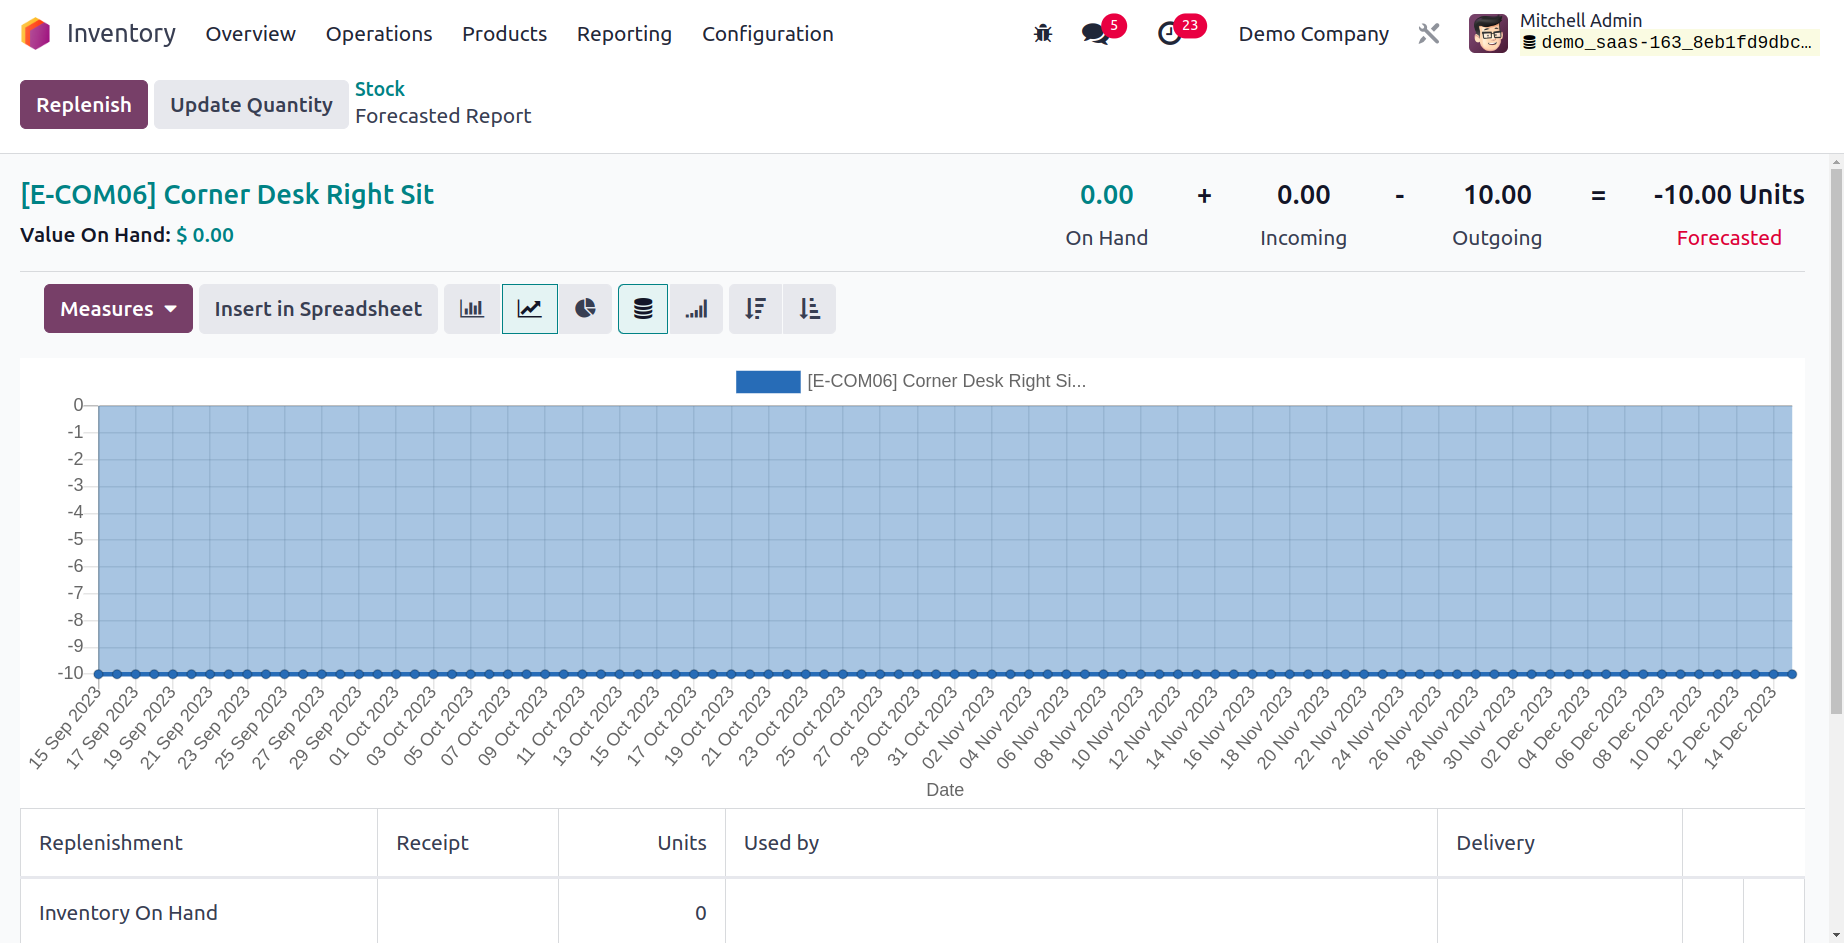
Location
The Location report's list view is provided below. Location, Product, Package, Lot/Serial Number, On Hand Quantity, and Reserved Quantity are all displayed here.
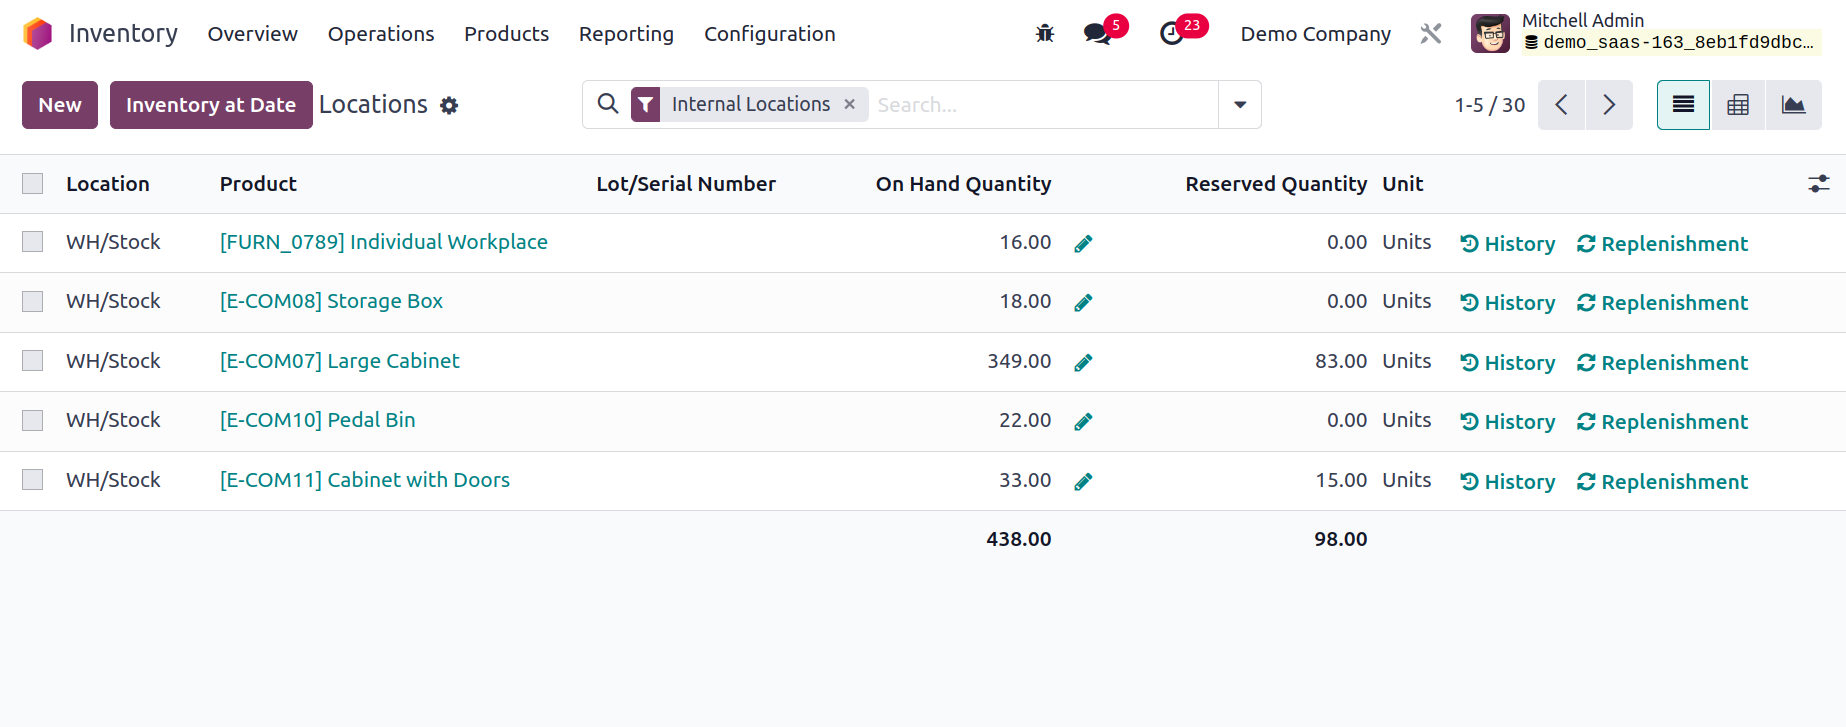
As we already indicated, you may restock the products using the Replenishment button and view the history of the moves using the History button from the Location reporting window. Utilizing the smart button on the screen, the inventory adjustment may be done.
The pivot table view of the Locations is displayed in this screenshot. Measures, Filters, and Group By options can be used to create reports that are ideal for your needs. You can also convert this window into a graphical view, where you can change the graph's type to a line, pie, or bar chart as it suits you best.
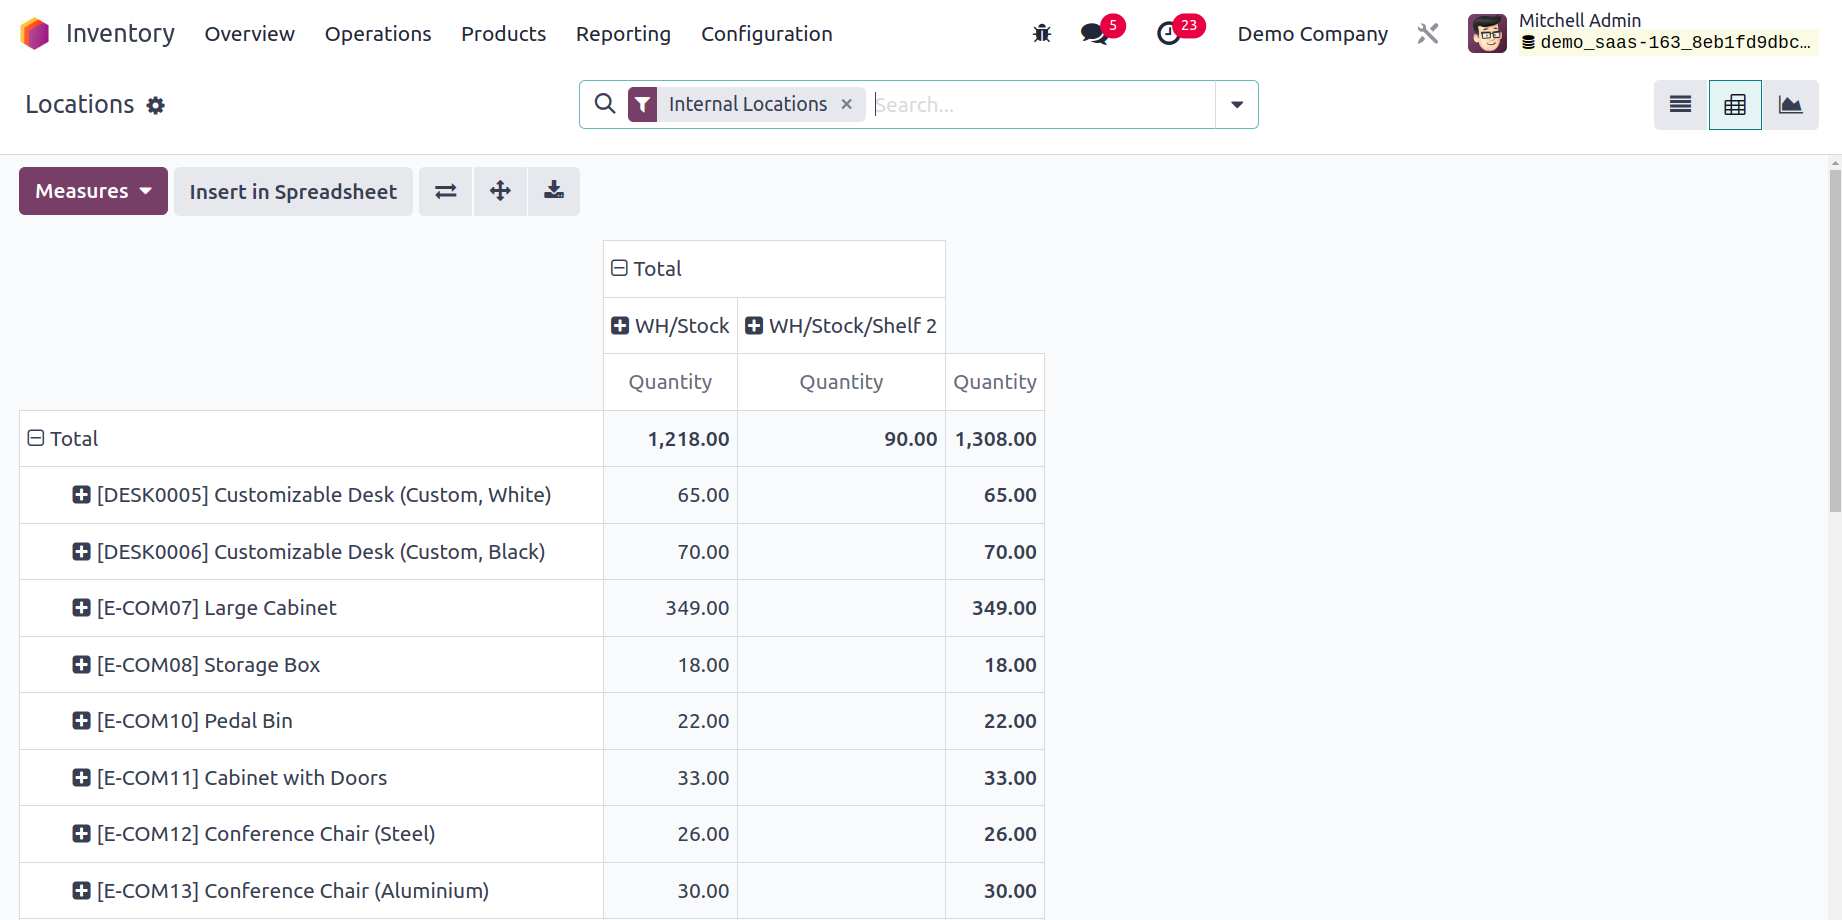
You may access the Stock Valuation Report for each product by selecting Inventory at the Date from the menu.
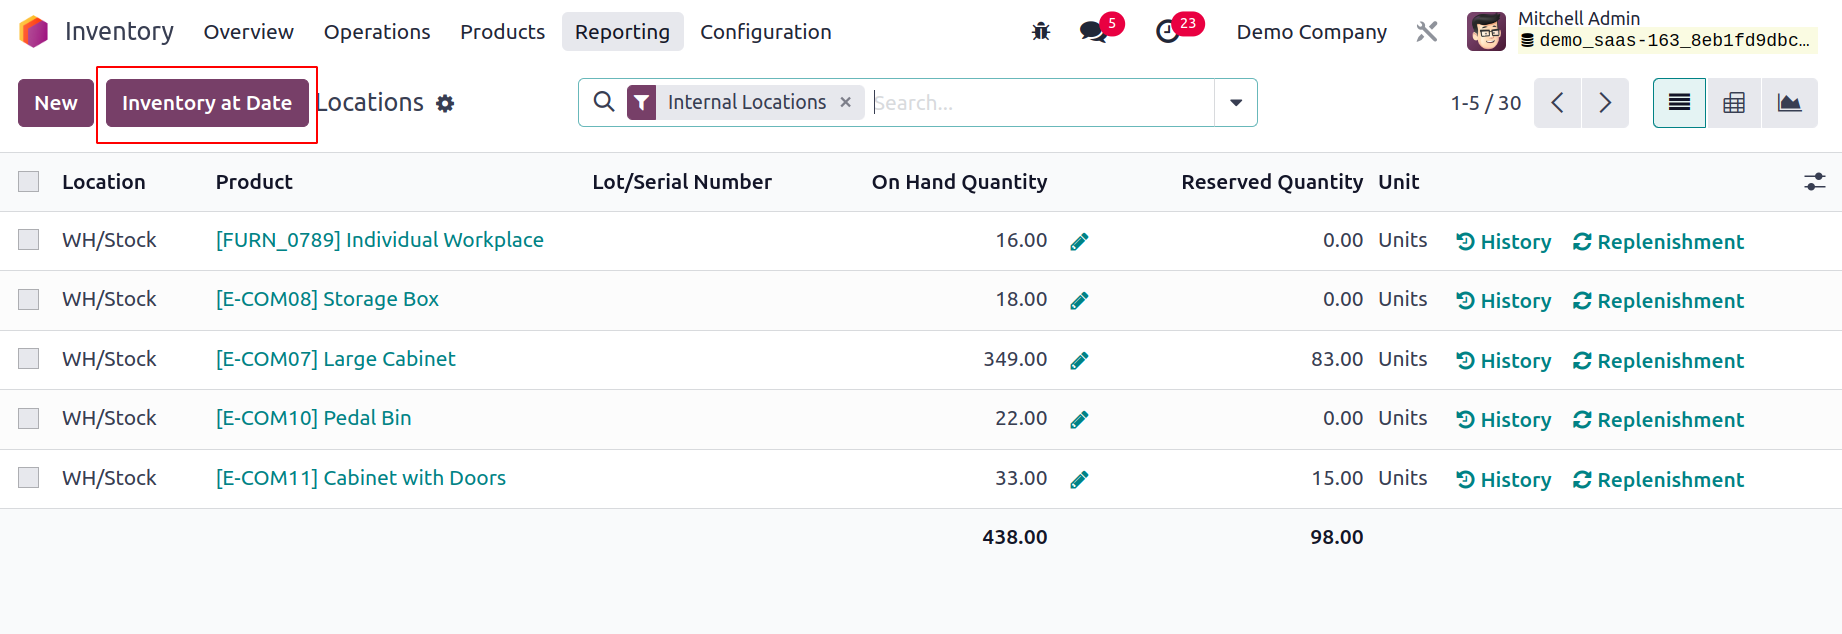
You will see a pop-up window asking you to select a date so that you can receive the value report on that day. After mentioning the date, press the Confirm button. On your screen, Odoo17 will display the stock valuation report for the chosen date.
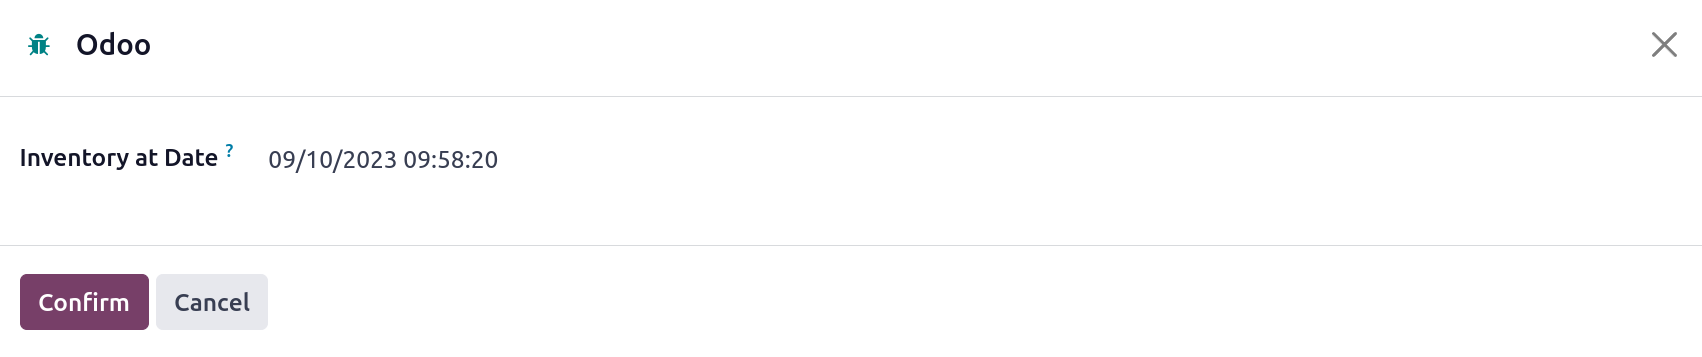
A product's stock valuation report will include the following information like product name, Reference, Variants, Sales price, Cost, Onhand quantity and Forecasted quantity, etc.
By selecting the Valuation at Date option, you can obtain the stock valuation report for the products as of a specific date.
Moves History
Odoo17 provides a separate platform where you may view the history of all product moves for all items listed in your inventory. You will have a clear understanding of the movement of the items in your inventory on a specific day thanks to this report.
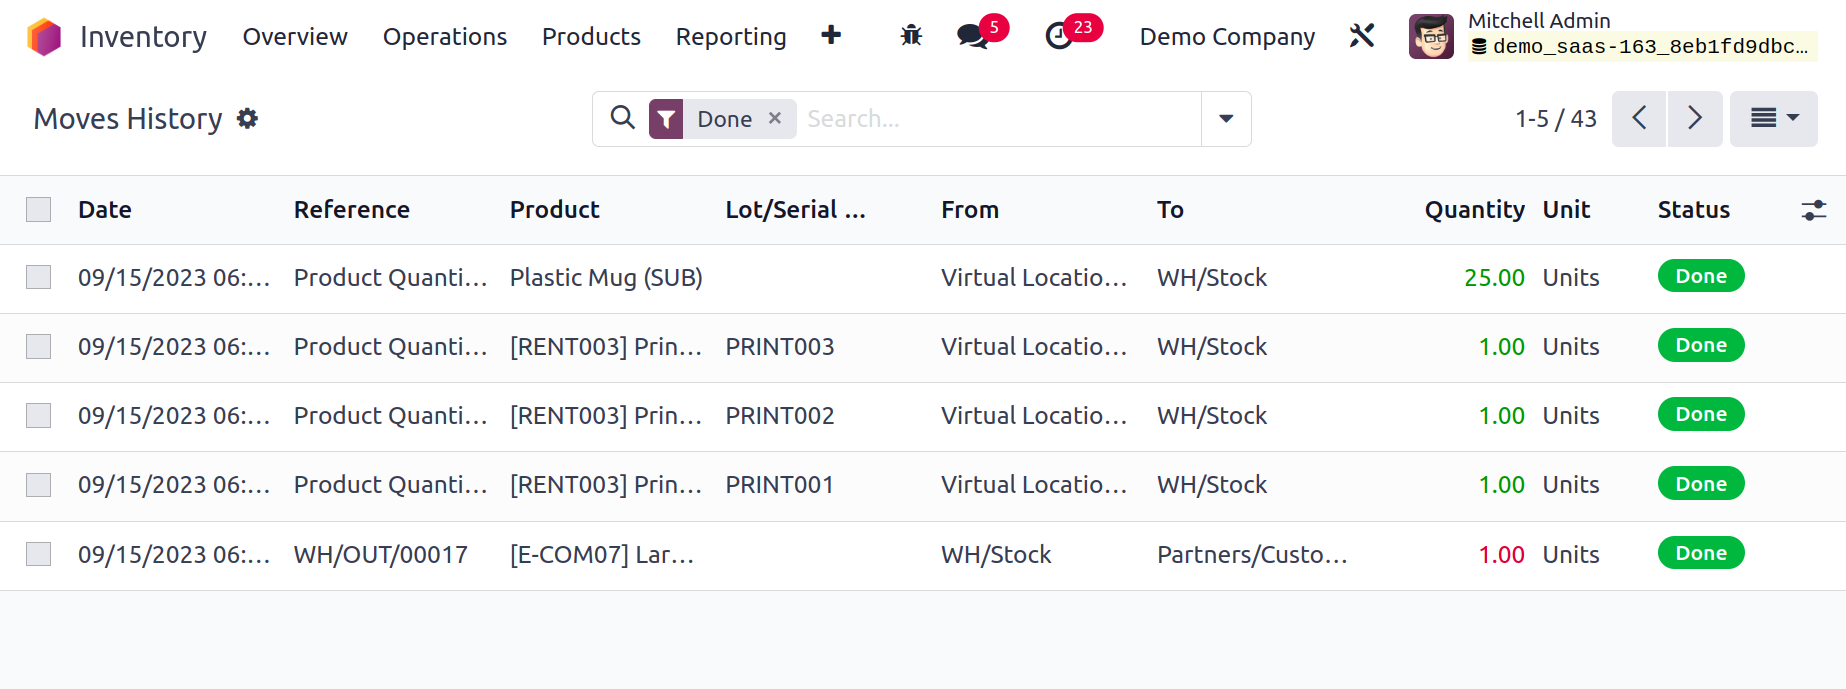
From the list view of the platform, you will also receive the Reference, Product, Lot/Serial Number, From, To, Quantity, and Status in addition to the date of operation. Additionally, it offers options for seeing the history of moves in both Kanban and Pivot perspectives.
Moves Analysis
Moves history and Moves analysis are comparable as well. Here, the movement of the products is displayed according to stock. Here, the Pivot View will be used to display the movement. Additional views, such as the List View, Kanban View, and Graph View are also offered.
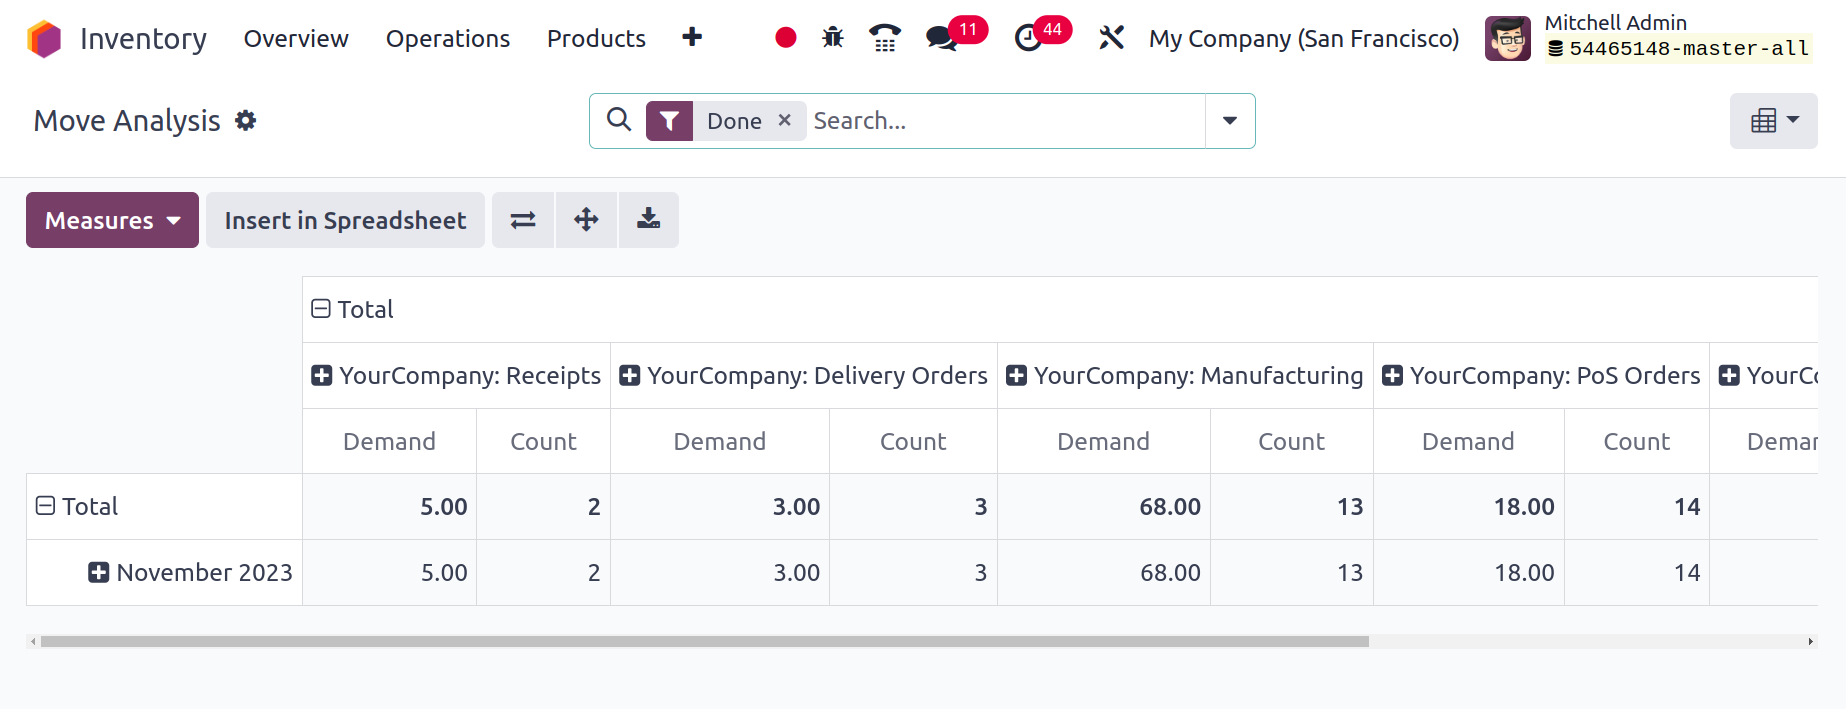
Valuation
The Valuation option, which can be found in the Inventory module's Reporting menu, can be used to generate reports on stock valuation. This report can be used to analyze stock valuation properly.
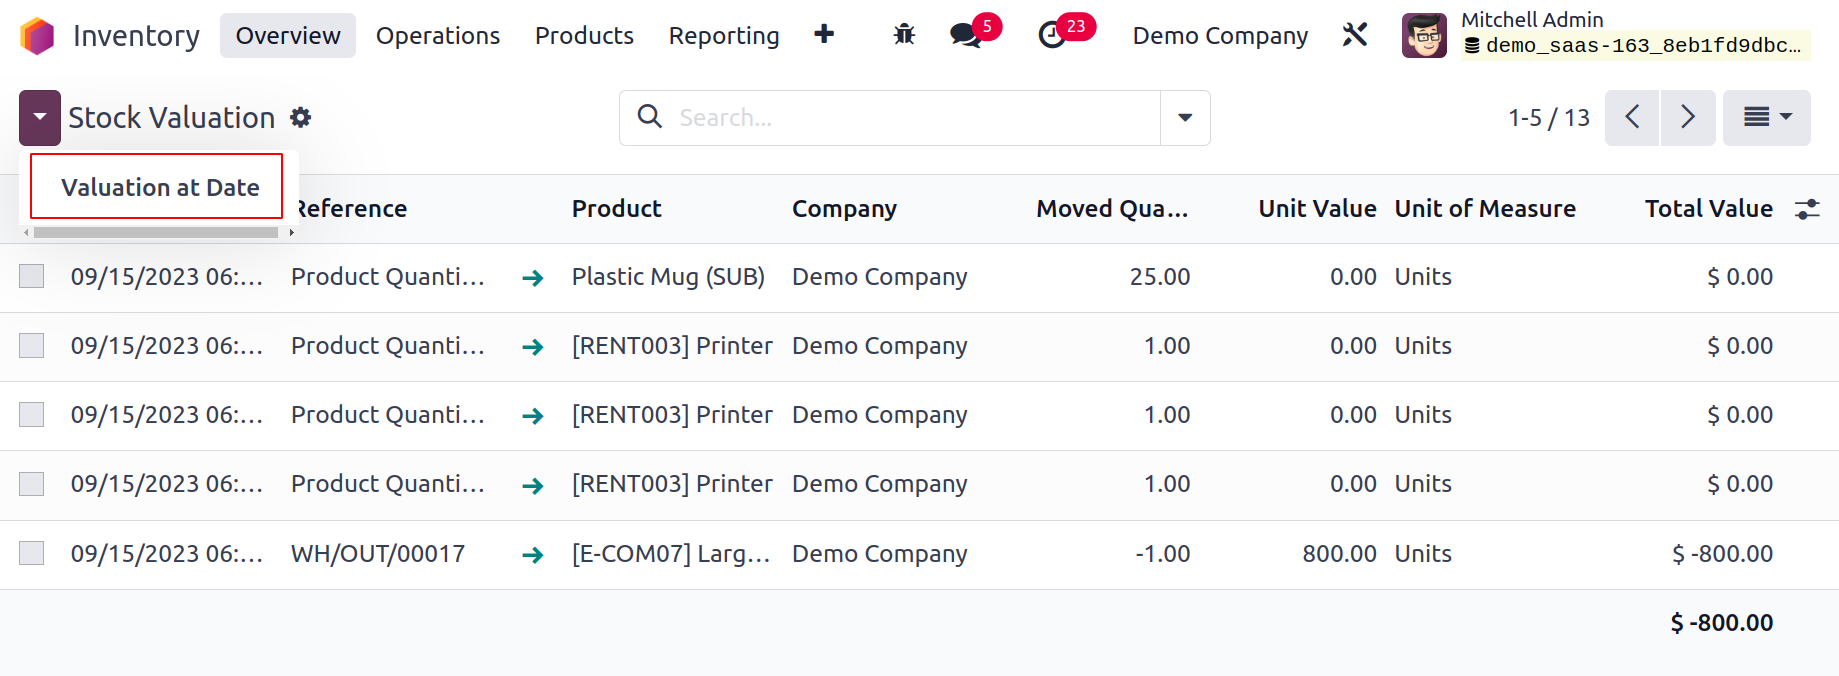
You can access the Date, Reference, Product, Company, Moved Quantity, Unit Value, and Total Value of the inventory valuation from this platform's list view. You can click the Valuation at Date button to acquire the valuation report for a specific date, at which point a pop-up window asking for the date will appear.
When you choose a date and press the Confirm button, Odoo17 will show you the valuation report for that specific date.
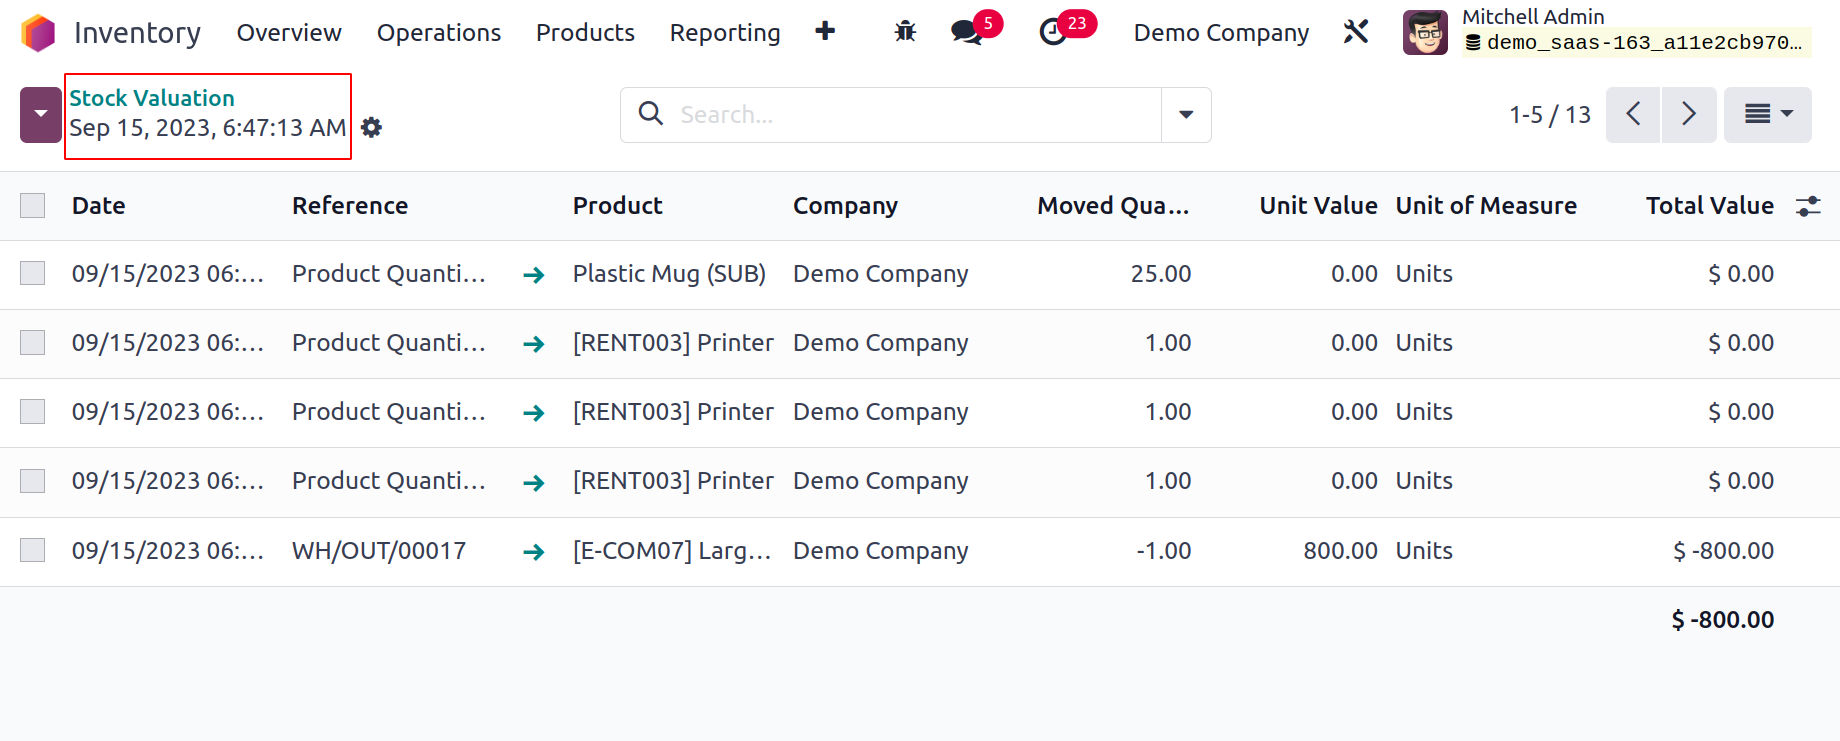
Above is the pivot view of the stock valuation report. As measures for the pivot table, you can use Quantity, Remaining Quantity, Remaining Value, Total Value, Unit Value, and Count. To obtain the anticipated report of the stock value, use the unique features offered by the Filters and Group By options.
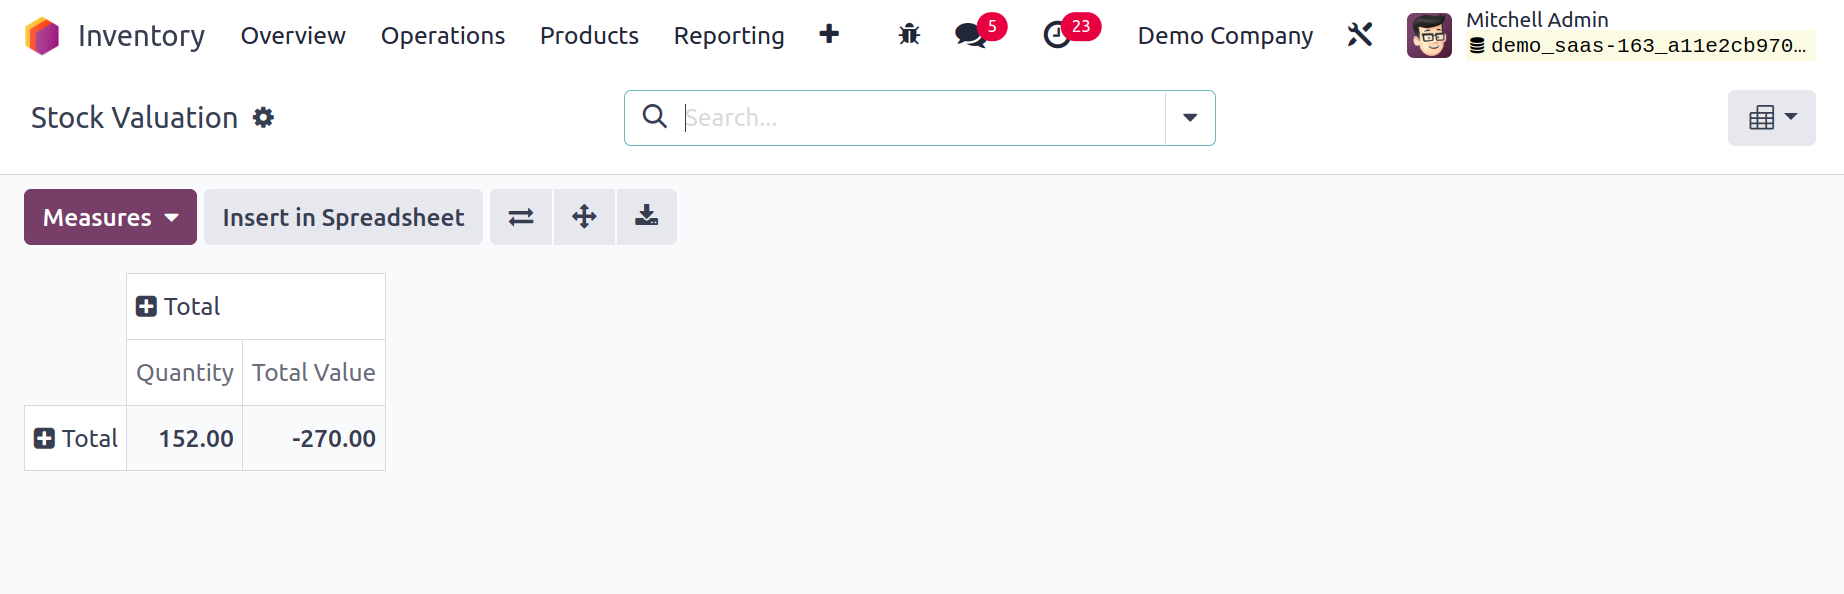
You can plan and keep track of all inventory operations in one location by using Odoo17's specialized inventory management system. You can rely on the highly integrated Inventory module to handle your inventory and warehouse operations completely while ensuring optimum workflow efficiency.
Inventory Aging
A list of incoming products is displayed in the Inventory Ageing report. The user can view the specifics of aged stocks with the use of this report. The user obtains information from the list regarding the date of transfer, product, reference, moved quantity, remaining quantity, unit value, and unit of measure, among other things.
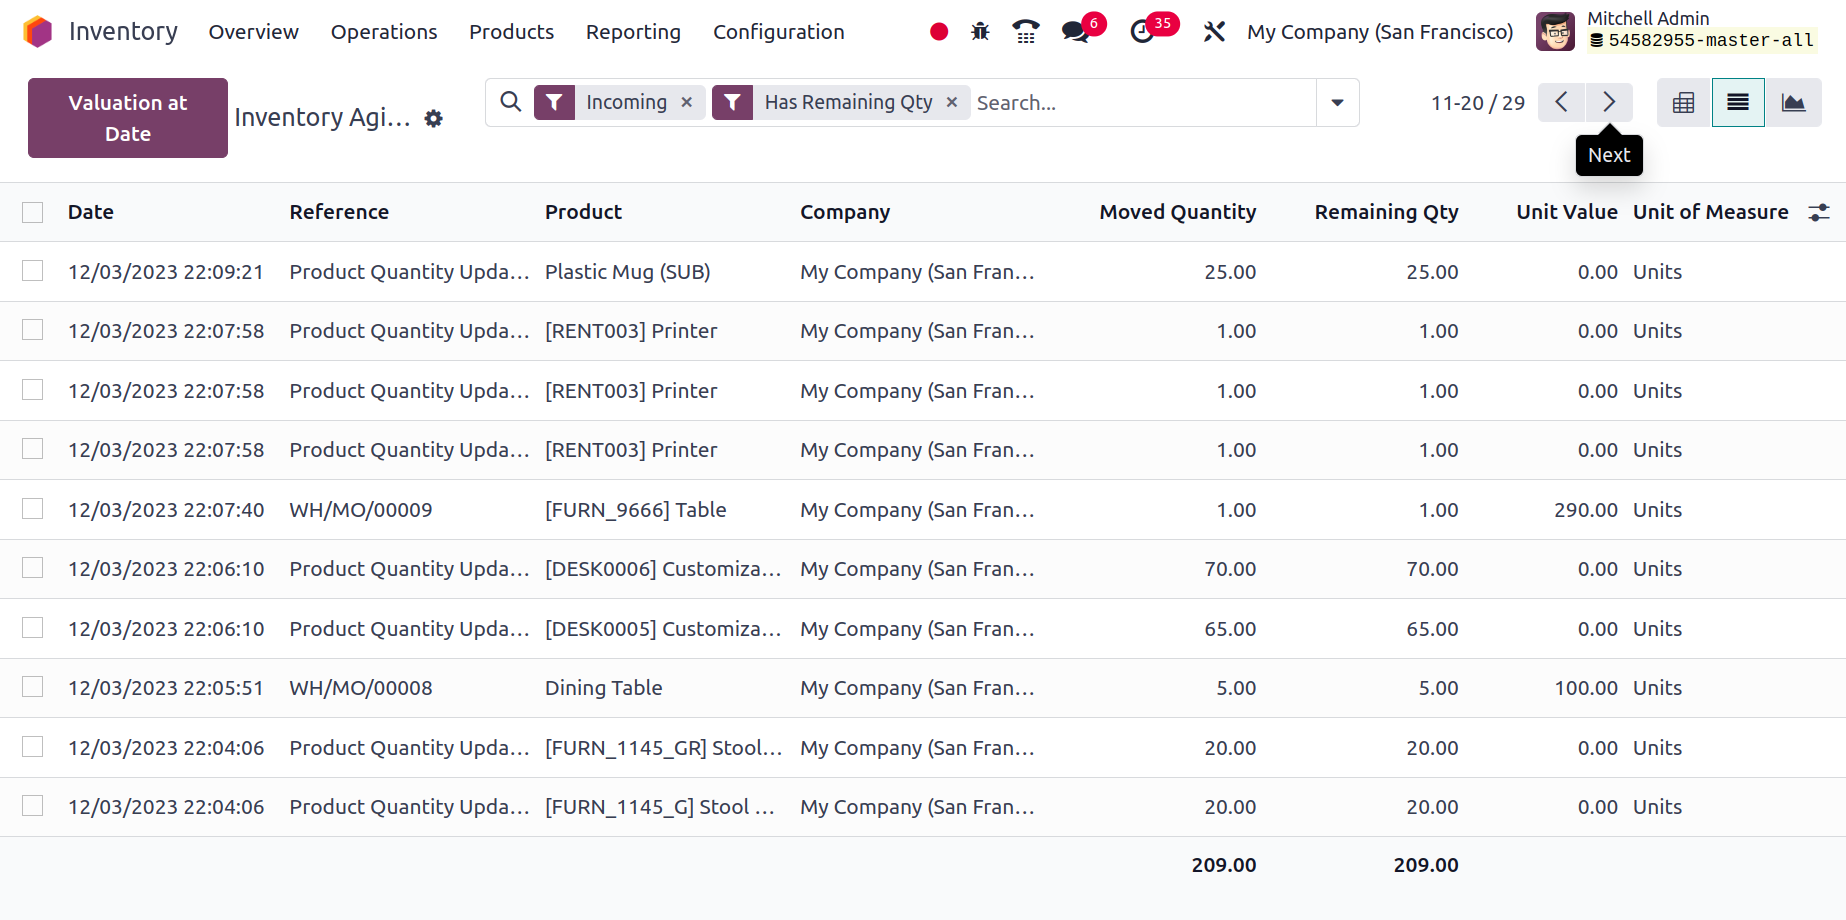
Performance
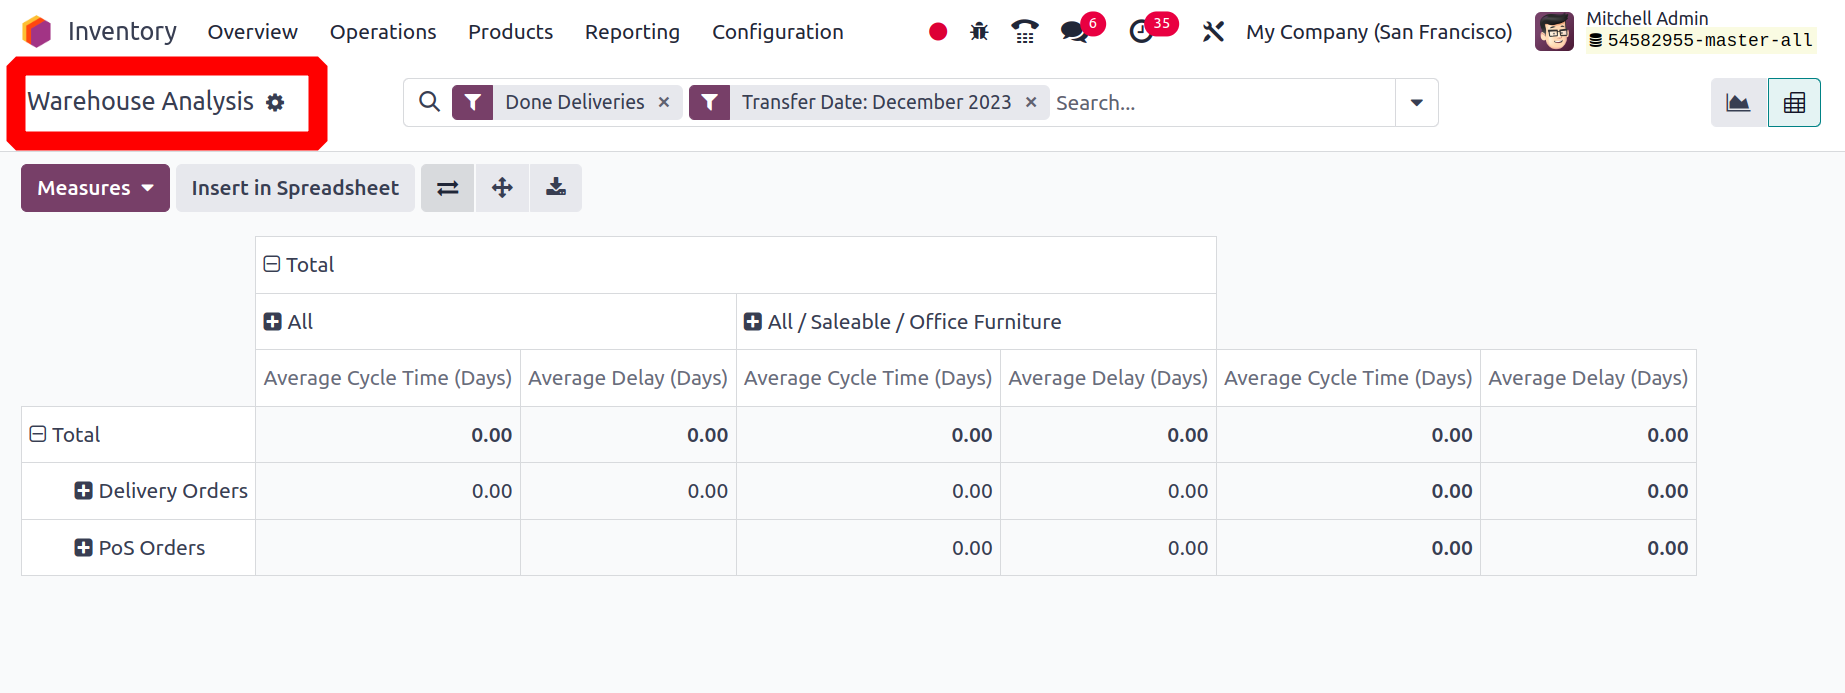
This platform is viewable in both Pivot and Graphical formats. Depending on the need, you can choose between Pie, Line, or Bar charts in the graphical display. To acquire precise information, you can adjust the Measures in accordance with your goals. Cycle time, delay, product quantity, and count are all applicable as metrics. Done Transfers, Done Deliveries, Done Receipts, and Transfer Date are the criteria that can be used to filter the report.
You can plan and keep an eye on all inventory-related tasks in one location with Odoo 17's dedicated inventory management system. You can rely on the highly integrated Inventory module to handle every aspect of your inventory and warehouse operations, ensuring optimal workflow efficiency.