WEBSITE
Website


Publish Specific Content for the website


Website Management
With its distinct interface and foundation, Odoo17, a comprehensive suite of business tools, provides you with an advanced website builder. The multifunctional, open-source Odoo17 website builder module gives you insight into handling all of the tasks involved in running an online store and managing websites. The flawless real-time integration feature of this module links the platform to every other module. The platform's multipurpose characteristics make it simple to manage every task and necessity. They also make it ideal for a variety of purposes, including building websites, eCommerce sites, customer portals, job portals, HR recruitment portals, and many more.
For your business, you may easily develop and modify websites. Additionally, the platform is specifically designed to build, administer, and design in accordance with your company's needs and standards. The unique platform provides usability from the front end as well as the back end. The modifications made on either end will be instantly recognized by the other.
Due to the numerous advantages, online and eCommerce platforms have become the preferred means of conducting business and shopping. The best course of action for a prosperous business is to sell goods online through a distinctive and well-run online store. Compared to typical business operations, the eCommerce platform in Odoo17 enables you to handle all online sales processes significantly more effectively. When searching for a reliable website and eCommerce system, businesspeople strongly recommend the Odoo17 website and platform. This chapter will go into great detail about every facet of the Odoo 17 eCommerce module and website.
Installing the Odoo 17 module into your database is necessary if you wish to use the Website module.
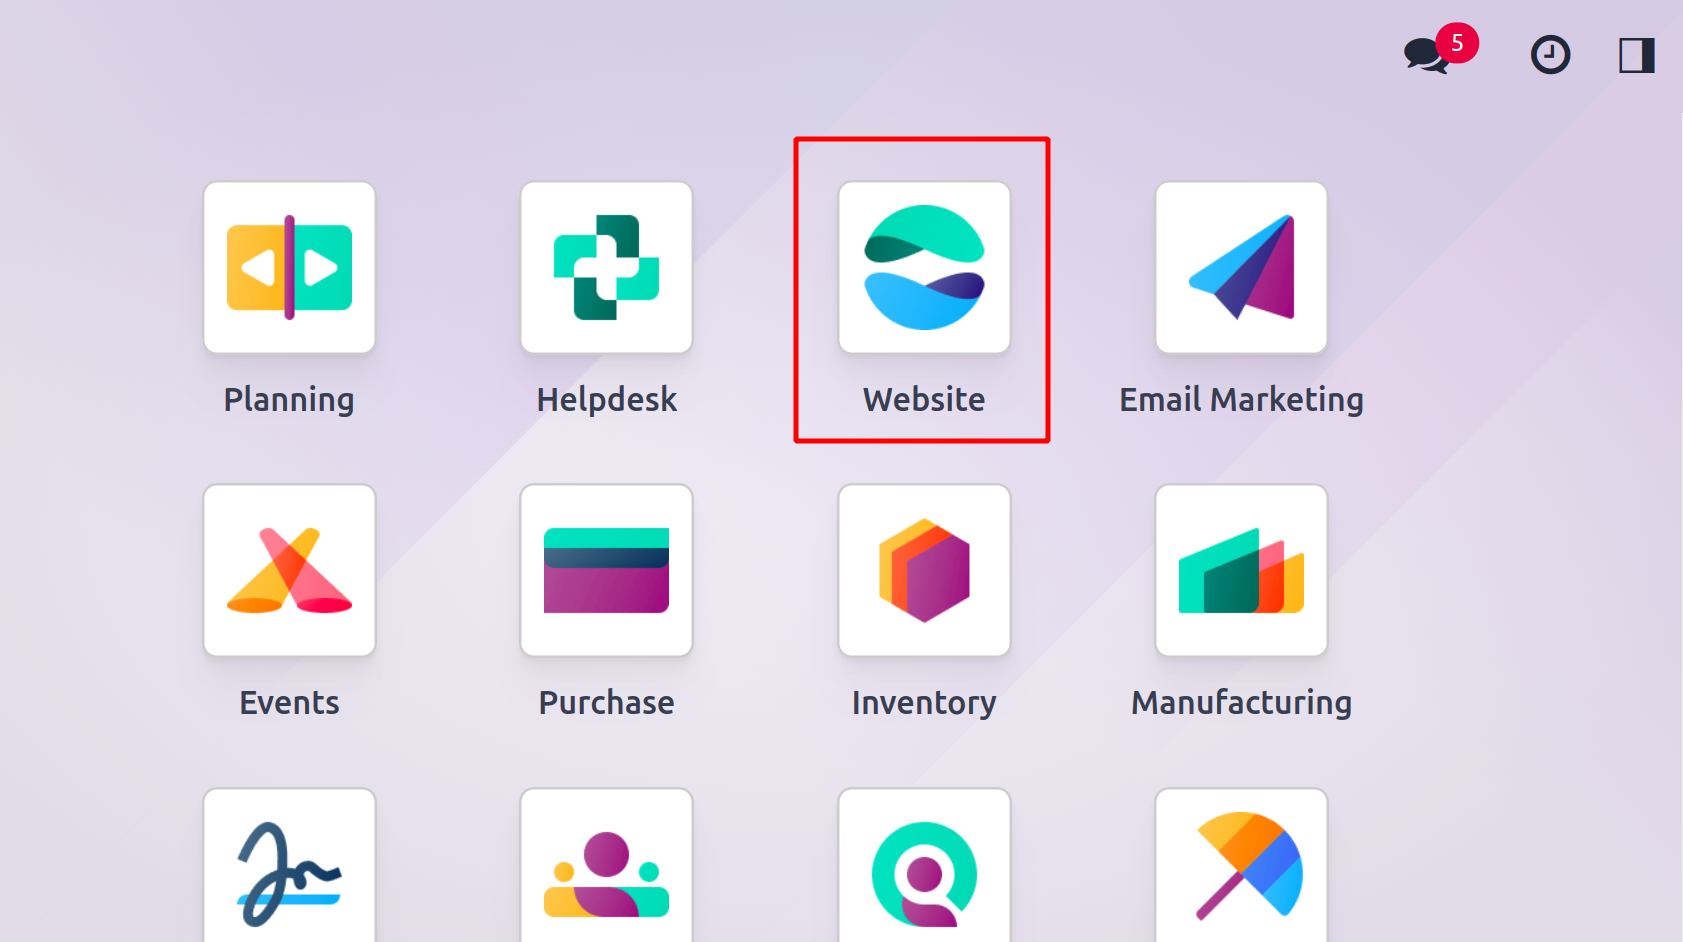
You may now access the module by clicking on the Website icon. The module's home dashboard image is seen below.
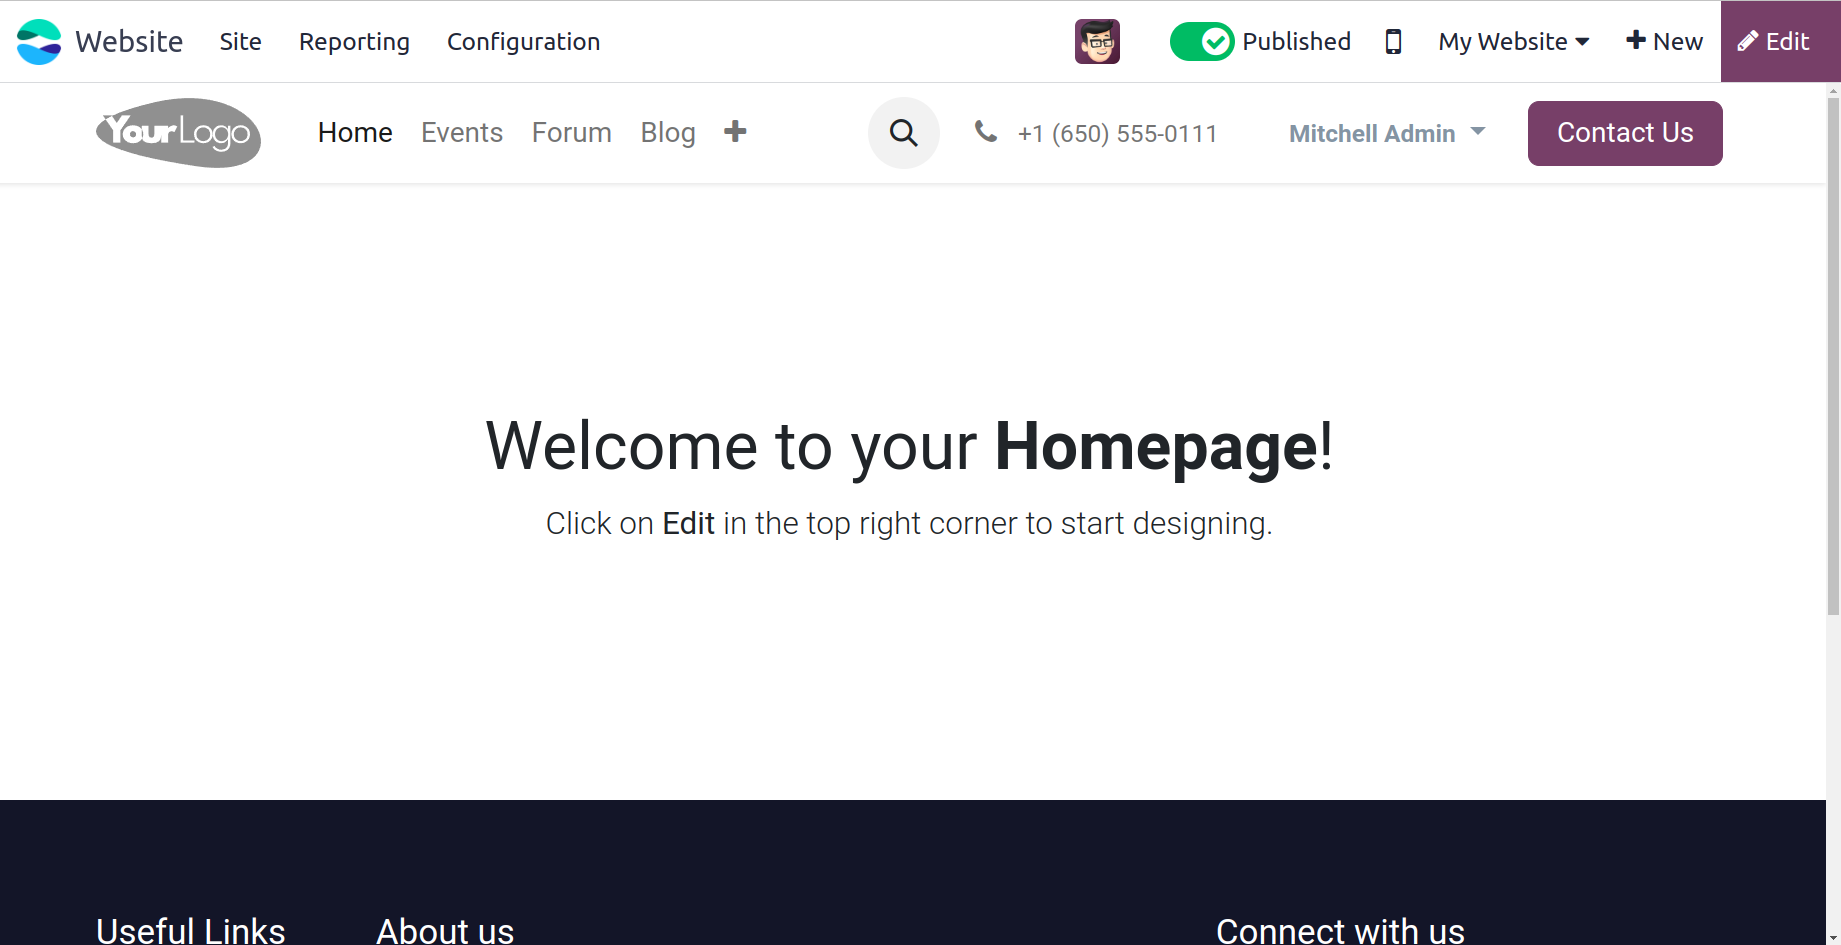
The eCommerce dashboard, as seen in the above image, will be displayed on the Odoo17 Website module's home dashboard window. Make sure your system has the eCommerce module loaded as well.
Multiple Websites
With the aid of the newest features and tools, the complex Website module of the Odoo ERP provides you with excellent support for managing many websites for your business. Because of its unique features and high degree of customization, you may conceptualize, develop, design, and oversee several corporate websites with just one system. Usually, managing multiple websites at once is a laborious operation that requires a significant amount of time to complete. However, managing several websites in your system is now simple thanks to the development of the Odoo Website module. Each website will have its own theme, design, operating parameters, header, footer, pages, and brandings in addition to the many website management systems operating independently. Additionally, the software lets you configure several languages for various websites.
You can use the Odoo 17 Website module's Settings window to set up different websites for your business. You can navigate to Website -> Configuration -> Settings to view the Settings menu.
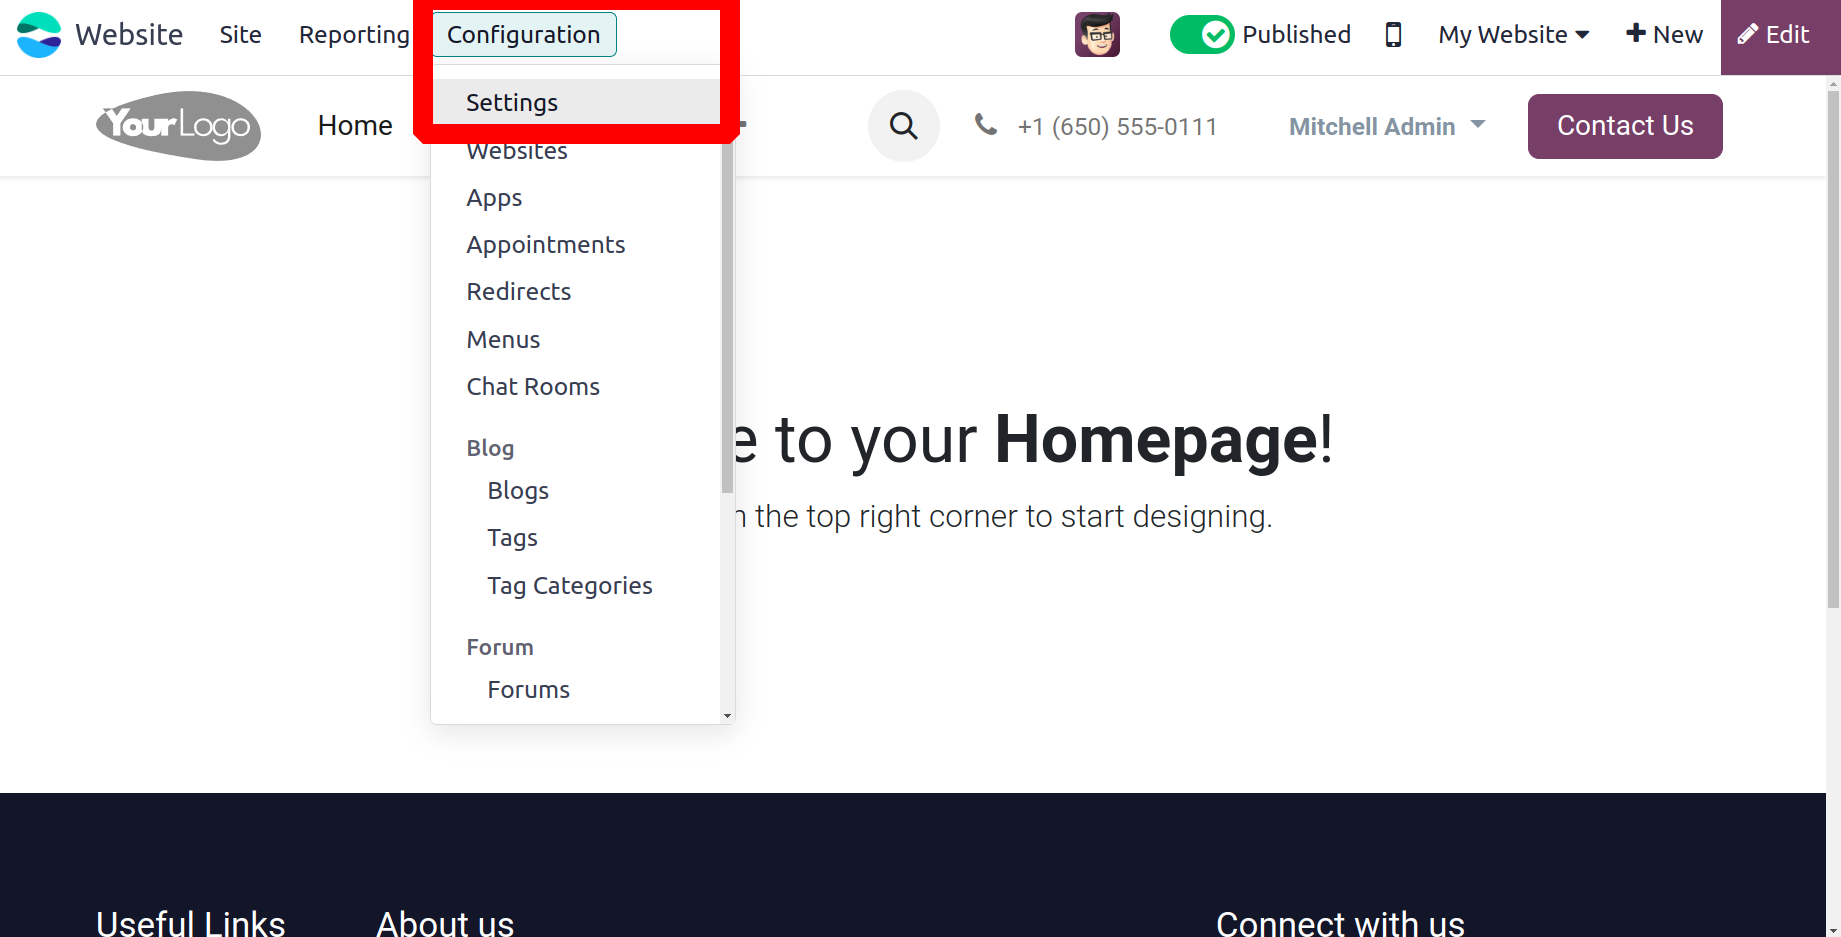
The Website Settings window will appear as seen in the image below, when you click on the Settings menu.
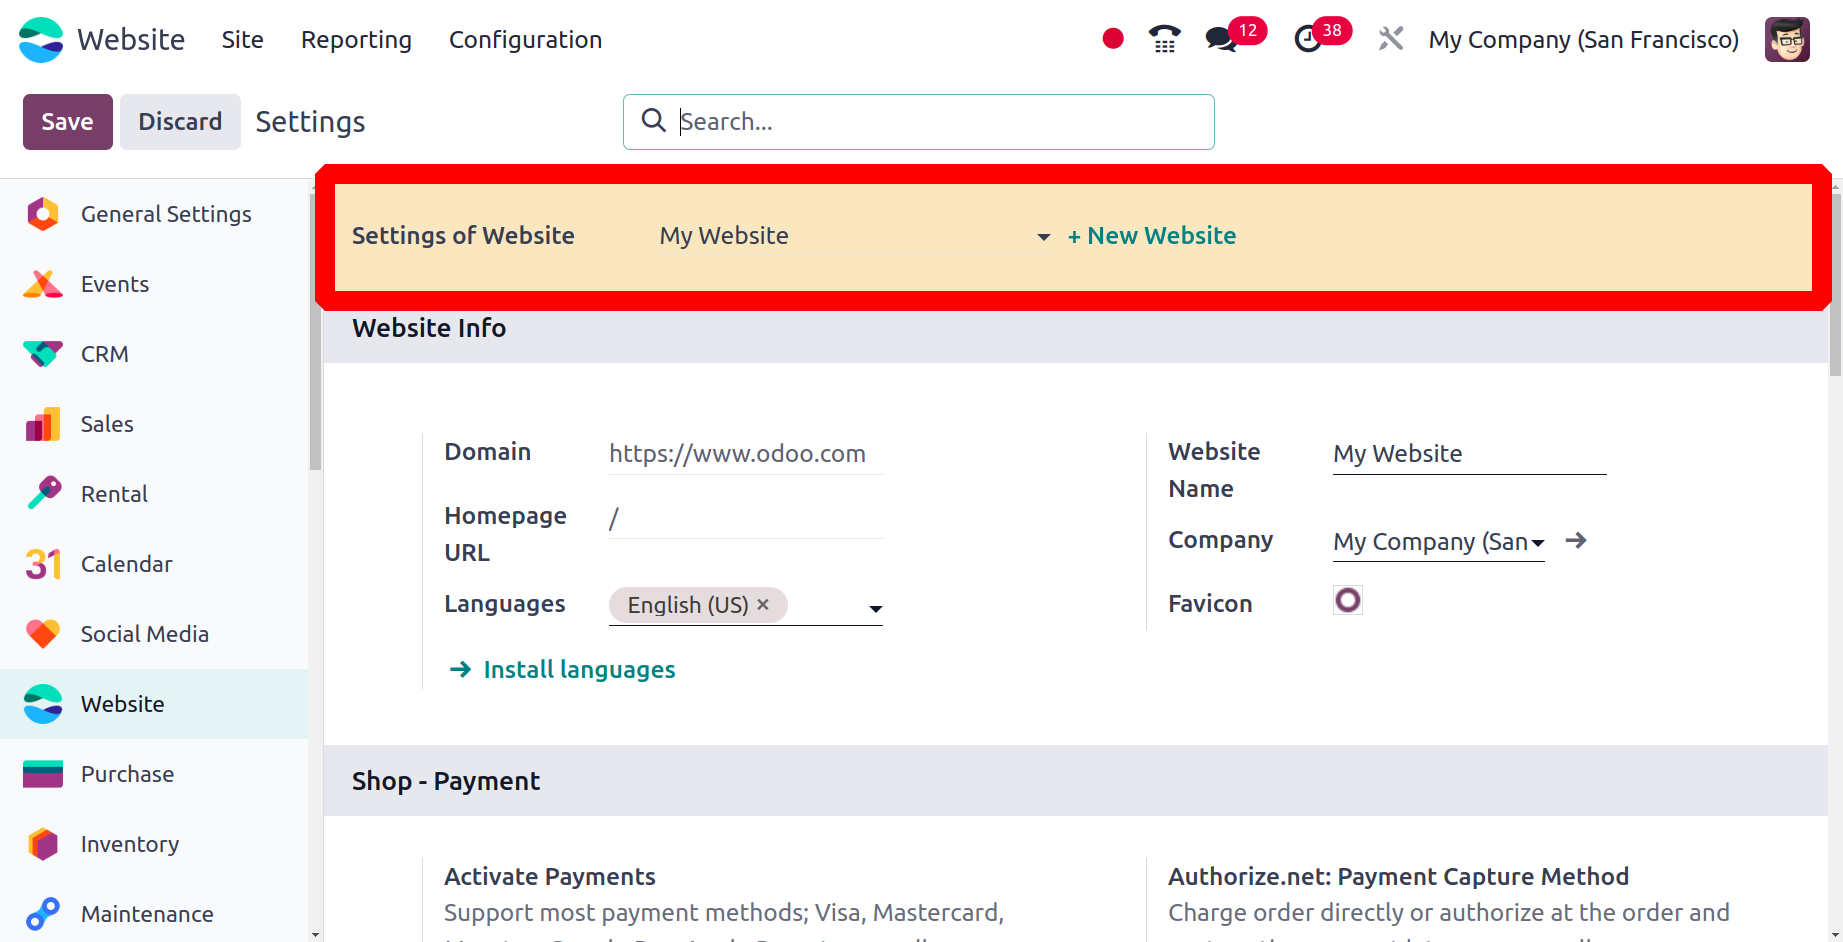
You can see the +NEW WEBSITE menu in this Setting window beneath the Select the Website to Configure section. This menu can be selected to display the pop-up window for building a new website. The pop-up window is seen in the following picture.
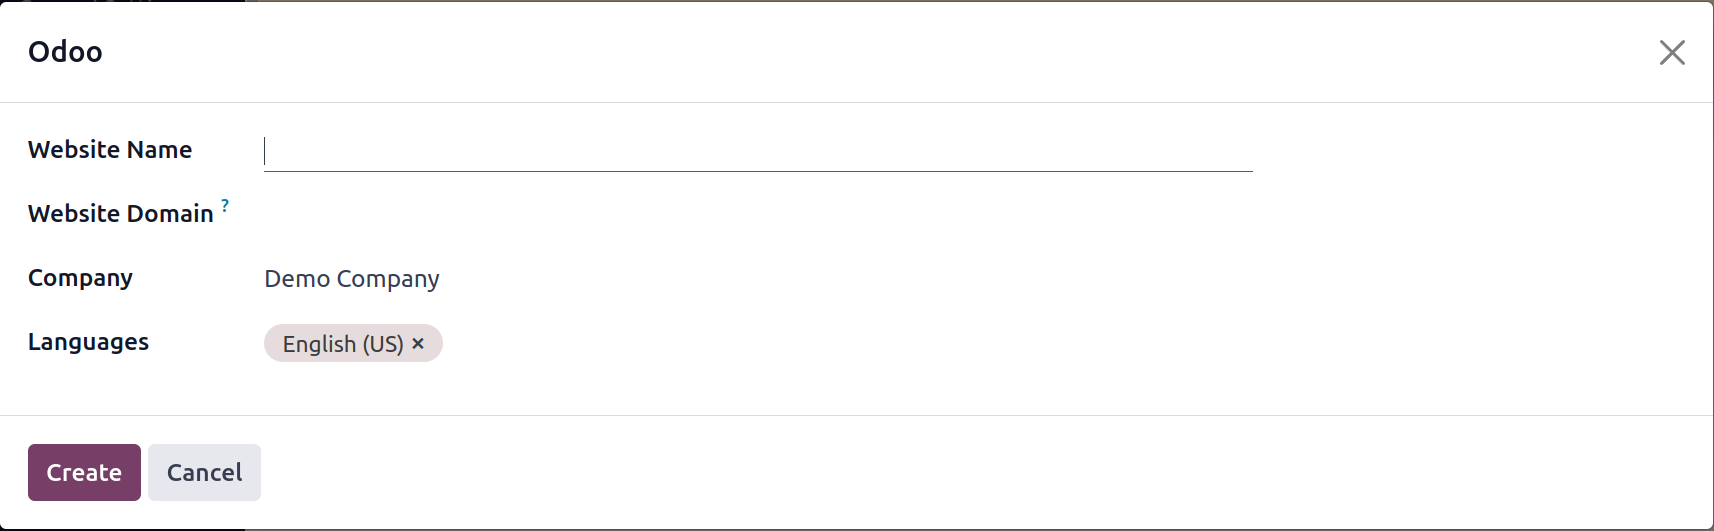
You can enter the Website Name and Website Domain in this pop-up window. The list of companies defined on the platform can be used to identify the responsible company for this specific website. You can click the Create button after entering these details. You will now see a new website configurator window with several messages shown, such as All set to create the ideal website? Don't bother and begin over.
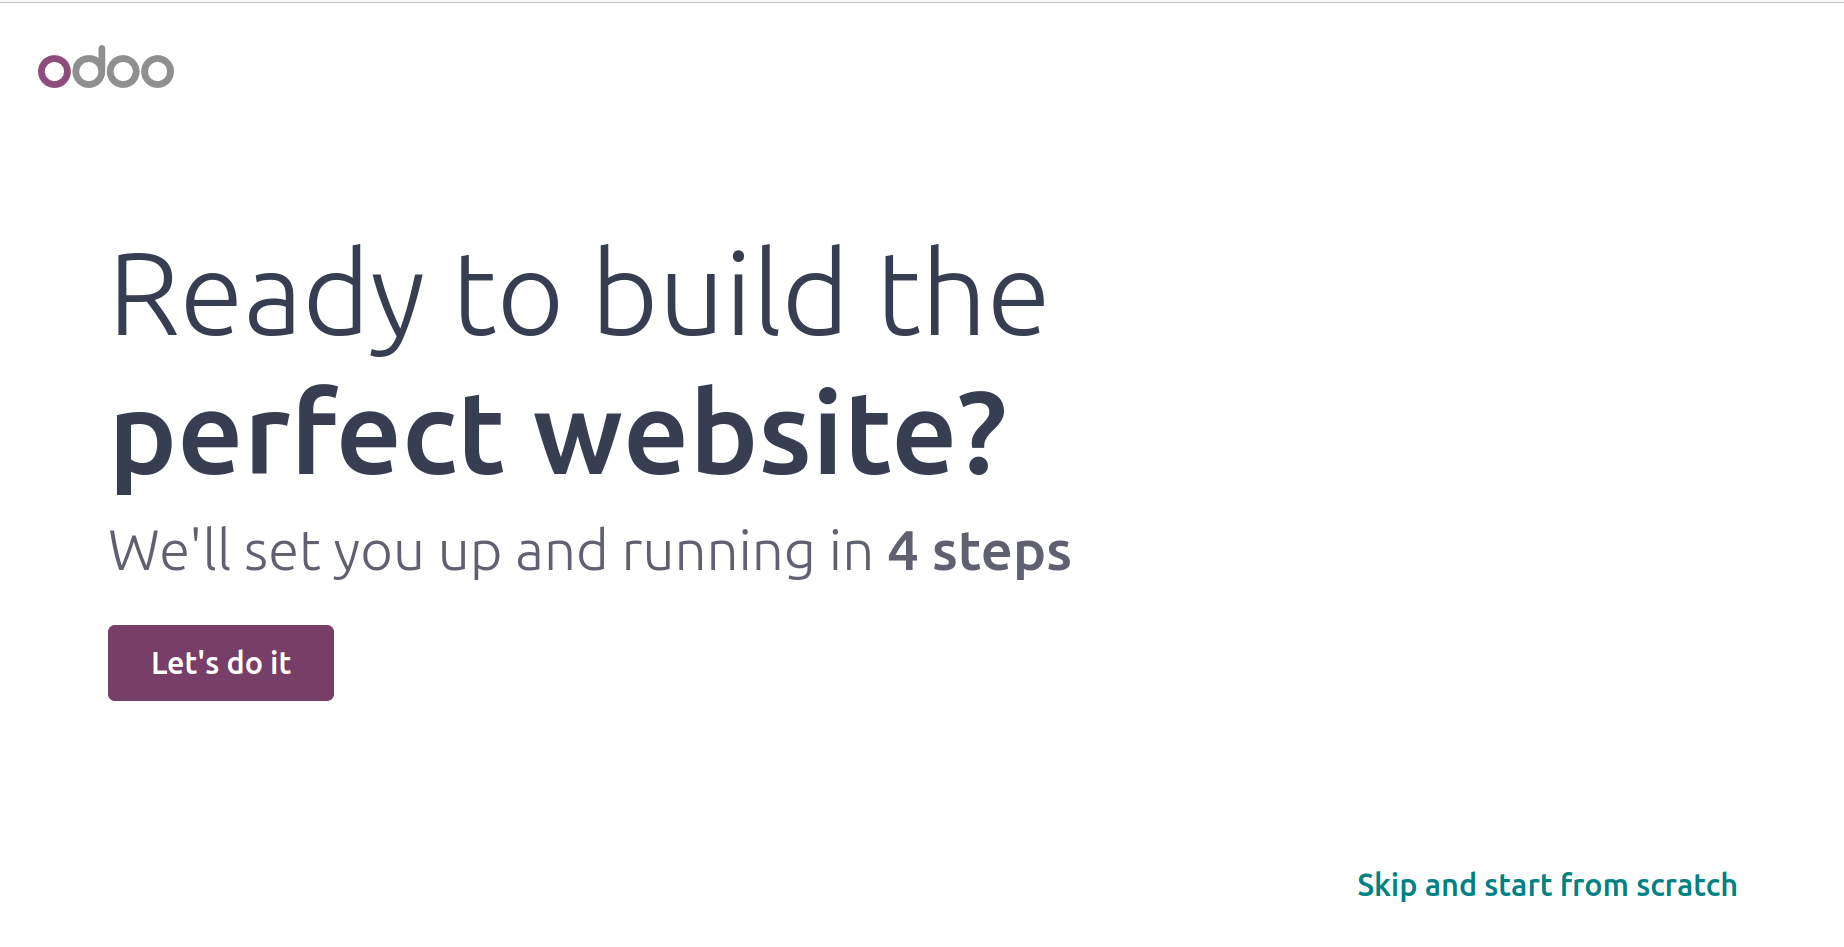
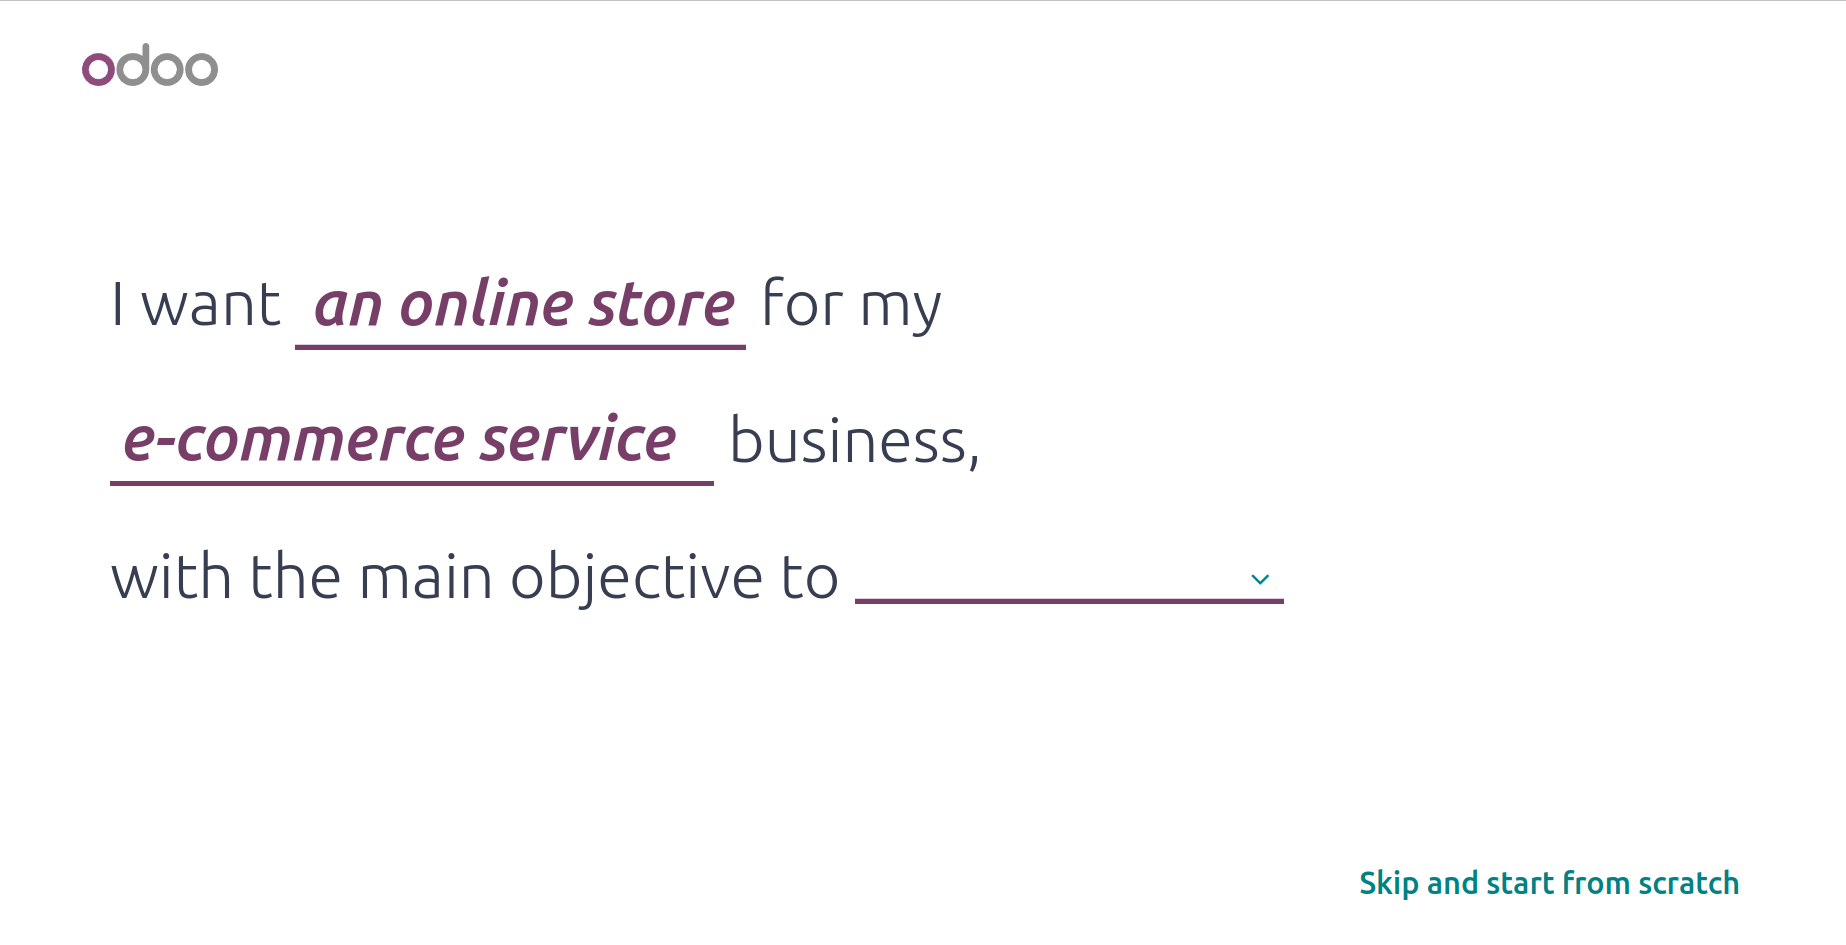
The Let's do it button will cause a new window to appear where you may specify the kind of website and its objective. Additionally, you may specify the primary goal of launching your new website in the window (as we illustrated below). Even if it is easier for those who lack experience with website creation and design, the new website configurator in the Odoo17 Website module is a great resource for all kinds of businesses. Every time you launch the module to create a new website, a form with your company's details will appear.
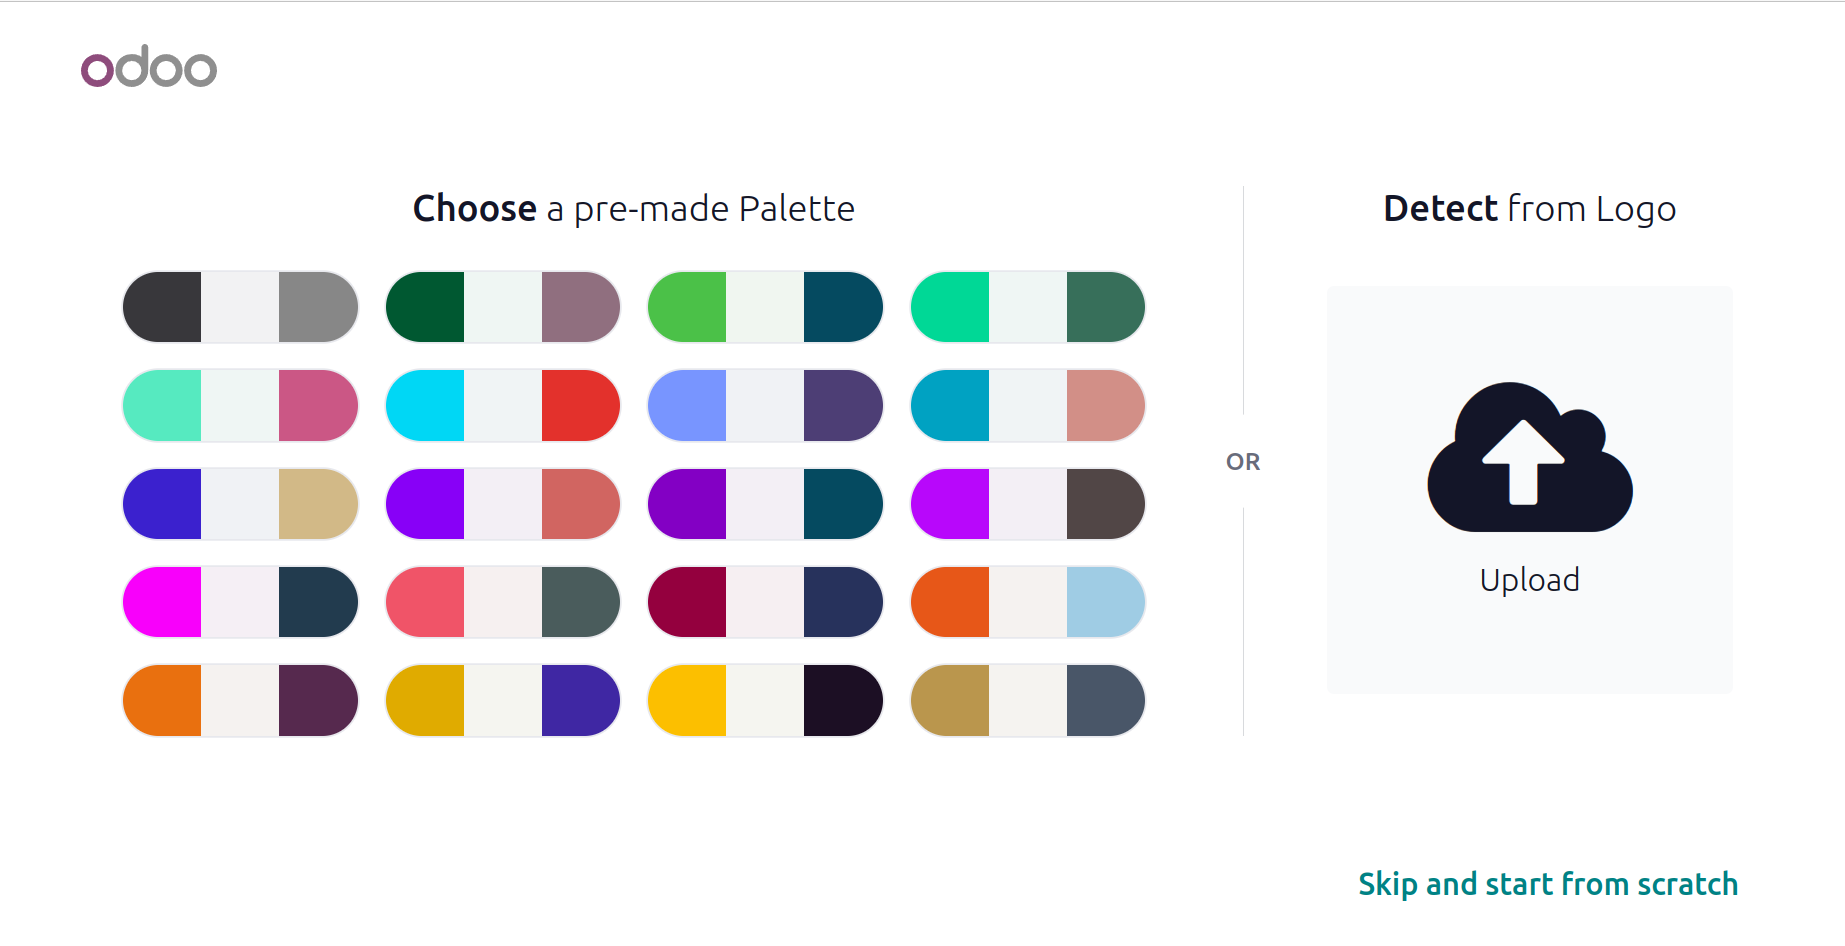
After that, you'll be taken to a new window where you may select a pre-made color scheme for your new website, which will enhance its aesthetic appeal and aid in establishing your brand. You can even upload your logo if you're not choosing from a pre-made palette; Odoo17 can assist you in identifying it from the uploaded logo based on this logo. By selecting the Upload arrow, you can upload your logo.
You can choose the pages and features for your website from the list of pages and features that is supplied after selecting the palette. It is not necessary to create every page by hand. Below is a picture of the window.
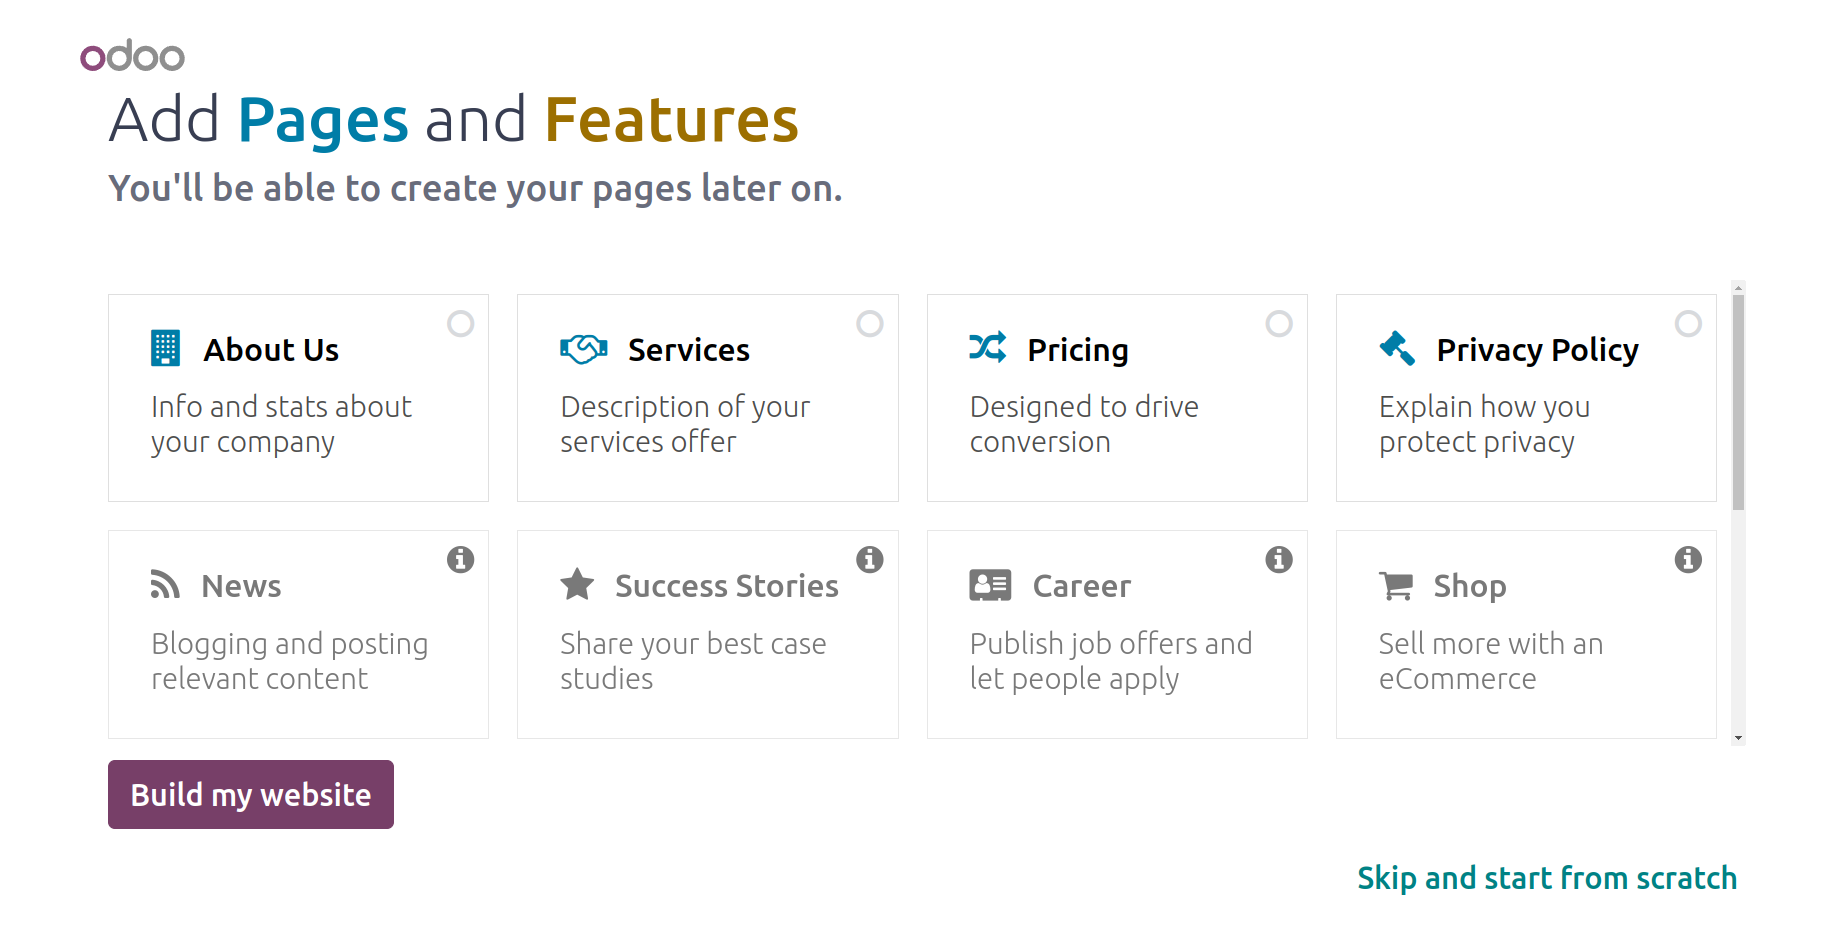
After it loads, you may create your ideal page in 7 easy stages by following the guide. This is the main page of your newly created website. In this case, Odoo17 has already provided the website's structure in the left section.
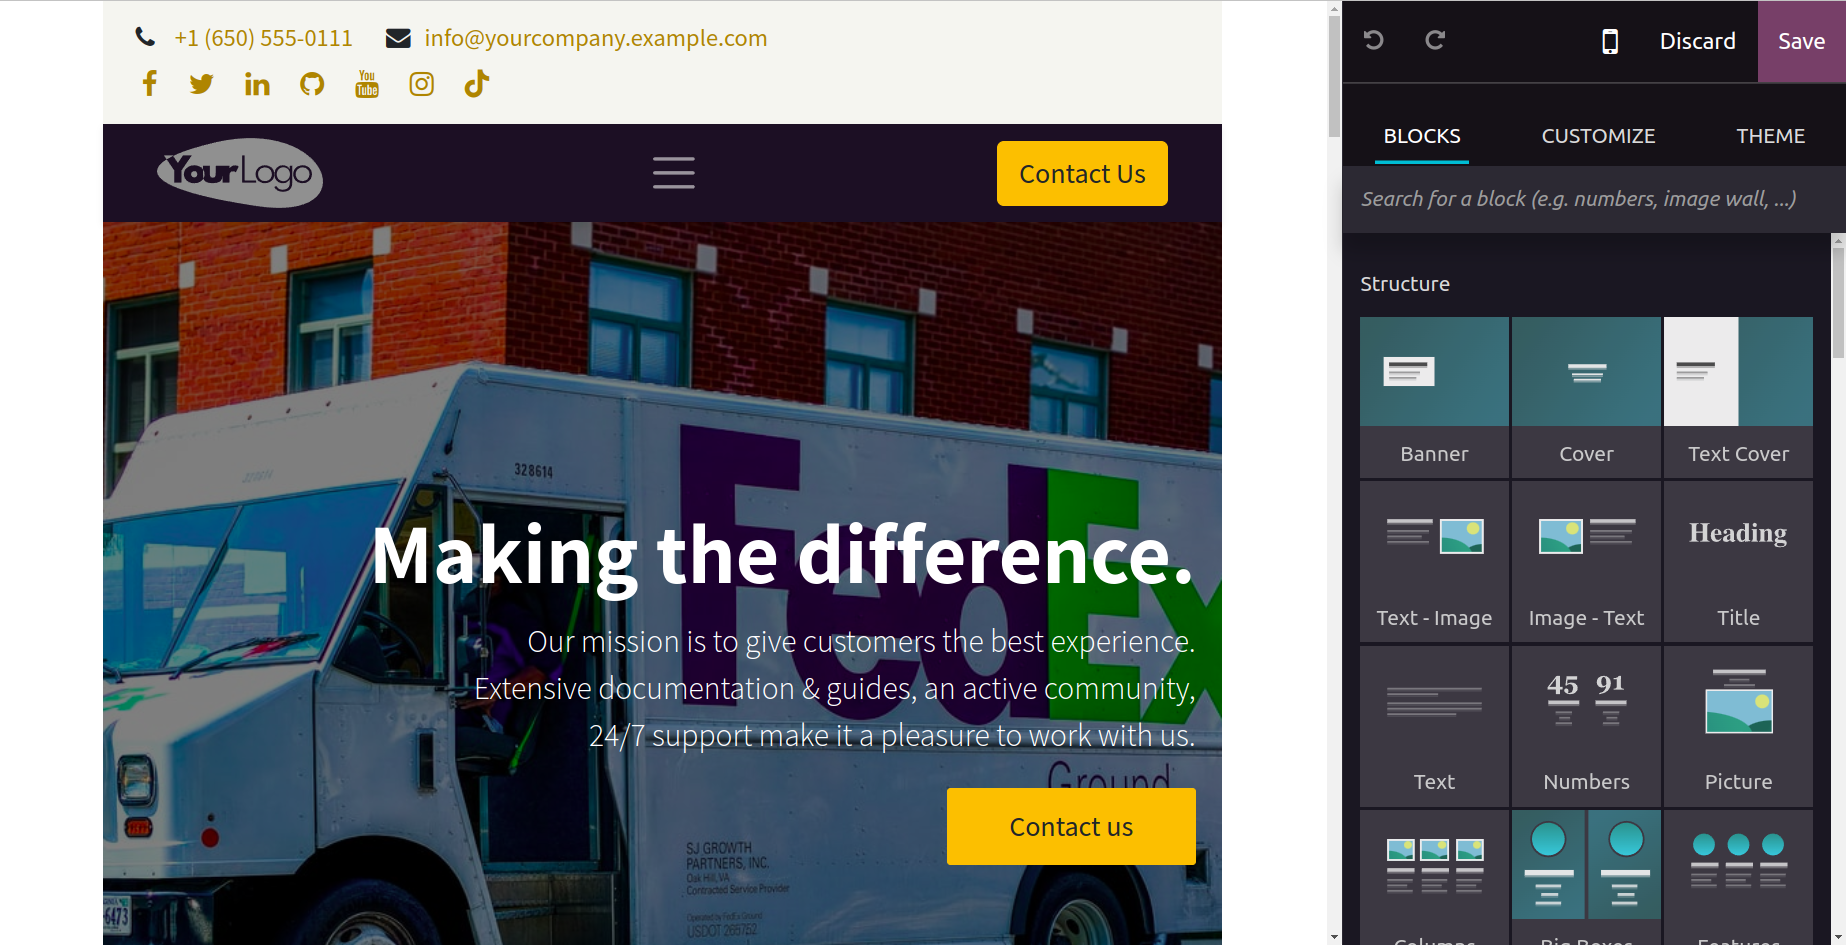
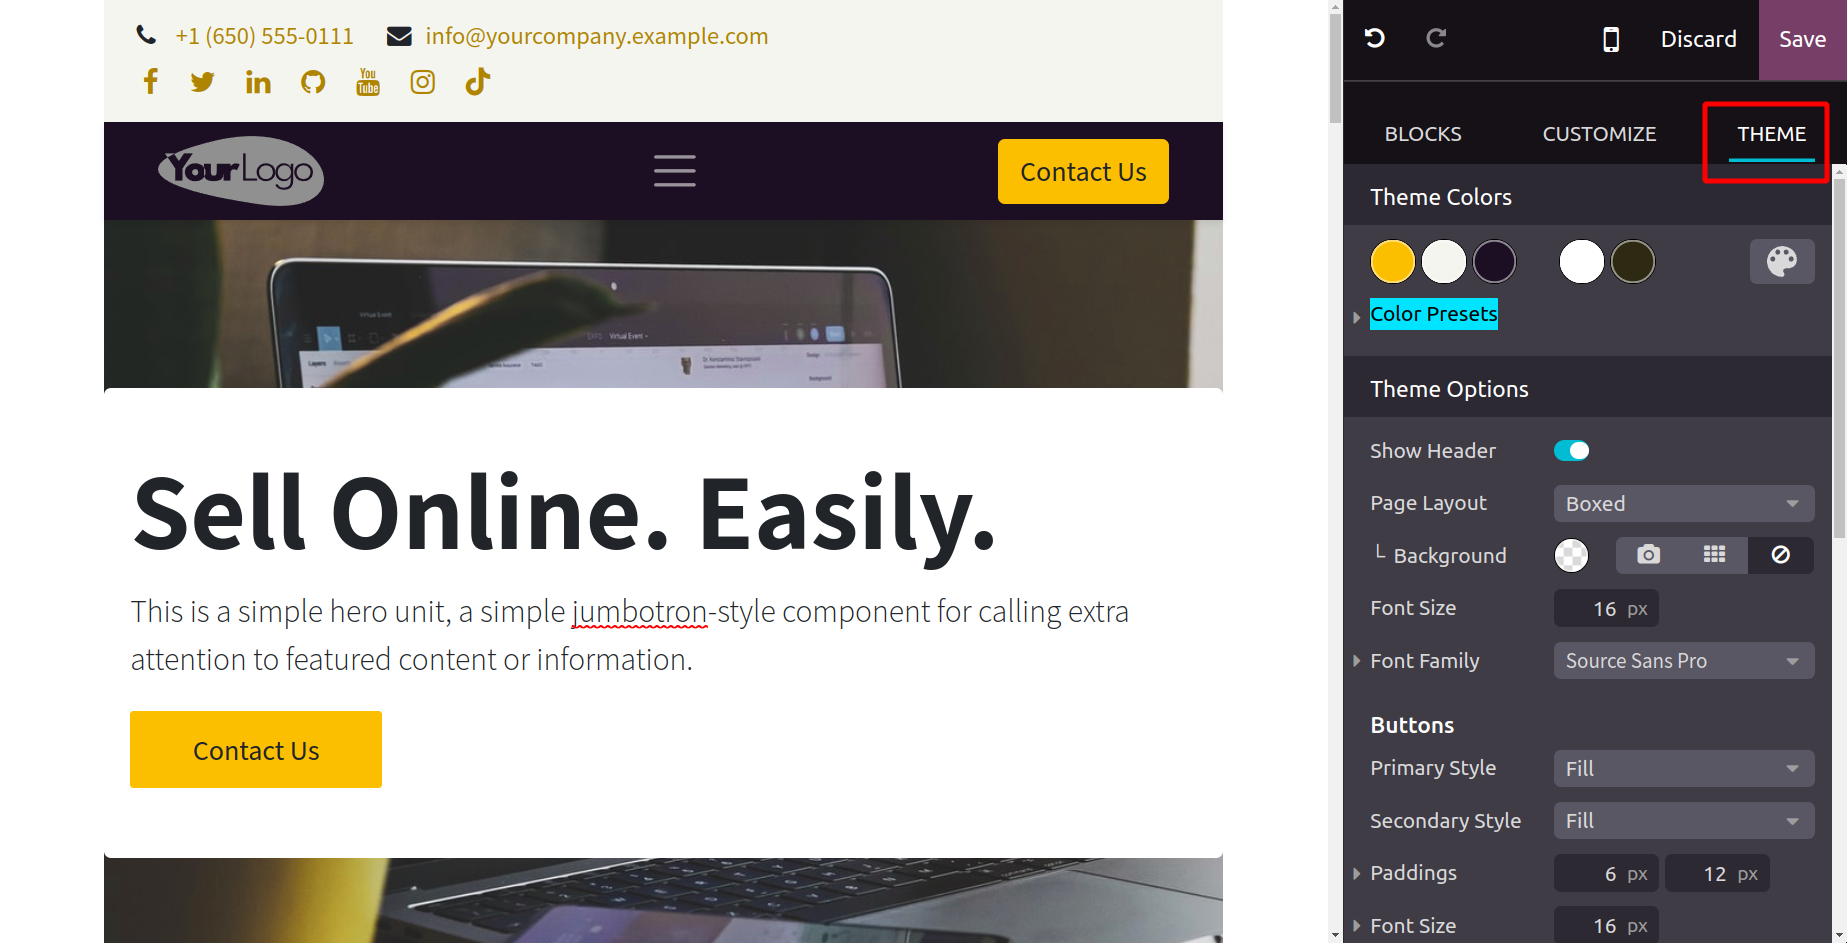
The readily draggable and droppable building blocks will be shown in the window's right section. From the Blocks area, you can select appropriate blocks. Once a block has been chosen on your page, you can style it by clicking the CUSTOMIZE button.
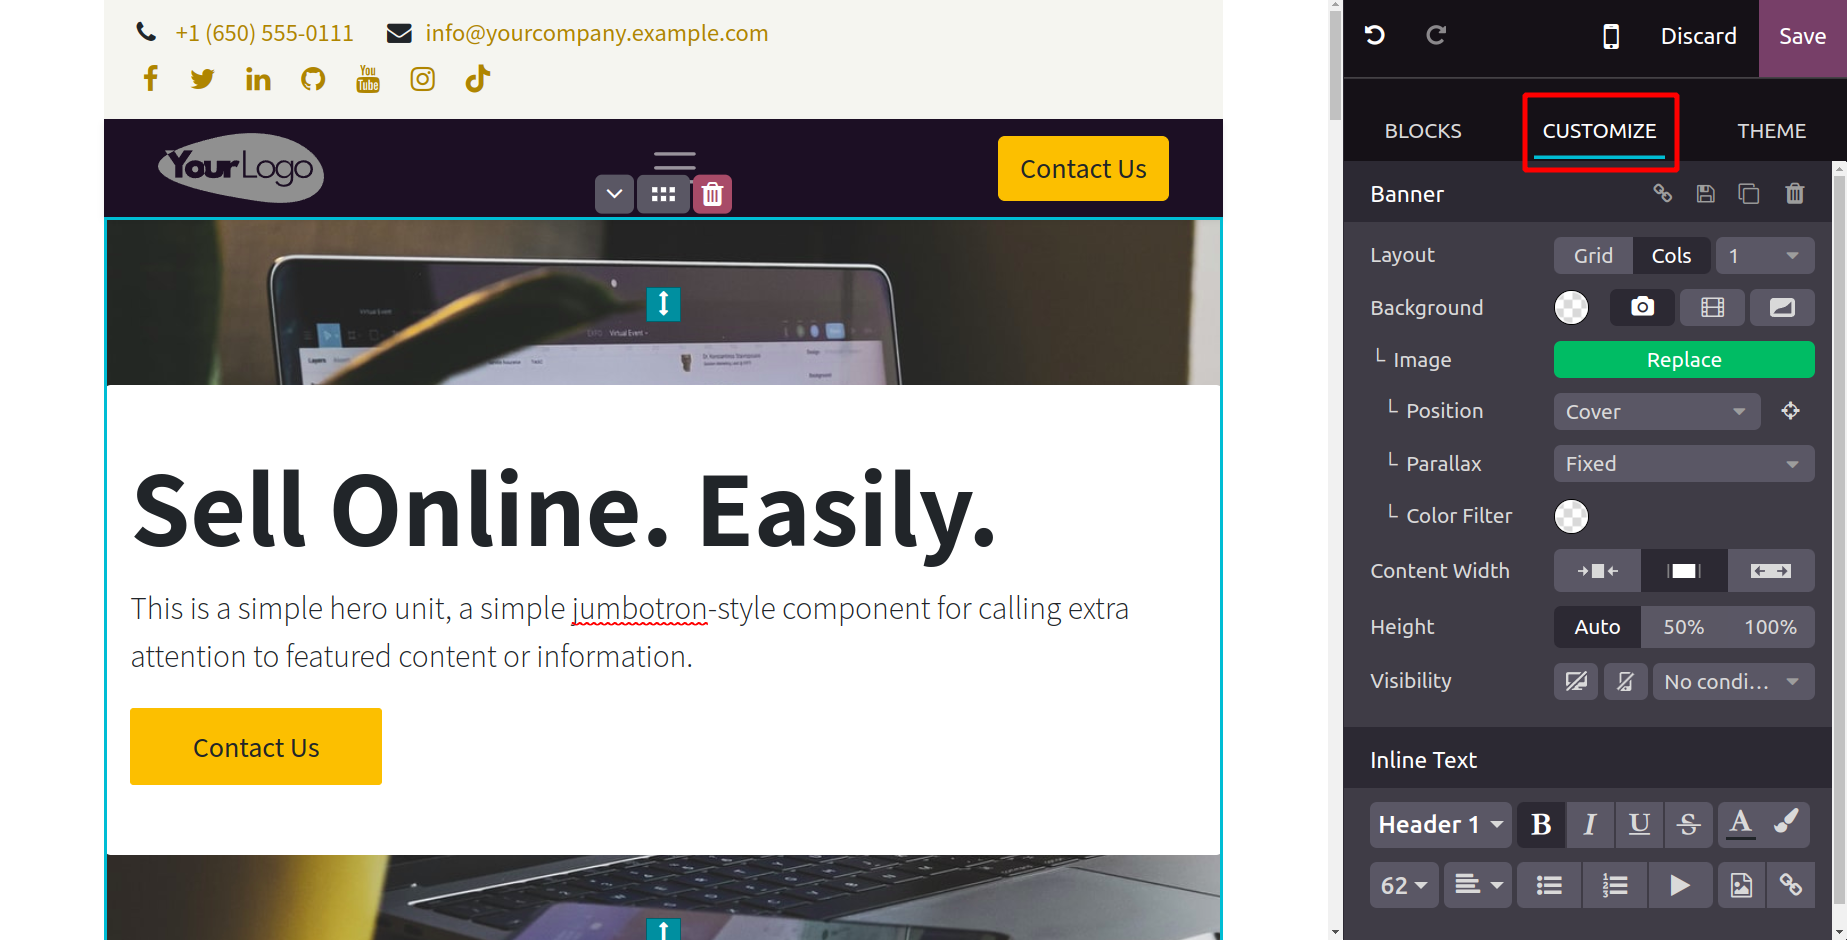
You can click on the available THEME button to change your theme. You will now illustrate the possibilities for developing and personalizing new themes.
It's now time to talk about managing several languages in the Odoo17 Website module.
Managing Multi-Languages
The widely acknowledged and approved Odoo17 ERP ought to take localization into account and be obliged to grant authorization for the incorporation of multiple languages on its website. Odoo17 is popular all across the world since it consistently supports these amenities. Additionally, the ability to view and access the firm website in the users' native tongues is a major benefit of the many languages operation.
The Odoo17 Website module's Settings page is another place to customize these settings for configuring the website's numerous languages.
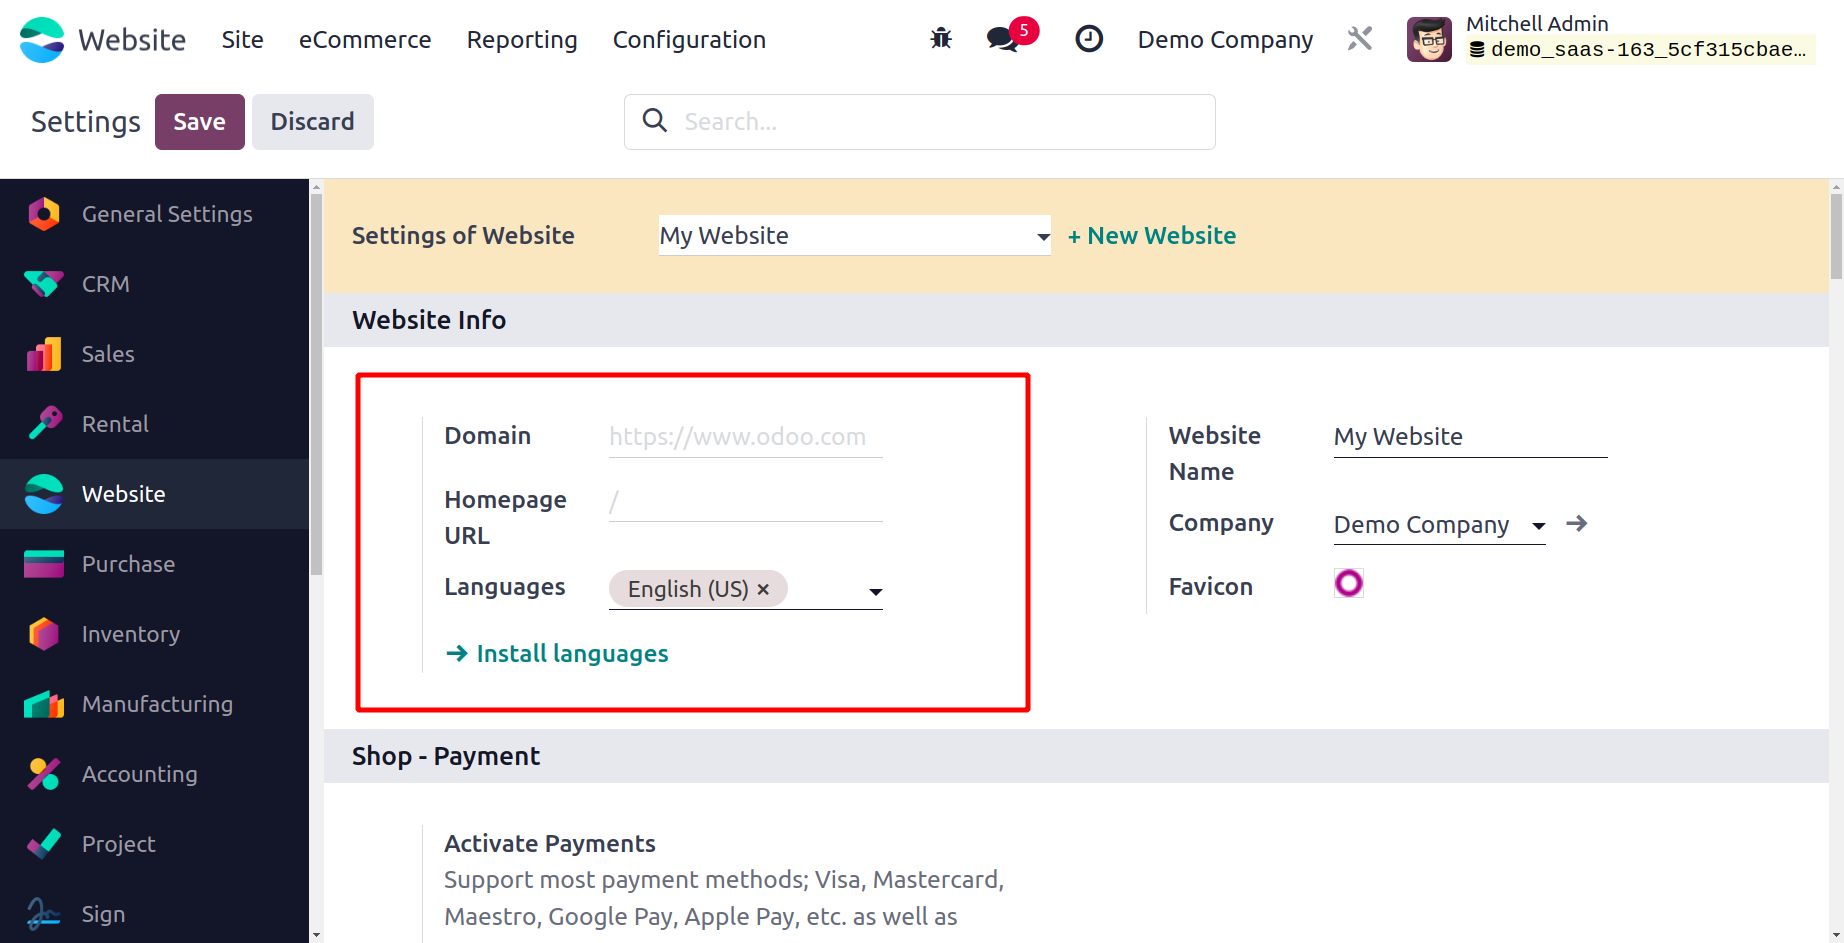
Languages can be changed under the Settings window's Website section, as shown in the image above. The Languages and Default option will show the language that is available on your website. Select the Install languages option to add other languages to your system. When you select this option, a pop-up window similar to the one in the image below will appear.
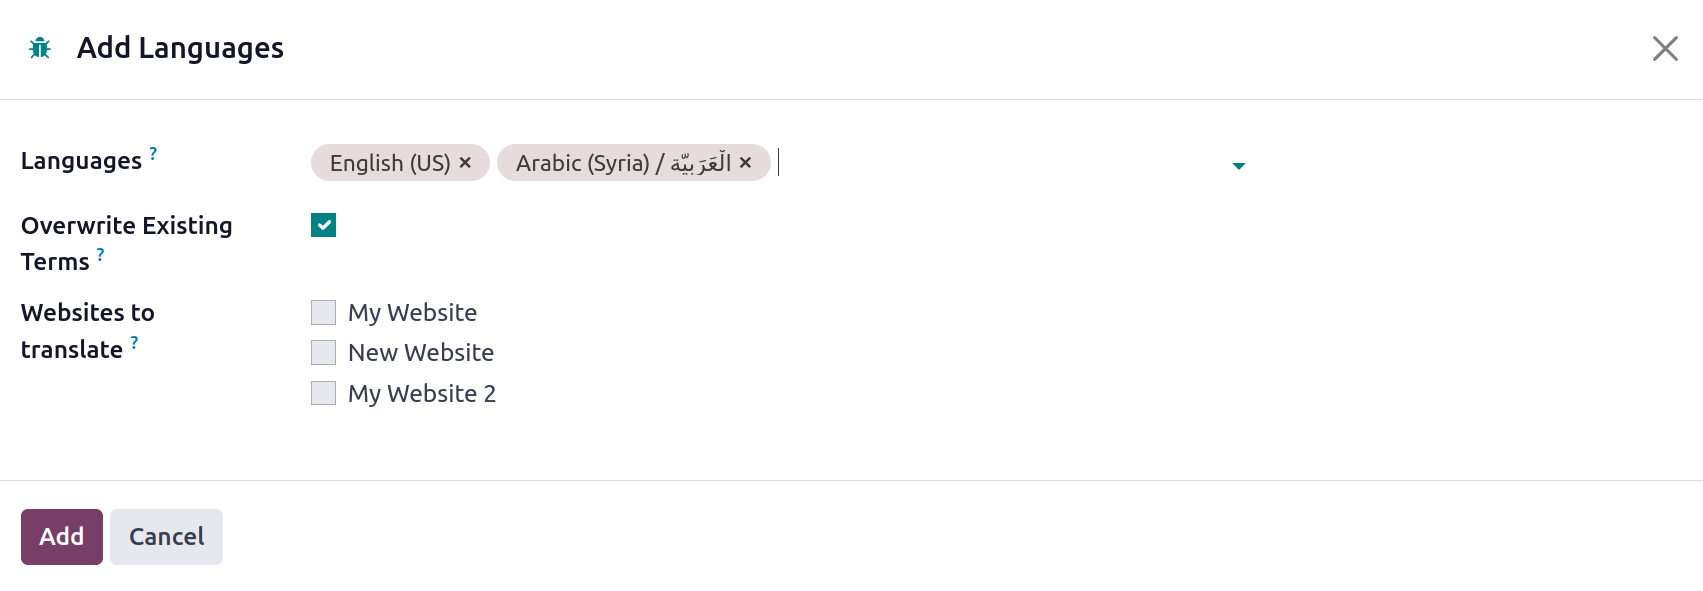
You can use the drop-down menu to describe the language in this pop-up box. After that, you can choose the website you wish to translate. When you're done, you can select the ADD button.
In addition to this feature, Odoo gives you the ability to change the language from the homepage of the website. A language option that is highlighted in the image below may be seen at the bottom of the website's main page.
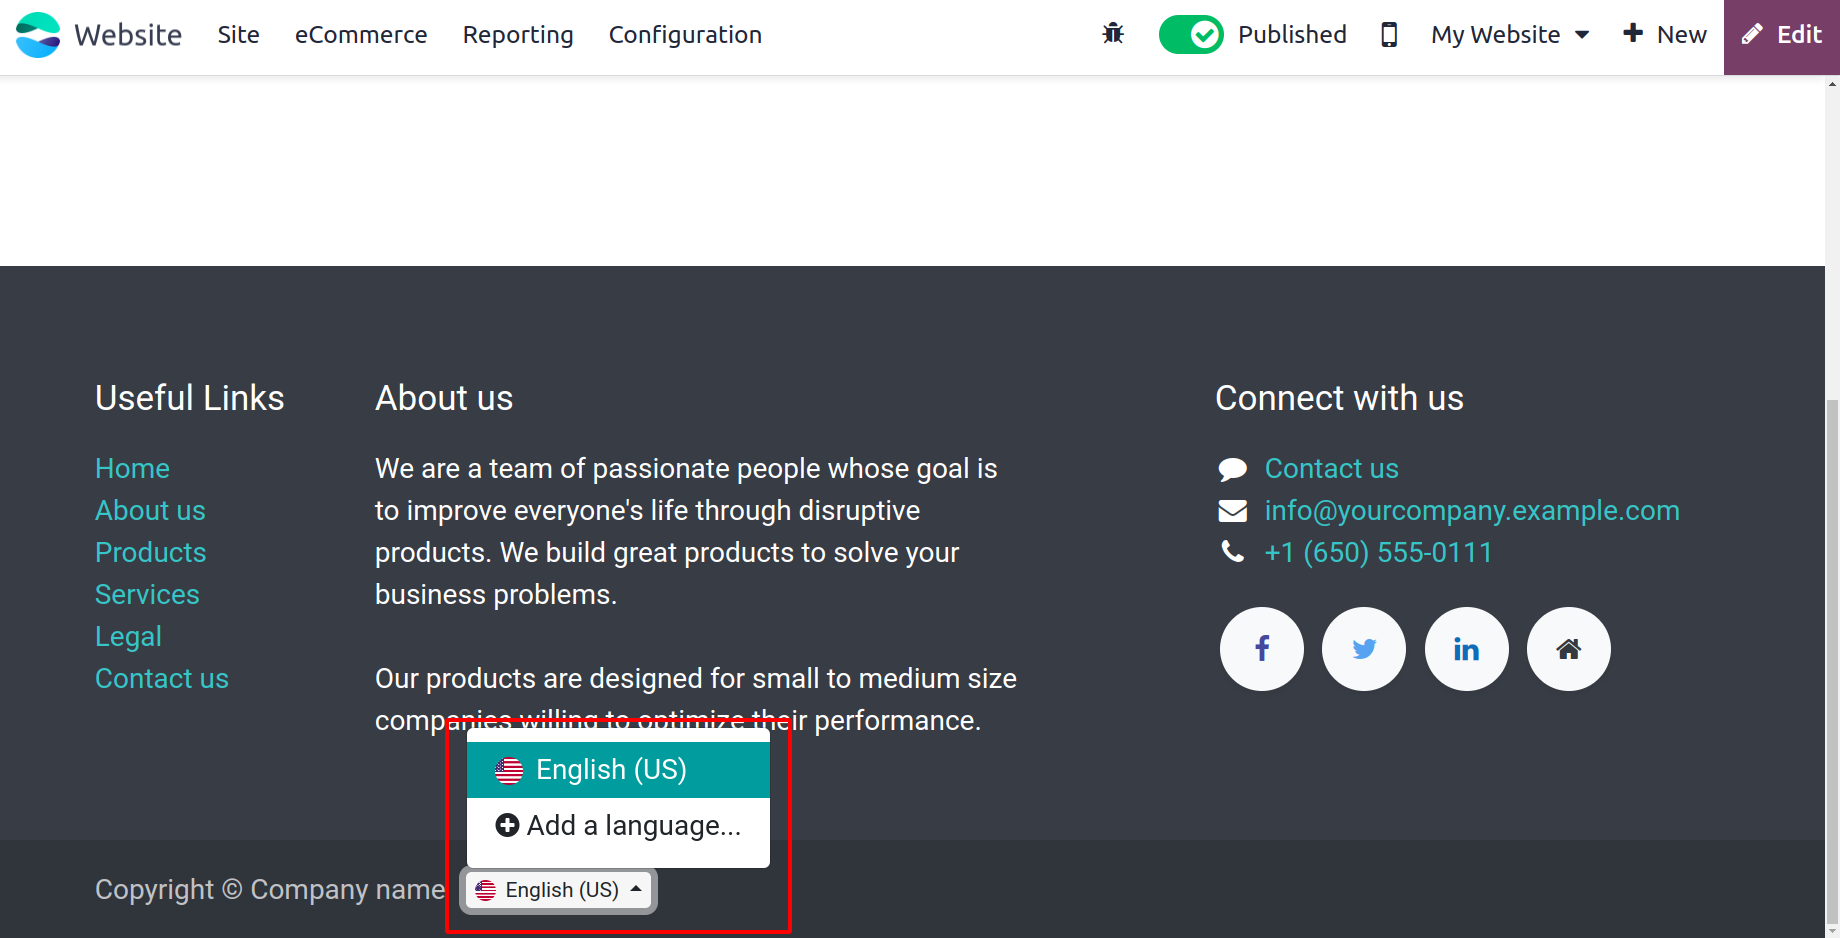
You can select any of the already supported languages from this menu, or you can click the Add a language option to create a new language.
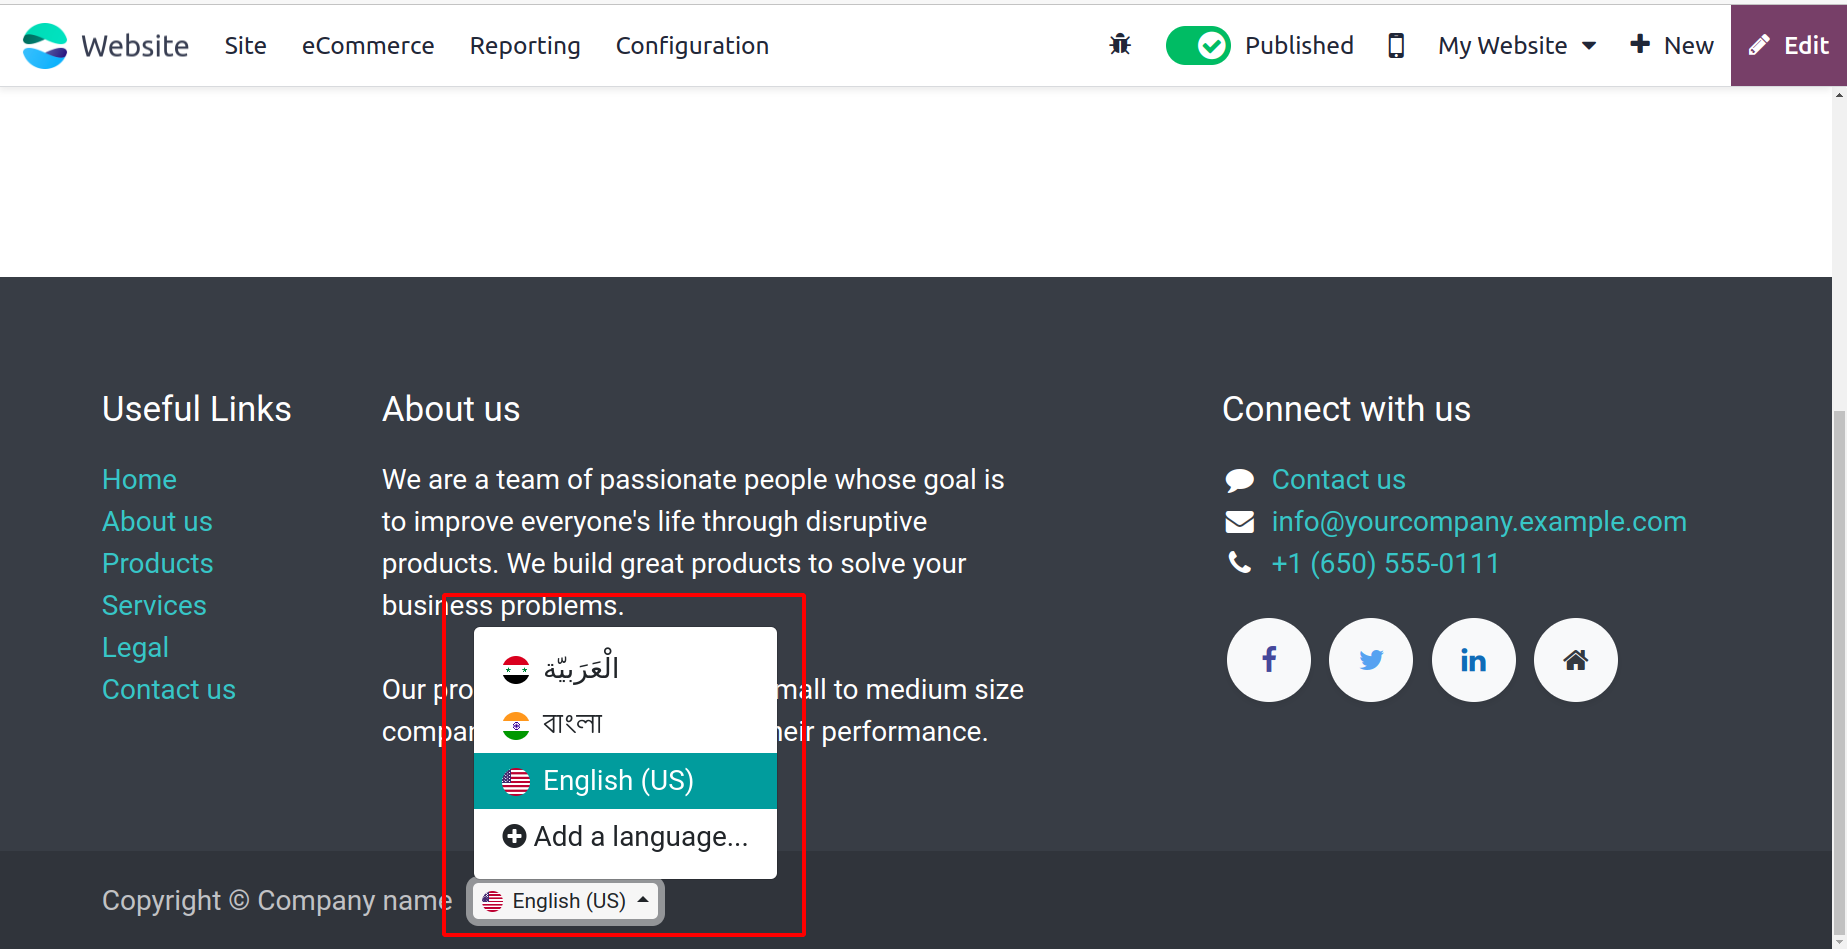
You will be taken to the Add Language pop-up box that we previously covered when you select the Add a language option.
Now that we know how Odoo17 helps you manage several languages on your website, let's talk about creating a page for your website.
Design your website page
The Odoo17 Website module is the ideal solution for creating a website for your company. You can use the platform to design and develop webpages for your website that meet your needs. You must access the Odoo17 website module's home window, as seen in the figure below, in order to create a web page for your website.
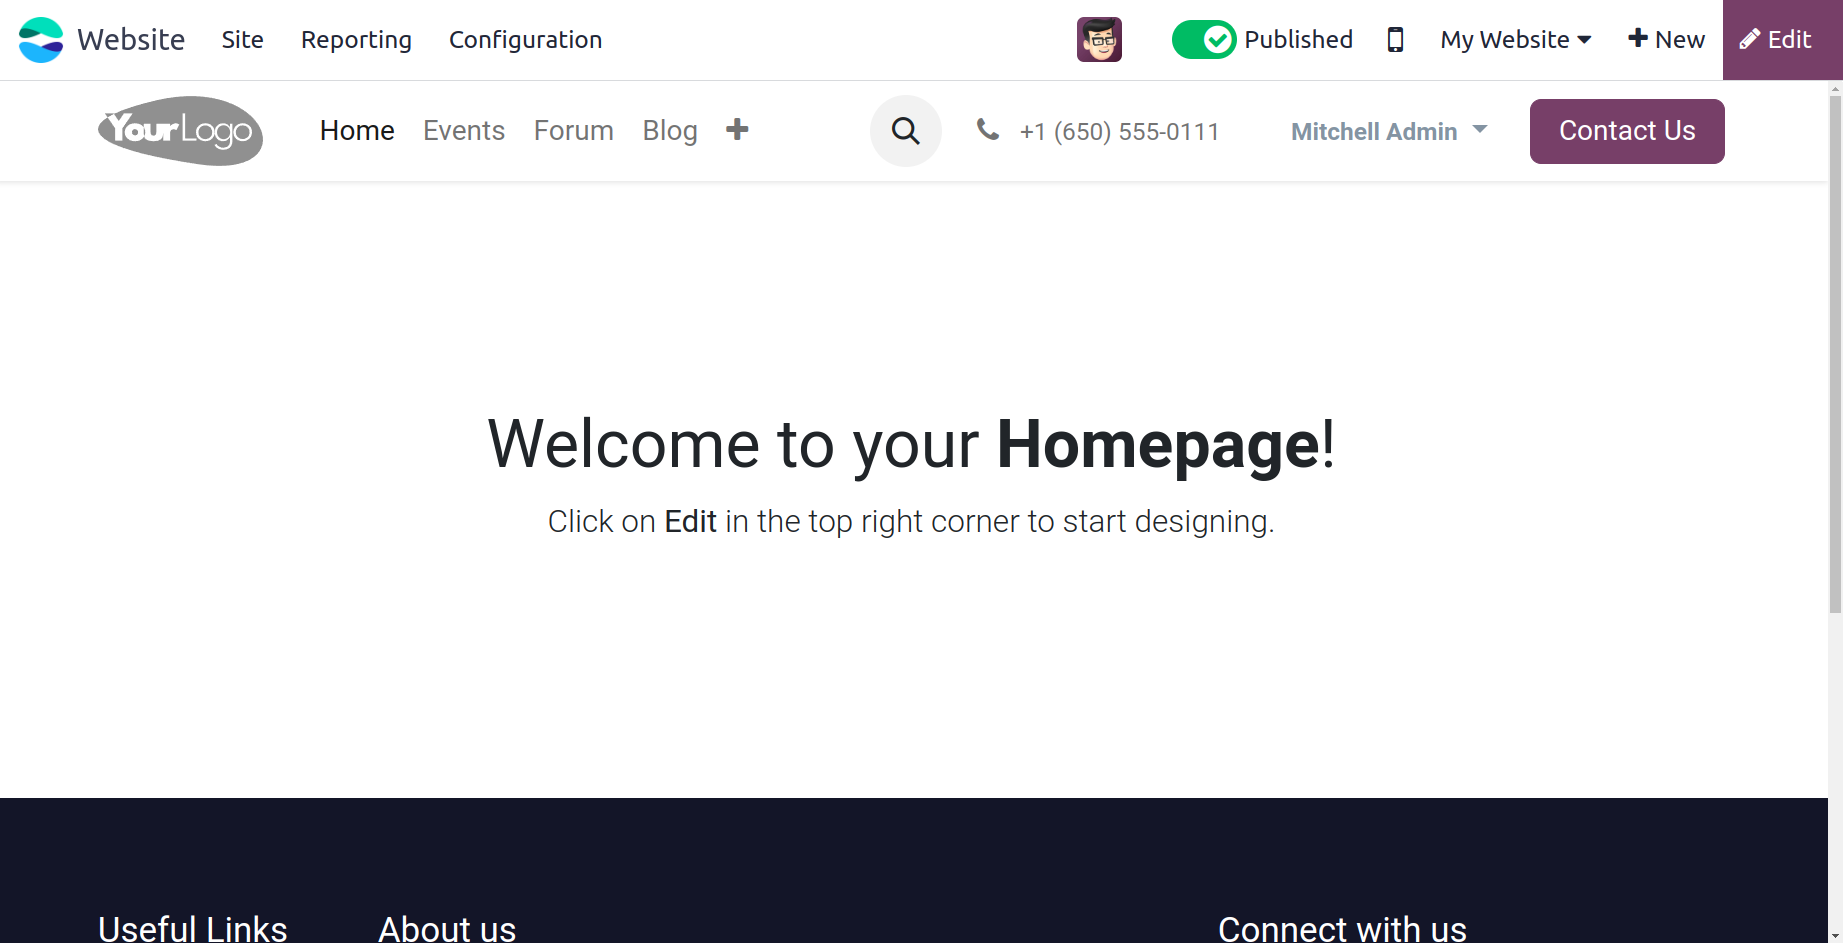
If you are utilizing more than one website on the platform, you can select the necessary website from the home page shown in the above image. You can click the My Website icon to examine these alternatives. Next, you'll draw the names of the websites as they appear in the figure below.
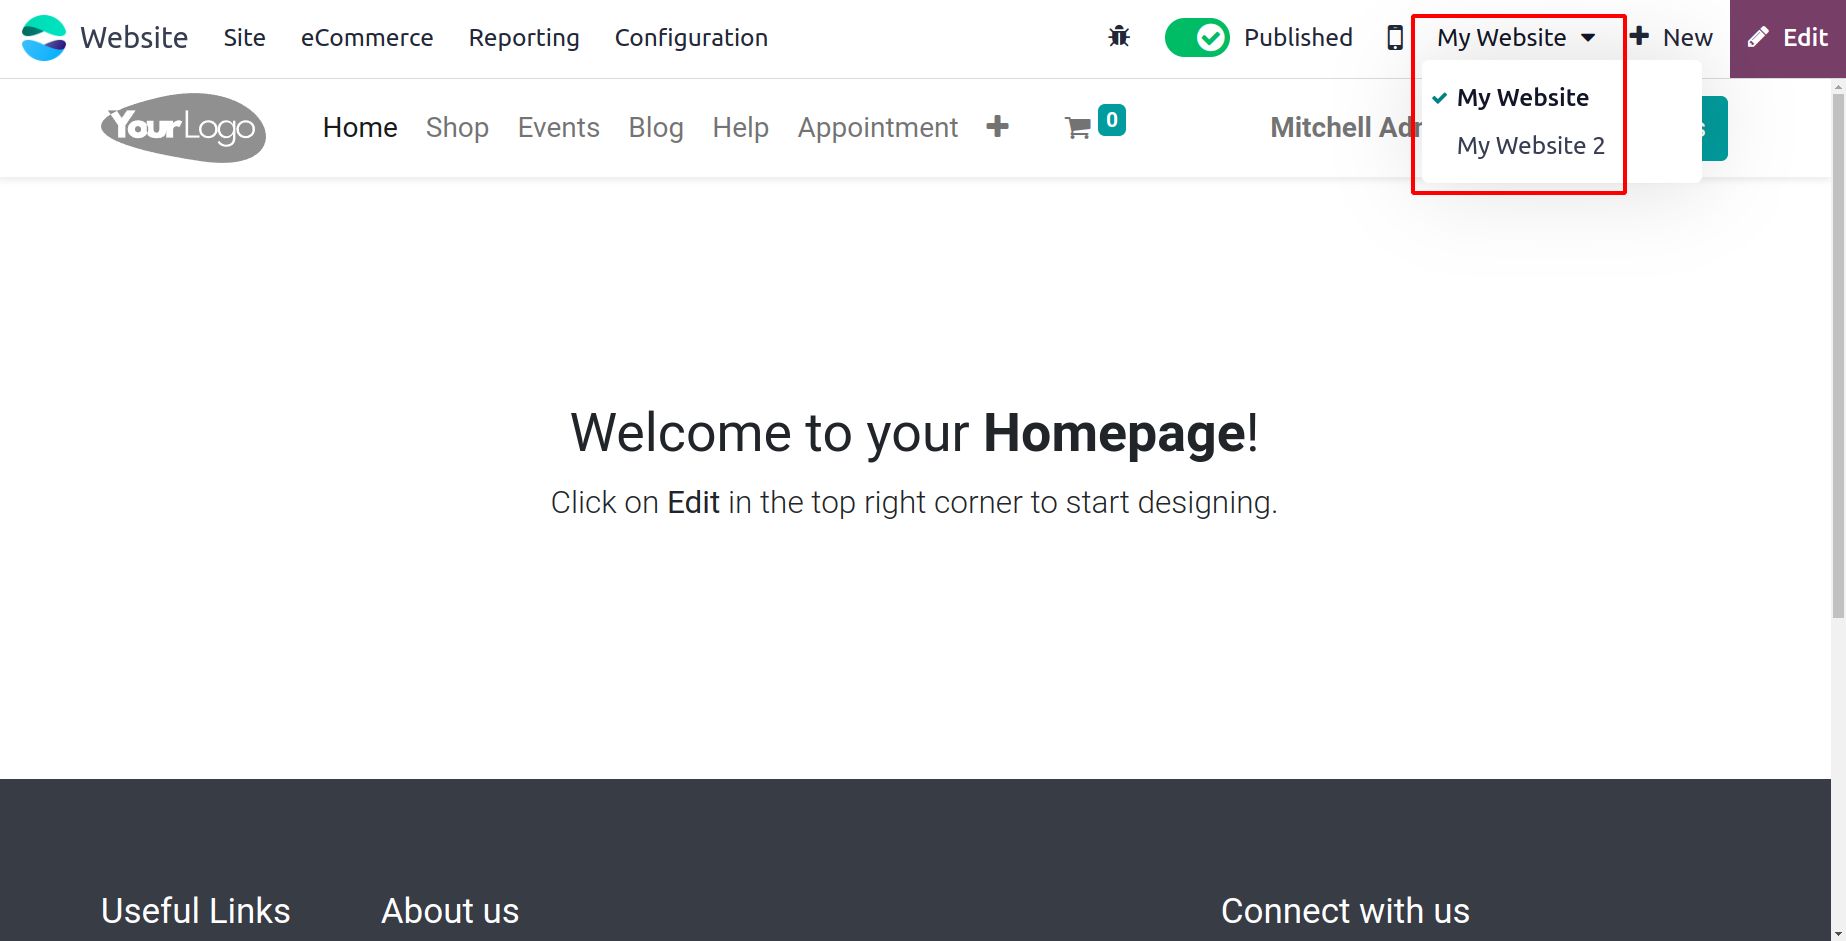
Additionally, you may customize and edit the website pages by clicking the Edit button that appears in the upper right corner of the window. The window will now switch to editing mode, allowing you to use the editing tools on the left side of the window to build the website page on the left.
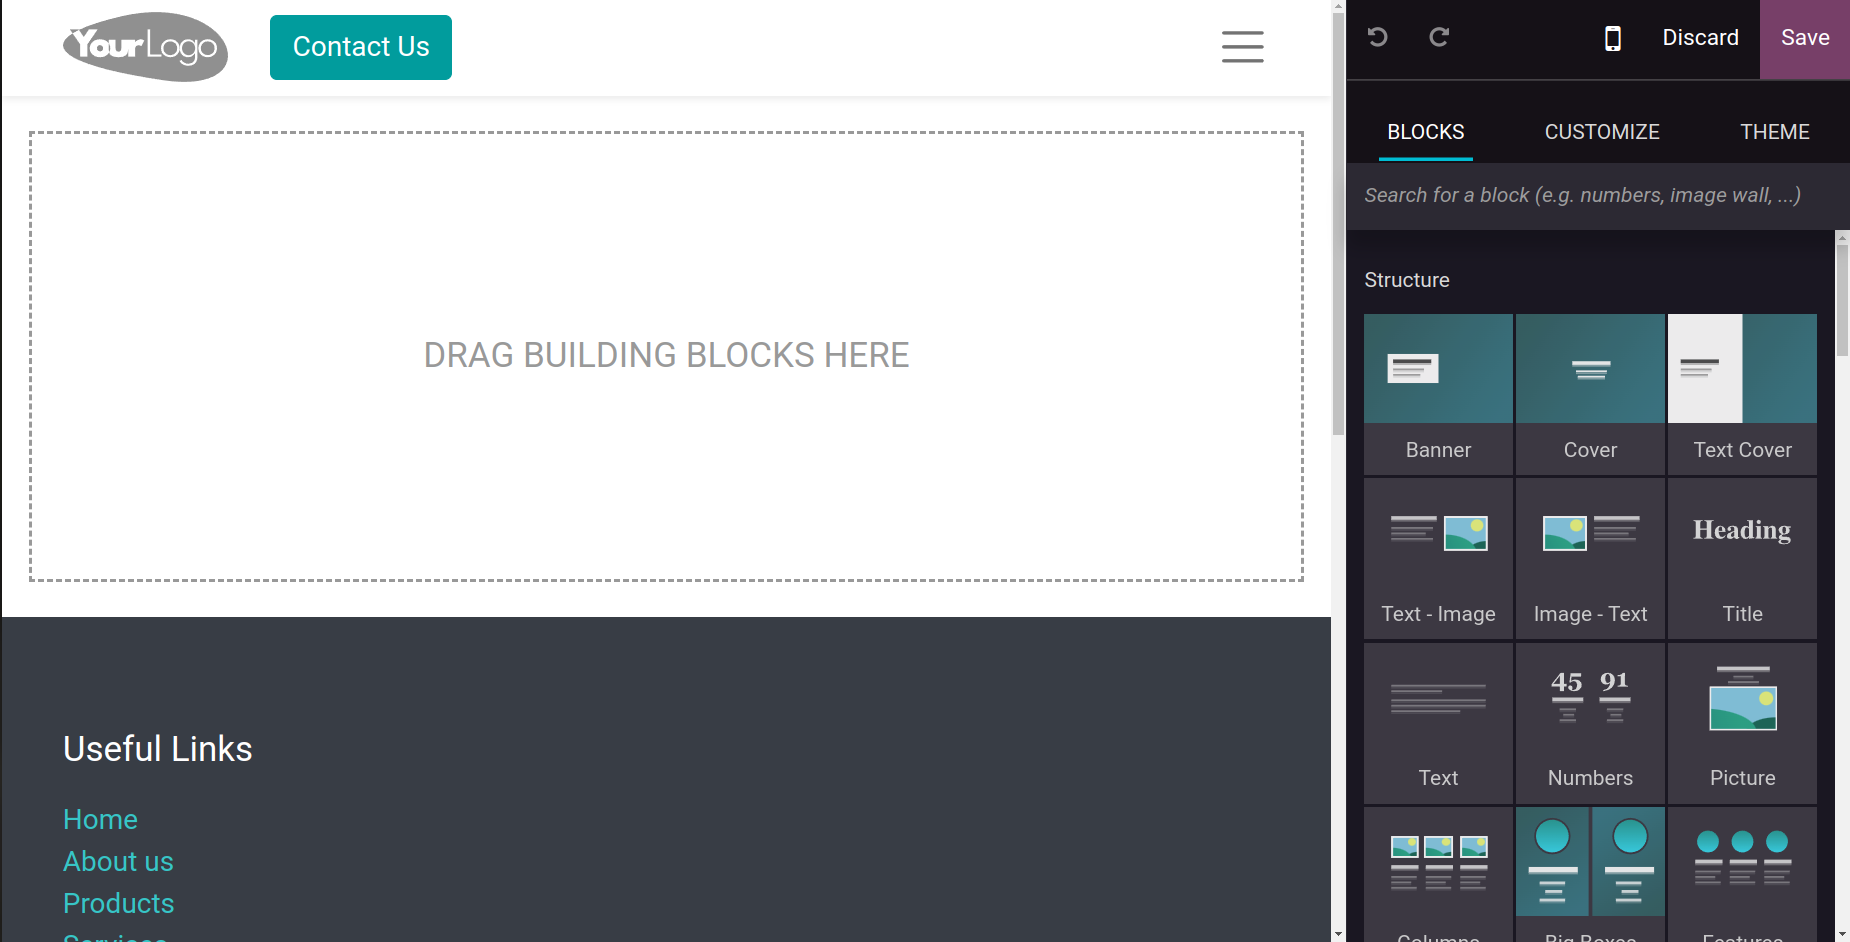
You can use the default options provided by Odoo17 to customize the appearance of your website pages. Your website's page appearances can be elegantly designed with the help of these default tools and features, which will all look very appealing to visitors. Additionally, these designs will work incredibly well to effectively communicate your messages. You can customize your page by selecting from a variety of drag and drop construction components in the window. These building pieces are simple to drop and drag. From the widow's right section, you can pick your favorite building blocks and drag and drop them into the designated area.
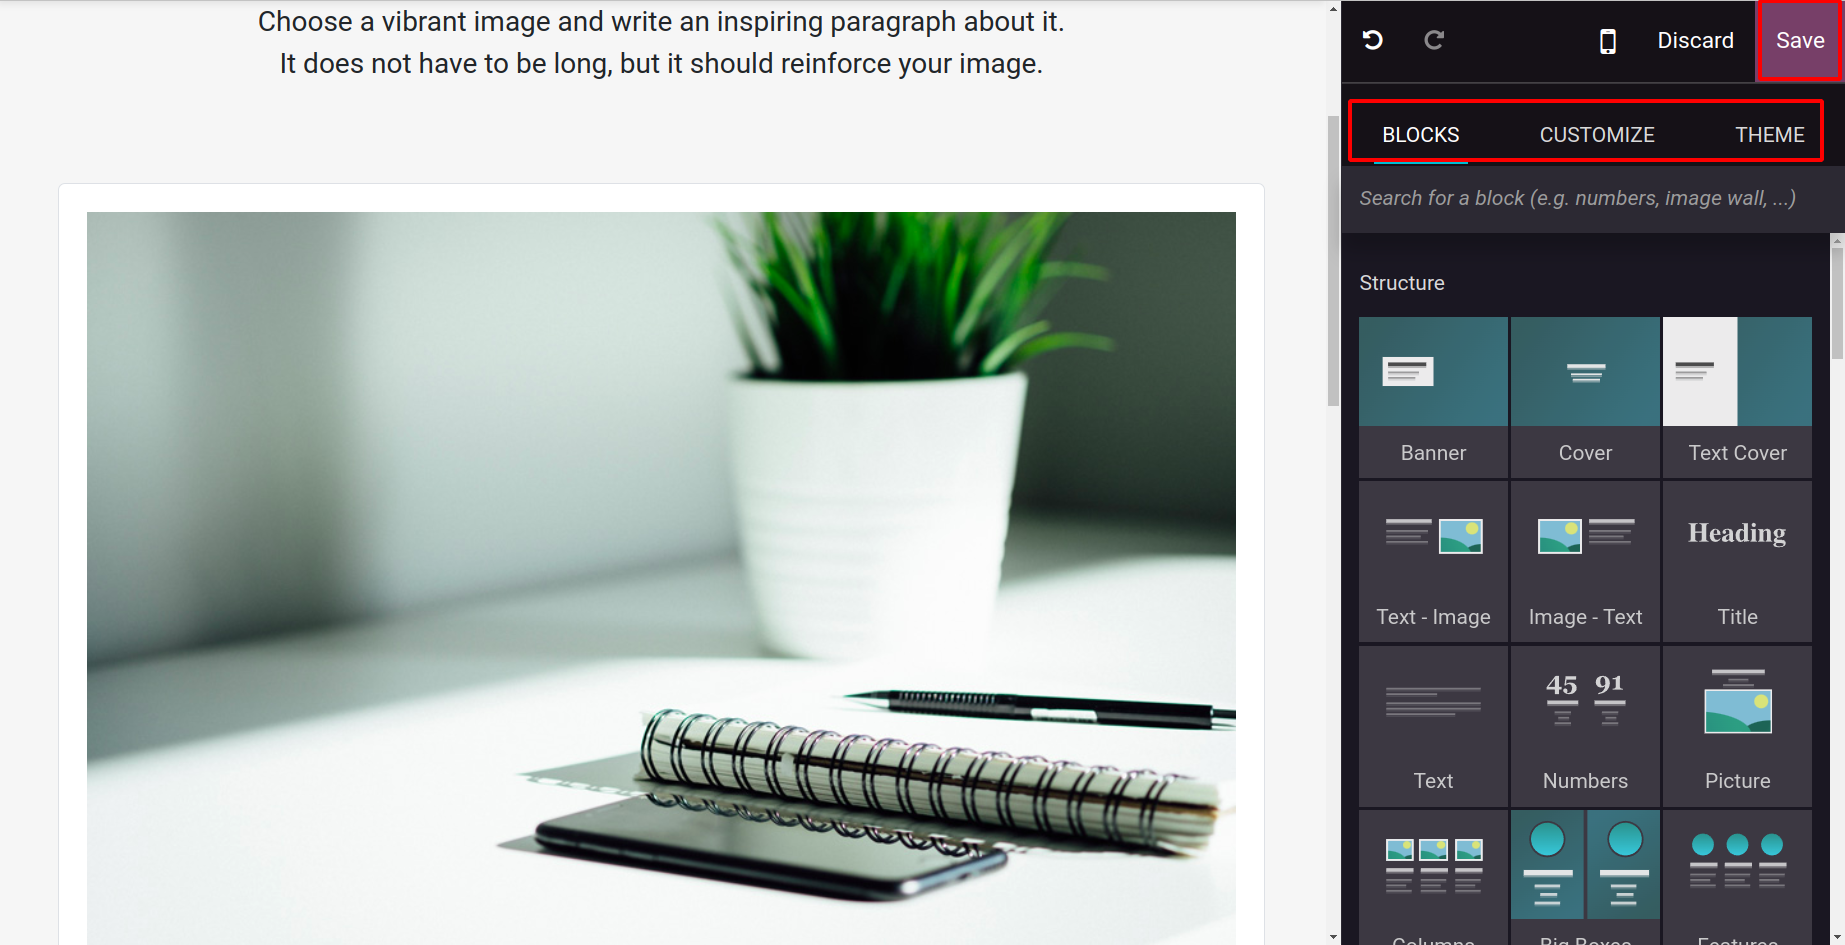
Initially, you can purchase a theme from the Odoo app store or select one from the preset themes established in the Odoo17 system for your website. You have the ability to alter different pages on your website if you have chosen a theme for it. You can save the page by clicking the Save button once the blocks, style, and theme have been set.
Snippet Tools
As previously stated, the block operational concepts form the basis of the website builder's functionality. You may create the best possible website design and development with these building elements. Drag and drop the blocks from the list that Odoo17 provides is a simple process. Let's talk about a few of them below.
-
Chart Snippet: On your business website, you can use the Chart Snippet to arrange a collection of numerical or qualitative data in a chart format. You can depict bar, line, doughnut, pie, and radar charts using this block.
-
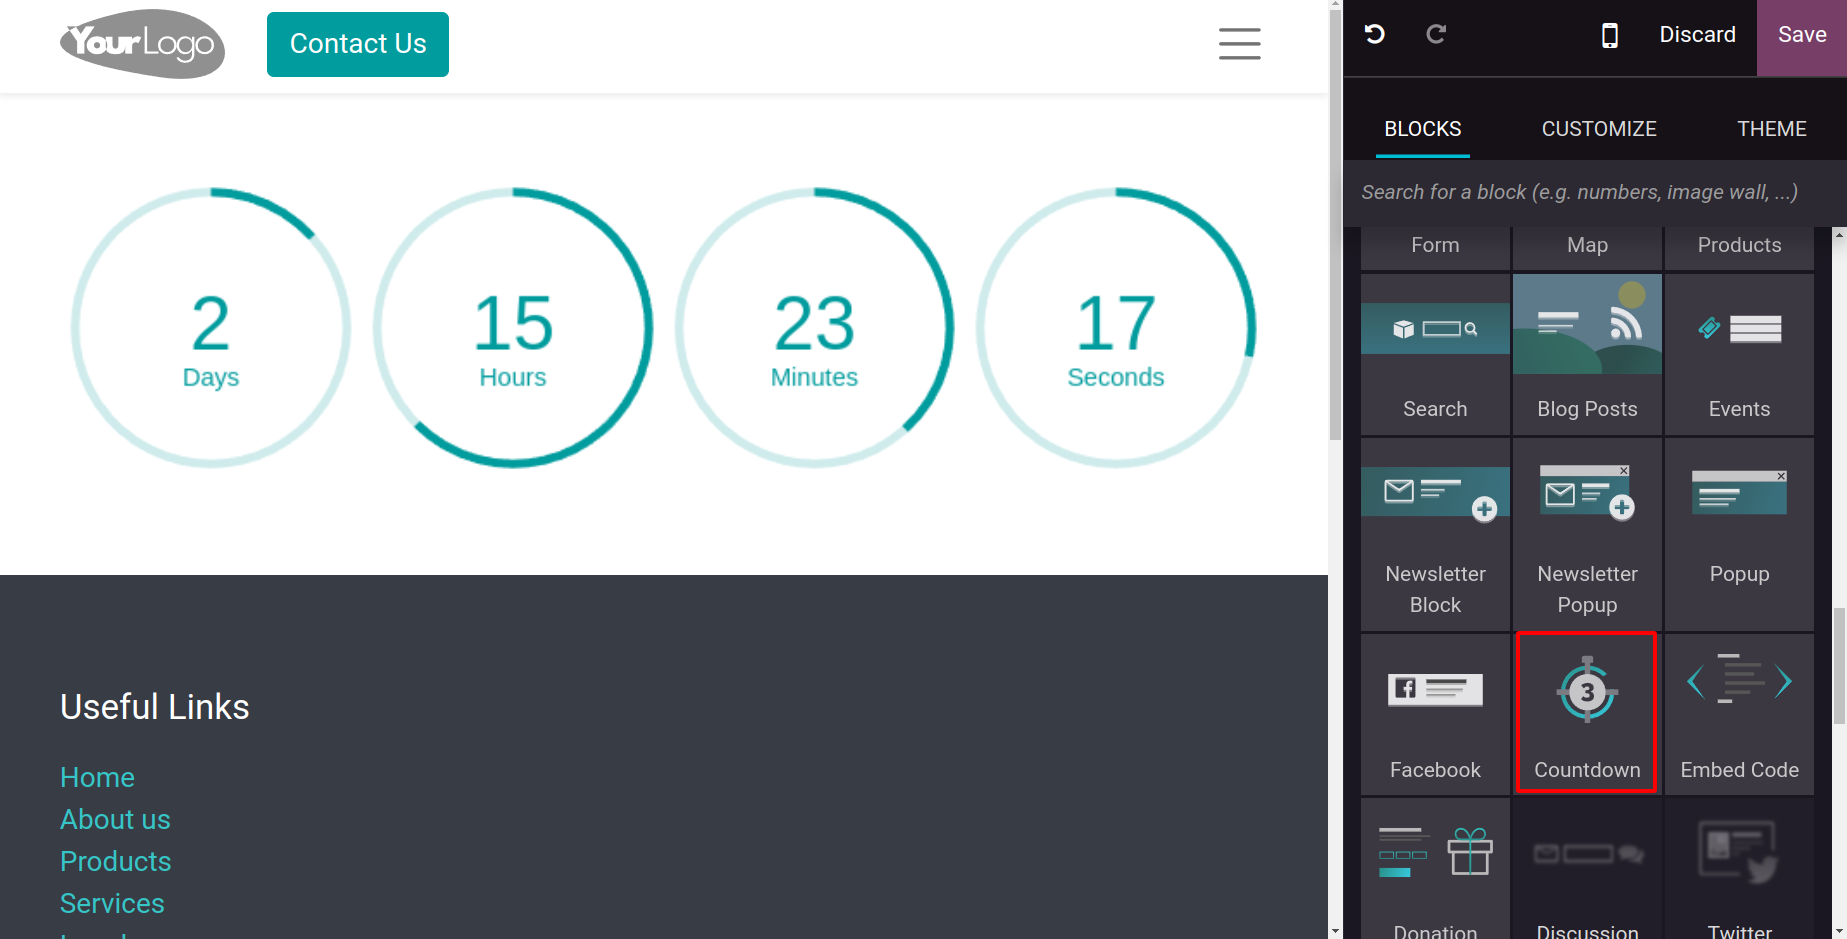
Countdown Snippet: Using a countdown is one of the most important ways to get immediate traffic to your website. You can utilize the default countdown widget provided by the Odoo website module in this platform to increase product sales in your online store. You can personalize a countdown widget in Odoo17 with clean, ringed boxes and inline text.
-
Step Snippet: The Odoo17 website module also has a Step Snippet that can assist you in defining the phases or steps of an operation. For explaining the order delivery procedures and many other things, this will be quite beneficial.
-
Product Catalog Snippet: This template allows you to modify the product description in a pre-established format according to specifications.
-
Auto Pop Snippet: With discounts and promotions, Auto Pop snippet will provide your customers with prompt support. You can quickly define the specifics of offers and promotions by using this widget.
-
Progressbar snippet: One of the dependable tools found in the website module, the progress bar lets you indicate the percentage data or the status of a corporate product. This tool will be helpful for your business's marketing efforts.
-
Timeline Snippet: The company's timeline operations can be defined using the Timeline snippet included in the Odoo17 website module. For the development of products and services, it would be highly beneficial. It will also serve as a useful tool for estimating how long a project or other task will take to finish.
-
Number Snippet: A number snippet is a crucial tool for summarizing quantitative data, such as company-specific numbers, on your website. It can also be used to describe accomplishments, the quantity of prizes won, or the quantity of goods and services offered.
-
Masonry Snippet: You can examine the specifics of a masonry snippet by using the Masonry Snippet tool.
-
Big box snippet: Big box snippet aids in optimizing the functionality of your website.
-
Product List Snippet: With the Product List Snippet, listing your products is simple.
Additionally, Odoo17 arranged all of these snippet tools according to their purposes and attributes. To help you define the structure of your website, Odoo17 offers snippets like these:
Carousel Snippet
-
Cover Snippet
-
Text Cover
-
Text-Image Snippet
-
Image-Text Snippet
-
Title Snippet
-
Text Snippet
-
Number Snippet
-
Masonry snippet
-
Column Snippet
-
Images Wall Snippet
-
Features Snippet
-
Image Gallery Snippet
-
Picture Snippet
-
Big boxes Snippet
-
Media List Snippet.
-
Parallax Snippet
The following snippets can be used to describe features.
-
Showcase Snippet
-
Comparisons Snippet
-
Team Snippet
-
Call to Action Snippet
-
References Snippet
-
Timeline Snippet
-
Quotes Snippet
-
Tabs Snippet
-
Items Snippet
-
Table of Content Snippet
-
Steps Snippet
-
Features Grid Snippet
-
Accordion Snippet
-
Pricelist Snippet
Depending on your needs, you can use the following snippets to add dynamic content to your website.
You can use the following if you need to include internal content:
Let us examine the appearance of the Countdown snippet once it is dropped onto the website.
Customize menu and appearances
Menu Customization
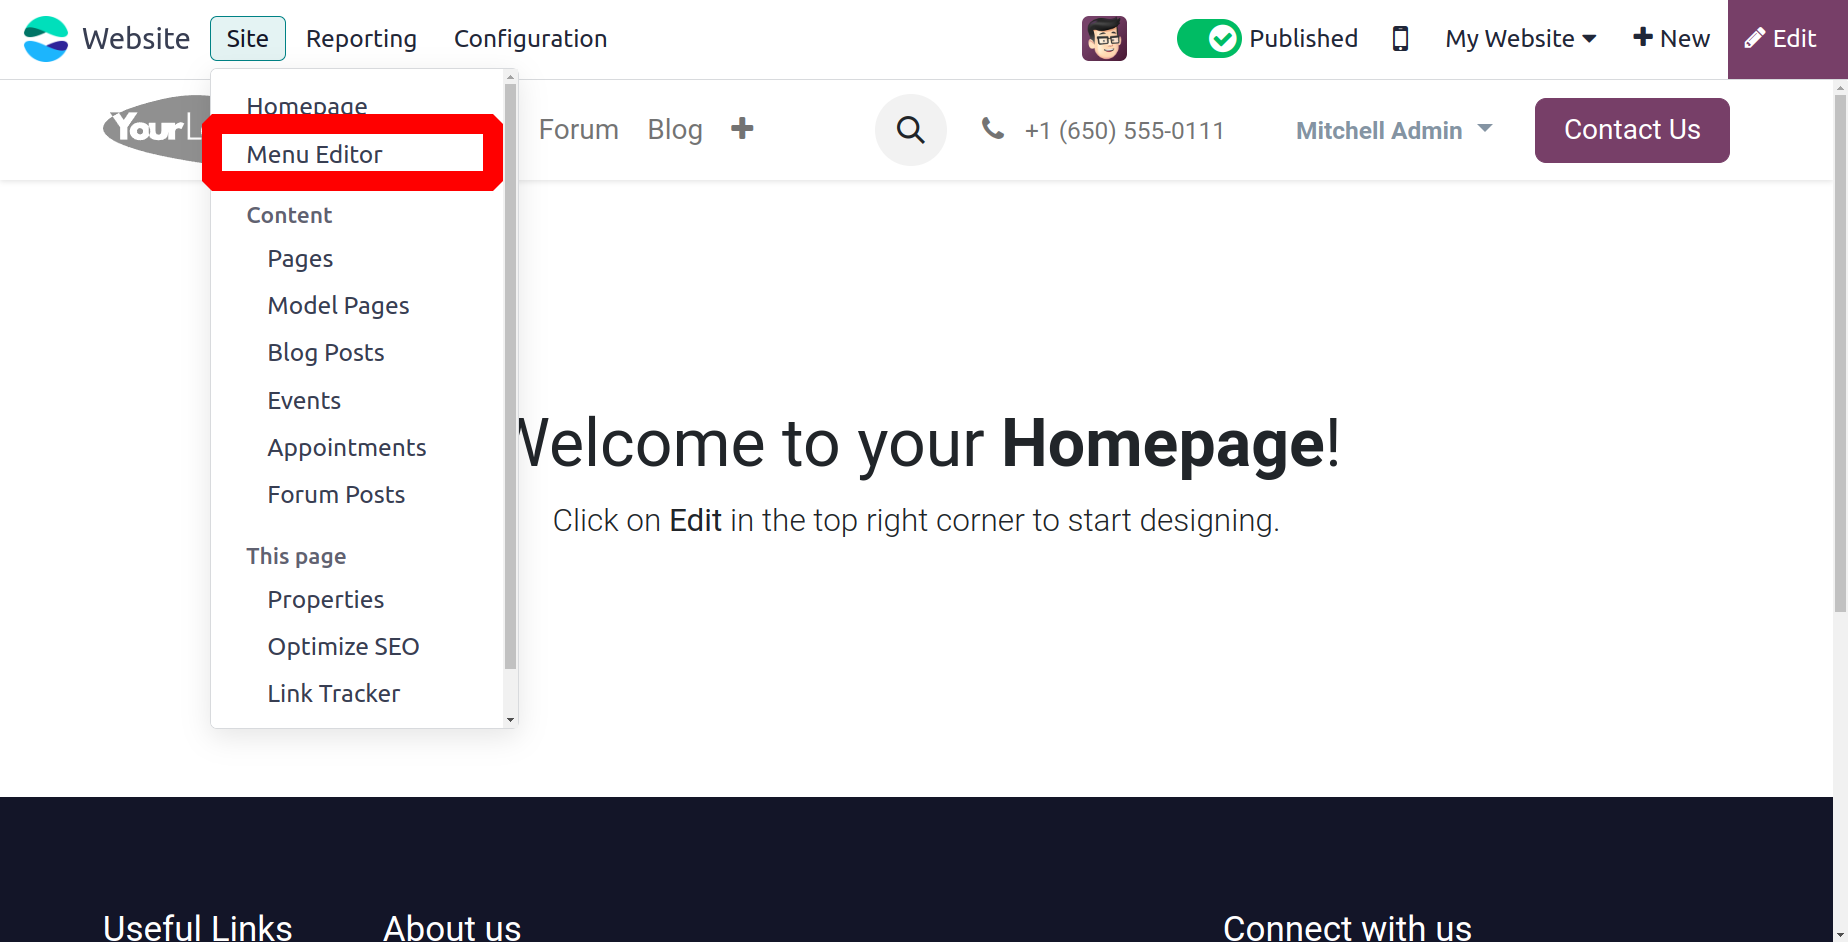
You can alter the appearance of your website thanks to the Odoo17 website module's great degree of flexibility. A few easy clicks will accomplish this. All it takes is a single click on the Site tab, which is located in the upper right corner of the window and is indicated in the screenshot below. A drop-down menu with the options to access sub-menus like Home page, Menu Editor, Content, and This Page will appear when you click on the Site tab. You can update the main menu items with the update menu, and you can control your website pages with the control Pages menu. So that the Menu Editor option can be used to build and change pages on the website.
Create a New Menu
As previously indicated, let us click on the Menu Editor icon to build a new menu. When you choose this option, the platform will display a pop-up window to you, similar to the one in the picture below.
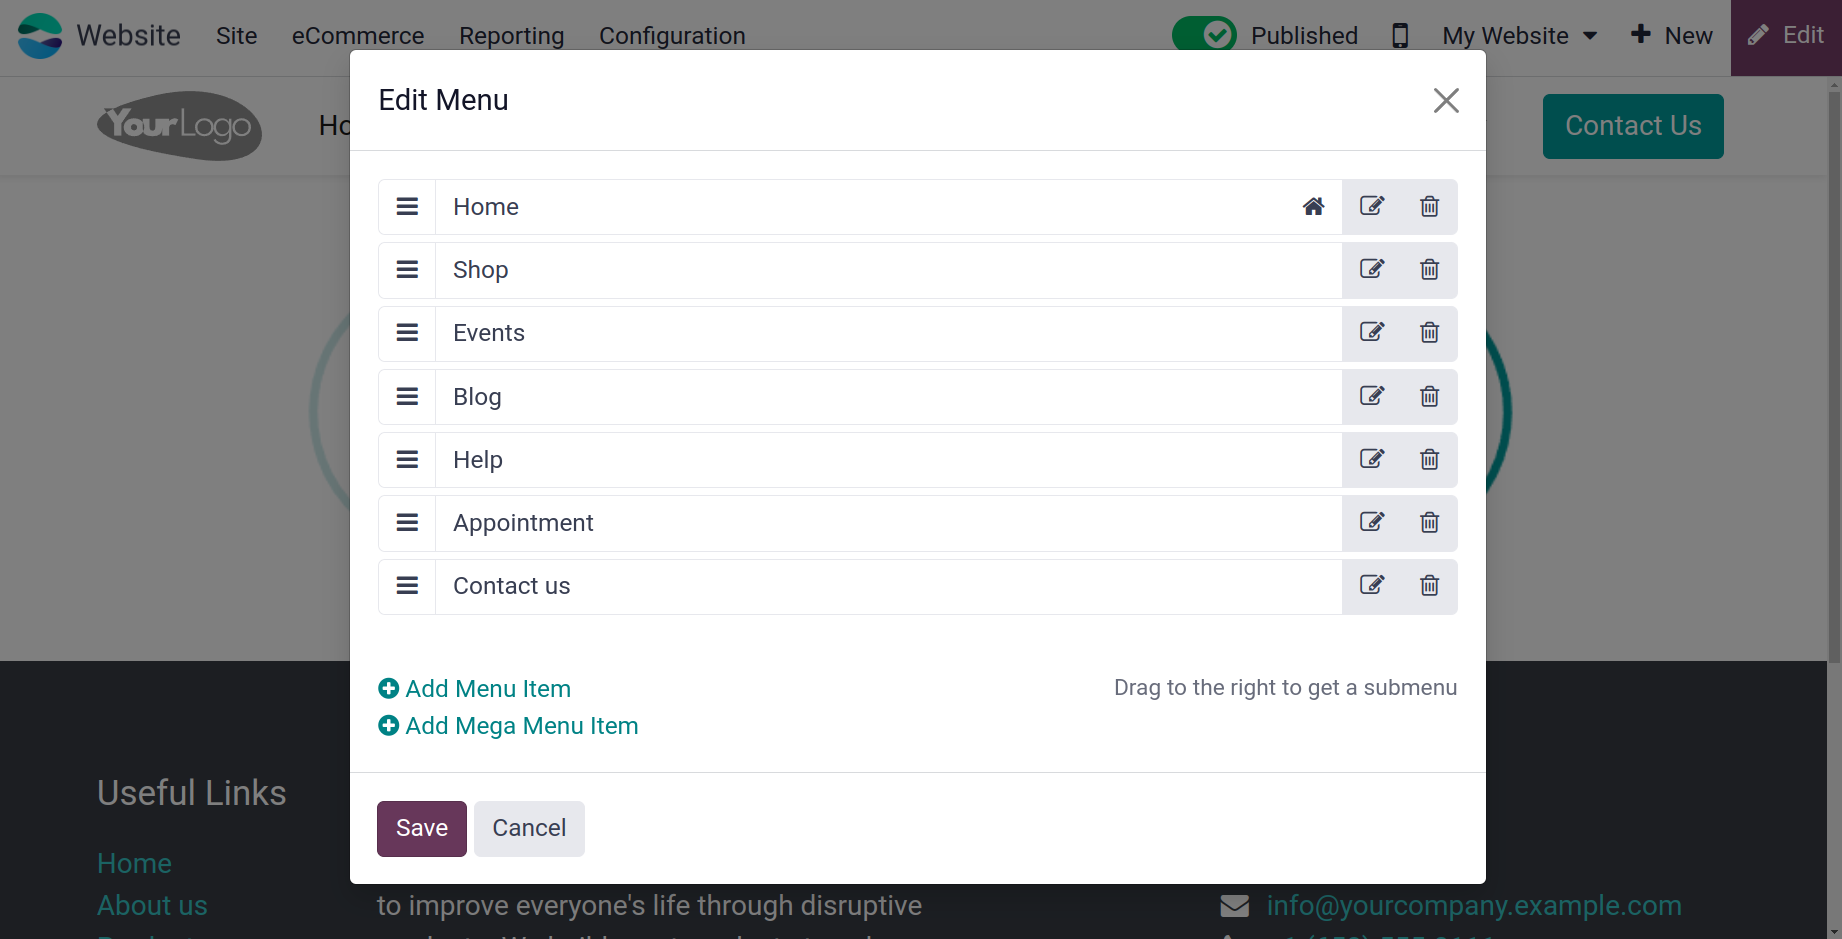
You can view every configured website page in this pop-up window, along with the corresponding Edit Menu Item and Delete Menu Item. A pop-up box allowing you to enter the new menu label and URL or email will appear when you click the Add Menu Item button. Once the information has been provided, you can click the Save button, which is also accessible from the window.
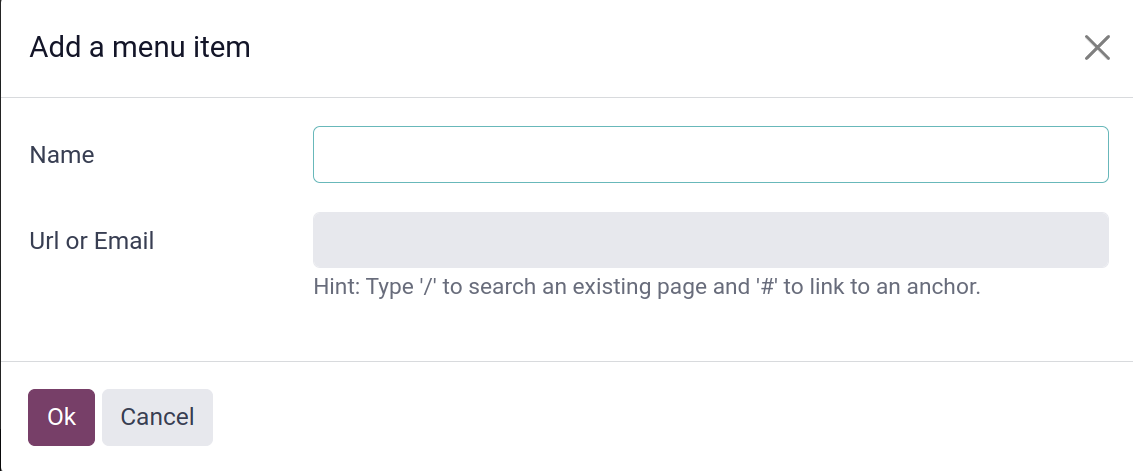
With the exception that you now need to select the Add Menu Item button, which is located in the bottom left of the window, the same process can be followed to add a new menu item.
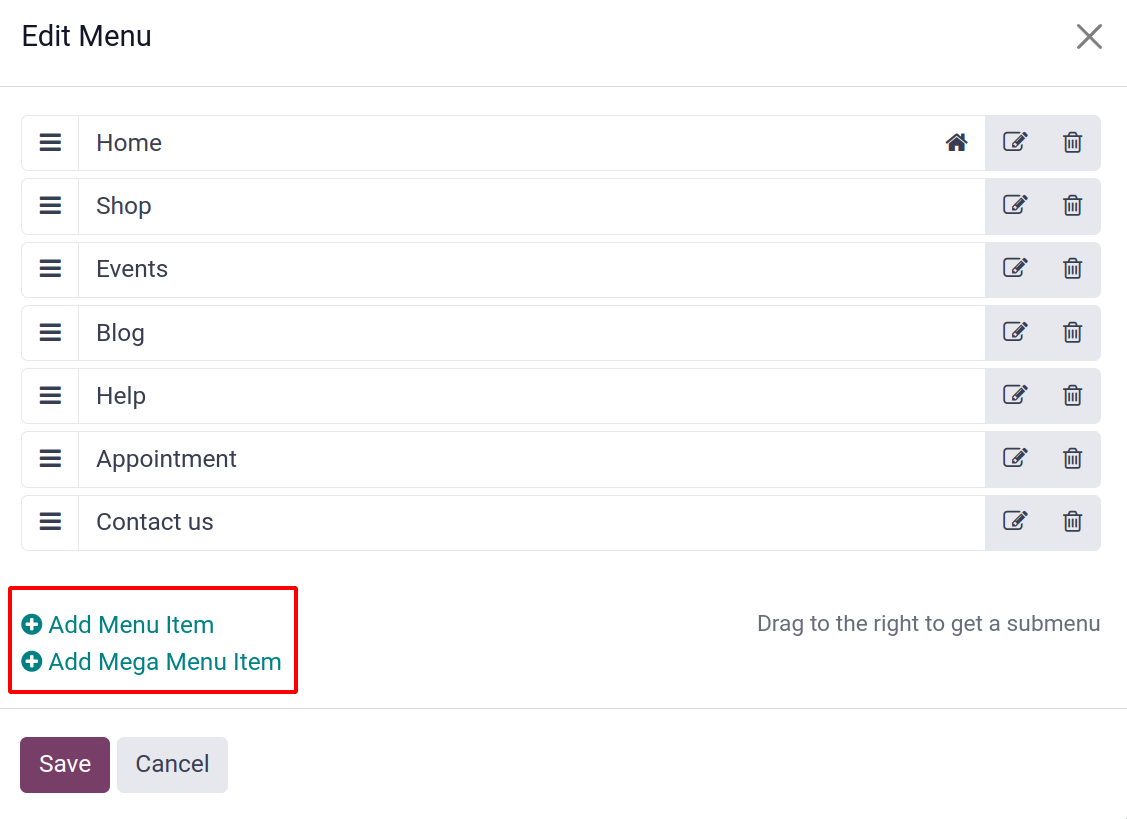
Additionally, you are permitted to add a mega menu item to a page's website. The Add Mega Menu Item button, which is located directly beneath the Add Menu Item button, can be clicked to accomplish this.
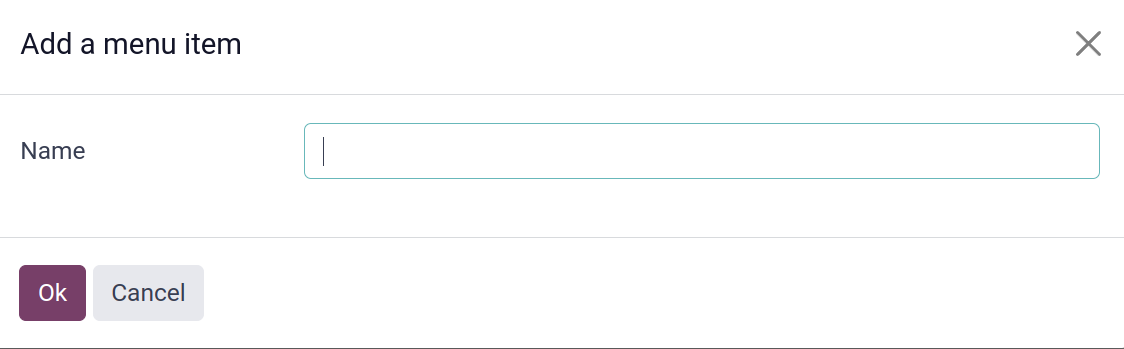
You can define the Menu Label in the designated place to add a new menu item. You can click the Save button when you're done.
We can talk about managing website pages next.
Appearance Customization
A website's aesthetics play a big part in drawing more visitors. The appearance of a well-maintained and polished website will draw in clients and visitors. Additionally, it will enable you to more accurately and thoroughly display all pertinent data and features. Odoo understands this as well, and the system provides a number of customization choices that come in useful when you want to alter and customize the website's appearance to fit your needs and those of your business. The Customize tab provides access to the option for altering a website's appearance. When you click the EDIT button in the top left corner, the Customize section appears.
One of the new structures introduced in odoo 17, which ‘text cover’.

With Odoo 17 the appearance of images and quality can be adapted to the page. The image size will appear in the respective tab. The width field allows for formatting, picture width, and the conversion of the format to a webp image, which will result in a compressed size. The quality of the image can be updated or altered. Similarly, the various parameters can be updated like background image, visibility, animation, image formats, etc.
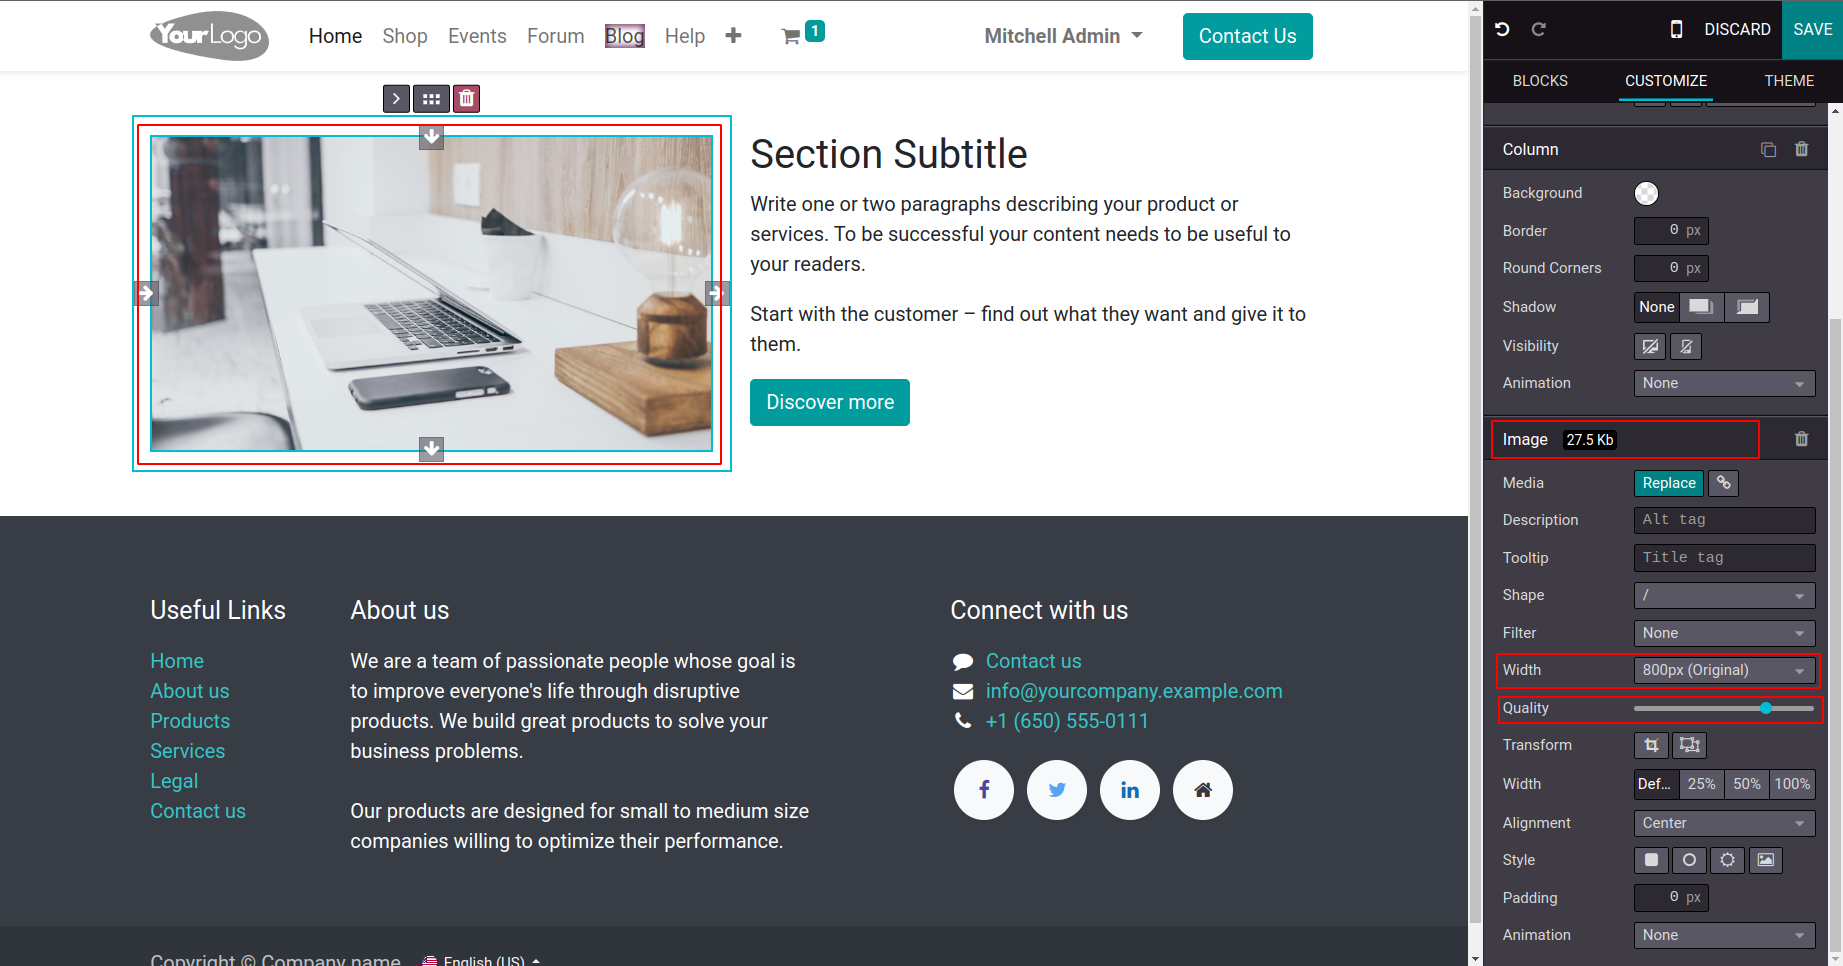
Other inner contents introduced in Odoo 17 are buttons, ‘Image’, and ‘Video’. The button snippet allows the addition of a button to an existing block.
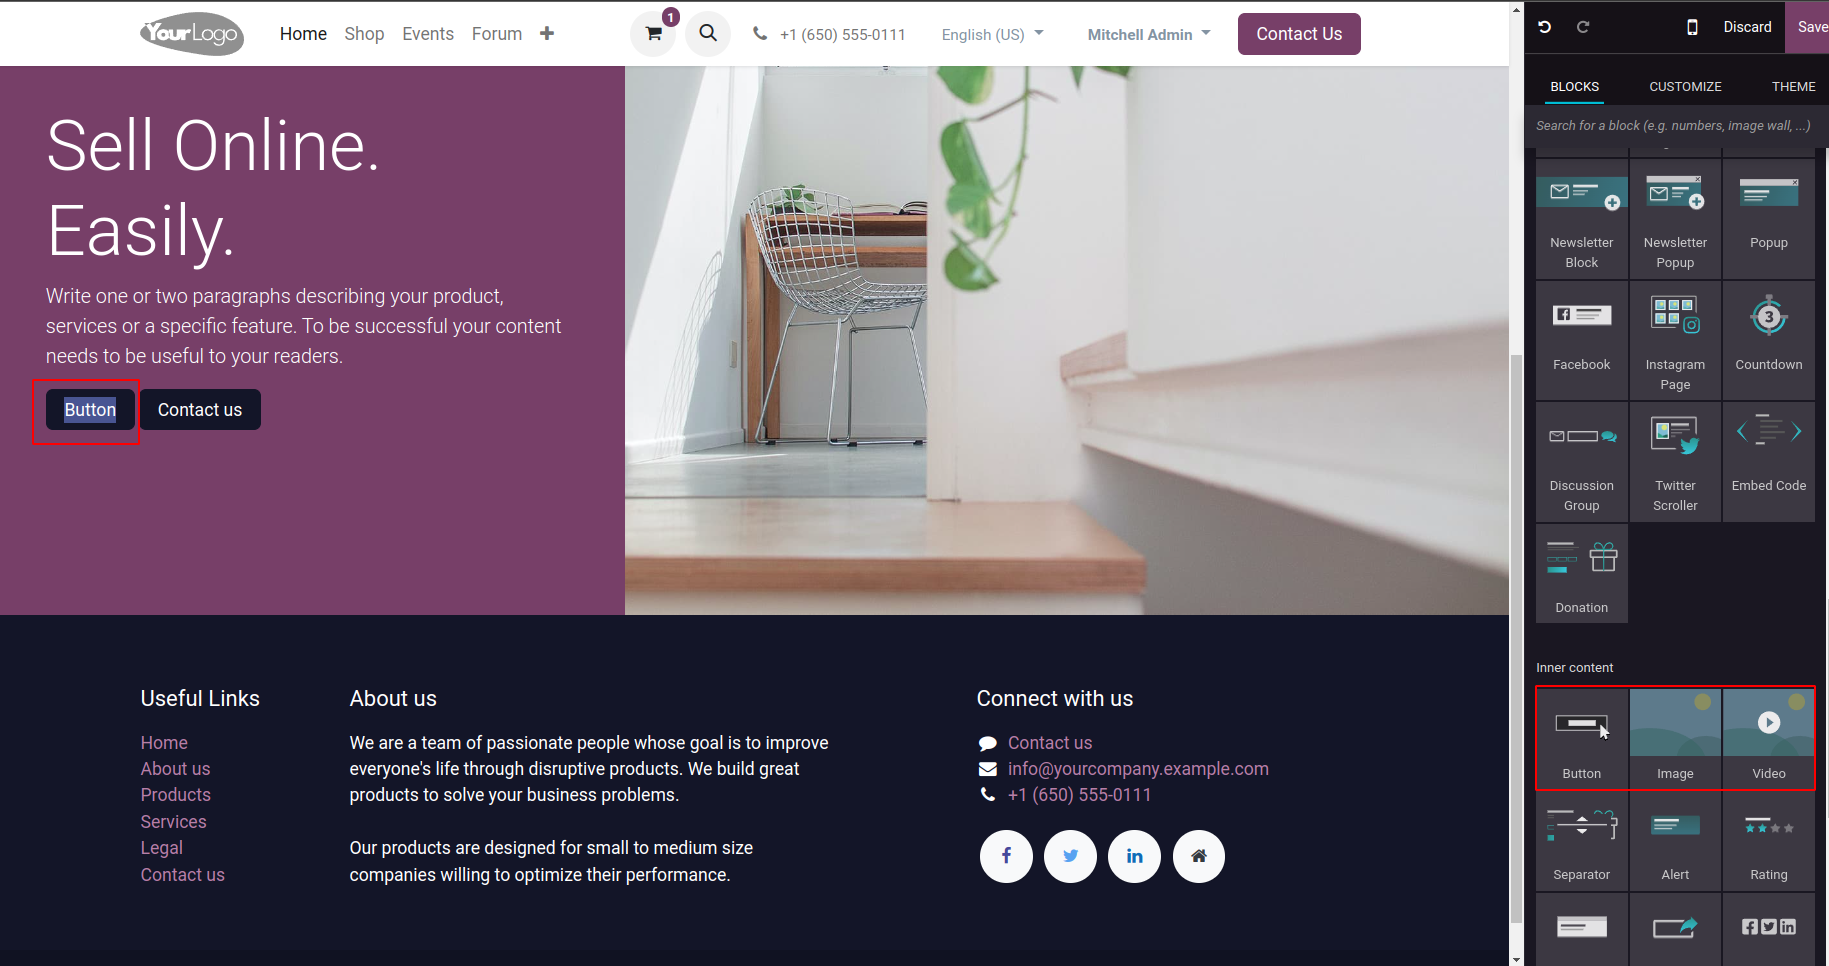
The image and video allow you to add images and videos to various building blocks, respectively.
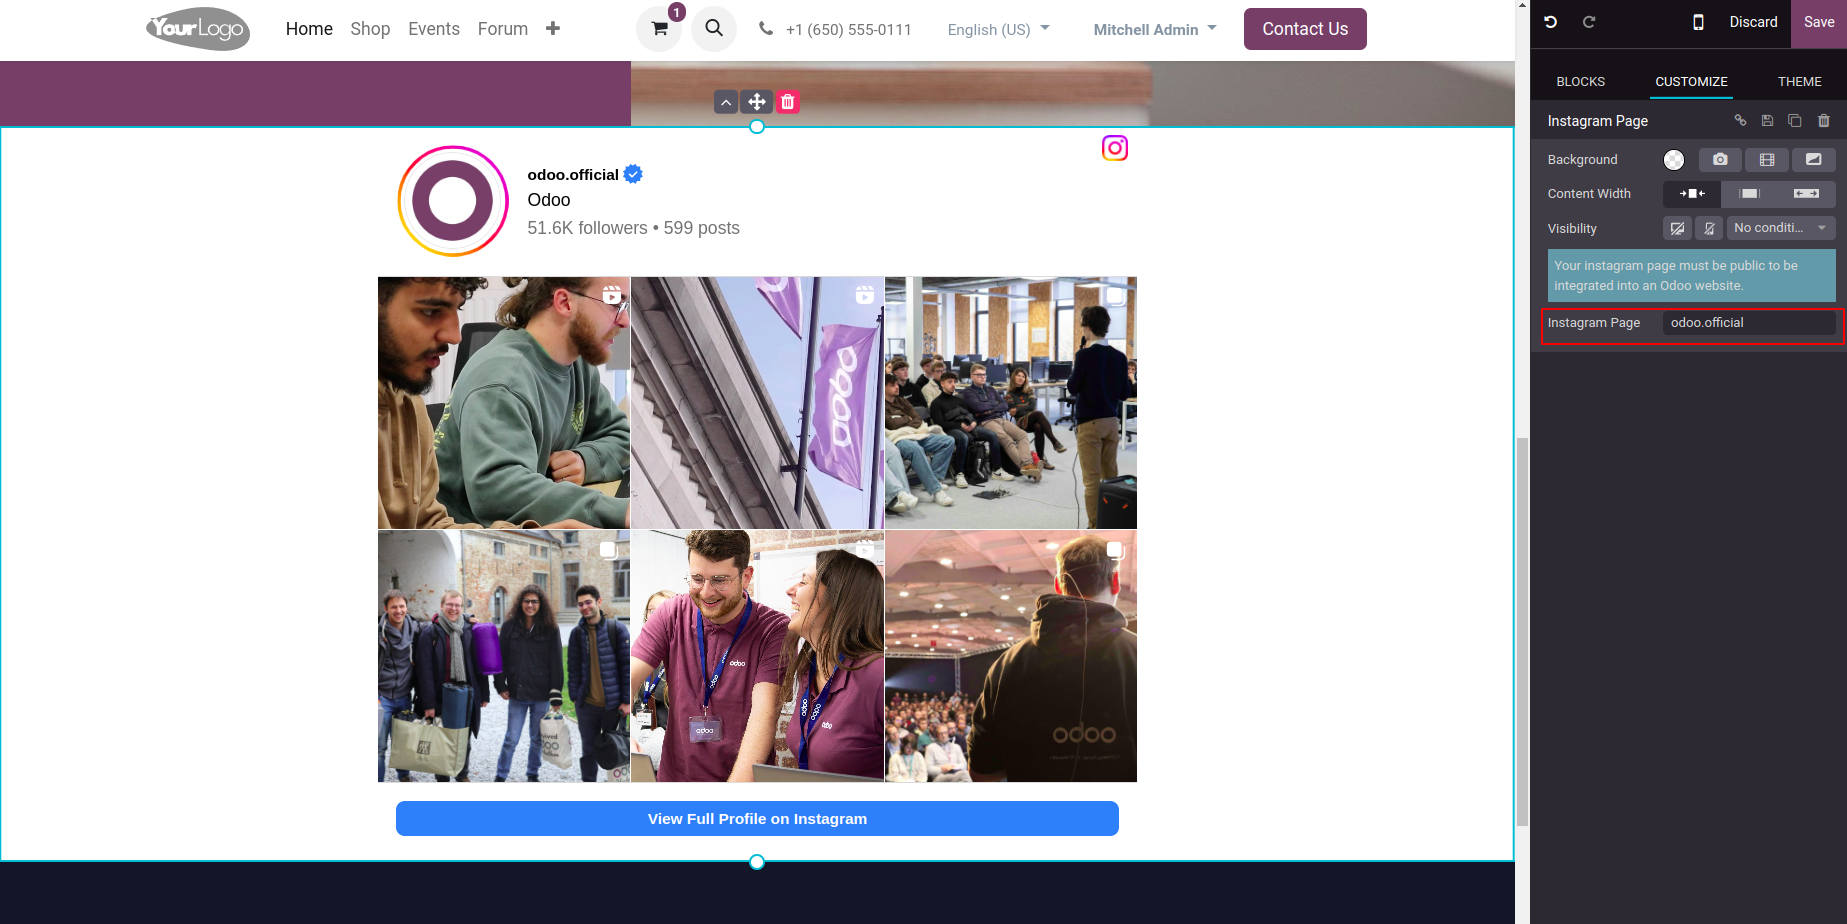
Now when it comes to Dynamic content, a new snippet in Odoo 17 is the ‘Instagram page’. This allows you to add your public Instagram account page to your website.
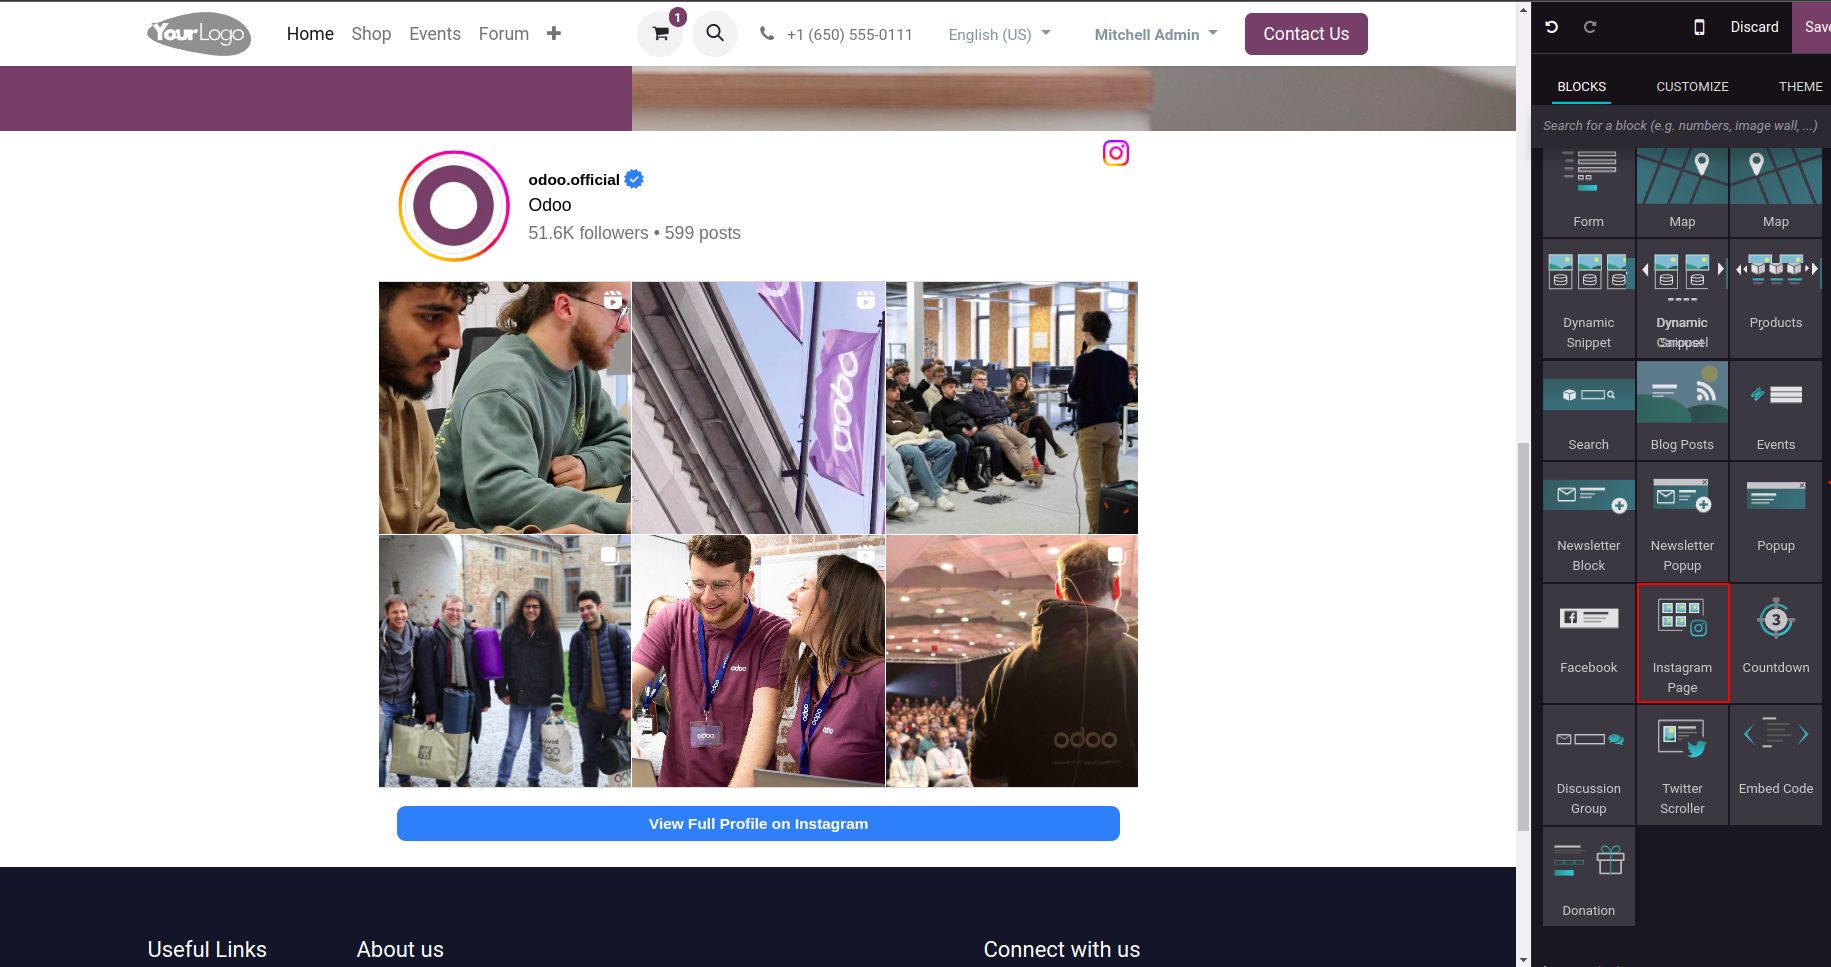
Your Instagram page must be public to be integrated into an Odoo website. Clicking on the image allows you to customize the details like background, content width, and visibility. You can add which Instagram page to be integrated with the website in the respective field ‘Instagram page’.
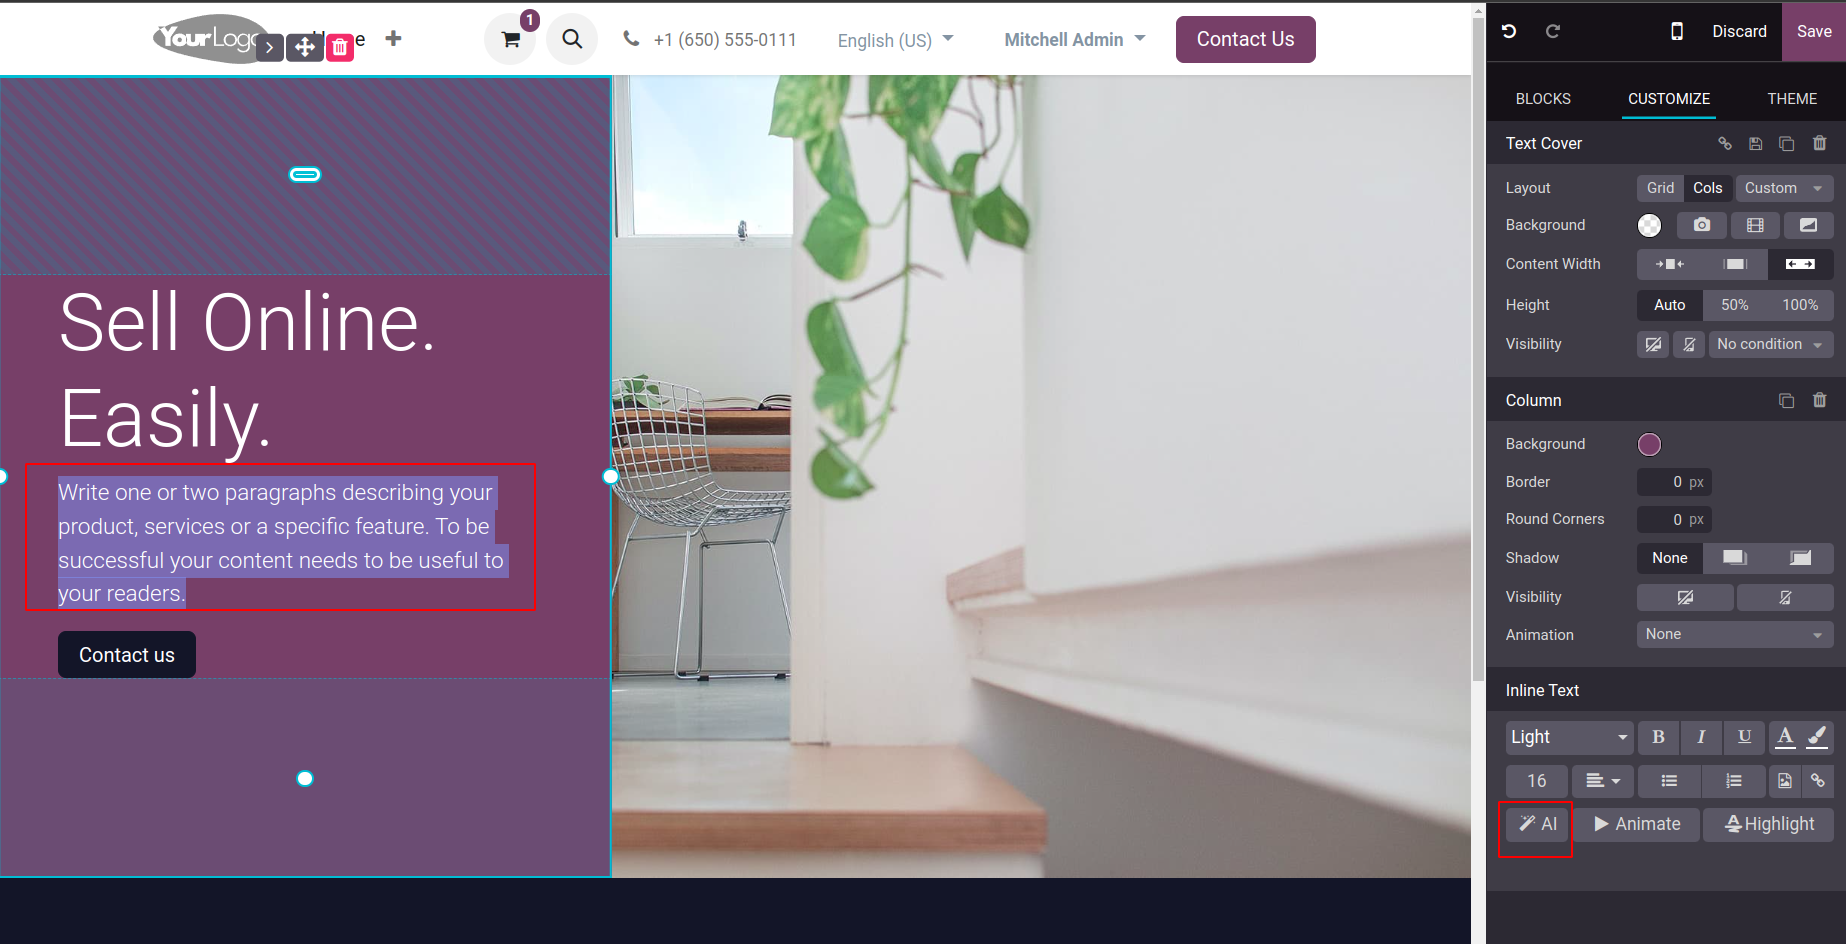
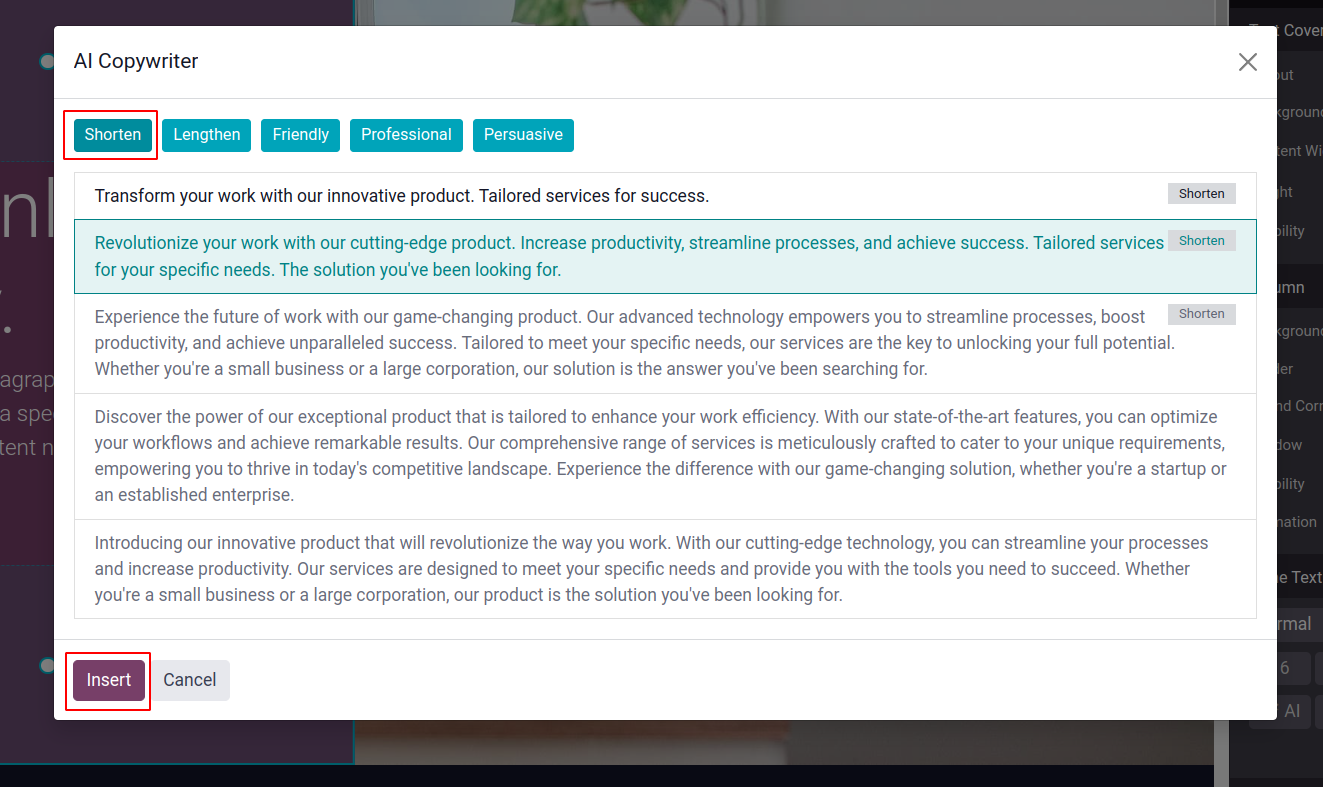
Another integration that Odoo 17 offers is AI integration, with chat GPT. Users are able to generate content for the new page, and they can shorten, lengthen, or make the content more professional.
For that, choose the content to be altered or shorten and copy it. And click the AI tool in the Inline Text section.
This will open up the Chat GPT to shorten the content. Paste the content in the pop-up box. The ‘shorten’ button will shorten the pasted content. As you click shorten again and again, it will again shorten the content to fit to your snippet. Then the Insert button inserts the content into your snippet, replacing the old content.
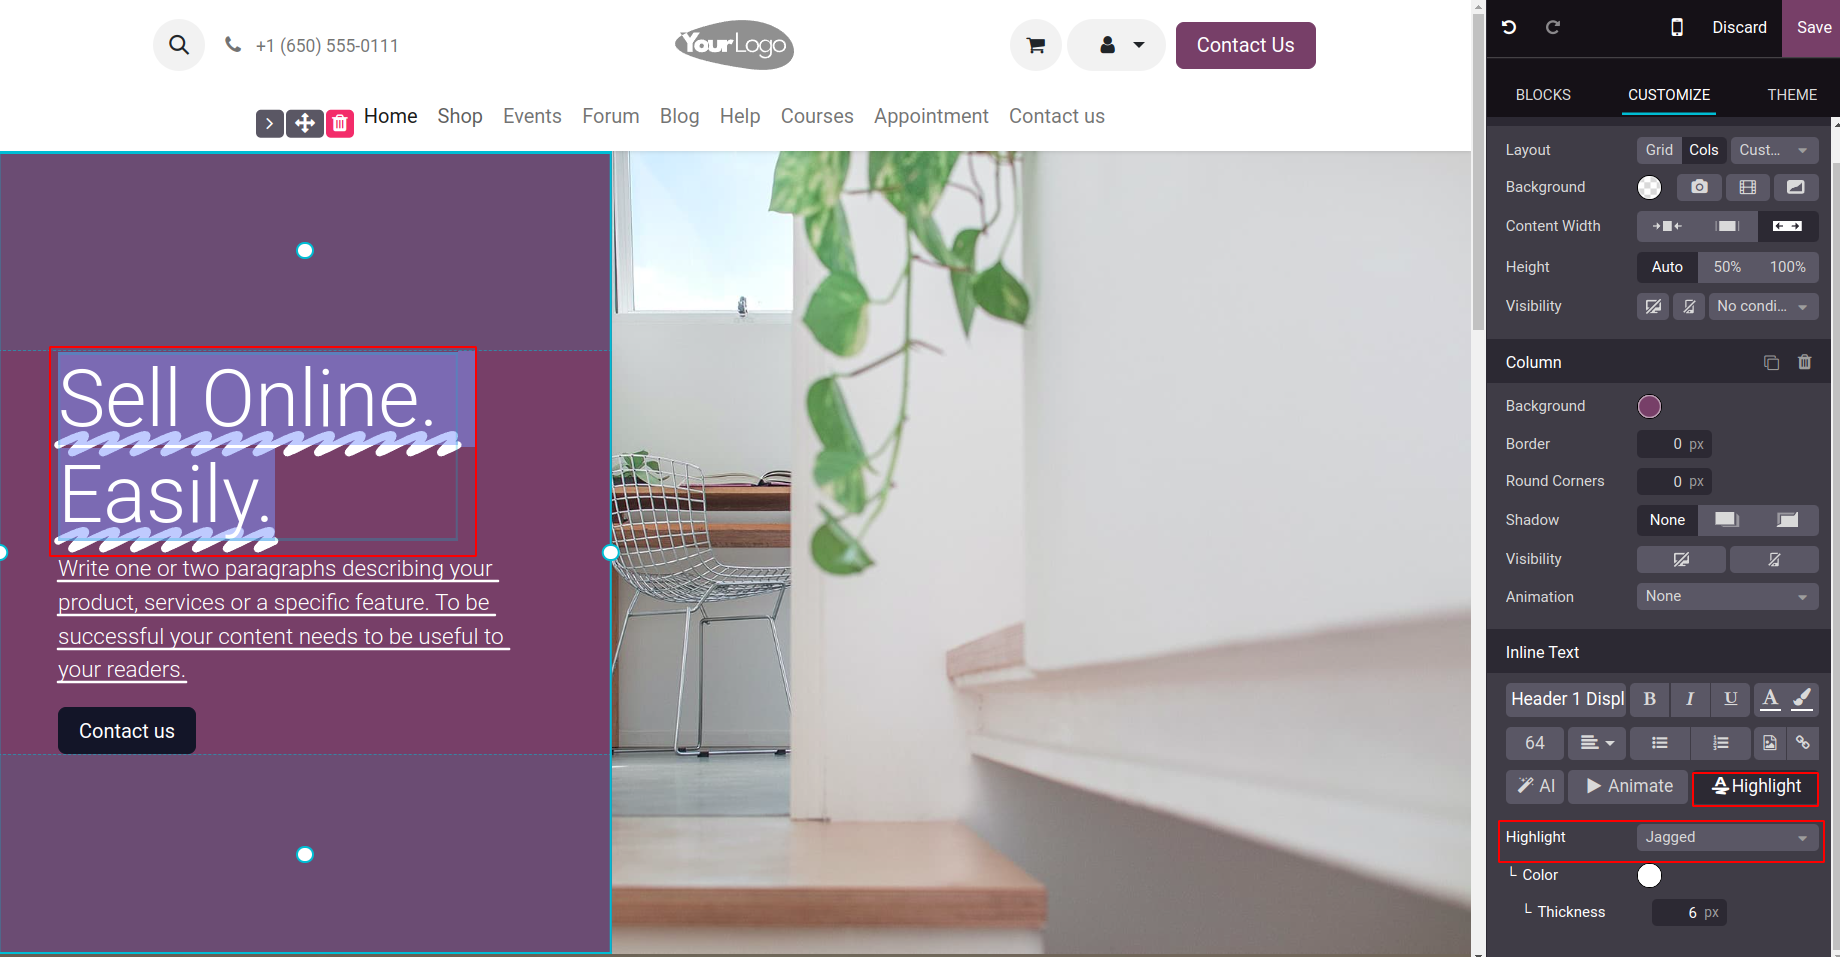
Highlighting texts is another advanced feature of Odoo 17.
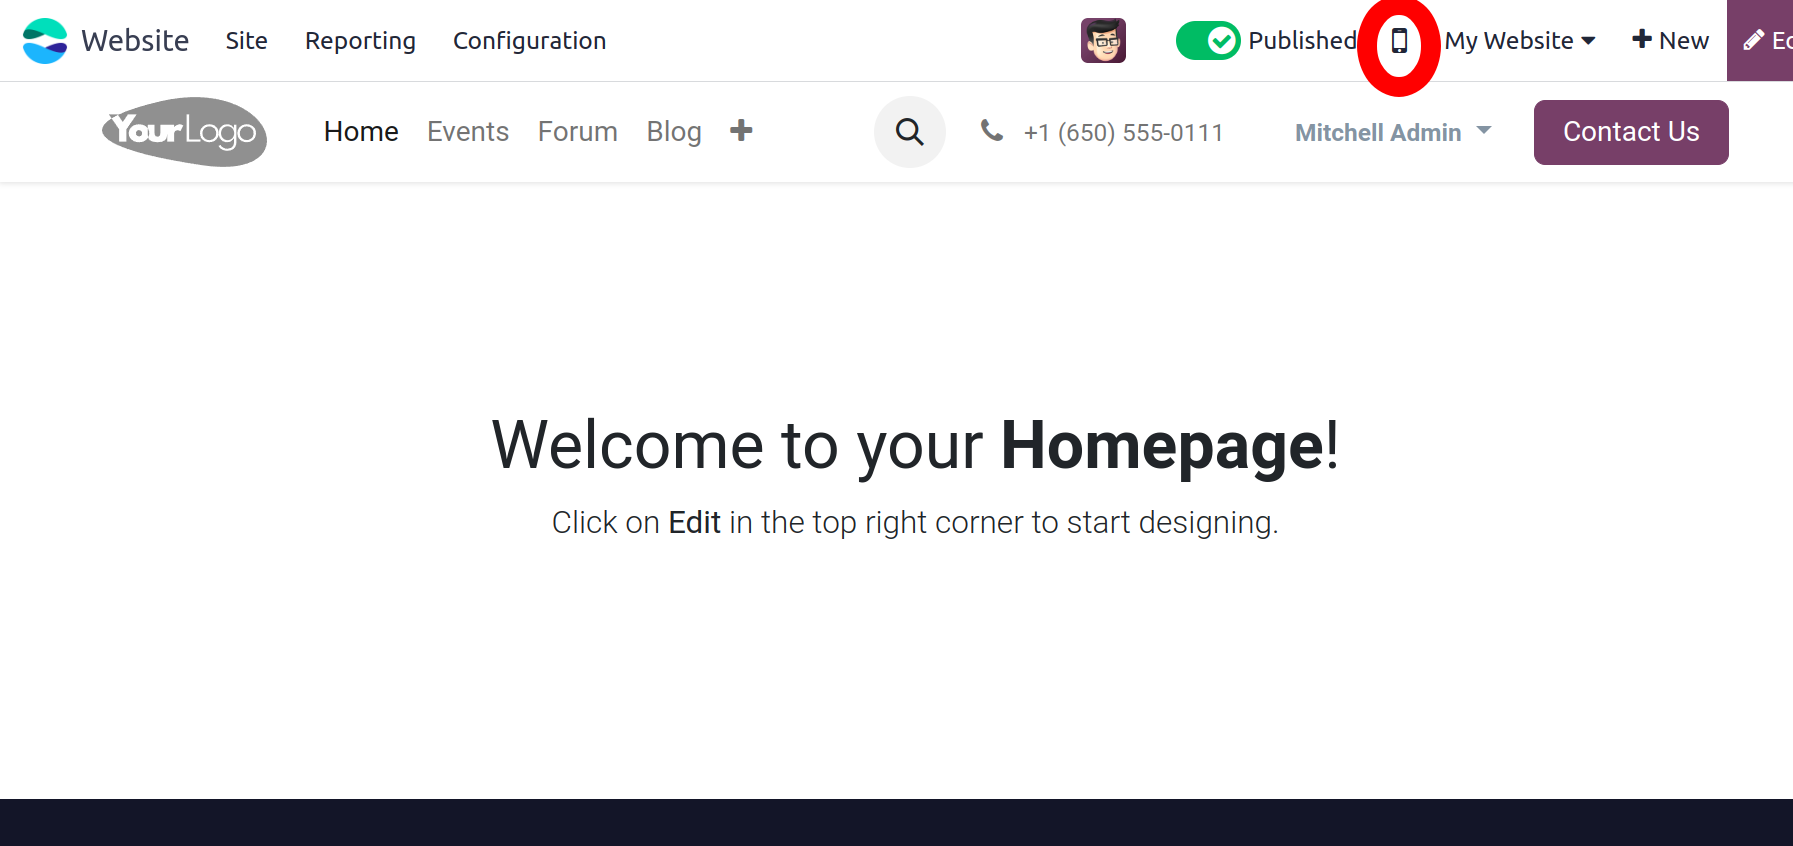
Mobile Preview
Every little detail of its operational effectiveness is handled by the Odoo17 ERP. You can view and access it on your mobile device through the system. The icon for Mobile Preview is displayed in the image below. To access Mobile Preview, click on it from the main menu bar.
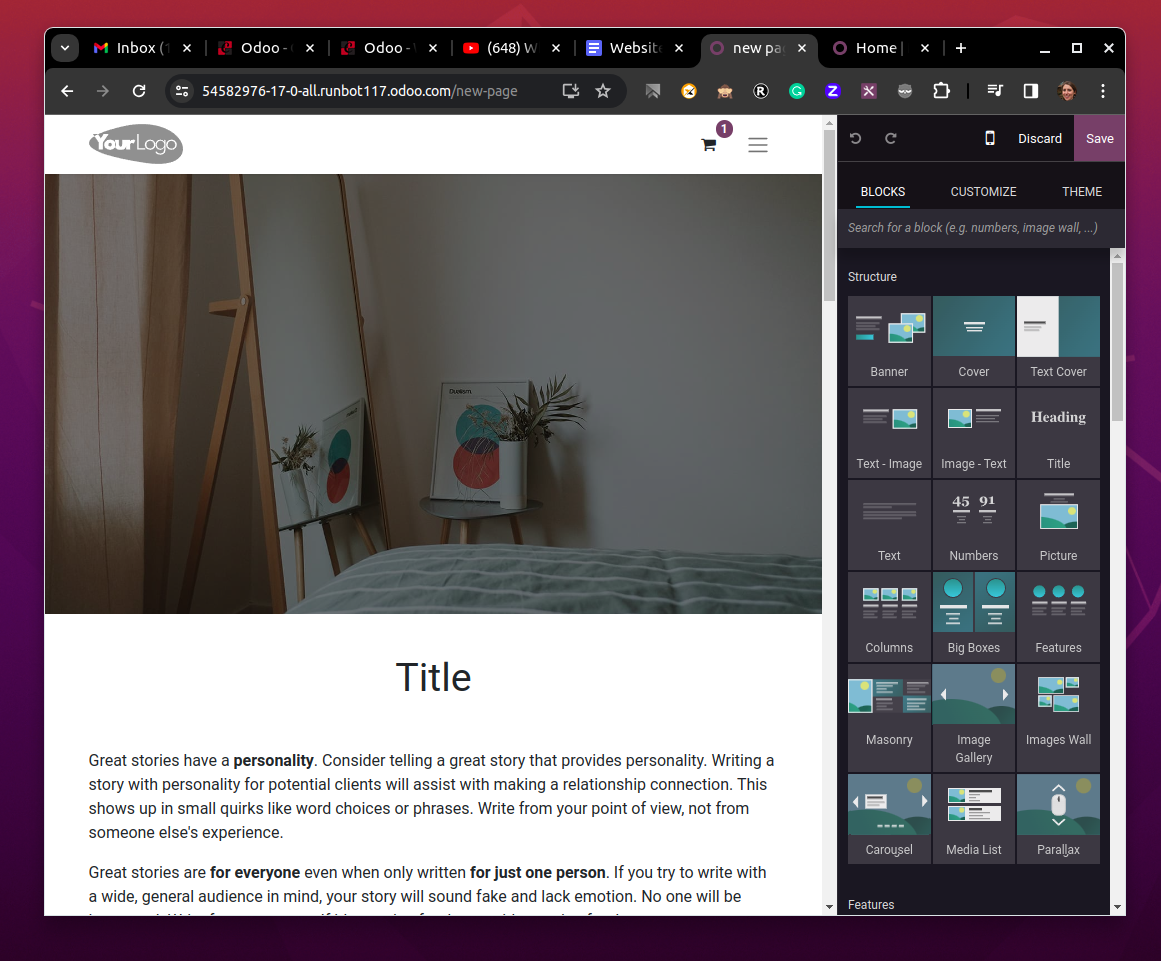
The websites created with Odoo 17 are more responsive with browsers and mobile devices. By minimizing the browser, the website will be responsive to the reduced size that fits in that particular window.
We can now talk about how to list the products and services in the module when we have a clear understanding of the accessible mobile preview option.
Publish Specific Content for the website
From the front end of the module, Odoo17 website users can quickly generate and publish custom content for the company website. This may be applied to a wide range of tasks, including product descriptions, blogs, forums, and many other things. Regarding the blog post, the platform enables you to complete it from the front end, including the details. Additionally, you have the option to change the views and attributes. You can then post them to the website using the system. Likewise, you can think about the job description, the forum, and a tonne of other items.
Page
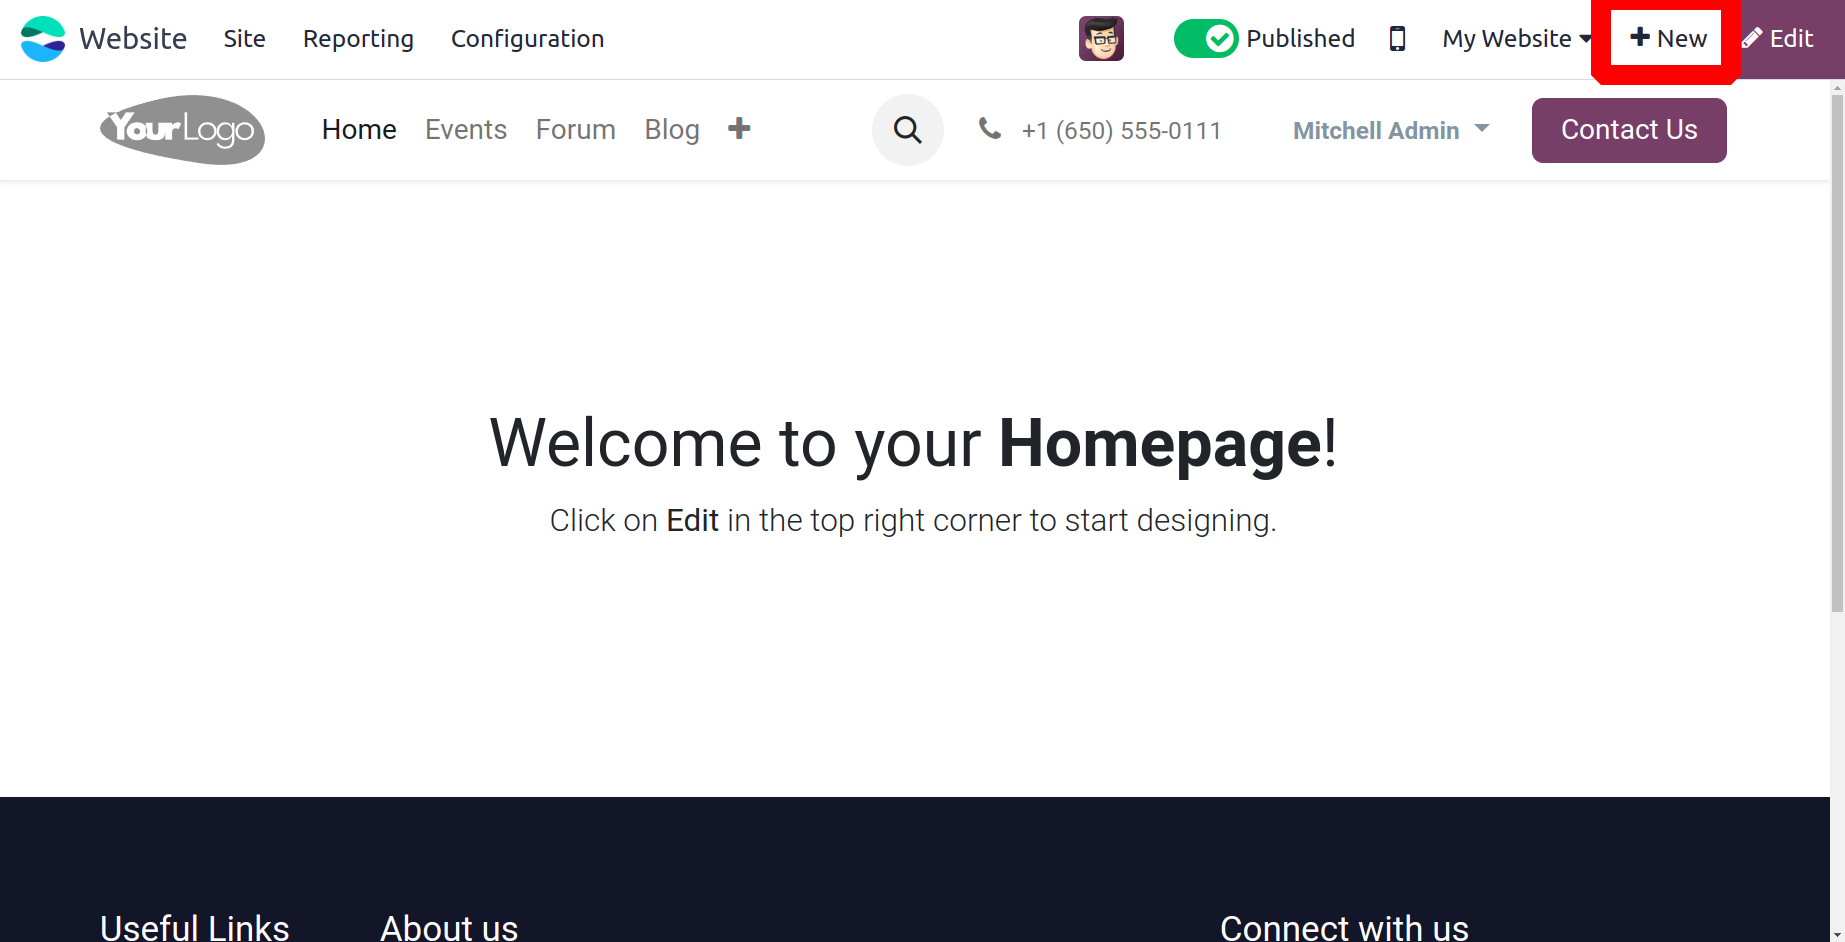
On your website, you can see the +New button next to the edit button, as seen in the illustration below. The icons for posting particular content on your website will appear when you click on this button.
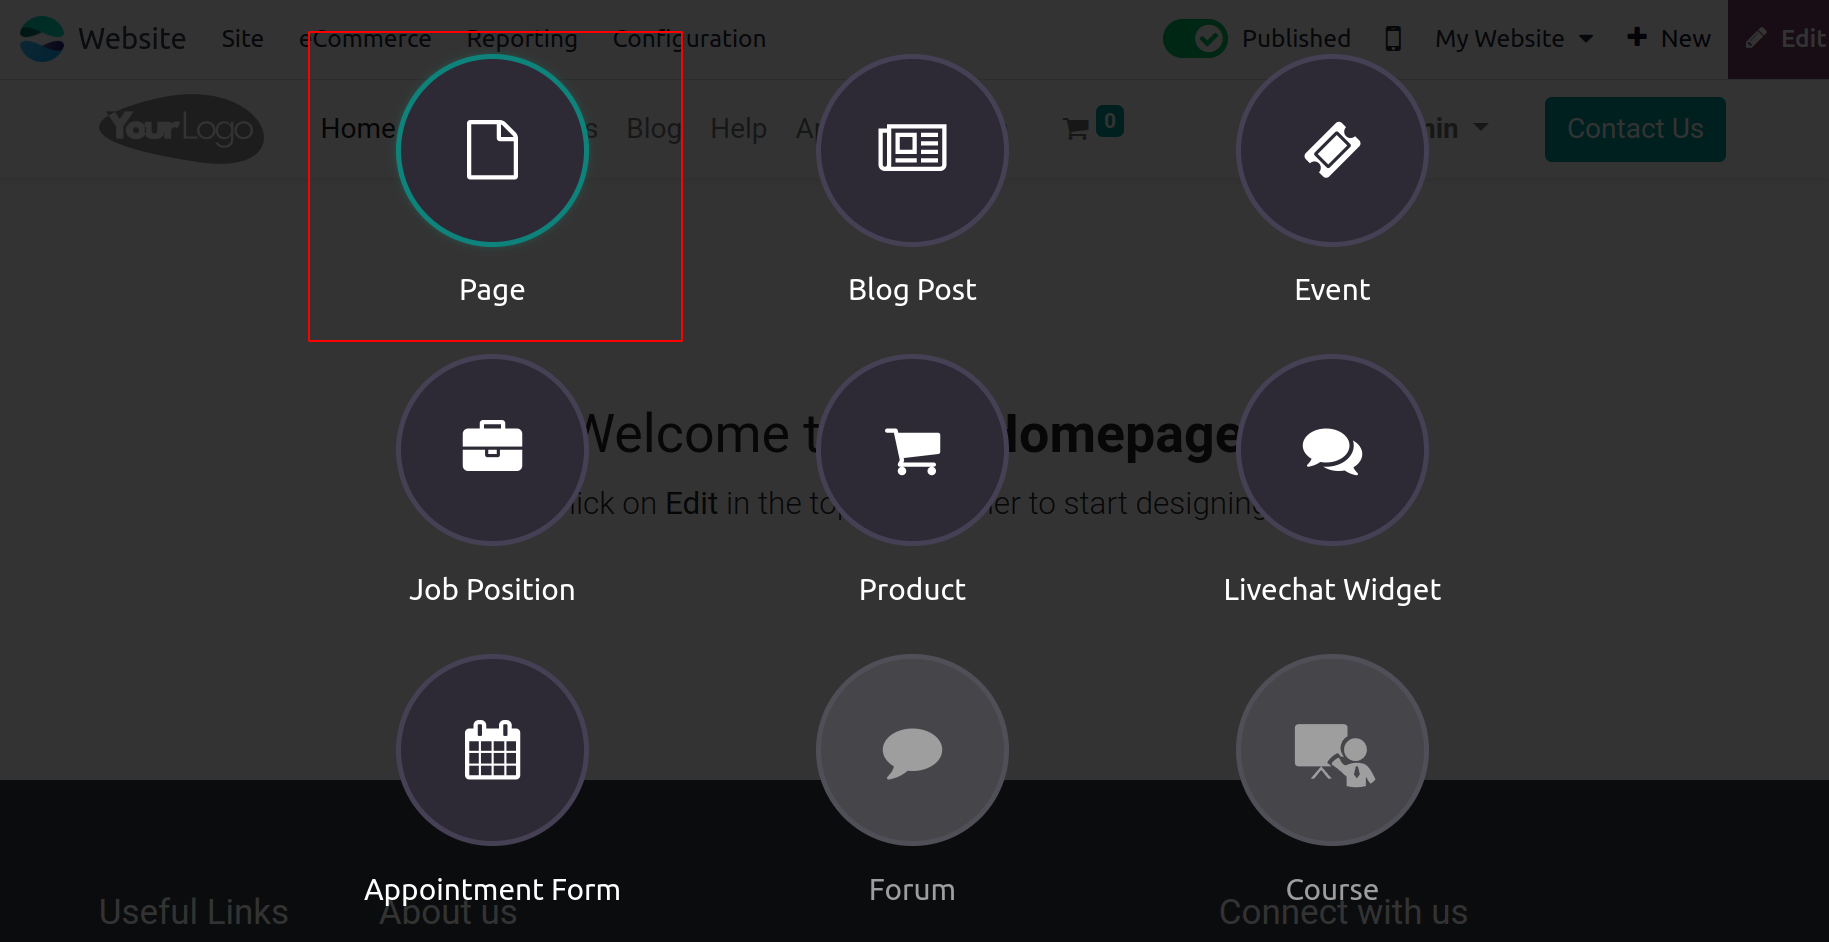
You can use the Page menu to create a new Page for your website. When you click on this symbol, the pop-up window pictured in the image below will appear.
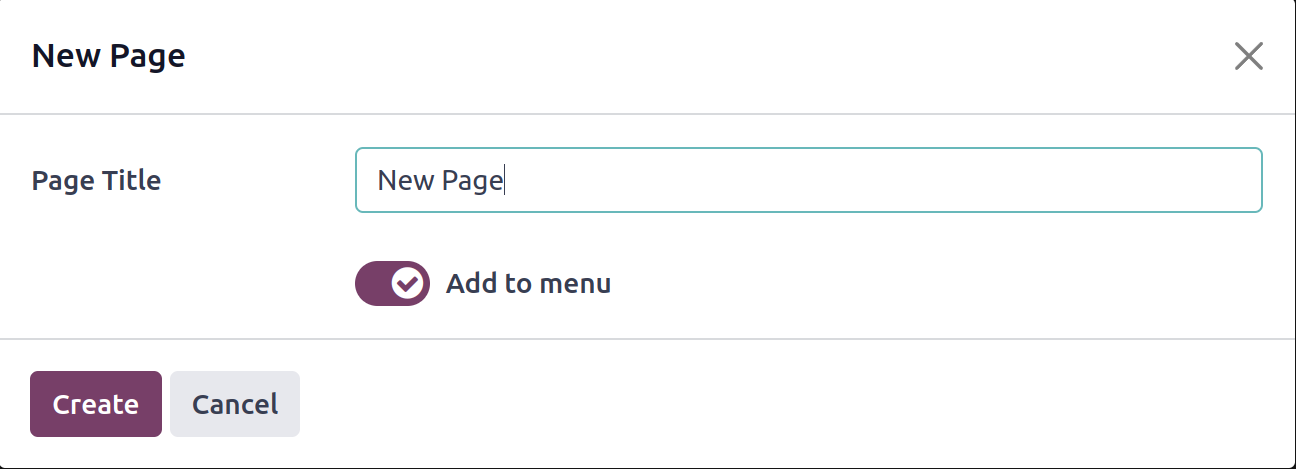
You can enter the Page Title and activate the Add to menu area in this pop-up window. You can later select the Create button from within the same window. This will cause the newly created page to appear on the website module's main taskbar.
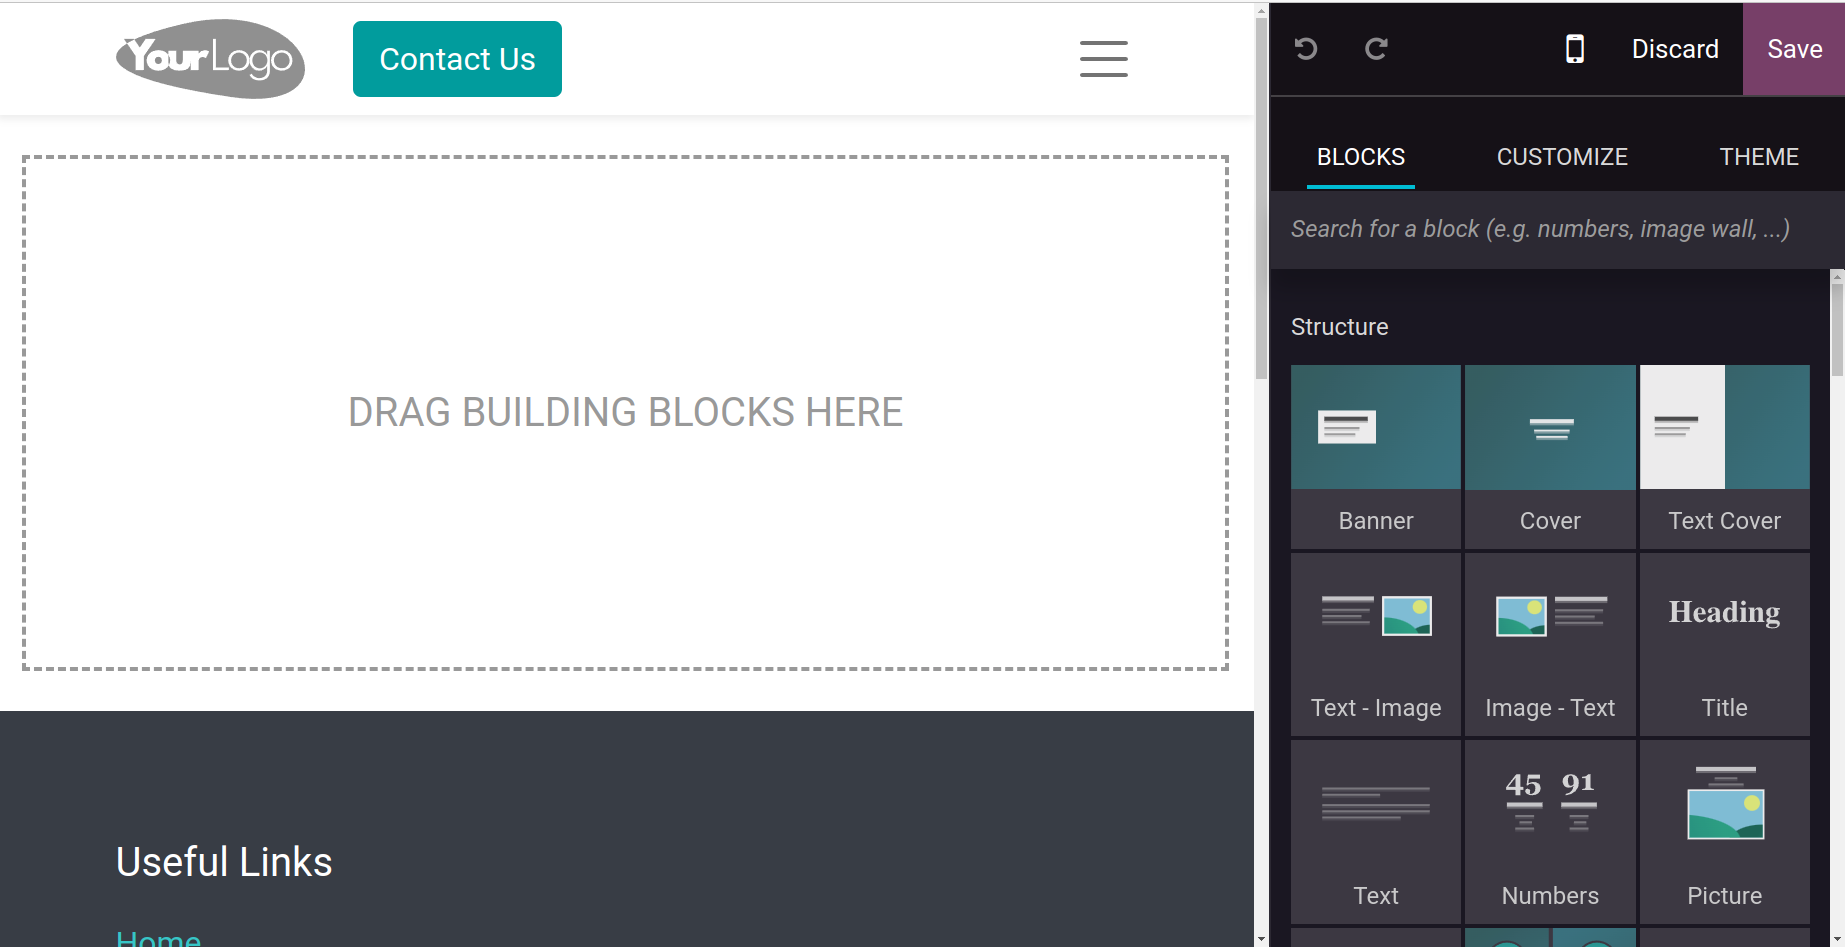
You may also use the Odoo17 system to construct and manage web pages from the back end. You can accomplish this by choosing the Manage Pages option, which is available in the Site tab.
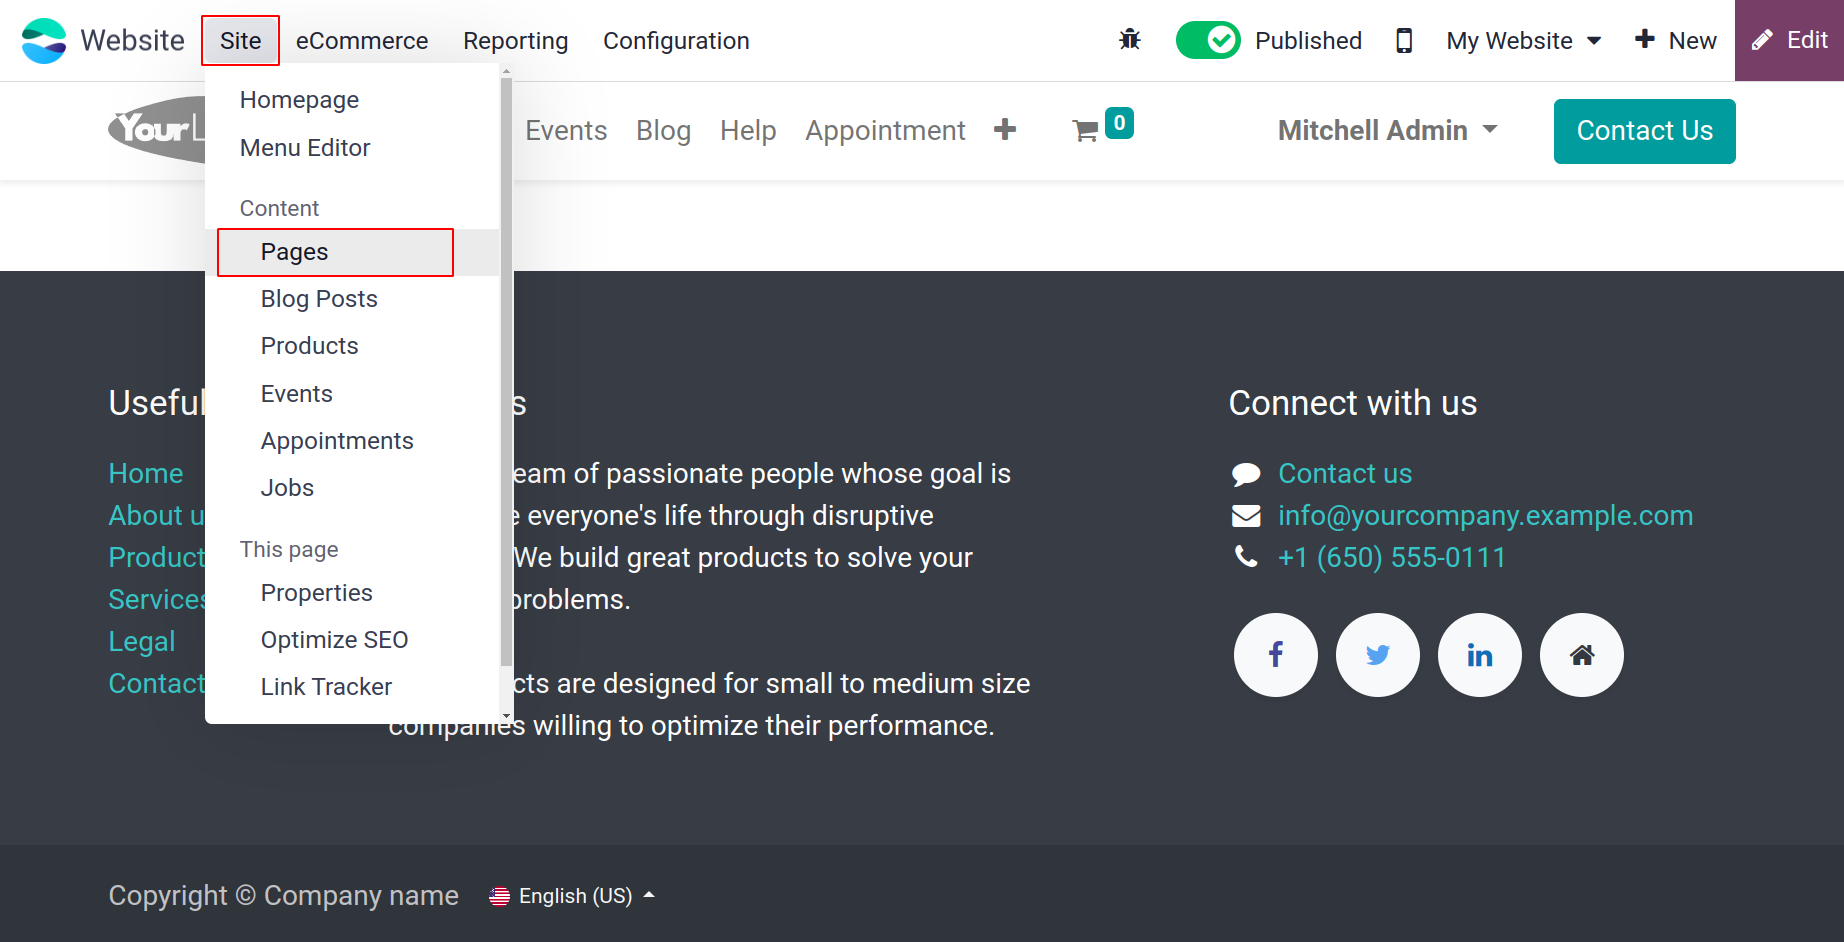
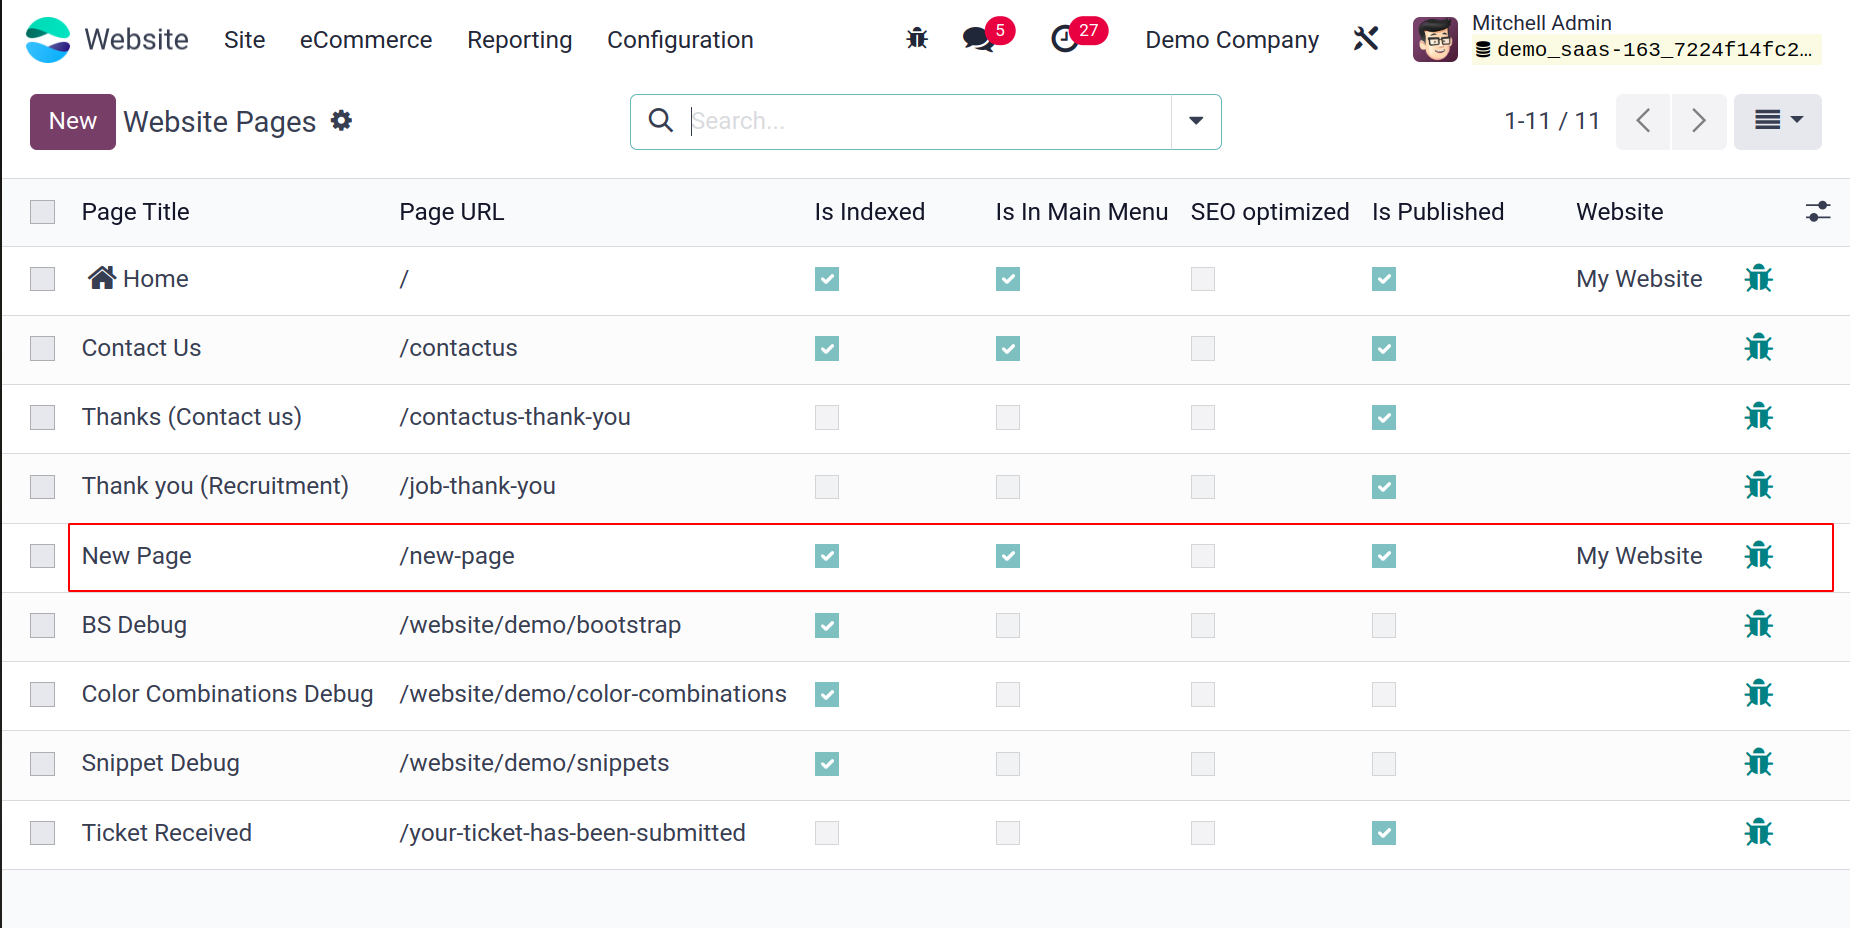
A previously created page is available there. A new page can be created by clicking the New button. Which is similar as said before. Click on the icon marked on the below screenshot to edit the created page.
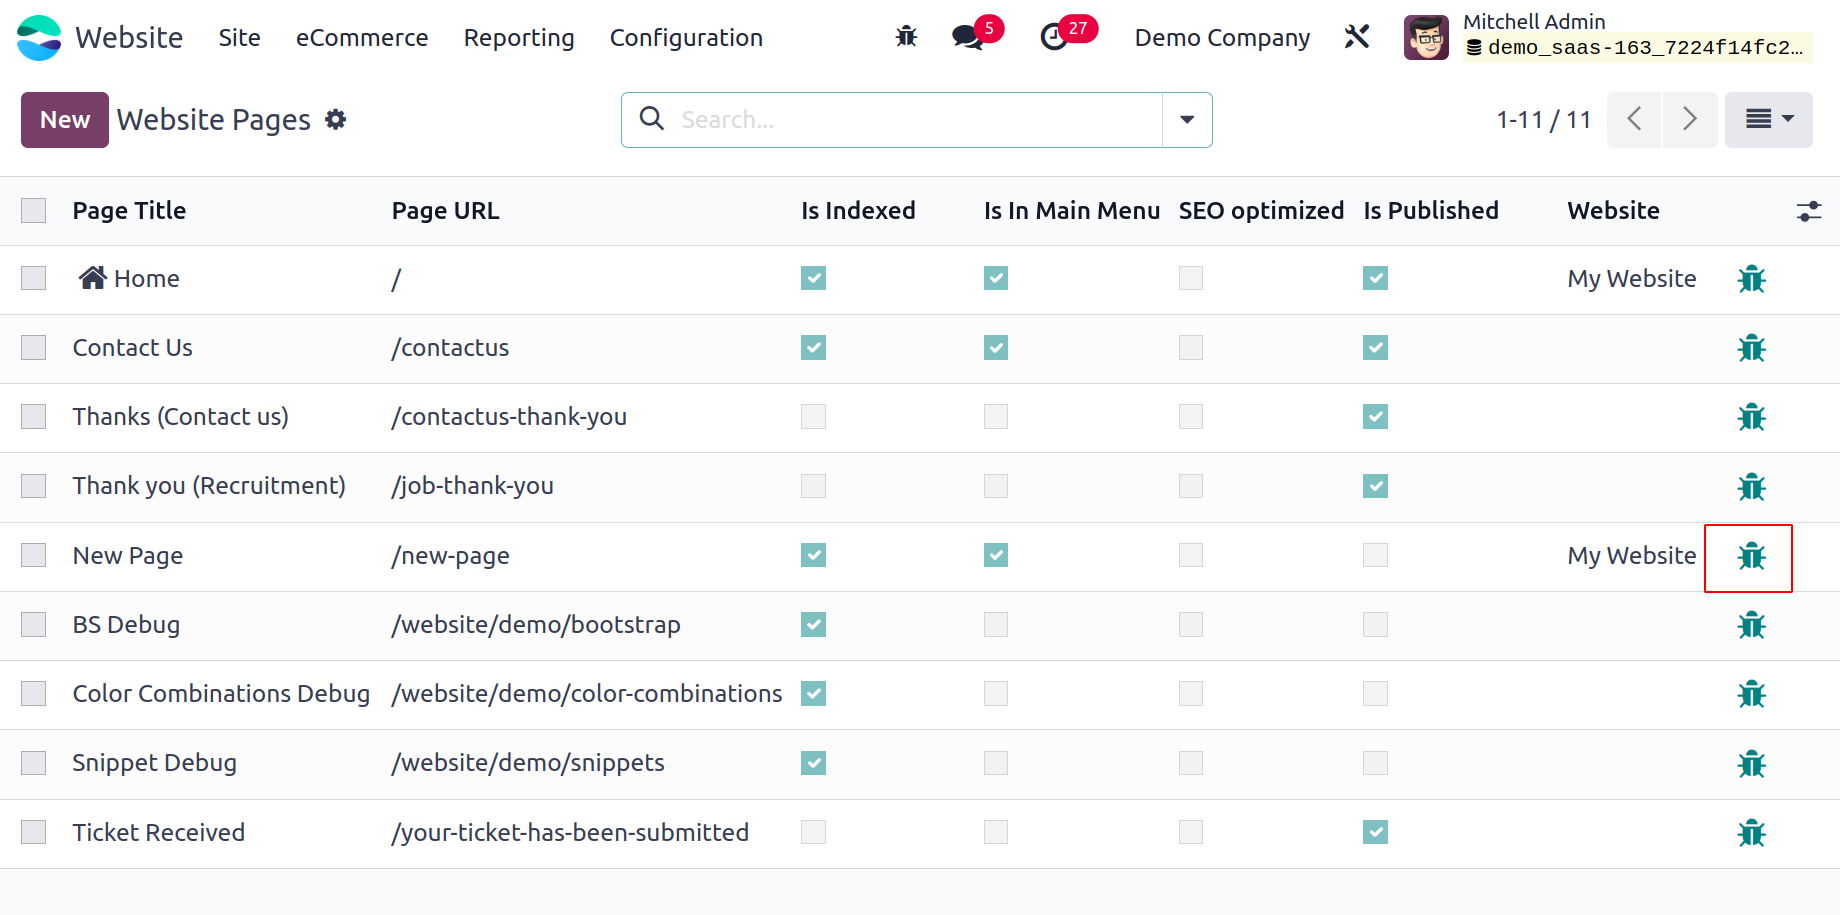
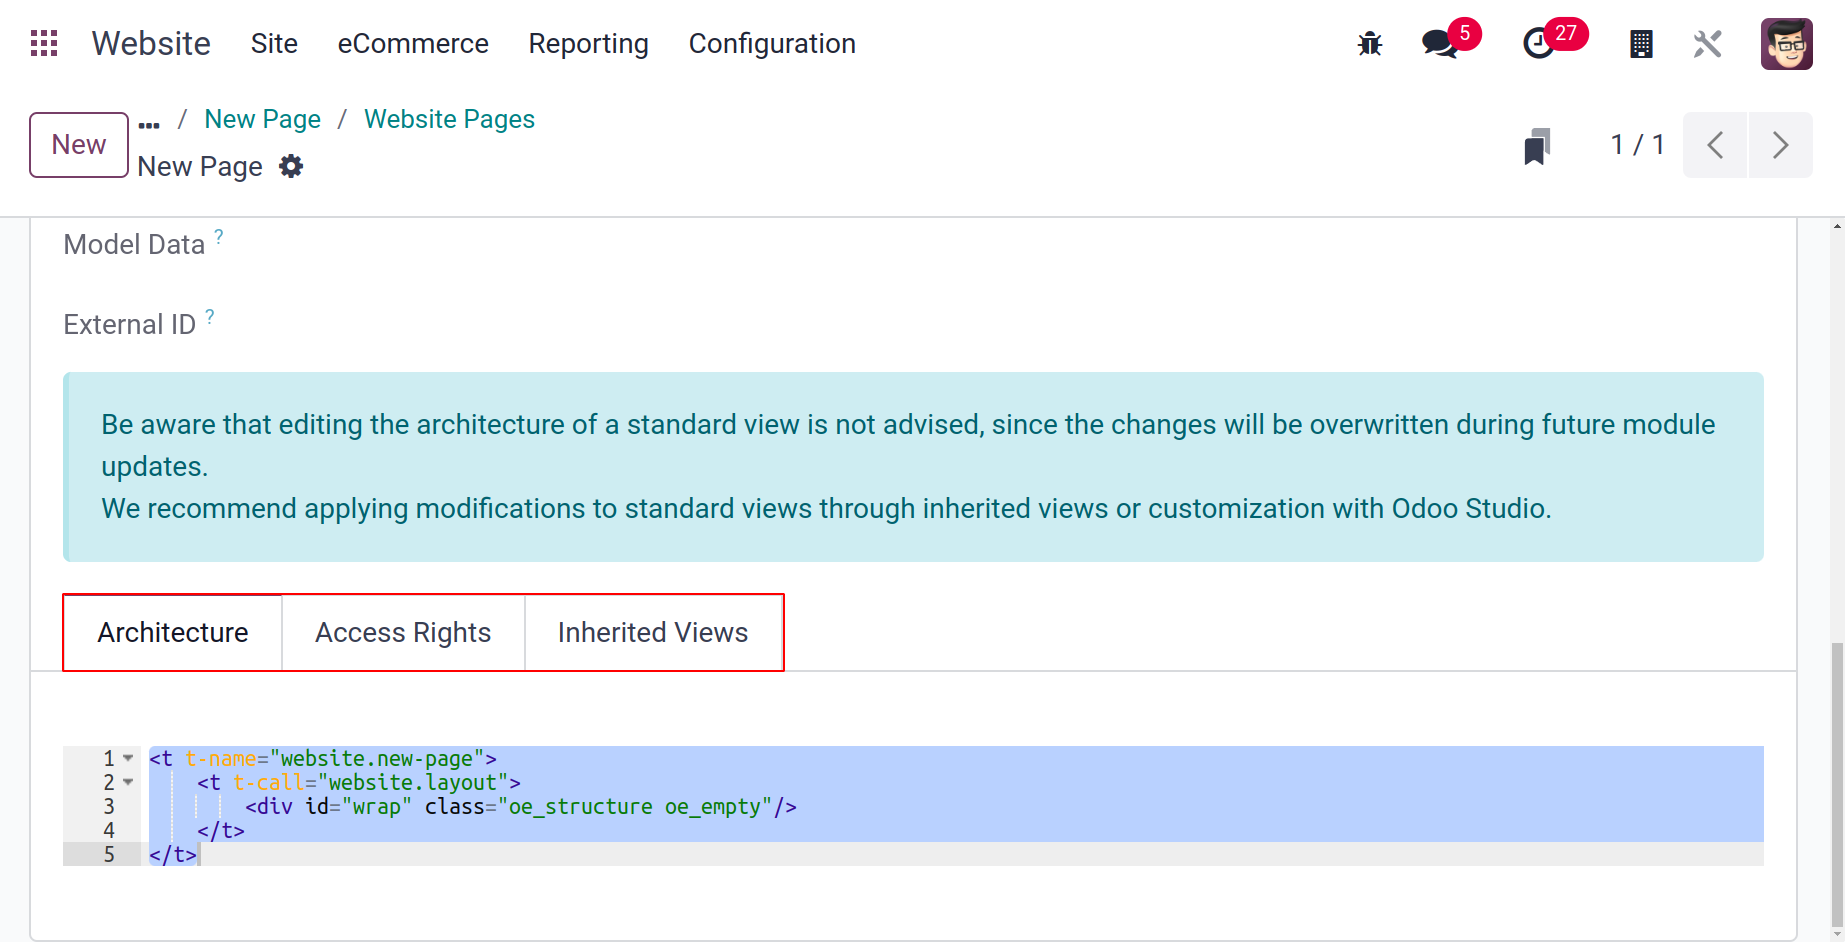
Then the opening page contains the page details.
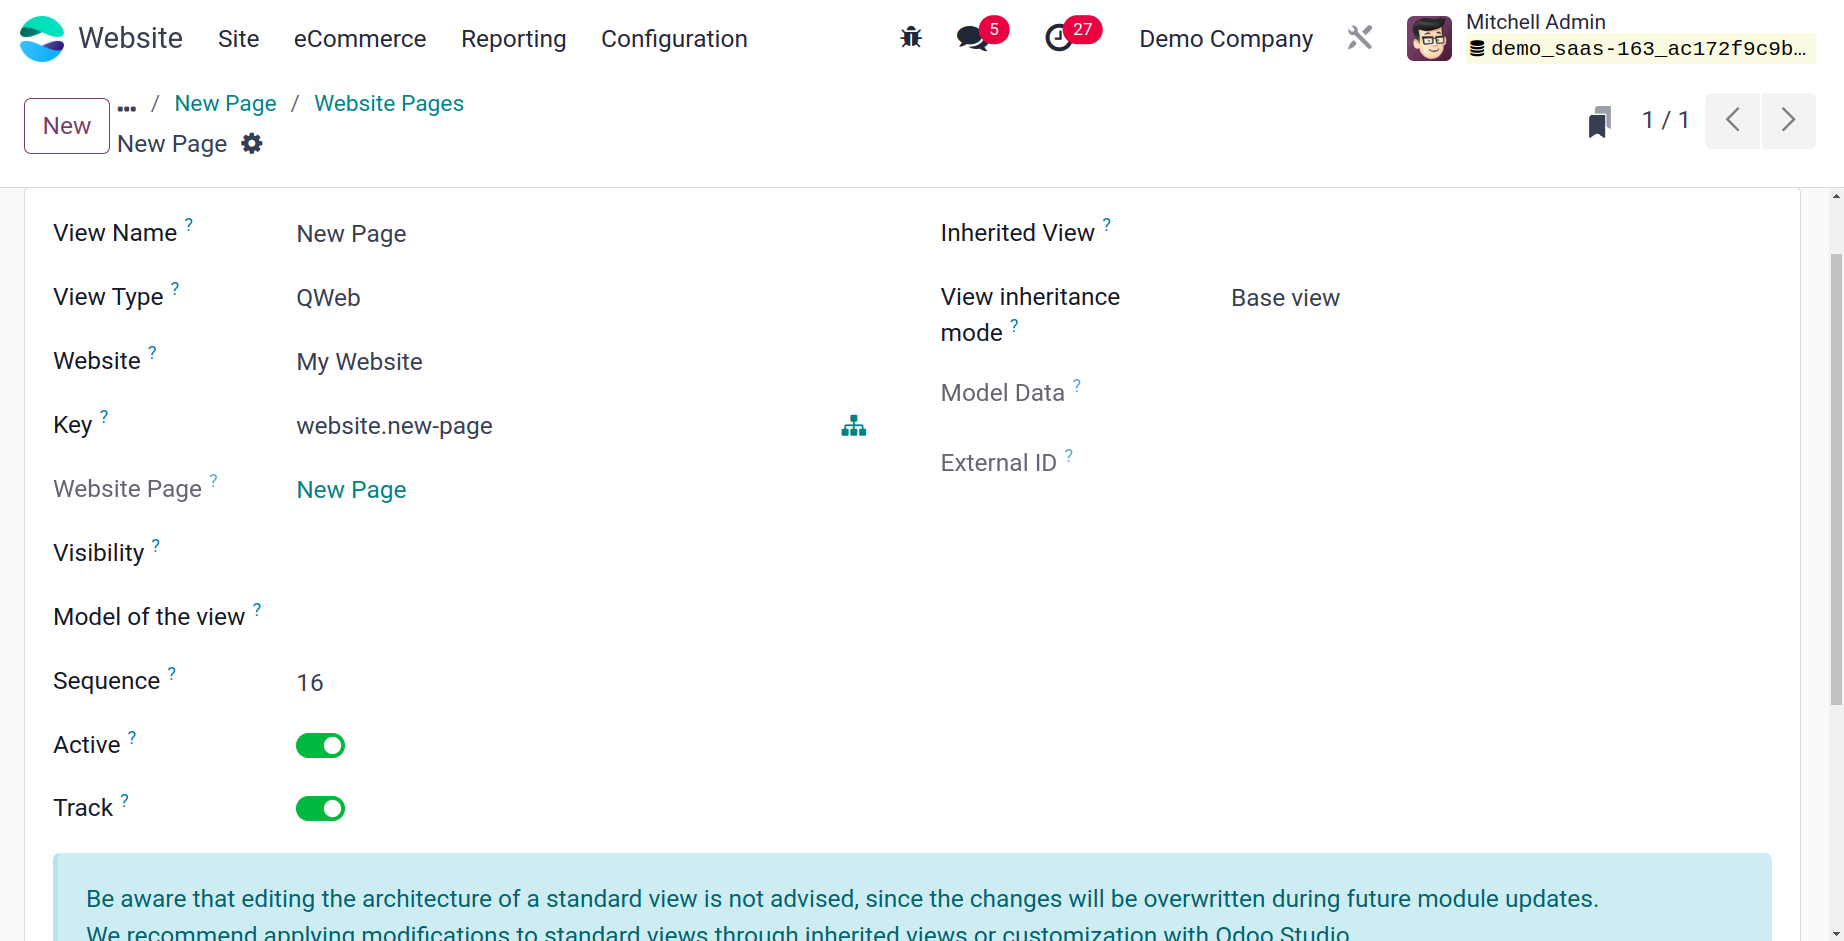
The Architecture, Access Rights and Inherited Views of the page can be viewed here.
Blog Post
Likewise, you can choose the Blog Post menu item to start a new blog post for your website.
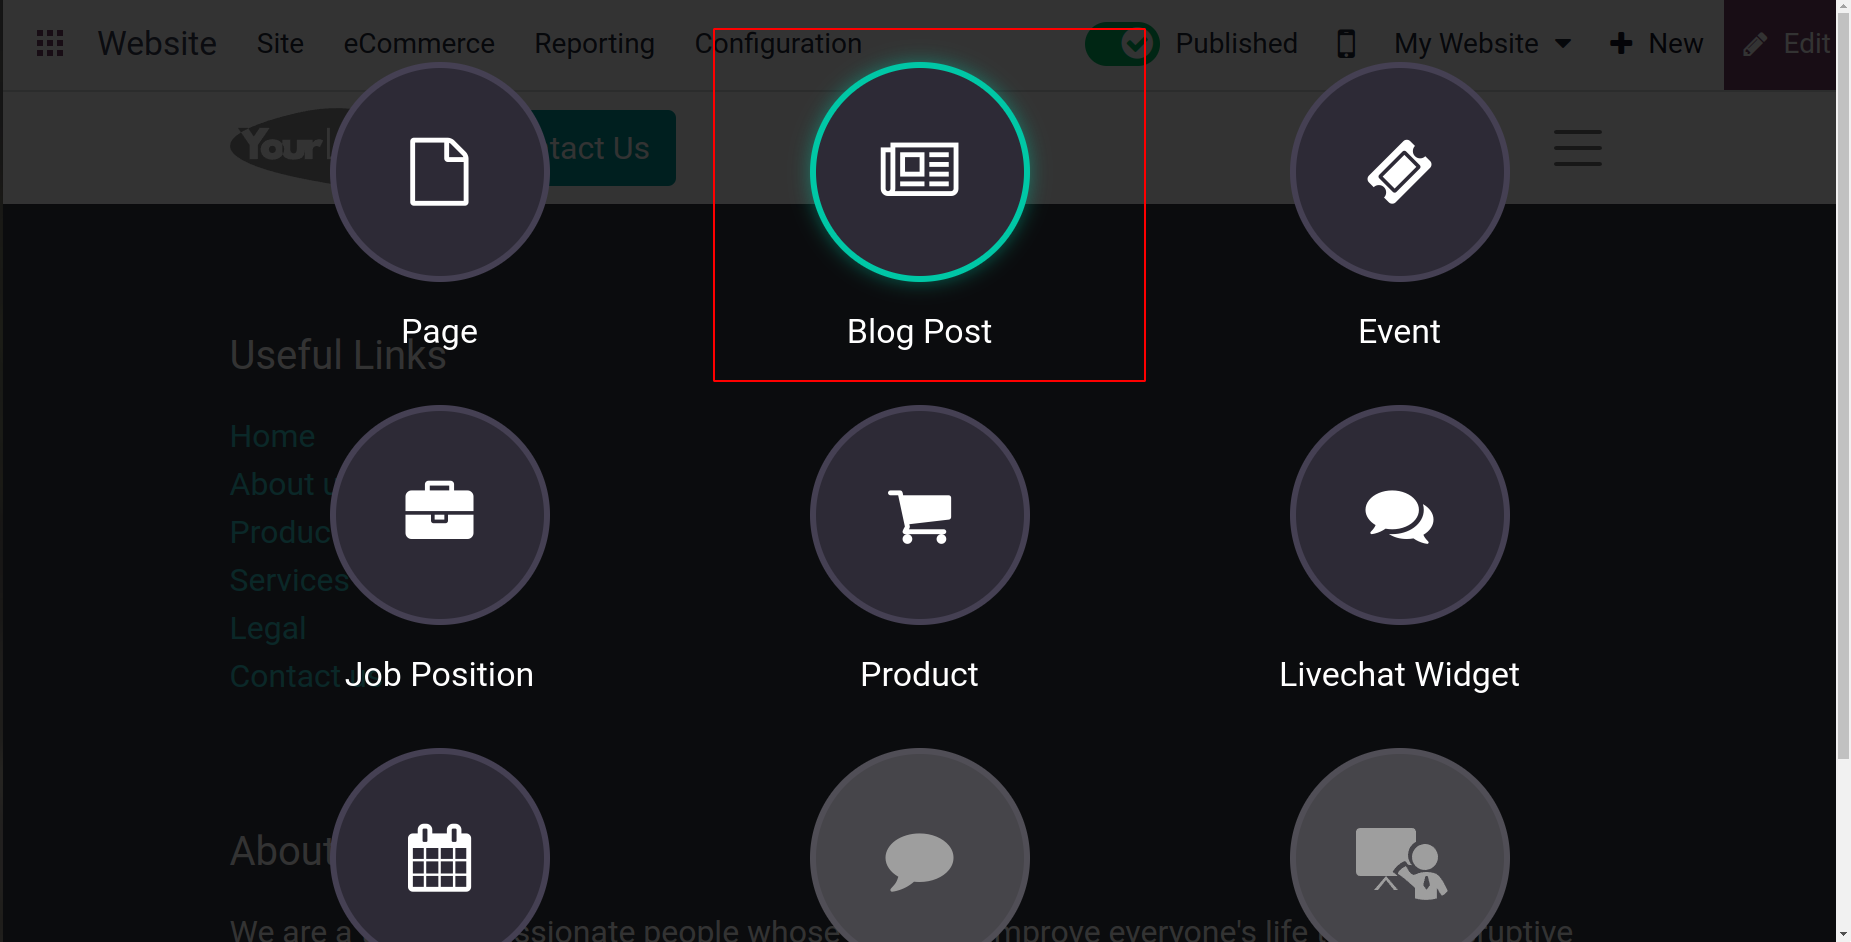
You can now see the pop-up and choose the type of Blog Post.
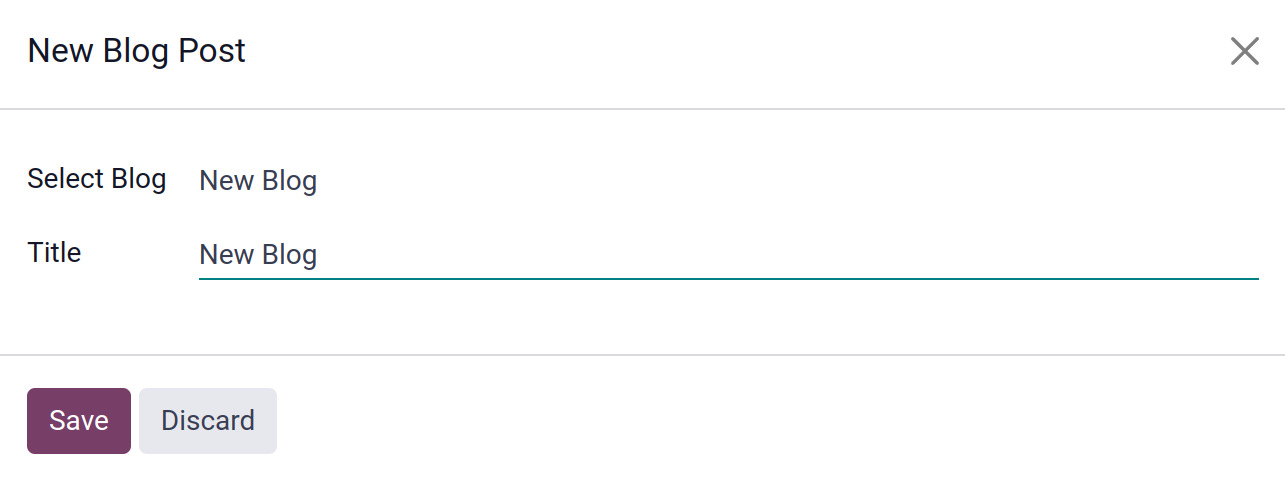
Click the Save button afterwards. You will now be given a fresh page on which to draft a new blog entry.
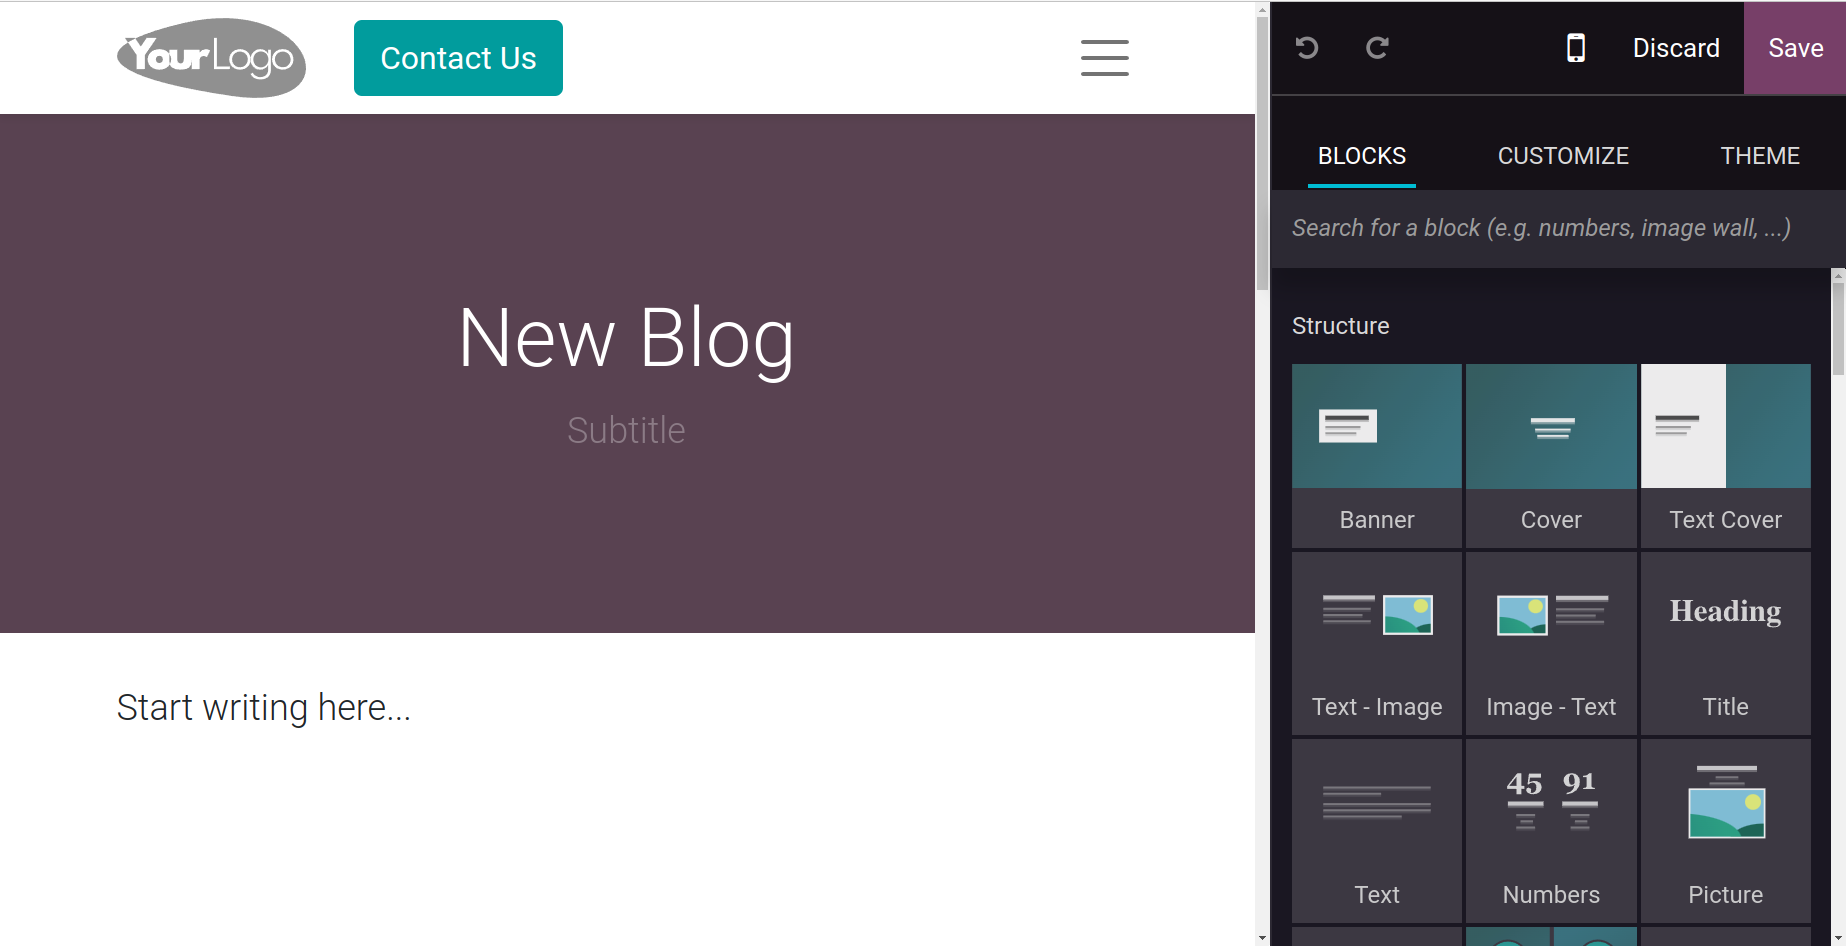
You can write a title and, if necessary, a subtitle here. After that, you may get to work on creating blog posts. On the right side of the page, you will find the options for creating your new blog page. These editing tools might help you create a more appealing blog.
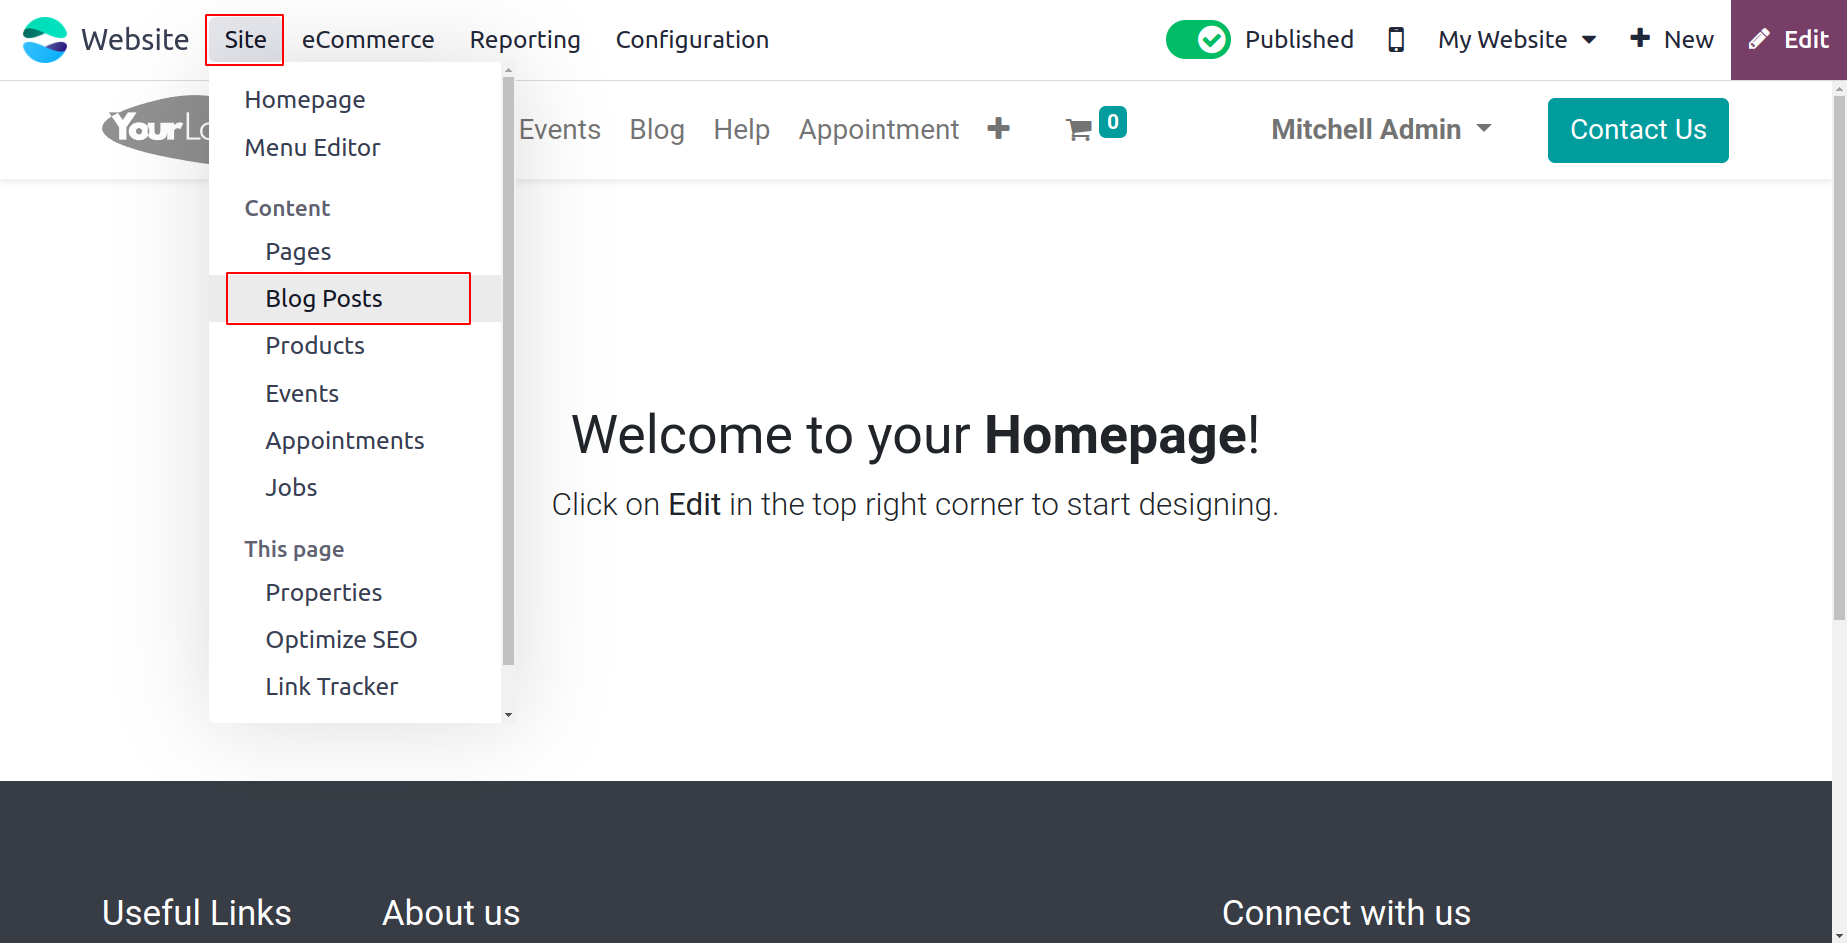
Let's open the Blog Posts pane to view it. To view the Blog Posts pane, click Blog Posts from the Site menu.
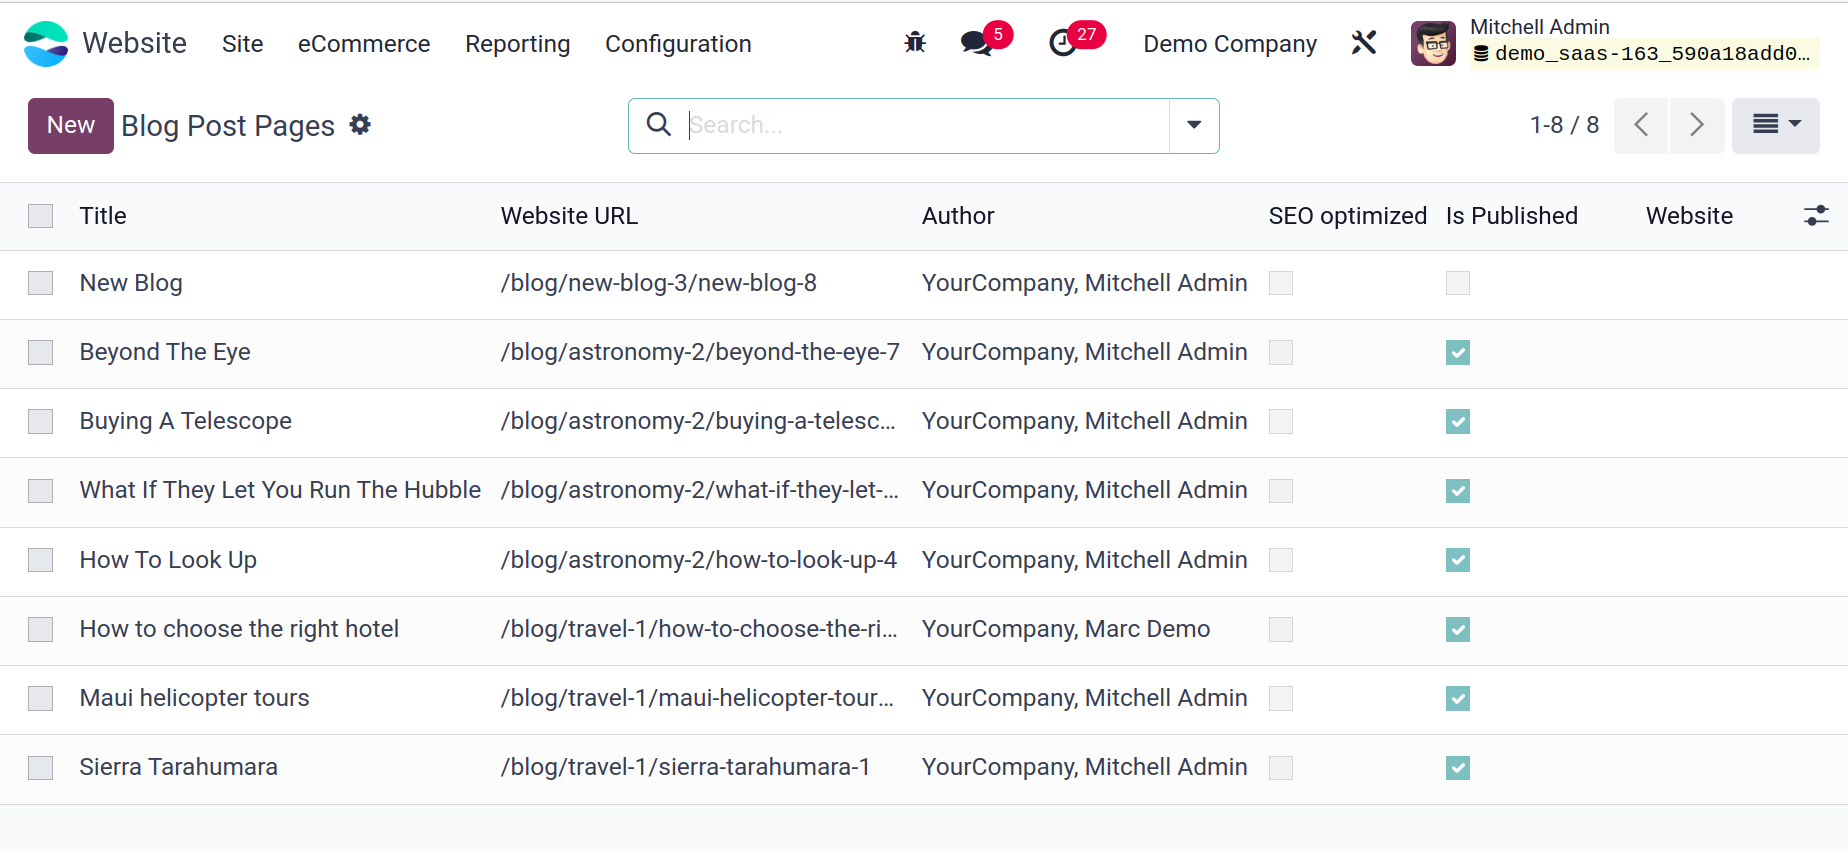
Every blog post that is detailed on the platform will be seen in the Blog Posts window. All the necessary details, including Title, Author, Blog, Website, Views, Last Contributor, Last Updated Date, and Time, are provided. Below is a screenshot of the window's List view.
You may examine the details in Kanban format with Odoo17 as well. To access the Kanban menu, click on it, which is located in the upper right corner of the window. The pane also has default and custom Filters, Group By, Favorite, and Search options, which will help you greatly in easing the process of finding, filtering, and organizing the blog entries that are listed.
You can click the New button in the upper left corner of the window to start writing new blog posts. You will now see a window for creating blog posts. This window allows you to create and edit new blog entries.
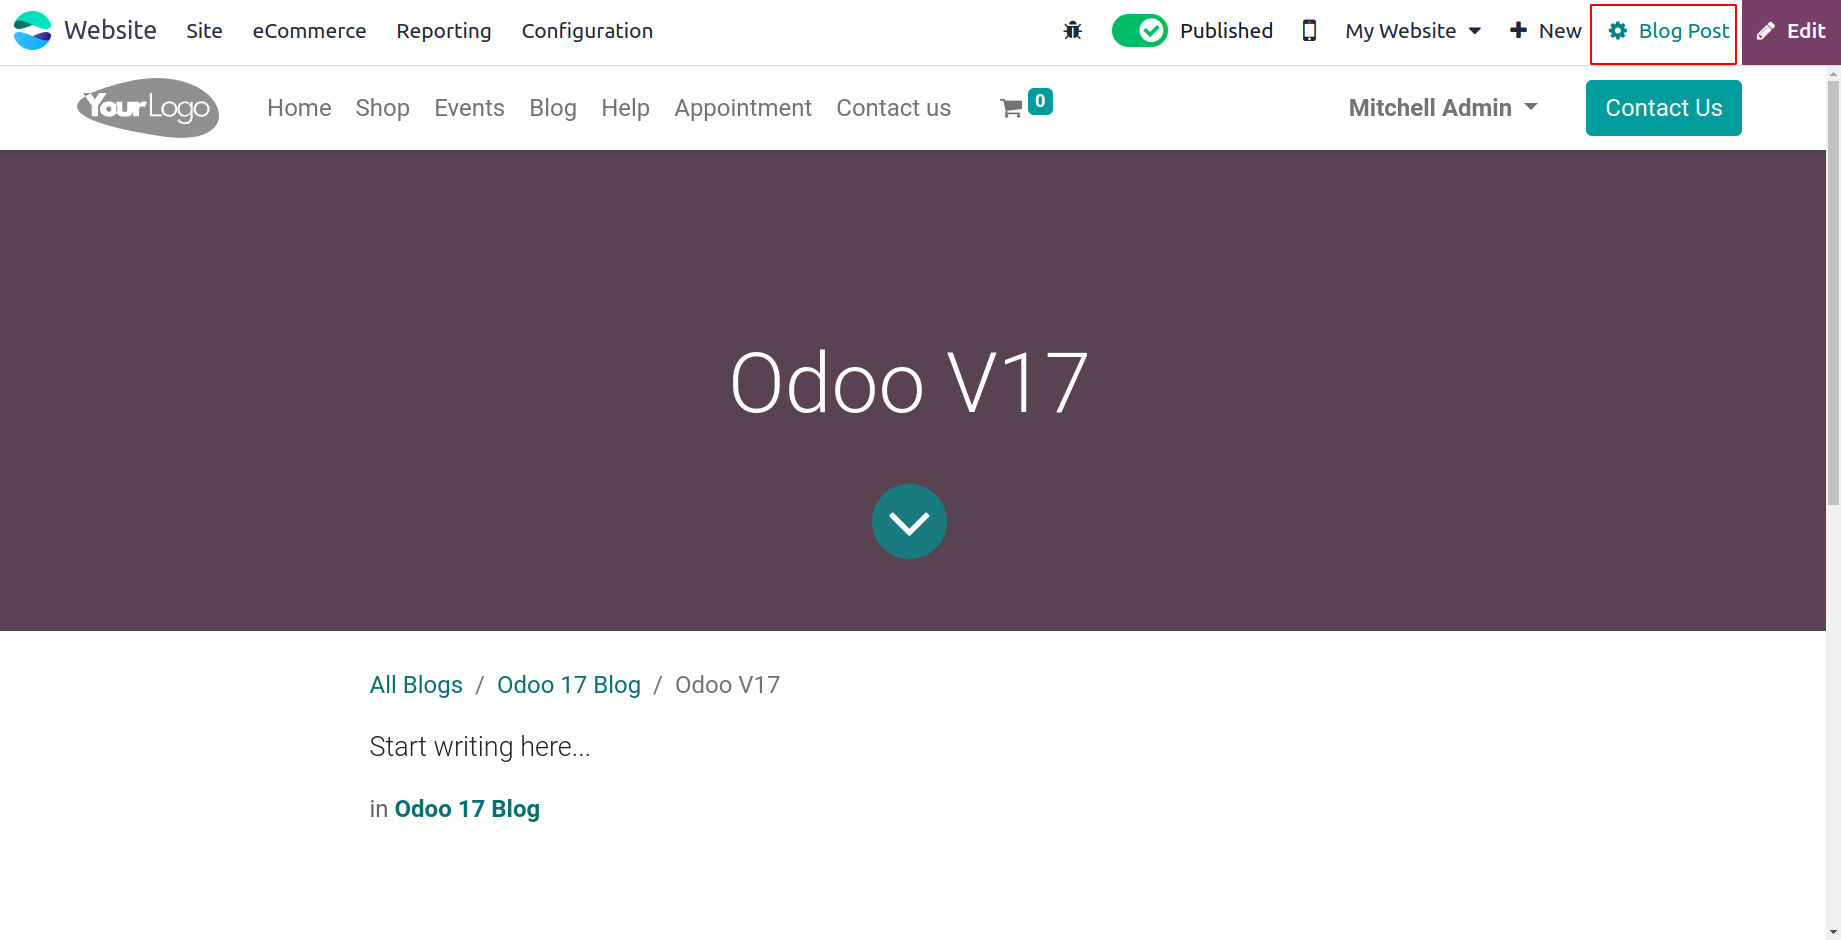
To edit the Blog Post click on the Blog Post button placed on the upper left corner.
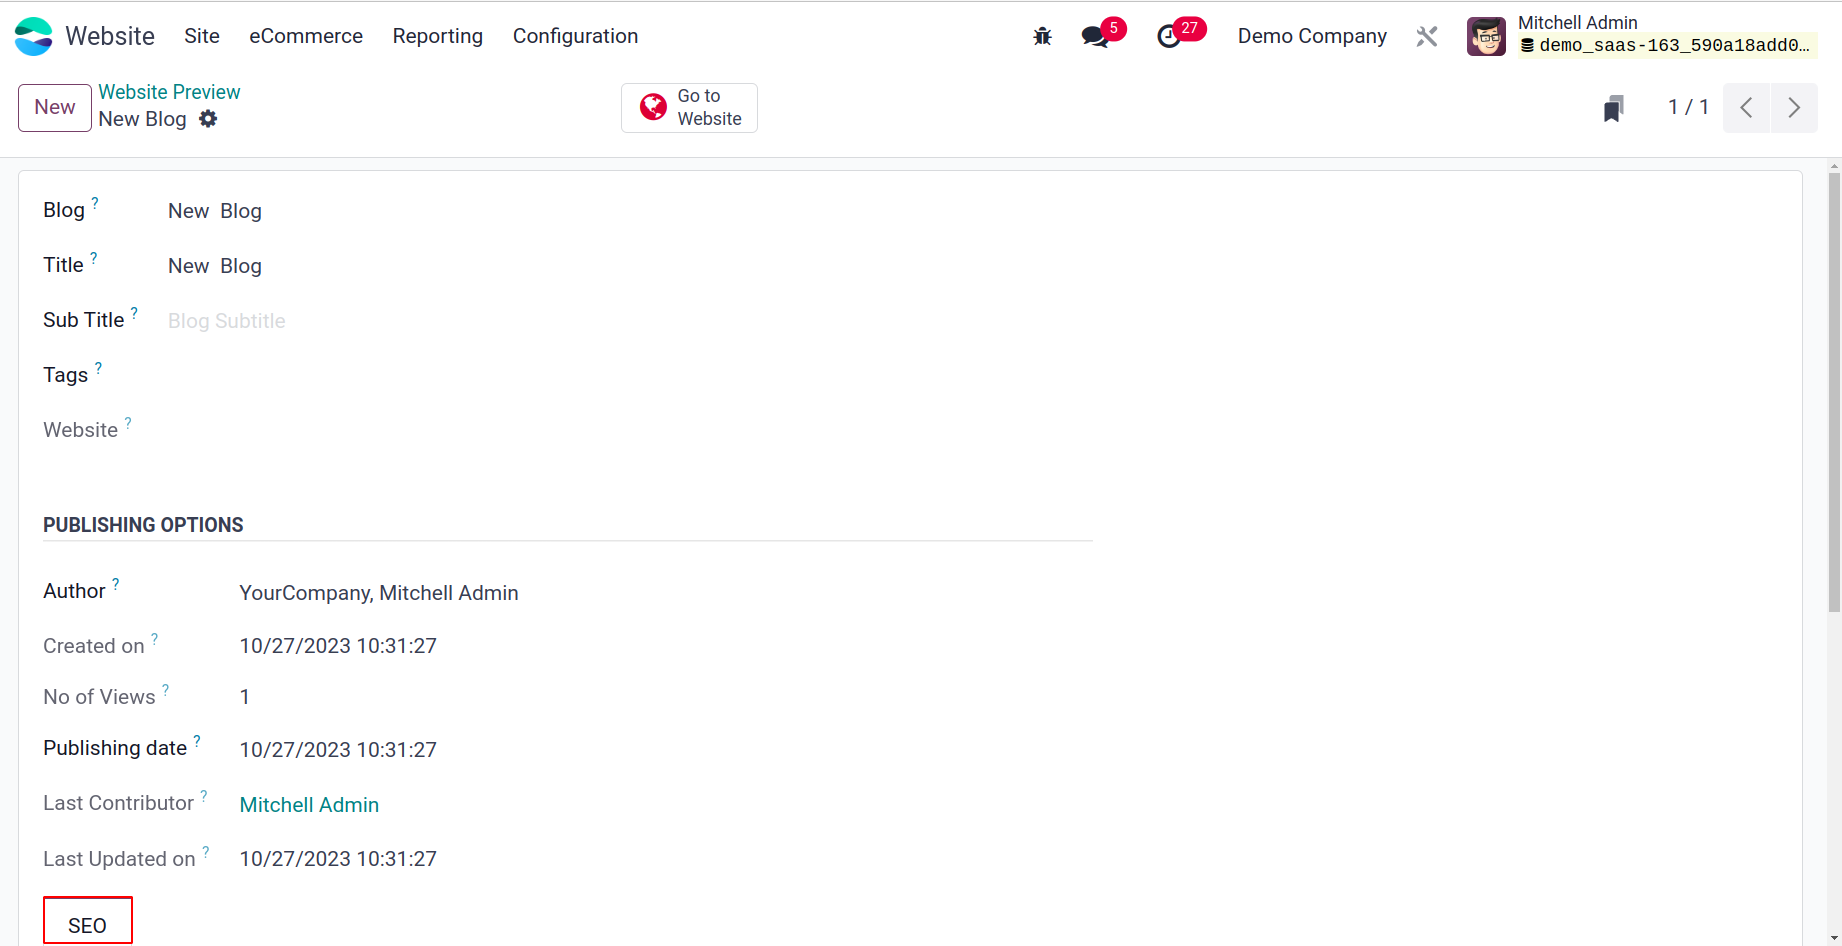
You can fill out this form with all the necessary information. Initially, you can specify the blog's Name under the Blog option. Using the available dropdown menu, you may define it. Next, if you are using various website options, you can enter the Website, Tags associated with this blog post, SubTitle, and Title of the blog post. You can provide the Author Name and the Publishing Date in the Publishing Options section. If the platform has already published one blog post that is currently undergoing revision, you can also assign the Last Contributor and the Last Updated On.
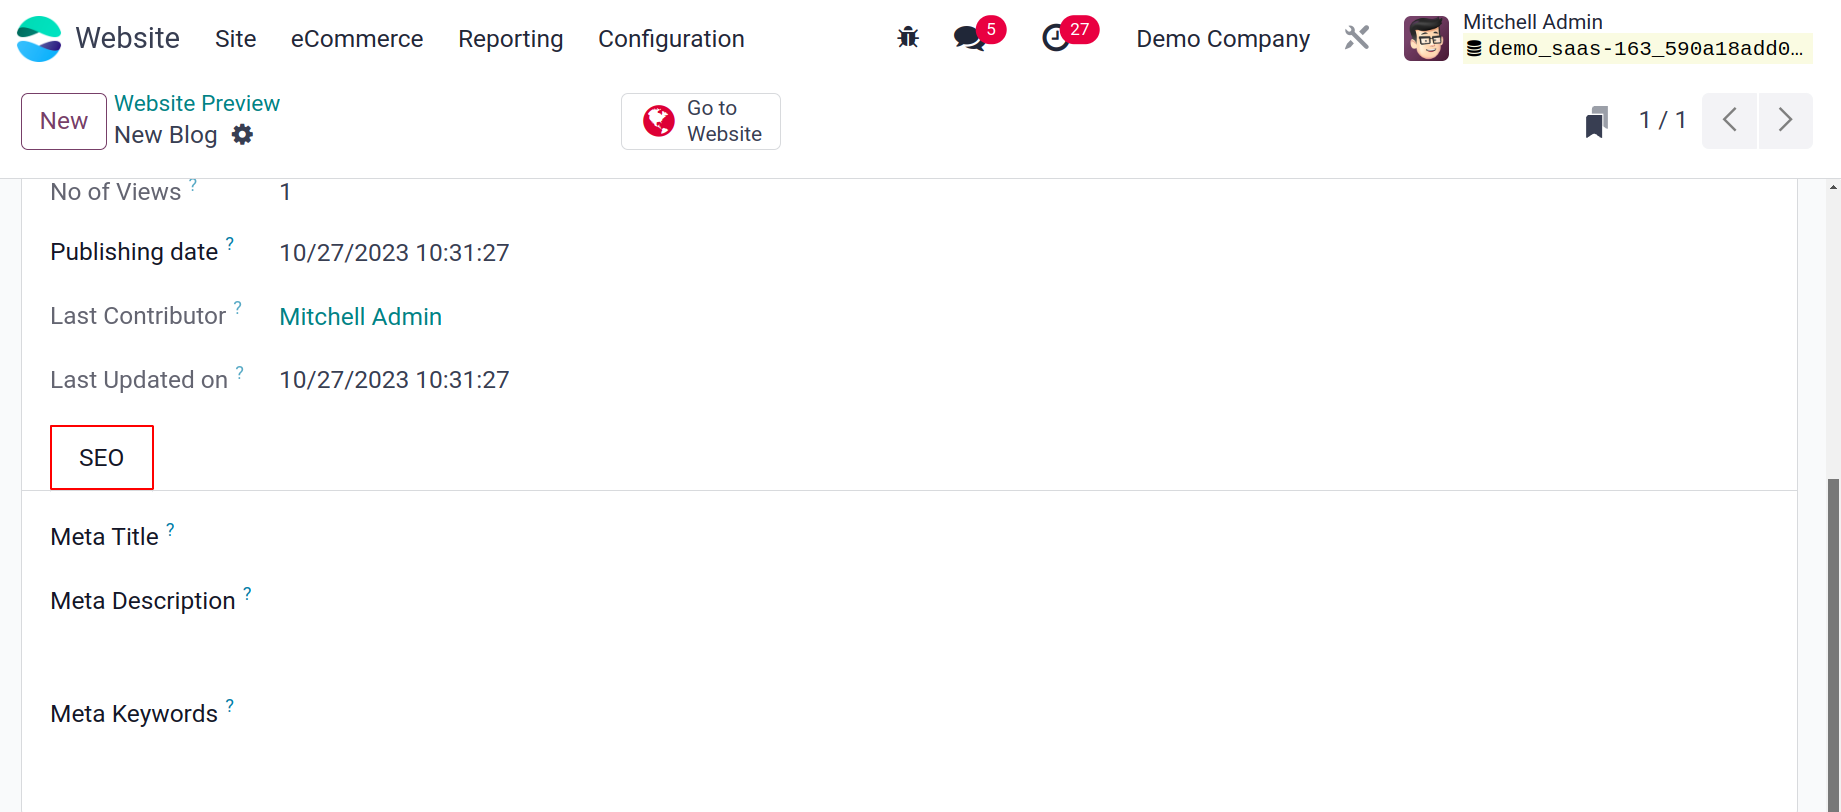
The SEO tab contains Meta Title, Meta Description and Meta Keywords.
Events
You can use the Event menu to add new events to your website.
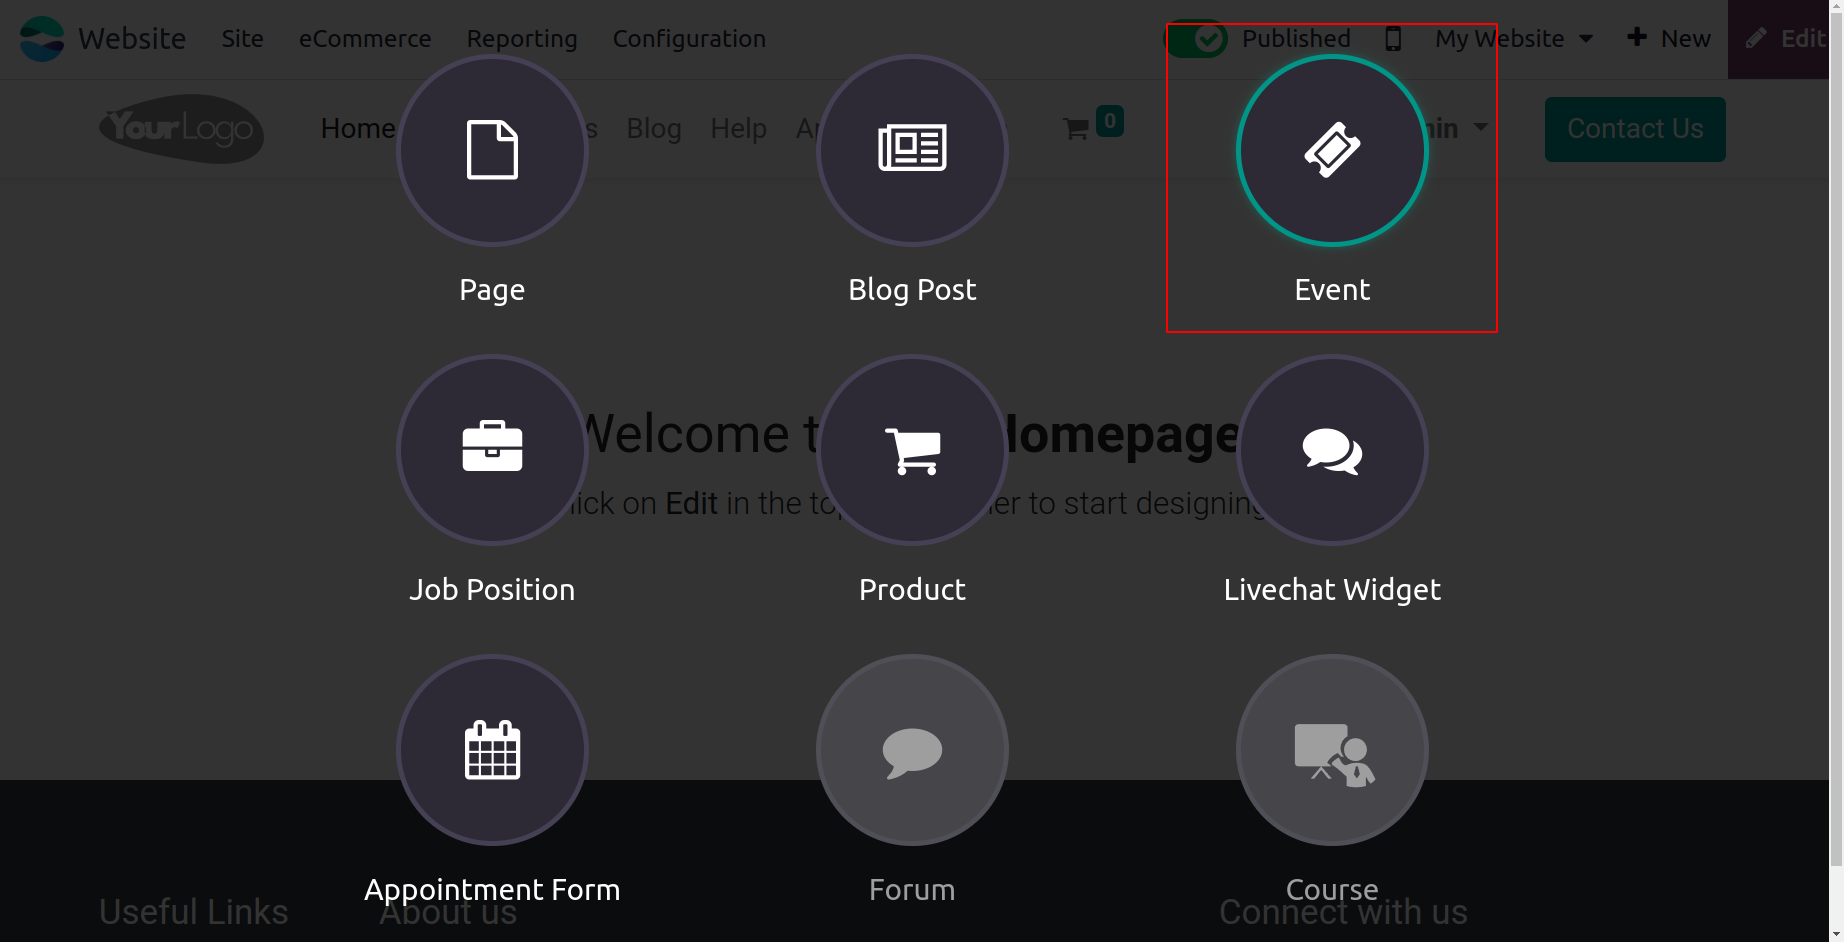
You can use the Event menu found under the +New tab to post new event details on your website. A pop-up window will appear if you select the Event menu.
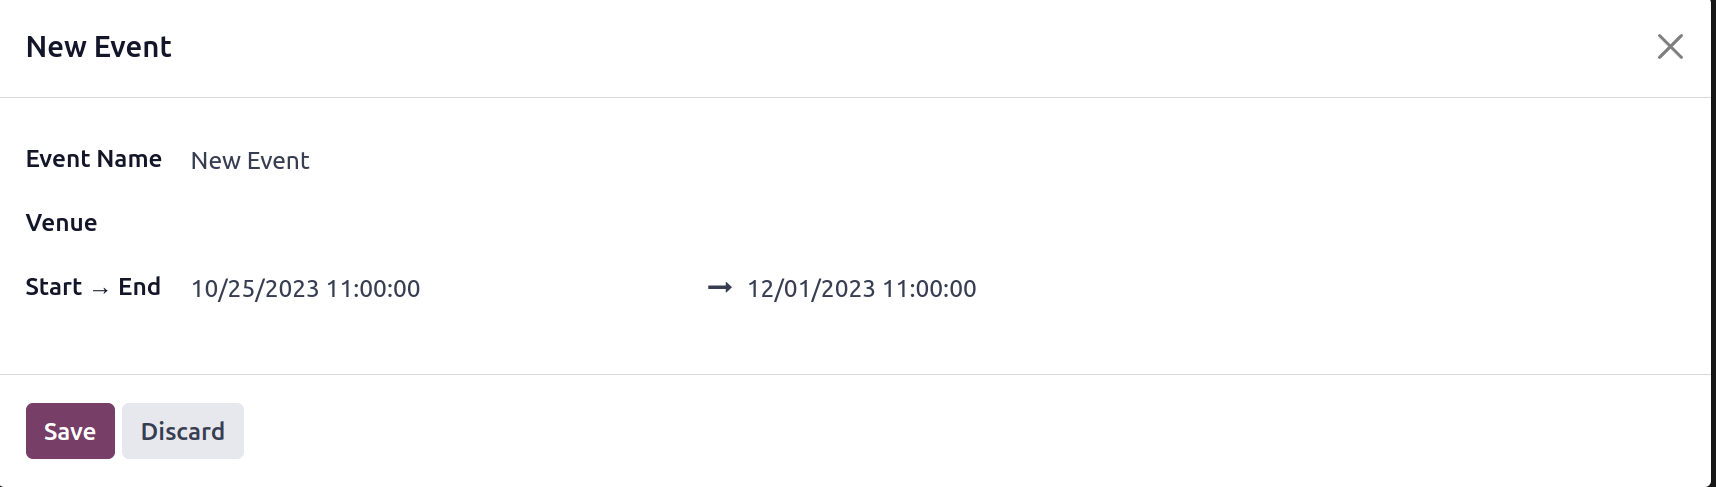
You can provide the Event Name and Venue in the pop-up window, including whether it is online or on-site. In the event that the programme is on-site, you must supply the venue. It is necessary to specify the Start and End dates. You can click the Save button when you have entered all the necessary information.
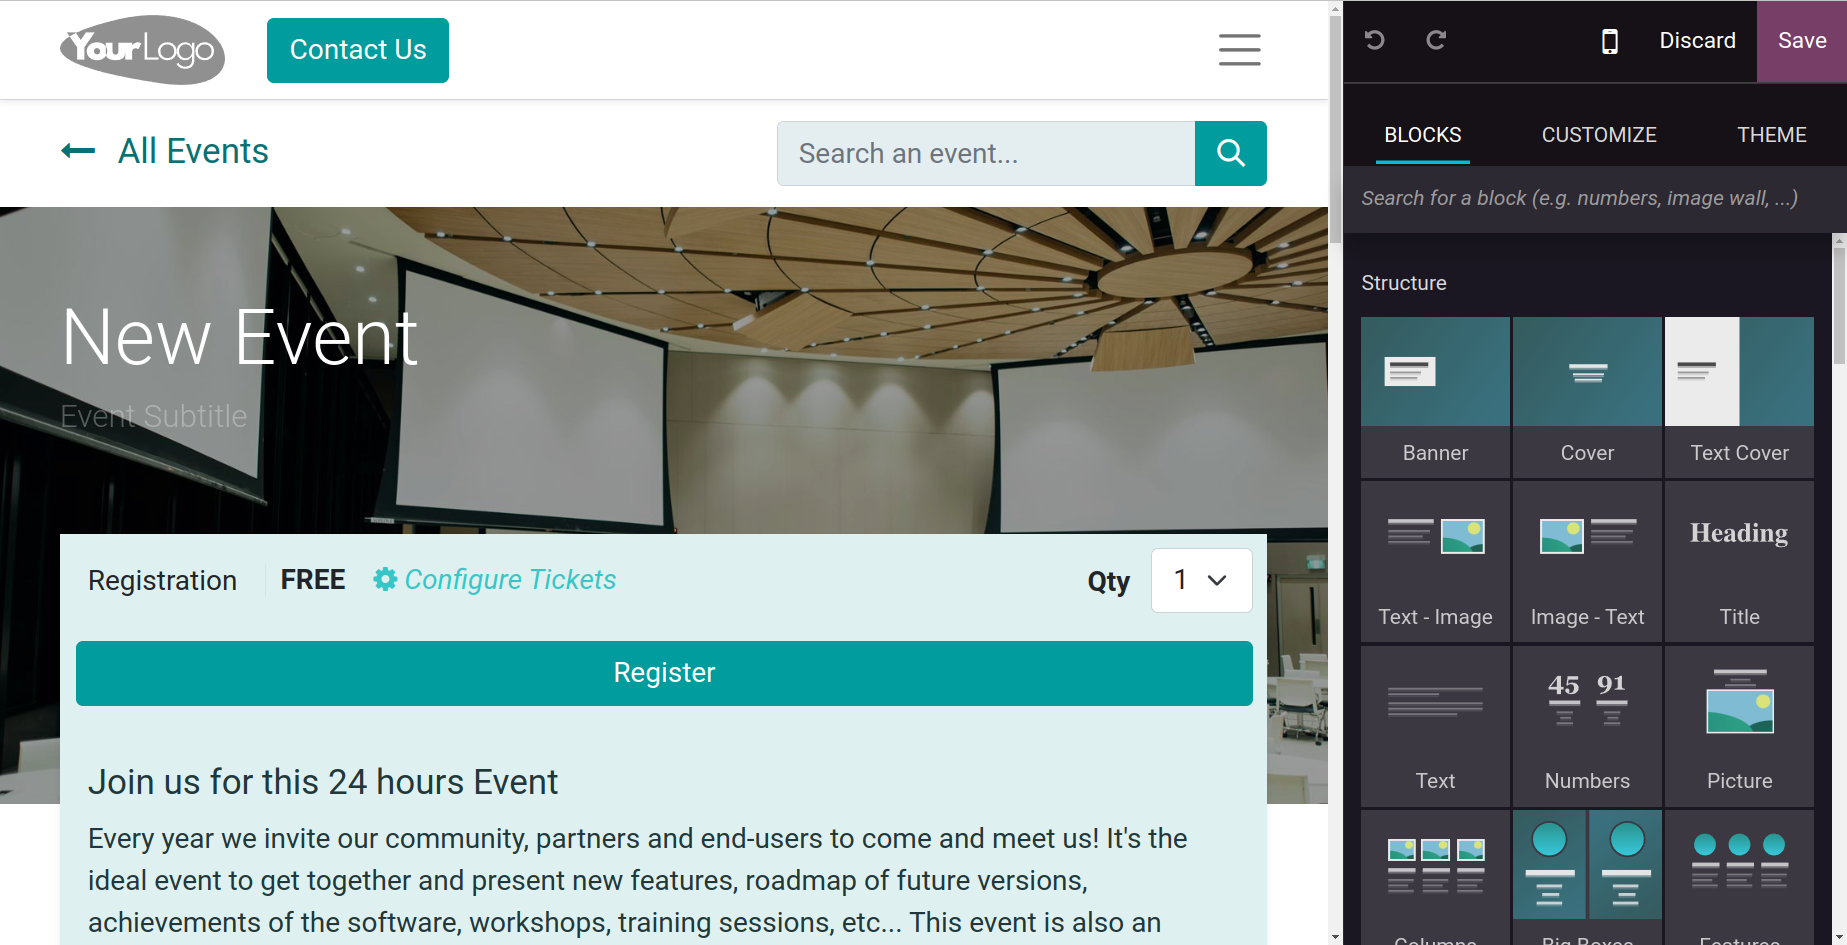
The event's name, default information, registration, quantity, configure tickets, and other significant icons will all be explained. The editing tools located on the left side of the webpage allow you to alter and personalize your material.
To edit the Event click on the Event button placed on the upper right corner of the website.
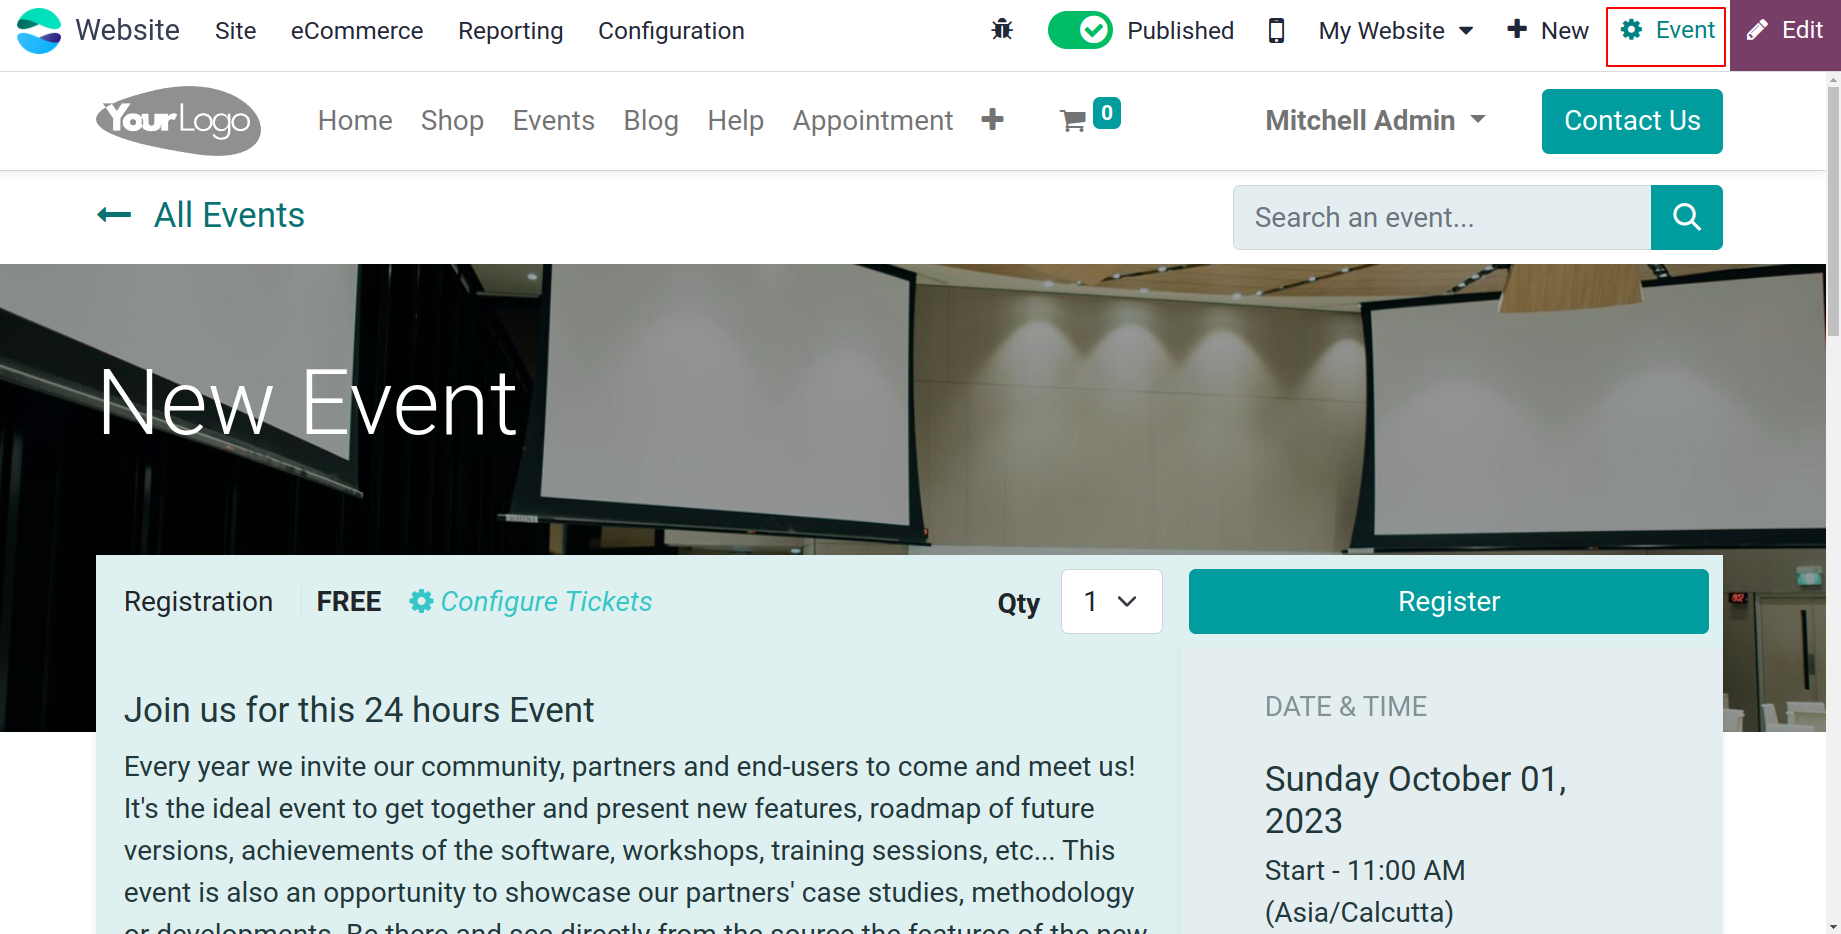
The created event can be edited from the opened window. The events date, Timezone, Template, Organizer, Tags, Responsible person etc can be added.
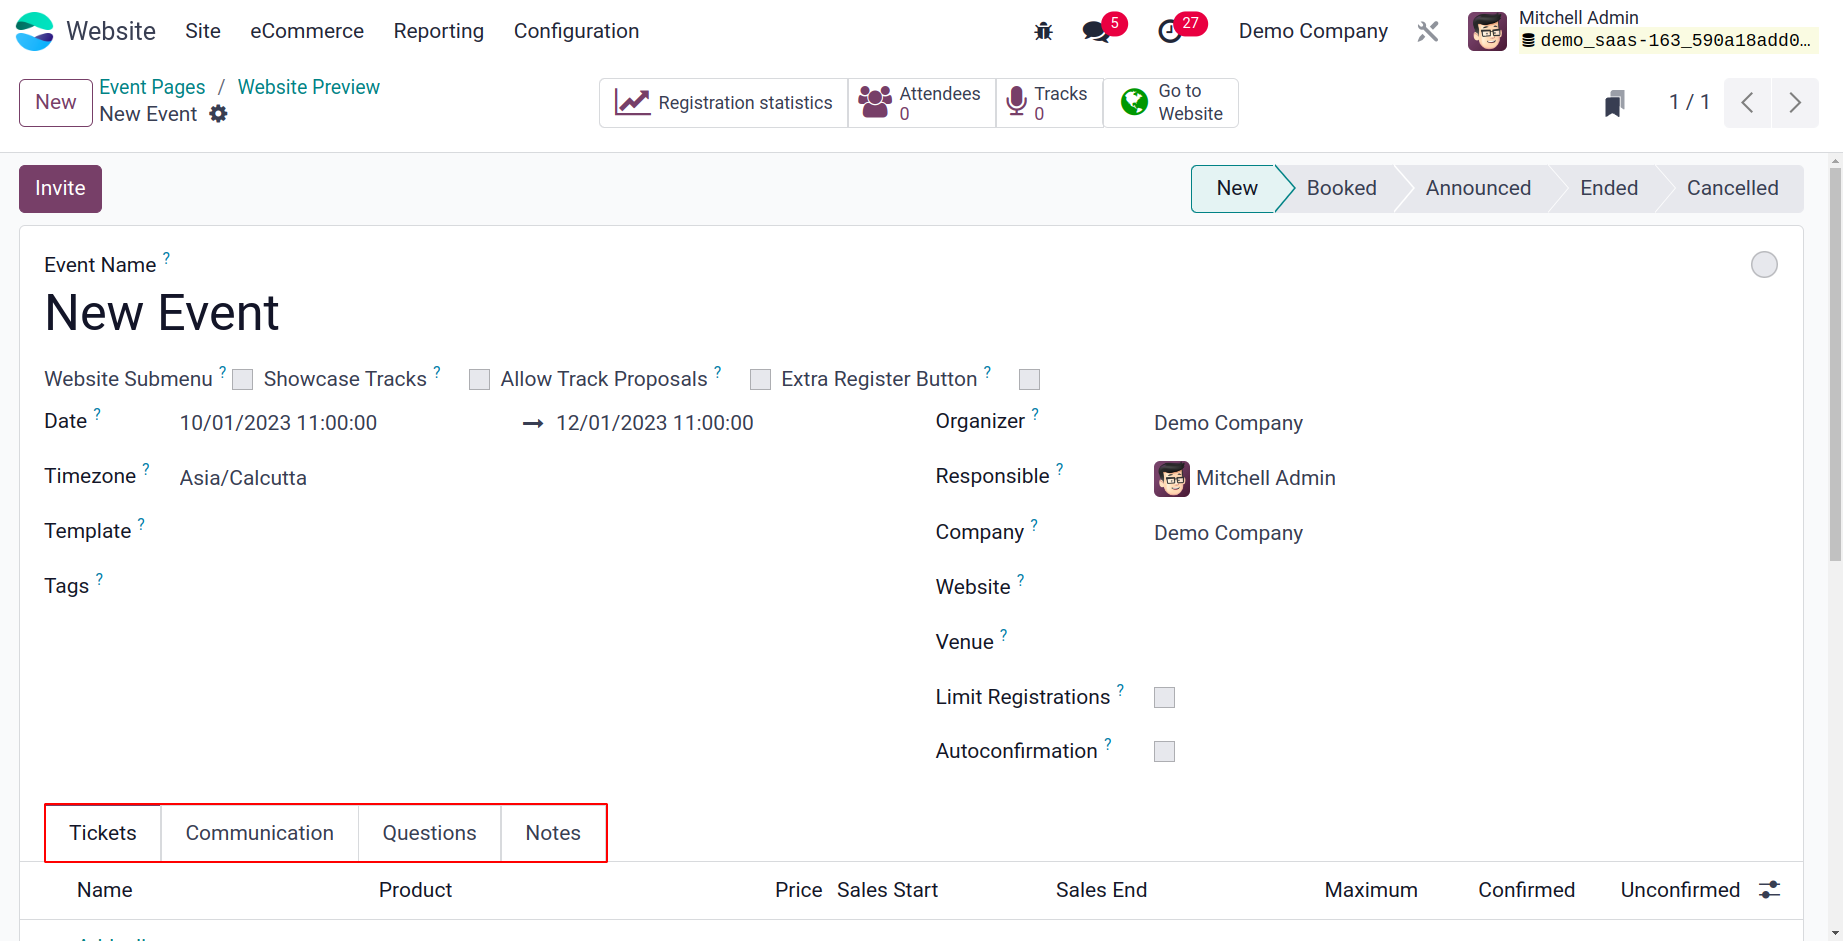
To know more about the Event creation, check the Events module.
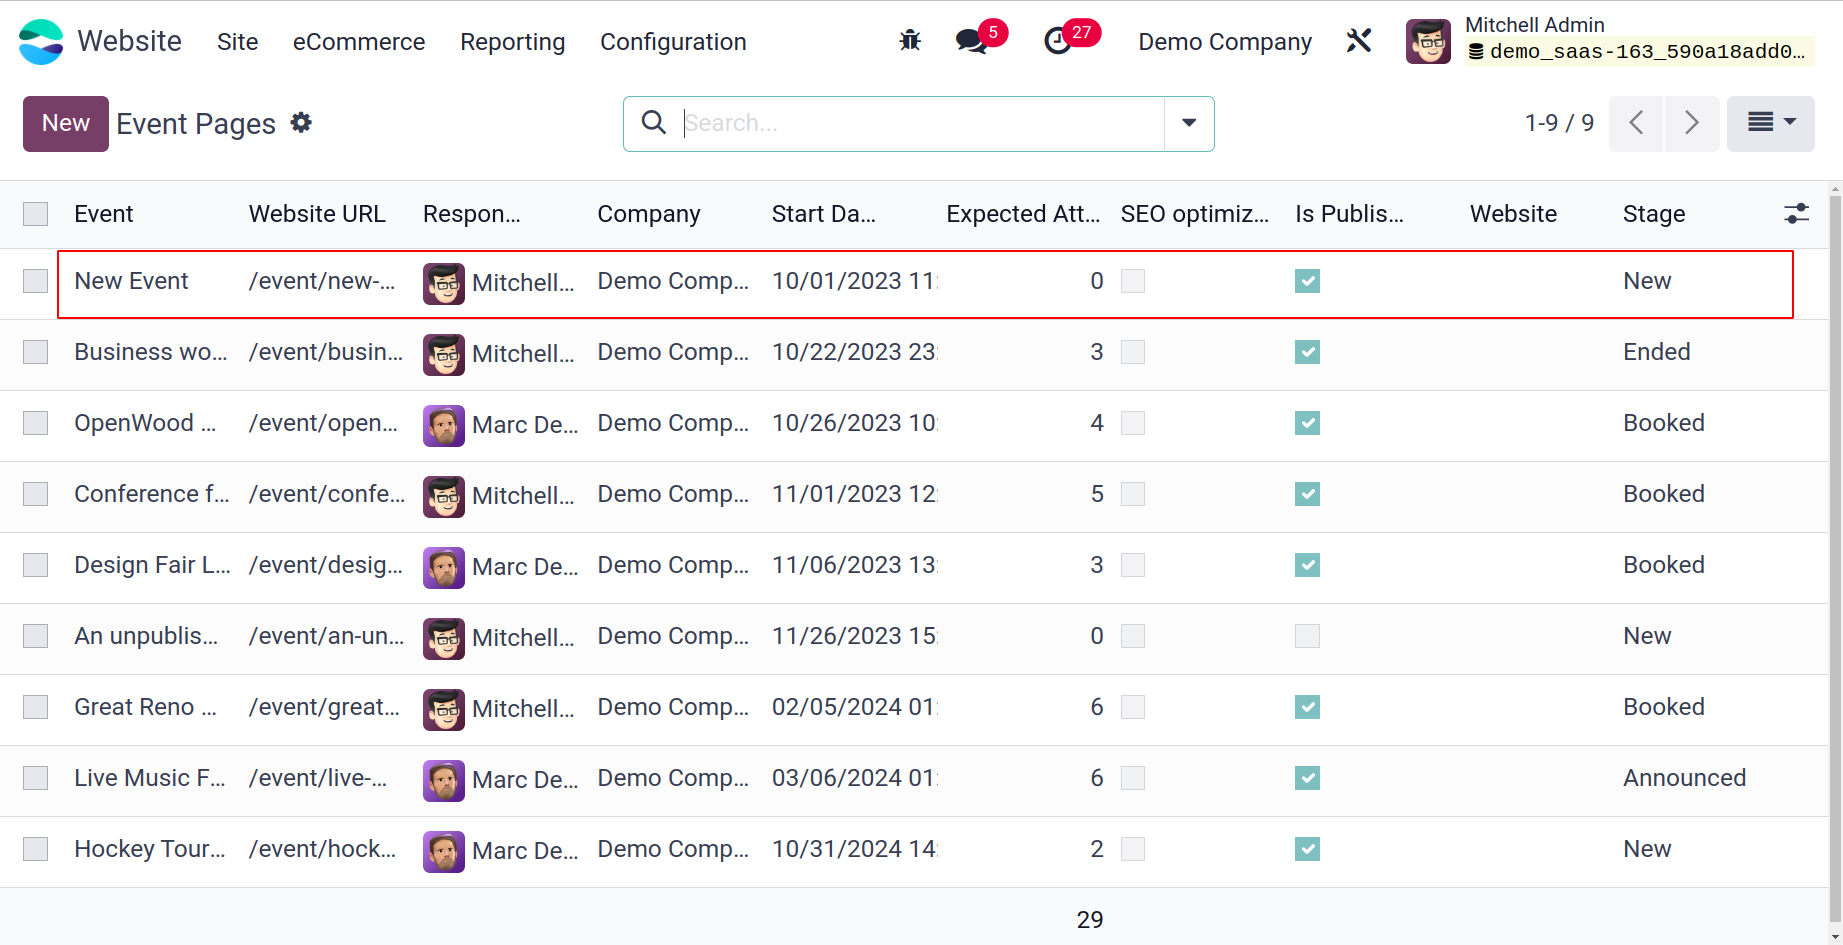
An event can be created from the backend also. The Site tab contains the Events option. All the created Events can view and new events can created by clicking the New button.
Forum
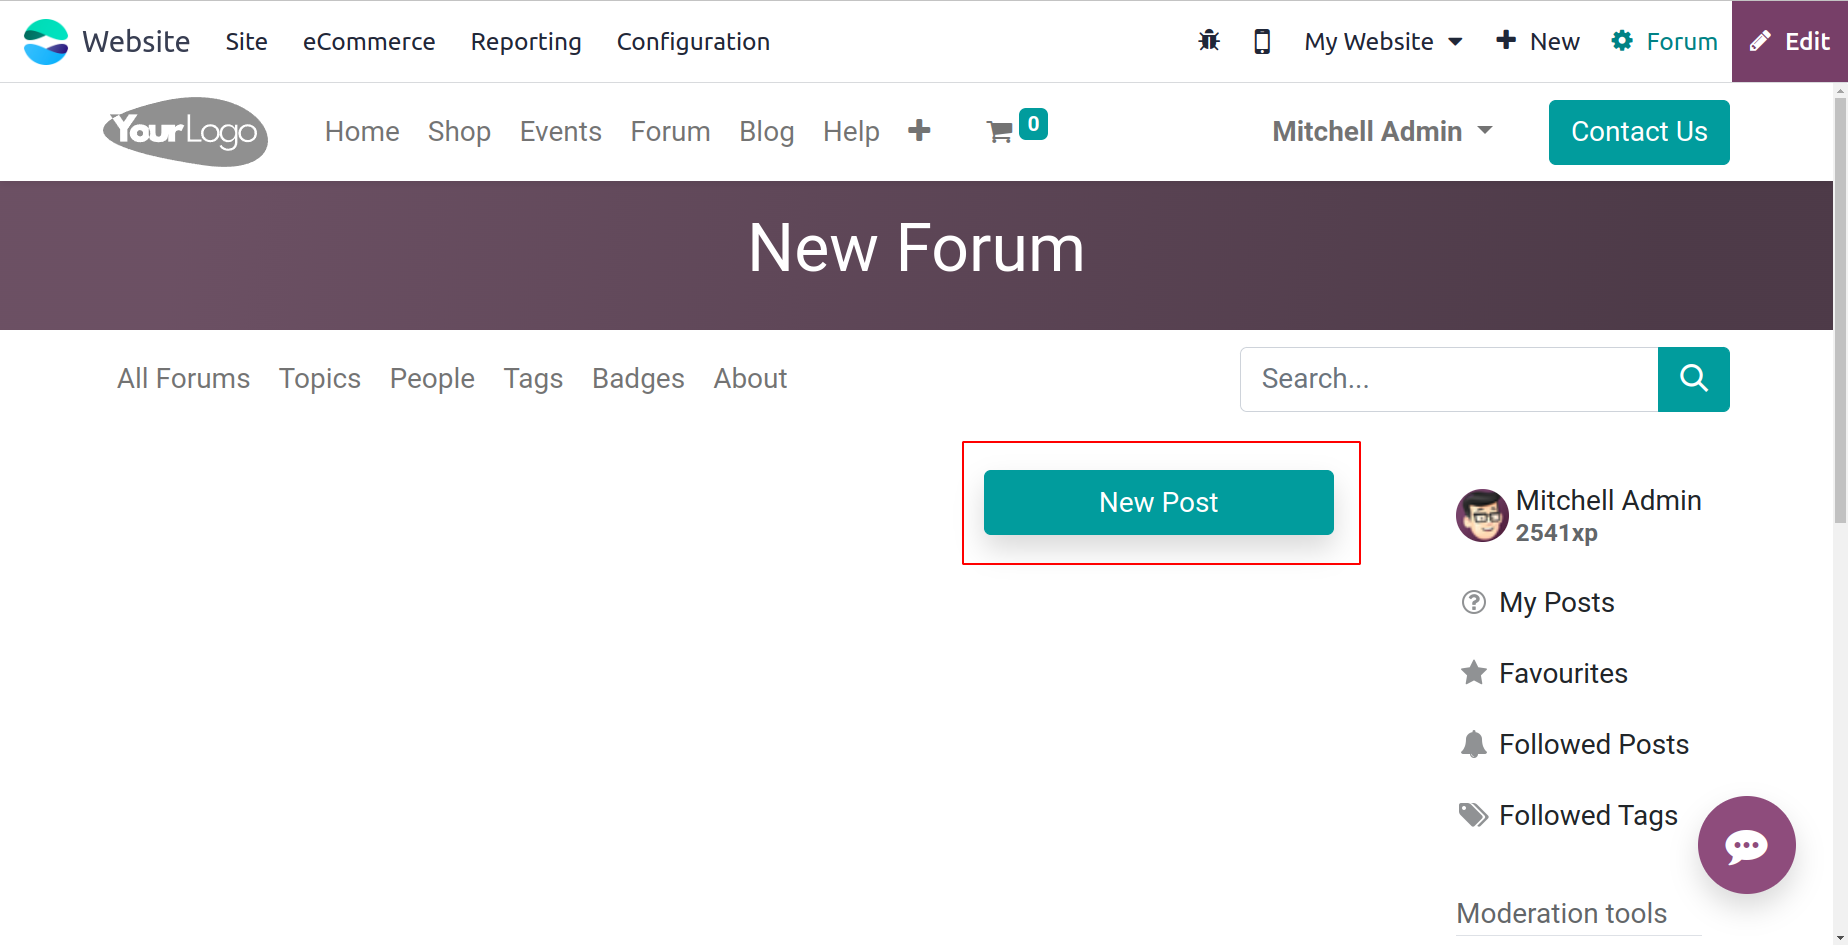
Adding new forums to your website is possible through the Forums menu. You can click on the Forum menu to accomplish this. You will now draw a pop-up window like the one in the picture below.
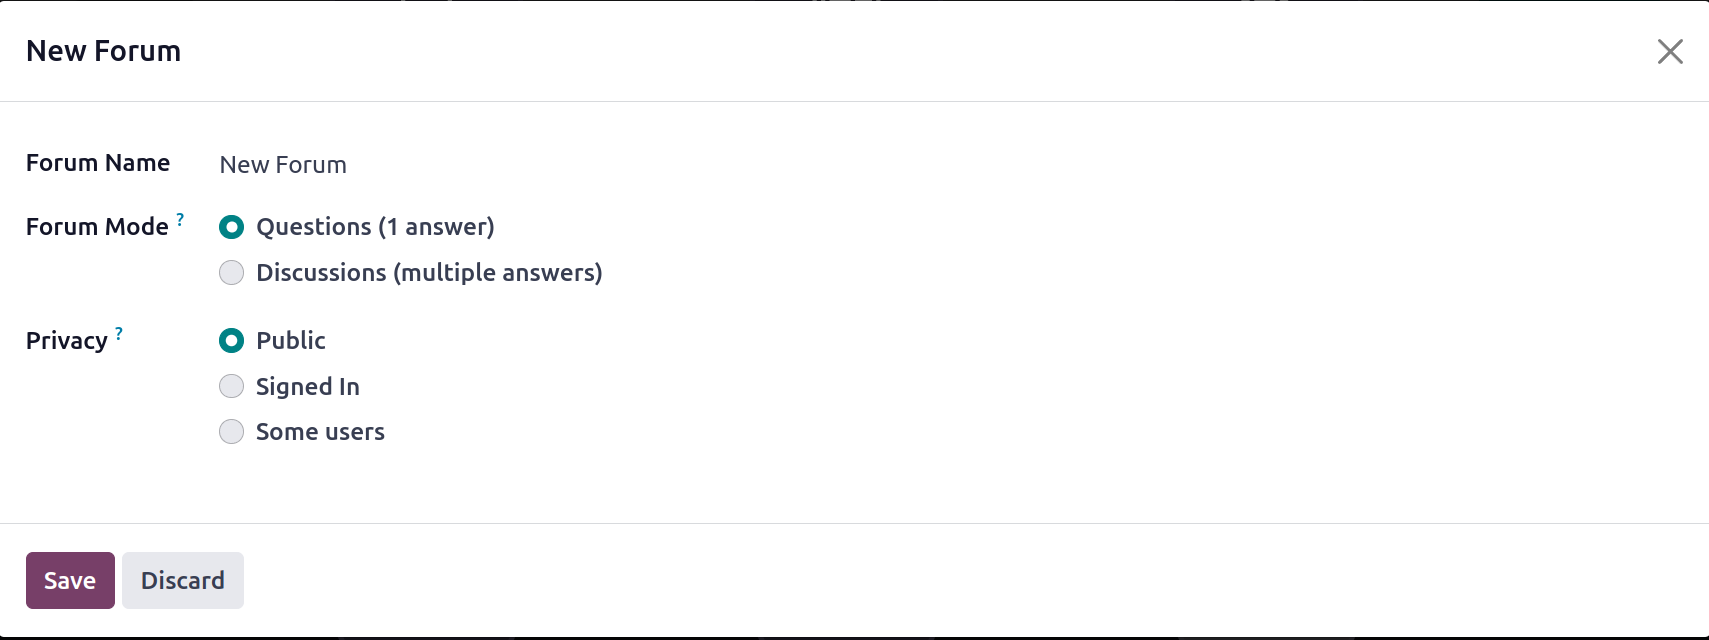
You can enter the forum name here. Then, the Forum Mode can be characterized as a Discussions or Question and Answers mode. Additionally, it gives you many options for setting the privacy policy. One definition of it is Public. Registered, or A Few Users.
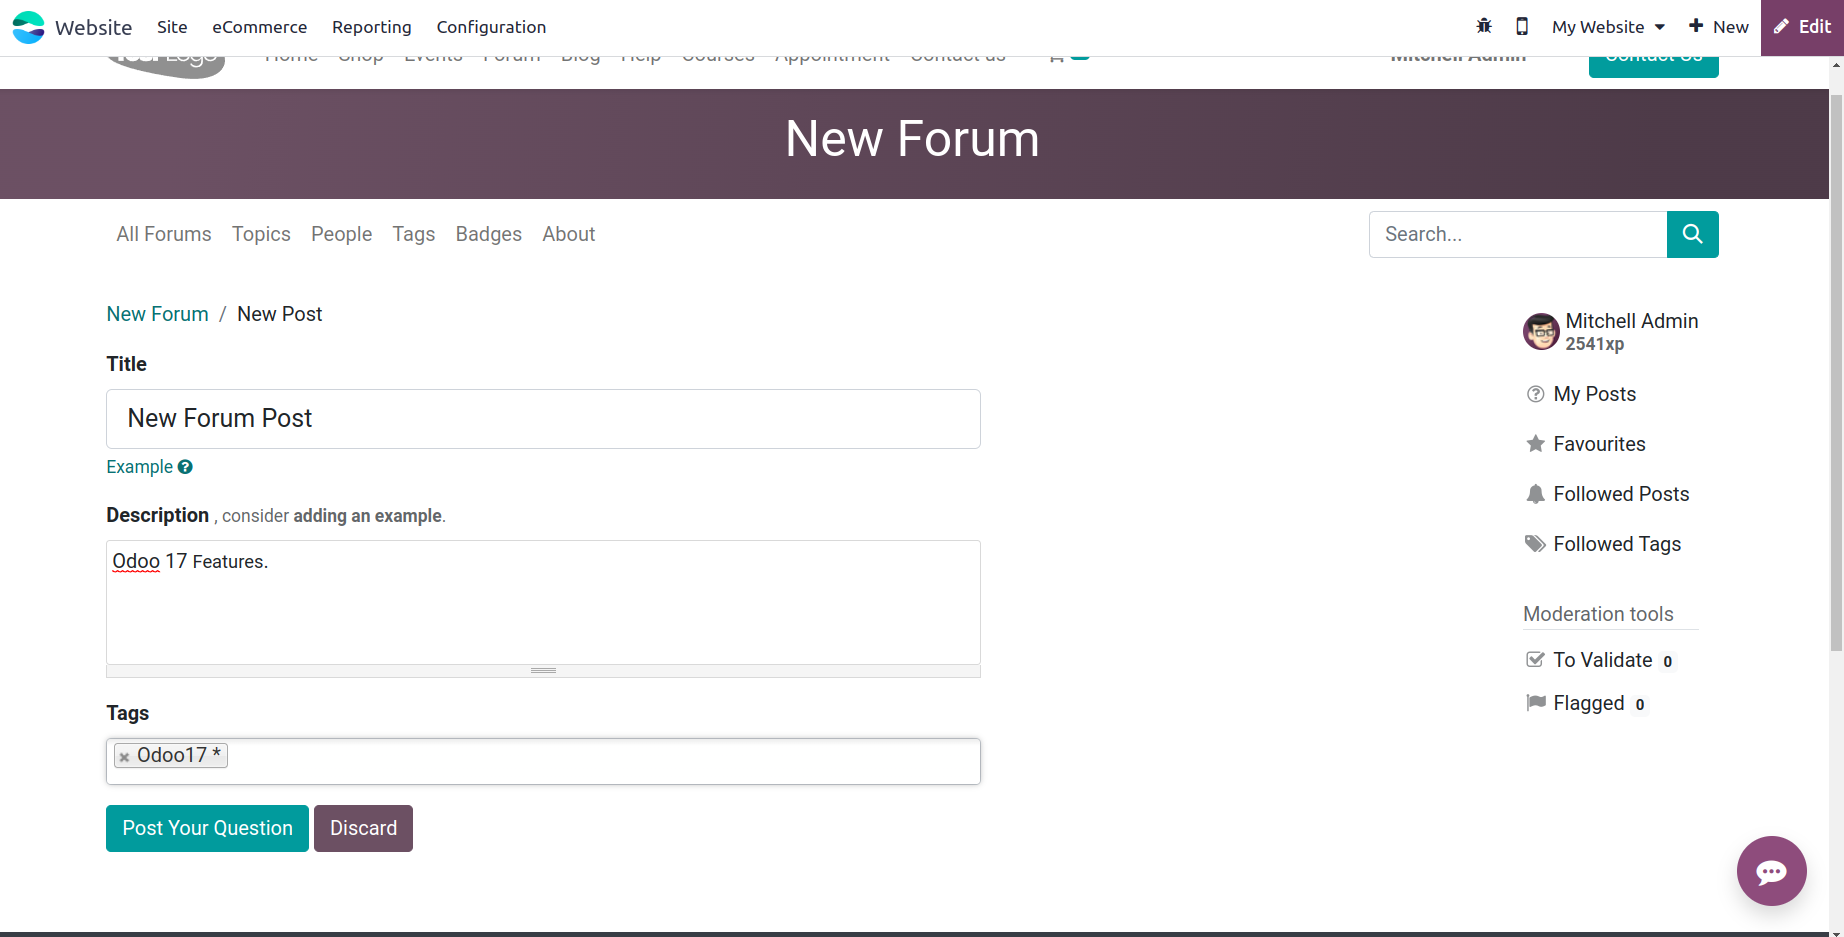
Add the Forum Post Title, Description and Tags. then click on the Post Your Question button.
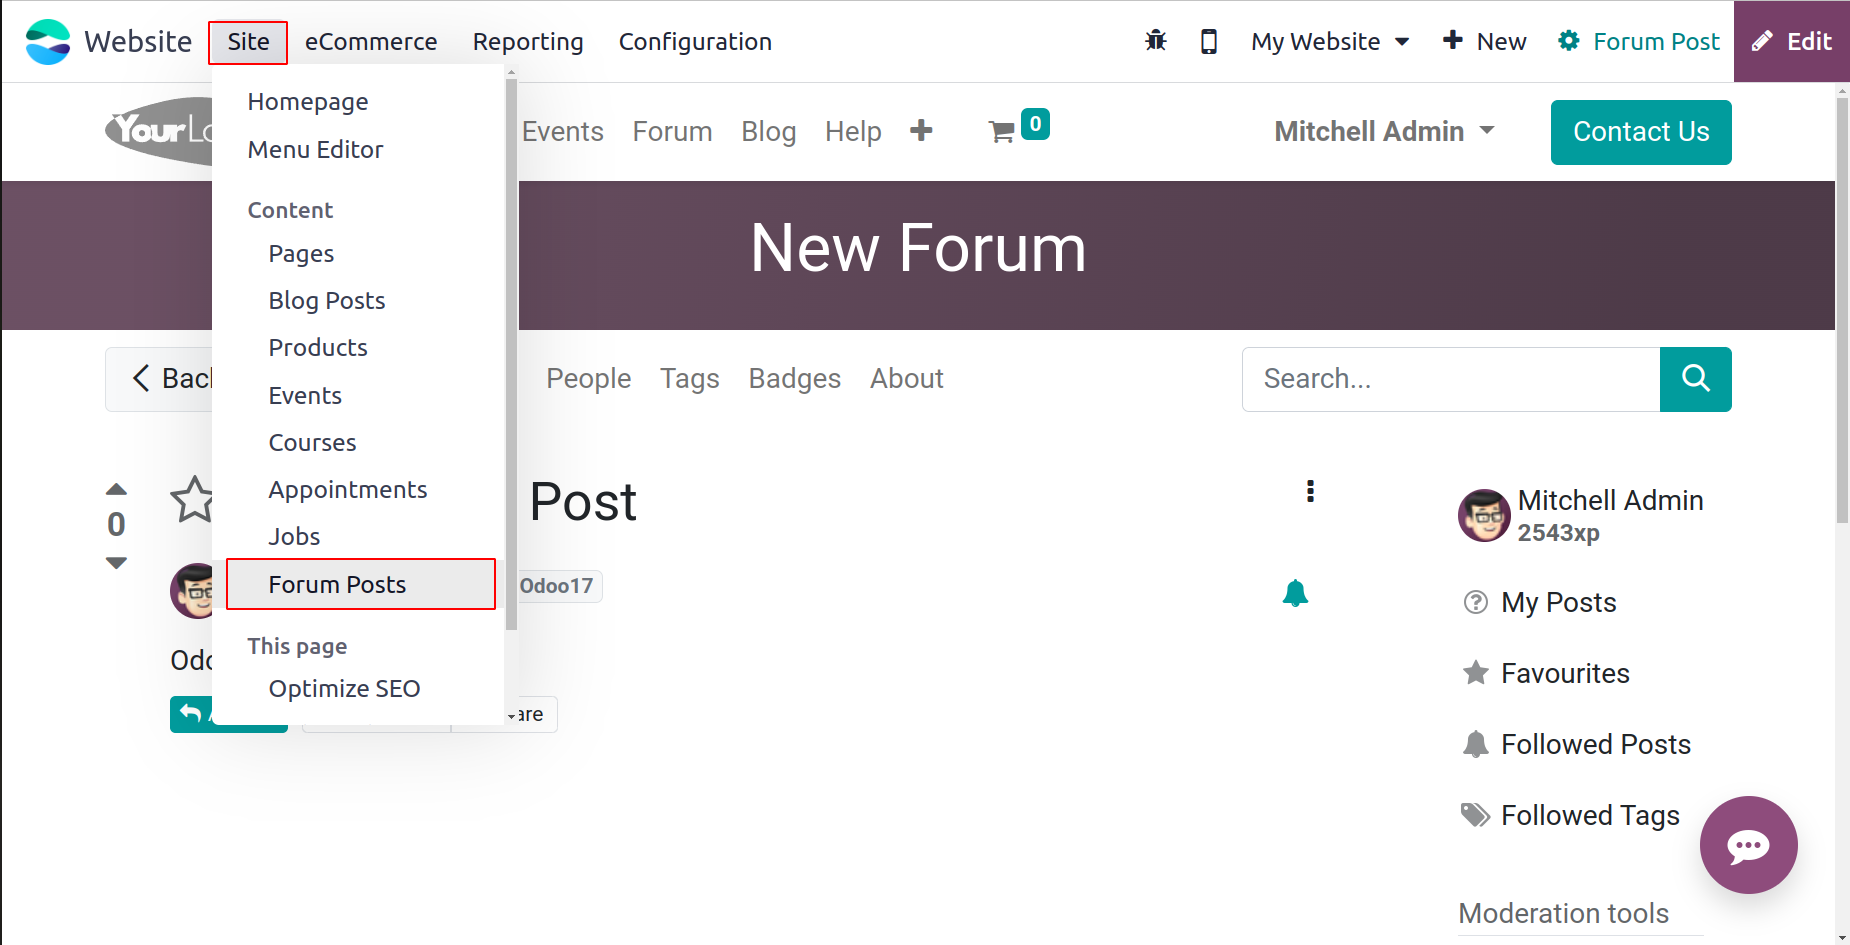
The created Forum Post can be viewed from the back end of the Odoo 17 Website.
The Site tab contains the Forum Post.
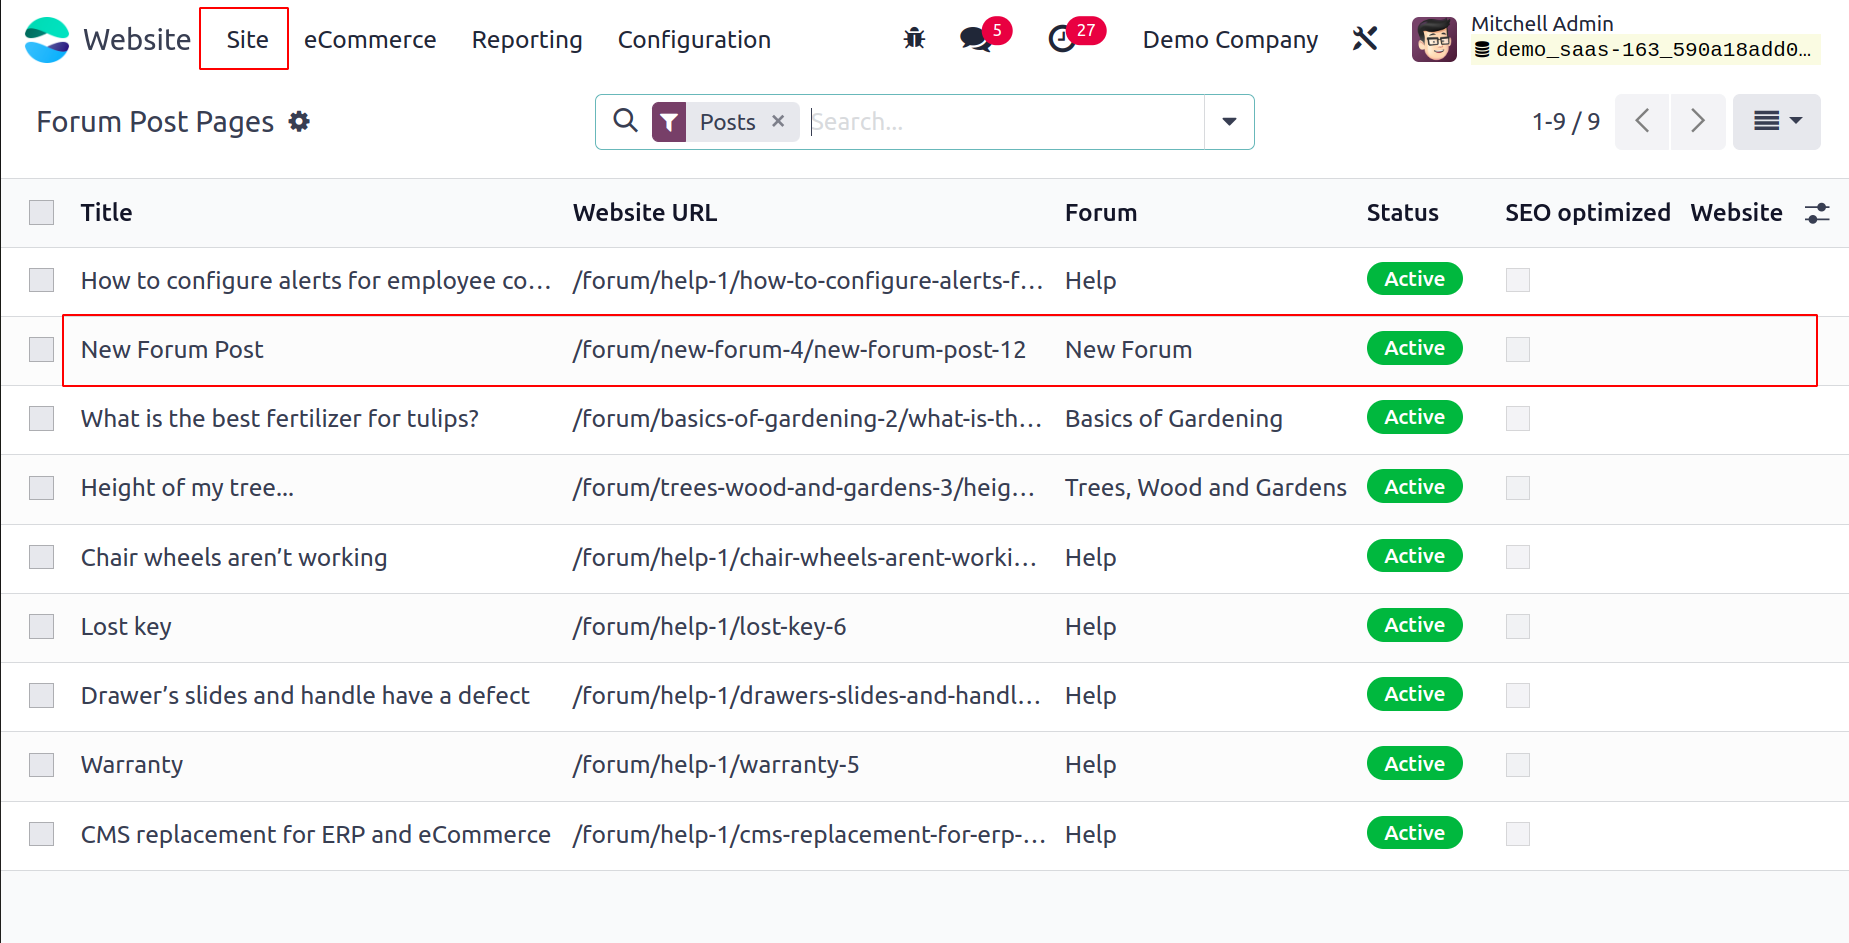
Which leads to the view of all created Forum Post Pages. The page contains Title, Website URL, Forum name and Website. The SEO Optimized checkbox can be viewed from the page.
Appointment Form
The Odoo17 Website module's home page has a +New icon that you can click to create and publish new appointment forms.
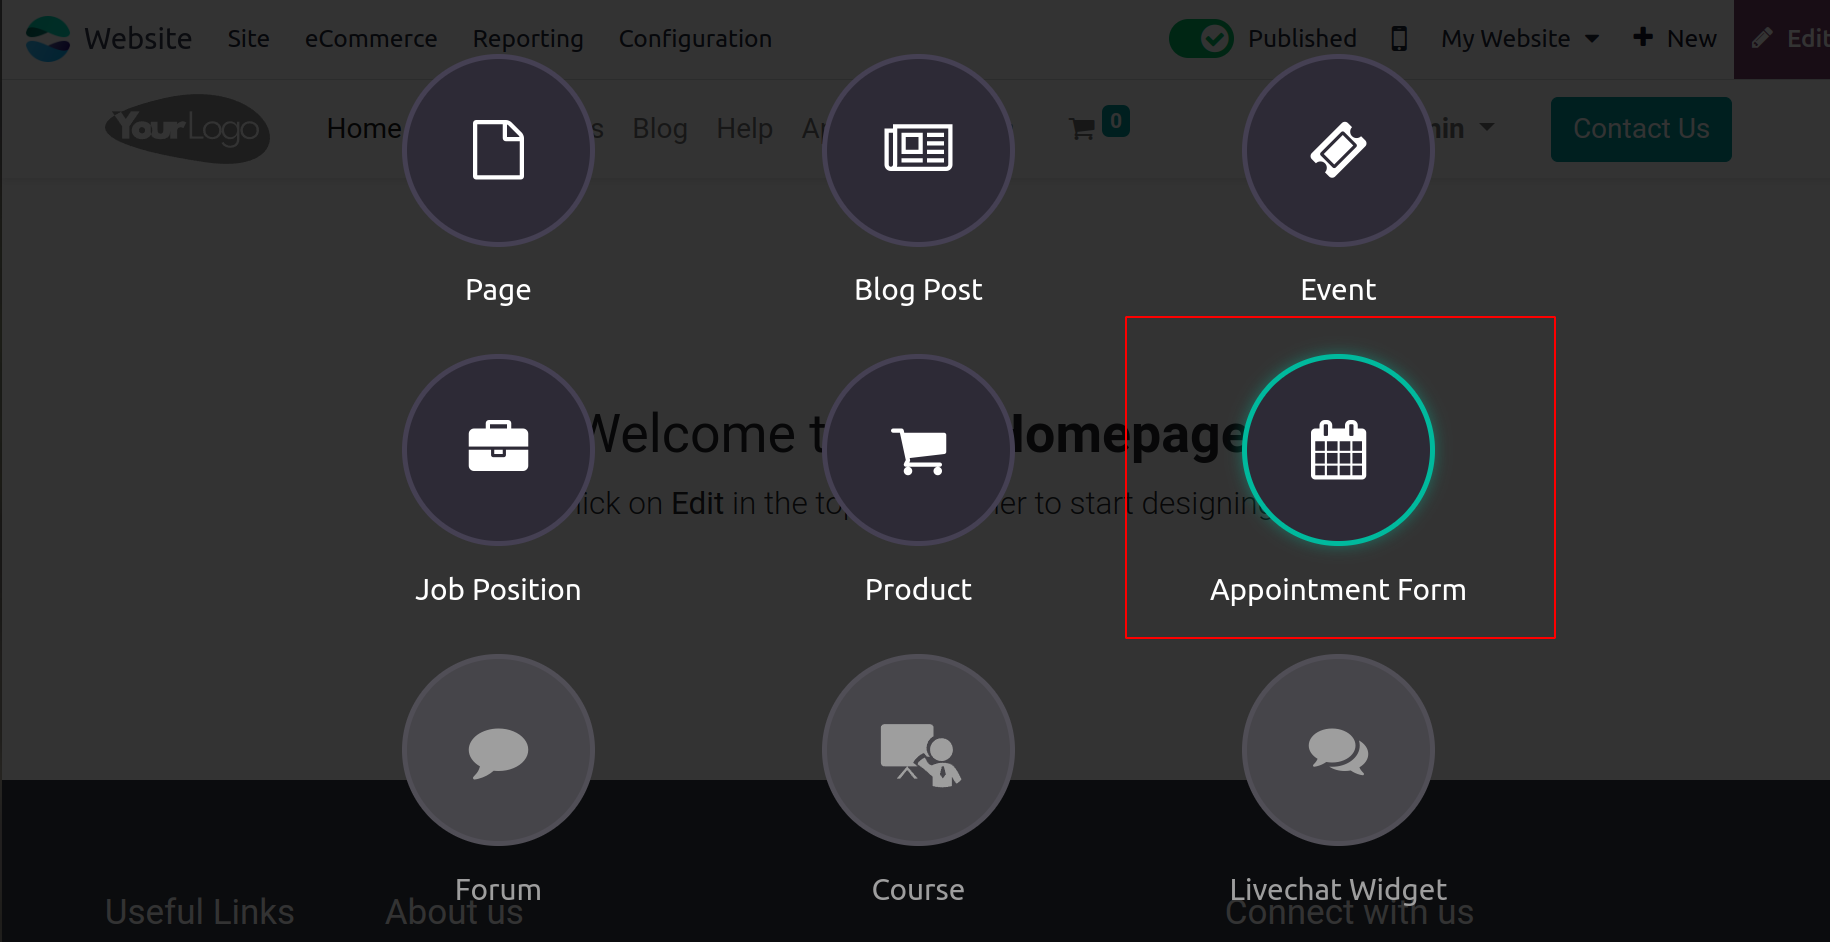
Among the choices that are shown, you can choose the Appointment Form menu to generate different types of website content. When you choose this menu, like in the picture below, you will be taken to a new window where you can access a pop-up.
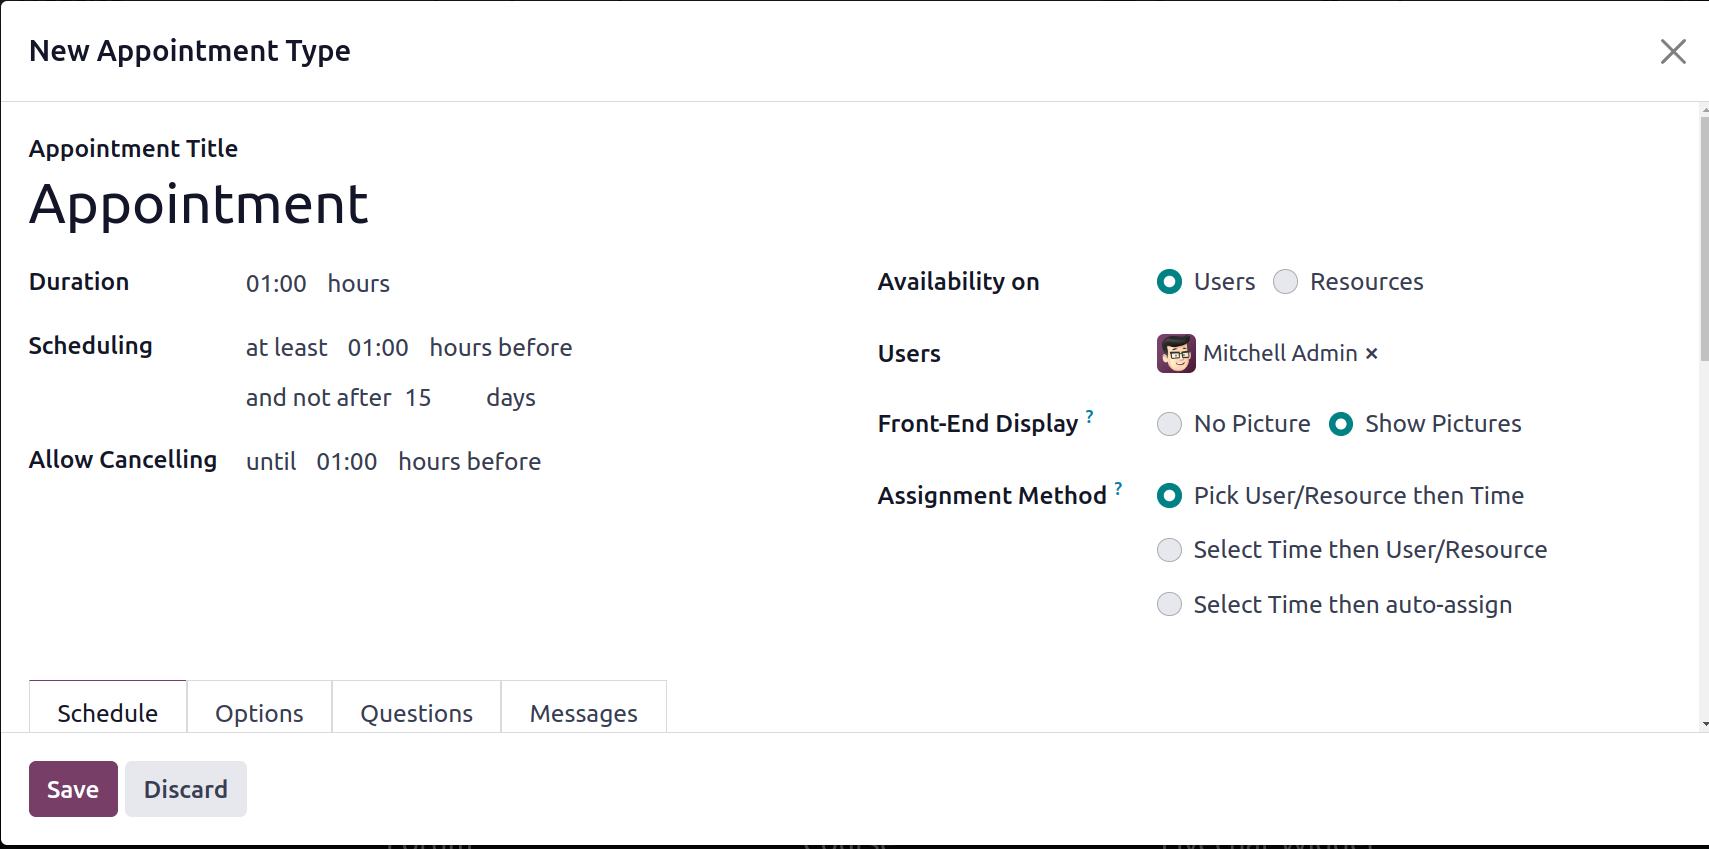
You can provide a description of the new appointment type's name in this pop-up option. You can add the appointment details like Duration, Schedule, Allow canceling time, Available users, Resources, etc. You will see the name of the appointment you already made when you do this and navigate into an appointment page.
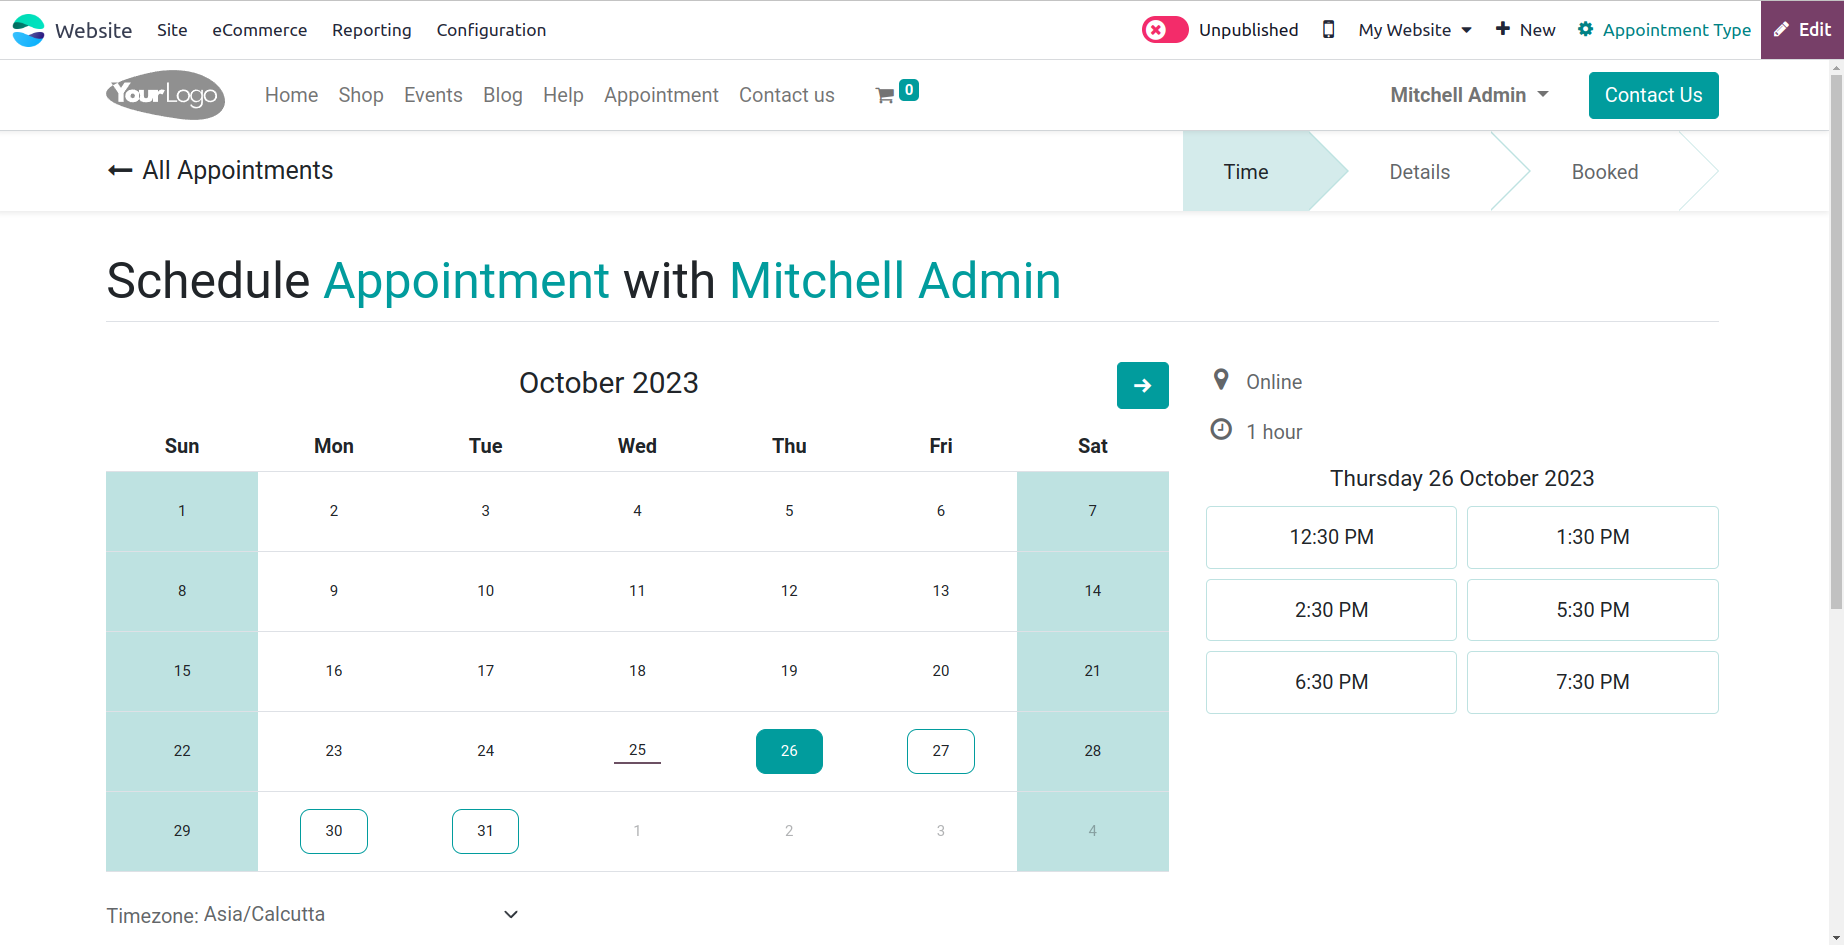
You can change the status of the new appointment from Unpublished to Published, as seen in the image below, to publish it on your website.
Now that we have covered every option for publishing website material from the front end, let's consider how the website module's back end was accomplished.
Blog operations
An effective platform for overseeing all corporate operations is the Odoo17 ERP. Additionally, it makes it possible for a unique platform to manage the website module's blog posting pages. With this platform, you may quickly build a blog posting page. It will only require a few easy clicks. Returning to the eCommerce Dashboard is where you should do the back-end blog posting procedures.
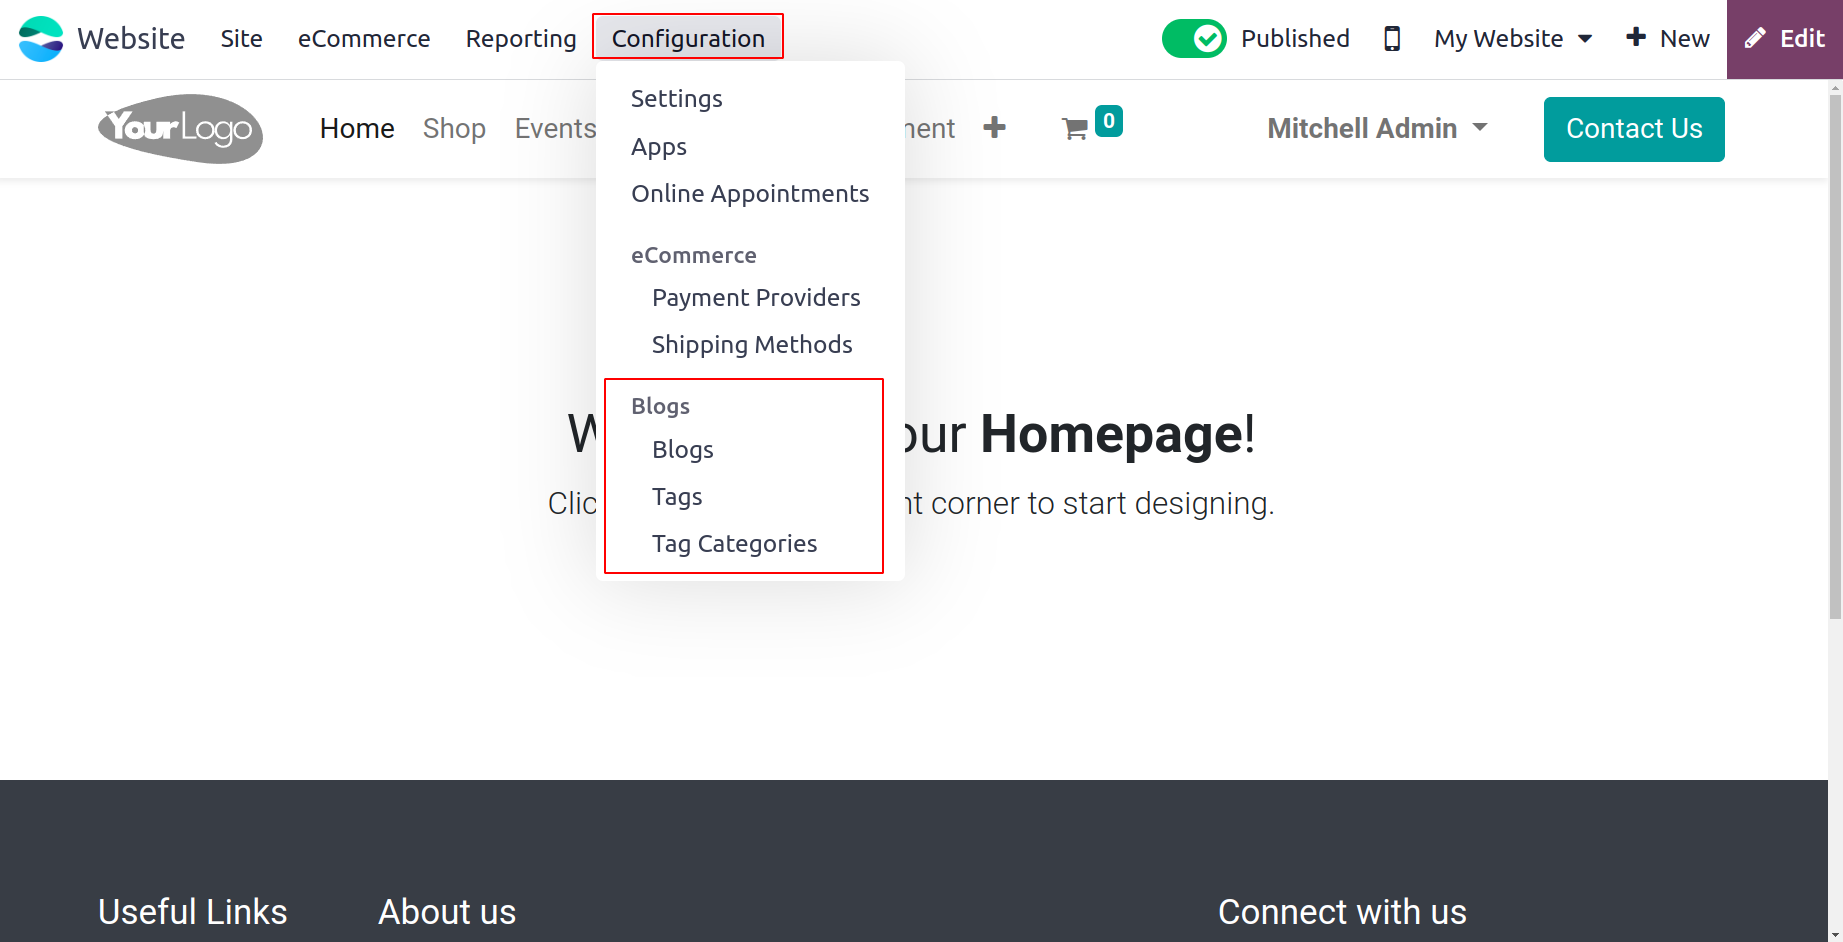
Below, let's talk about each of them.
Blog
You can create distinct categories for your blogs using the Blogs menu found on the Configuration tab of the Odoo17 Website module. Sorting blogs by topic will be quite useful in order to make them easily accessible. Check out the pdf link provided below to learn more about the blogs.
Forum
Website
All of the website details that you configured in the platform are listed in the Website window that is accessible under the Configuration tab of the Odoo 17 Website module. The window's image is seen below.
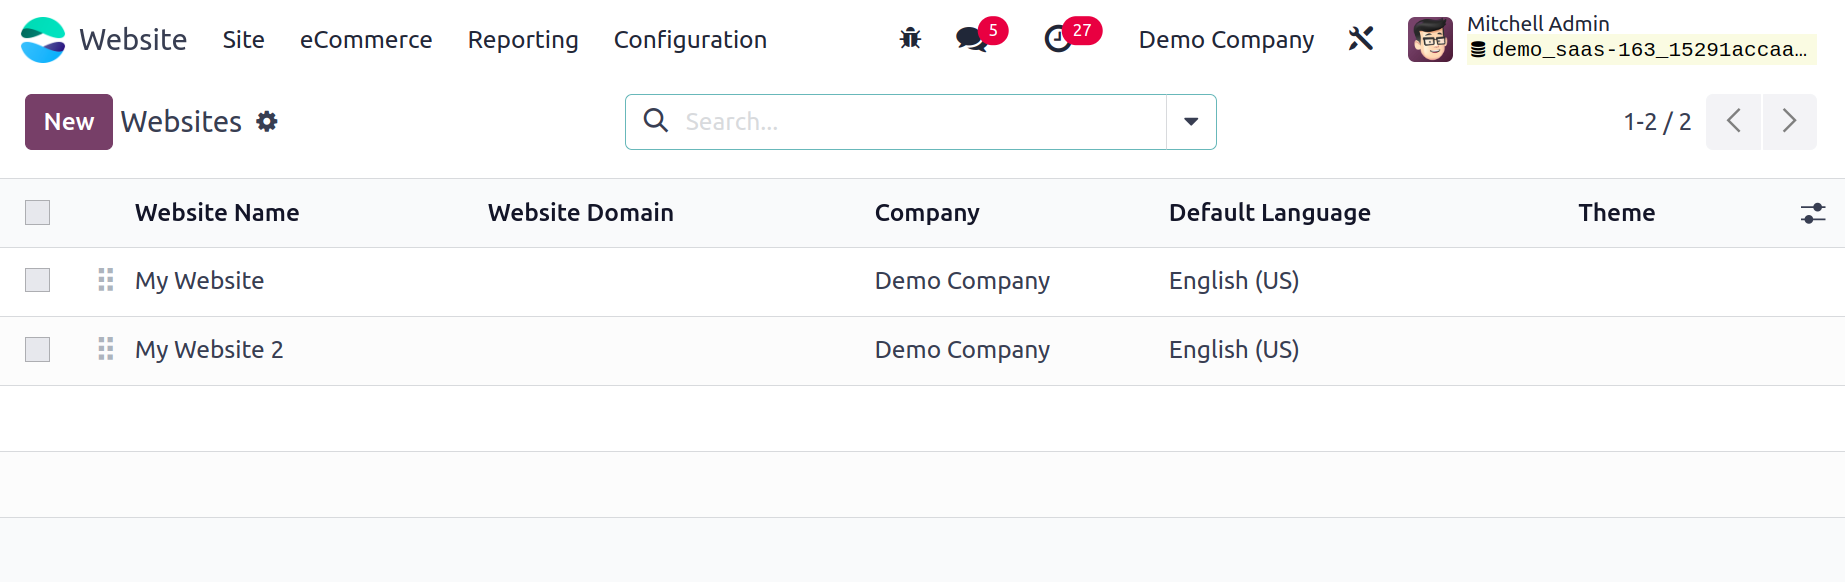
It will list each website's name, domain, company, country group, default language, and theme, as you can see in the window. To see them in more depth, click on them.
Appointments
You can set up online appointments through the Odoo 17 Website module's Online Appointments menu. Using this Odoo functionality to manage company meetings and appointments would be quite beneficial. This tool gives your customers the ability to schedule appointments with you. Please be aware that in order to benefit from this functionality, you must install the Odoo applications' Appointment module. This feature is therefore brought into the Website and Calendar module due to the highly integrated nature of this module. The Online Appointments window will appear as shown below when you select the Online Appointments option from the Configuration in the Website module.
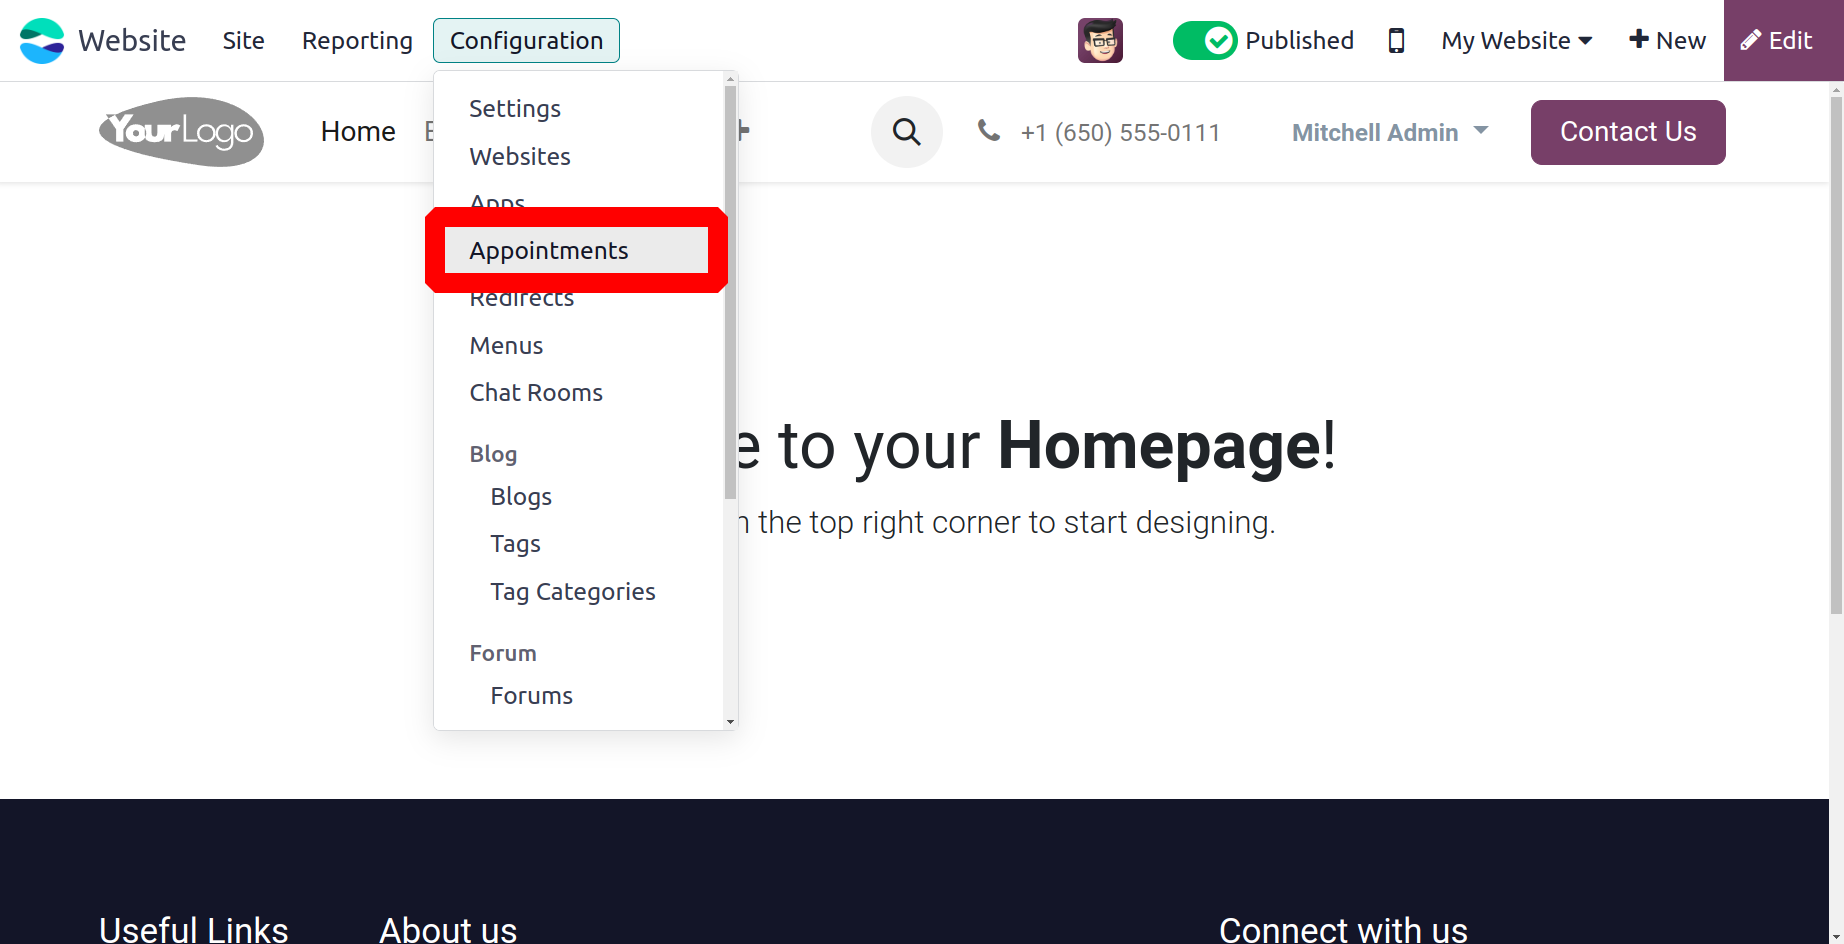
All of the previously made online appointments are intended to be listed and stored in this window. This window is shown by the system in both List and Kanban view. You can click on the New button to begin scheduling new online appointments.
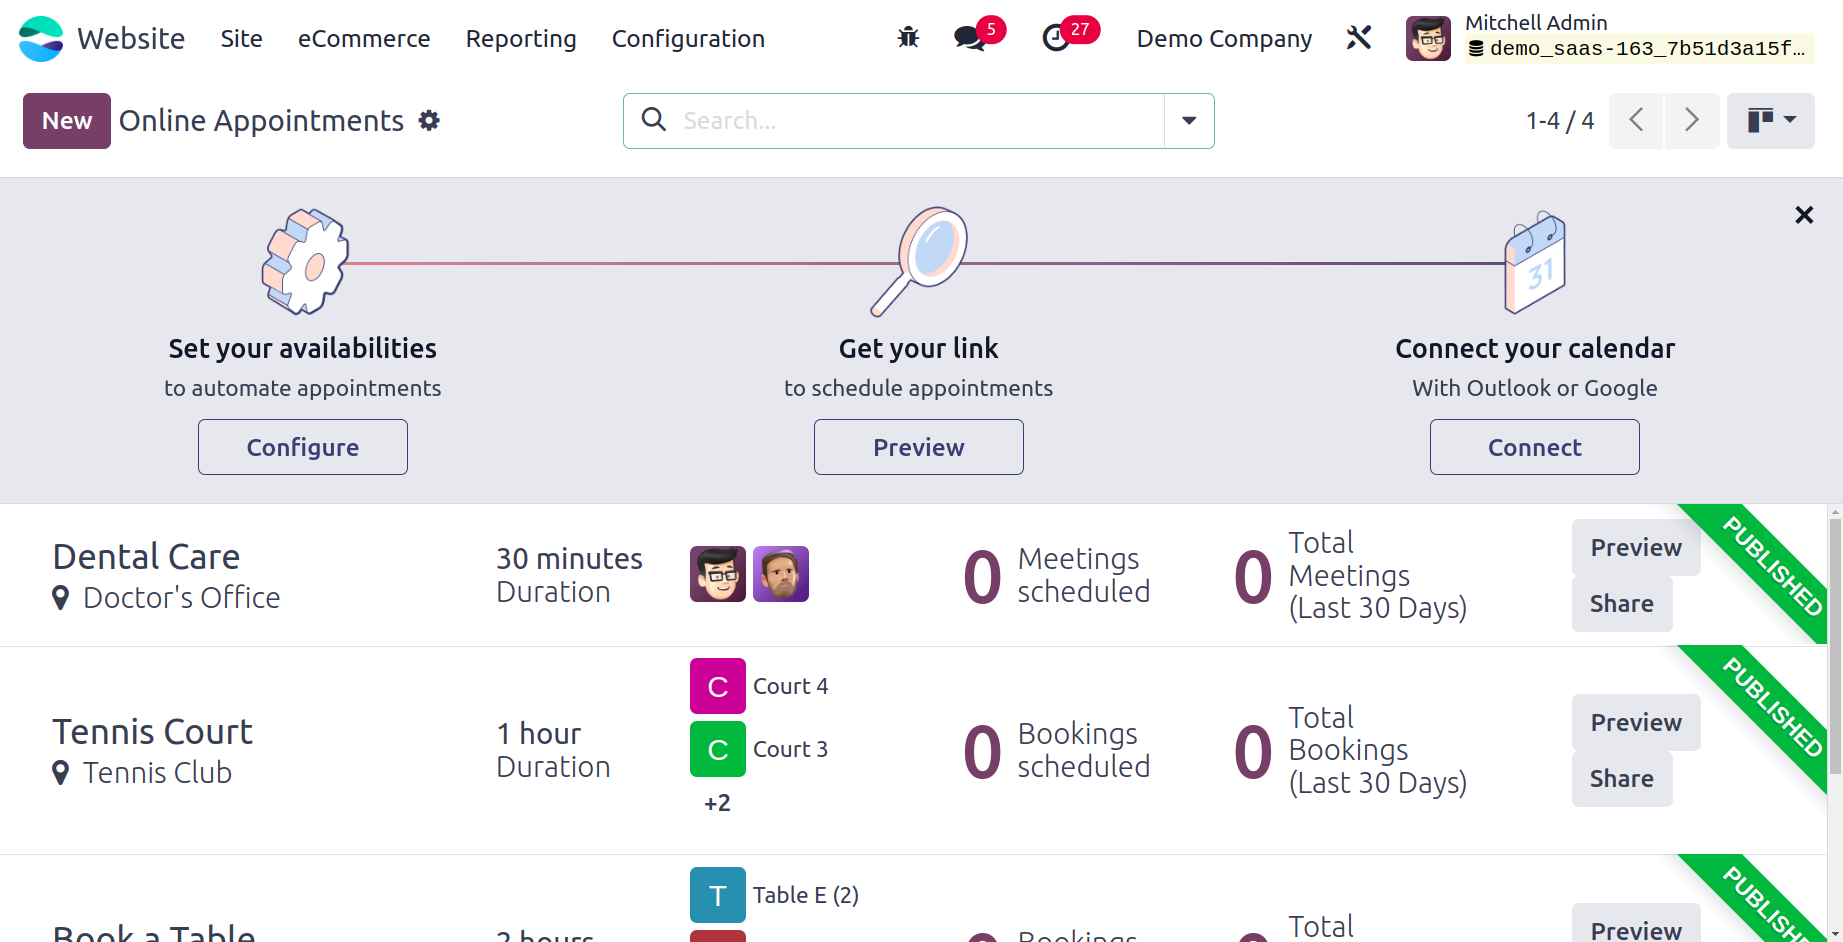
The online appointment creation window will then appear, as seen in the screenshot below.
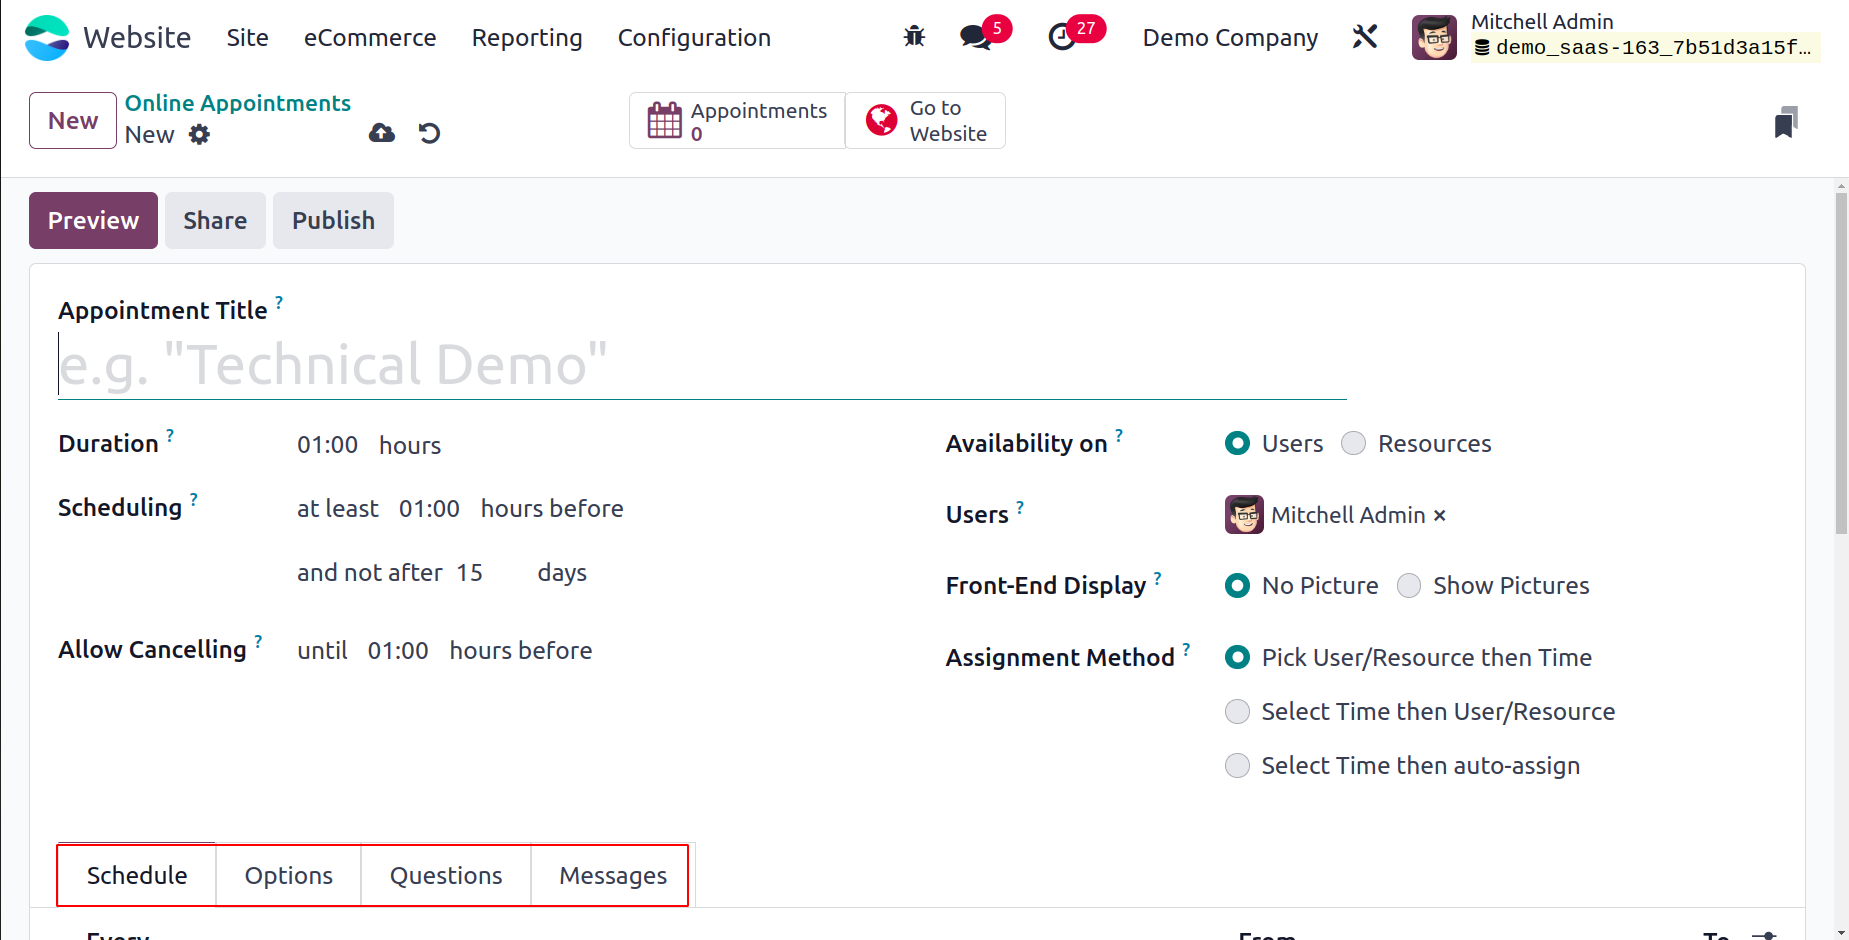
The Appointment Duration in hours can be set. The details can be mentioned in the Scheduling area. You can choose the number of hours you would like to have an appointment before. additionally have the choice to postpone appointments. Thus, you can enter the duration in hours in the field labeled "Allow Canceling." You can specify how staff members will be assigned to meetings that customers book on your website by filling out the Assignment Method form. The consumer has the option to set this to either Random or Choose. By selecting the Add a line option under the Available Employees section, you can add staff members or their details.
You may also fill out the fields on the Schedule tab. The day and hour of the appointments are enterable.
Next is the Options tab. You can indicate the type of appointment in the designated field of this form. Then, in accordance with your business needs, you can activate or deactivate the Create Opportunities option. It will be useful to create new opportunities and designate them to the responsible employee for each planned appointment if you enable this option. Together with the appointment's location, it is possible to provide the time zone in which it will occur. Additionally, you can set the Reminders in the designated field.
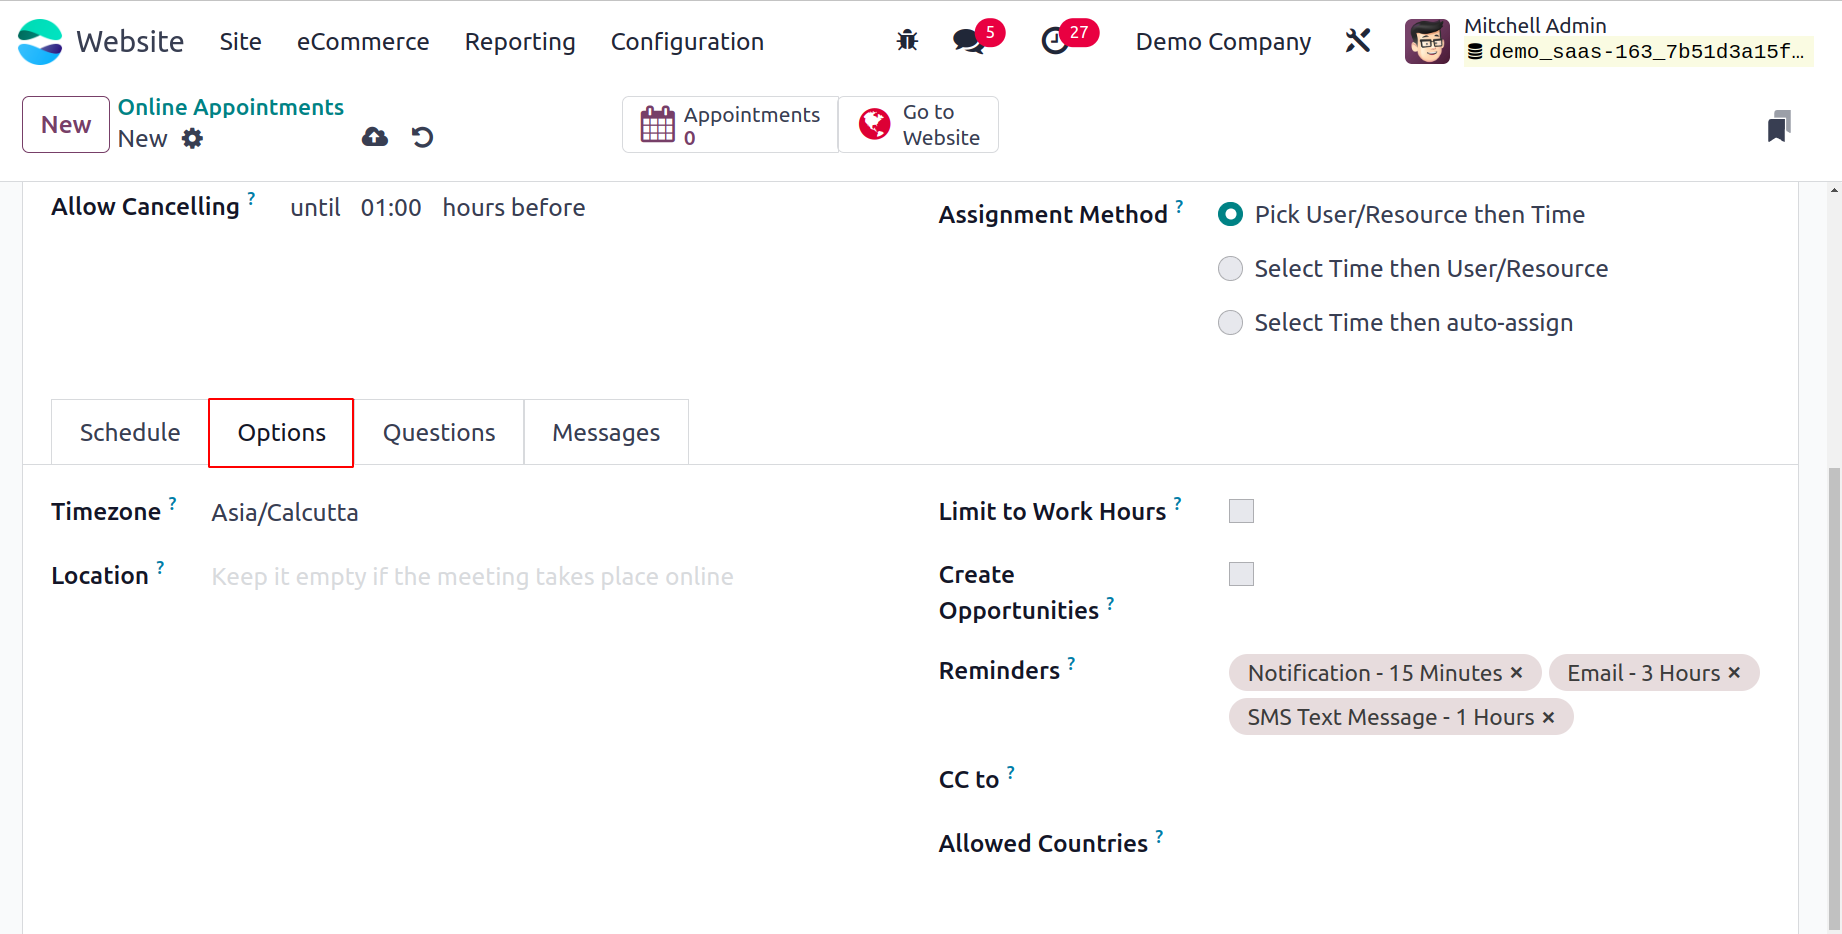
You can specify it under the Questions tab if you would like to pose questions to the participant during the appointment creation process.
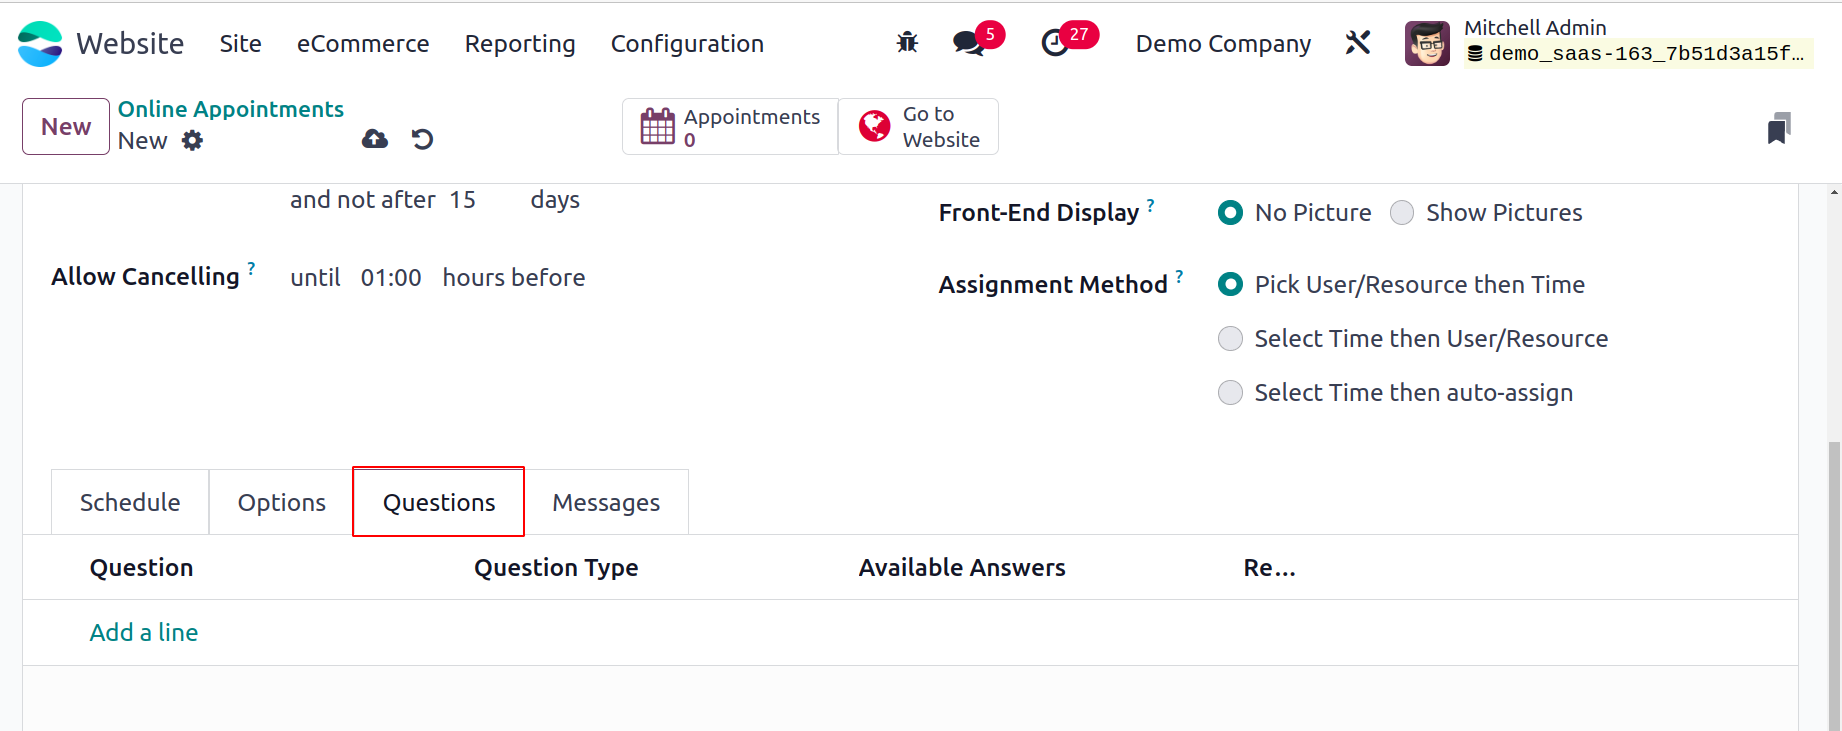
You can click the Add a line button to add questions. After that, a pop-up window for composing questions will appear.
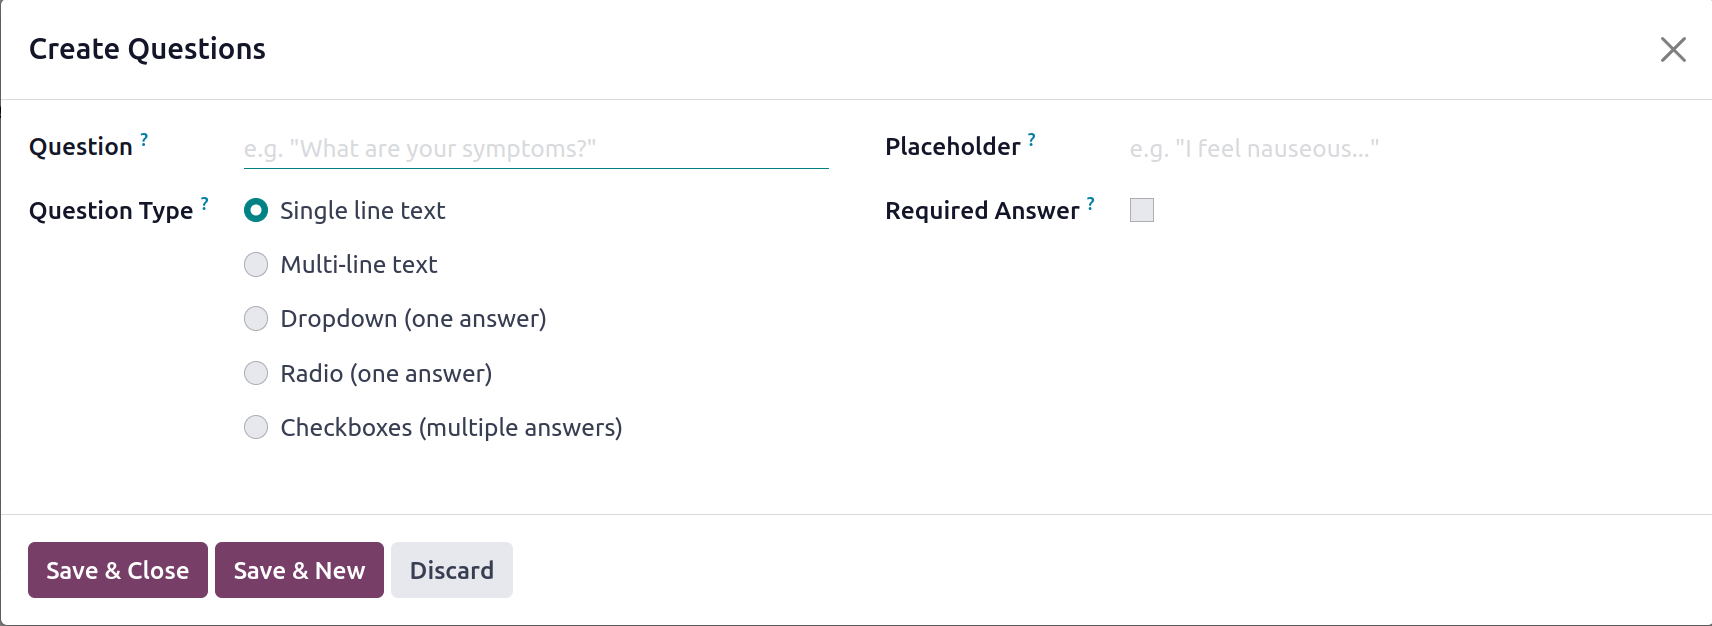
Here, you can state the question as well as its type. You can create the Question Type in the system in a number of ways, including Checkboxes (many replies), Dropdown (one answer), Radio (one answer), and Single-line text. Lastly, you can fill in the provided area in the Messages tab by describing the Appointment Introduction and the Appointment Confirmation.
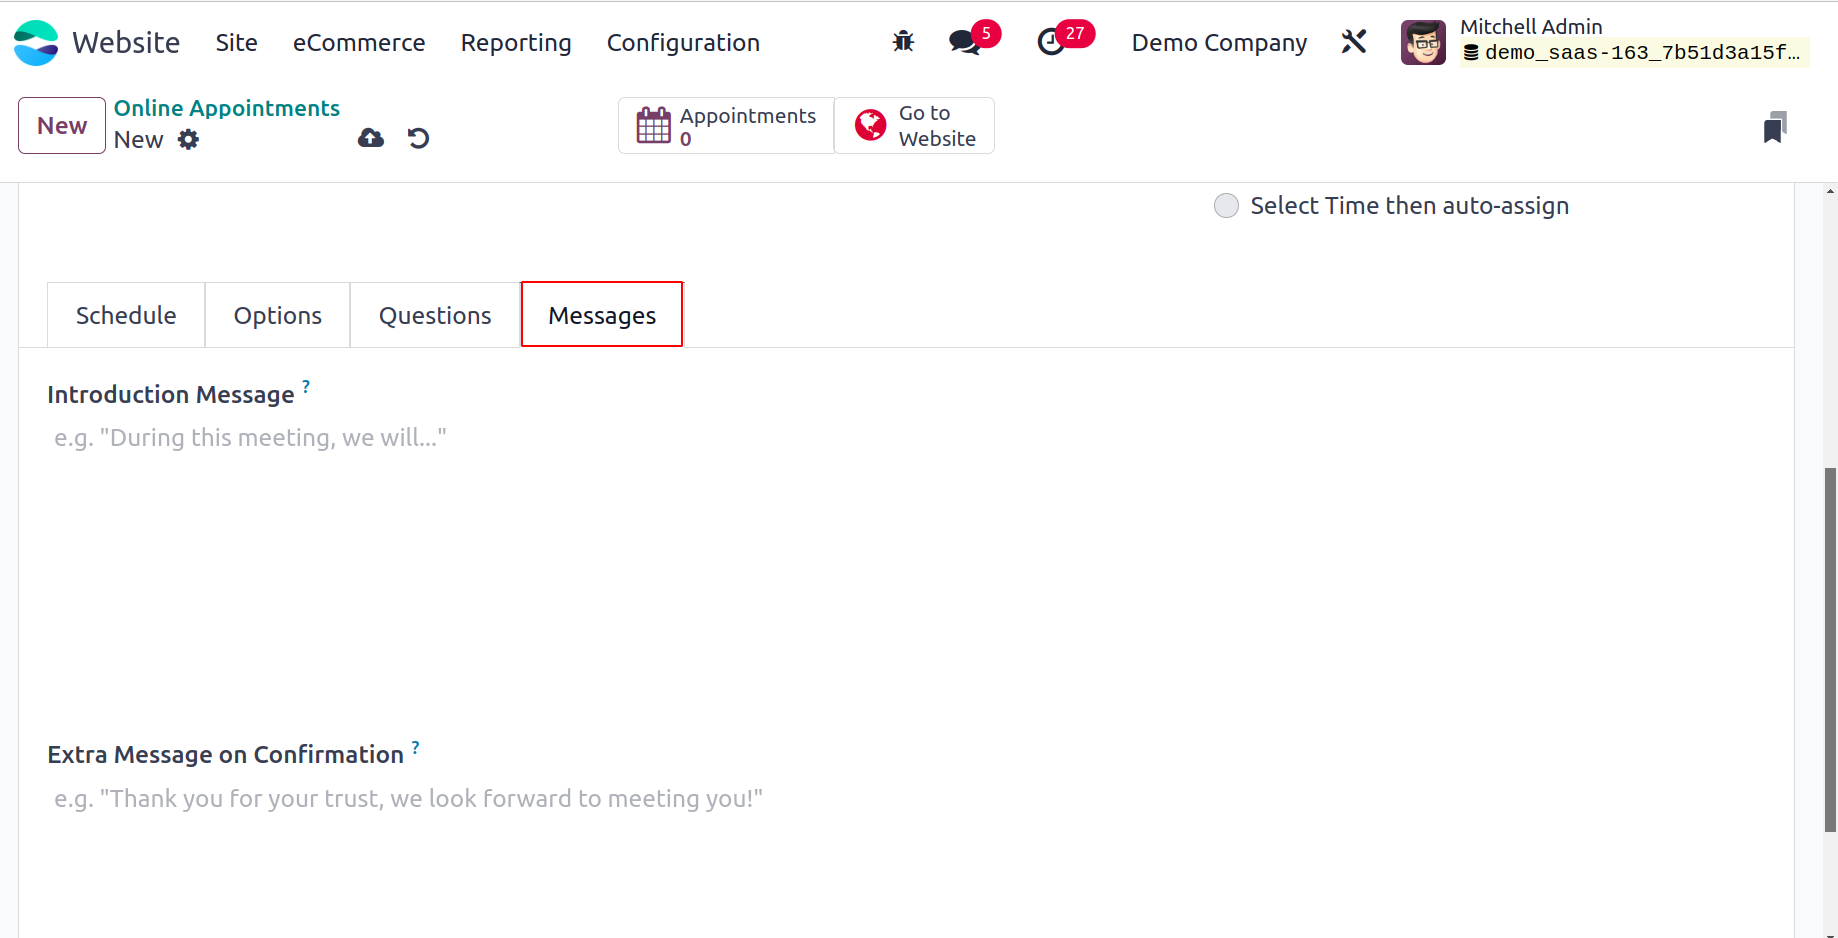
You can save the details when you've finished all of these steps. The smart buttons on the upper side of the window are displayed based on the Odoo17 modules that you have installed on your system. The Appointments and Go to Website buttons are visible here. You can navigate the website page as indicated in the image below by clicking the Go to Website button.
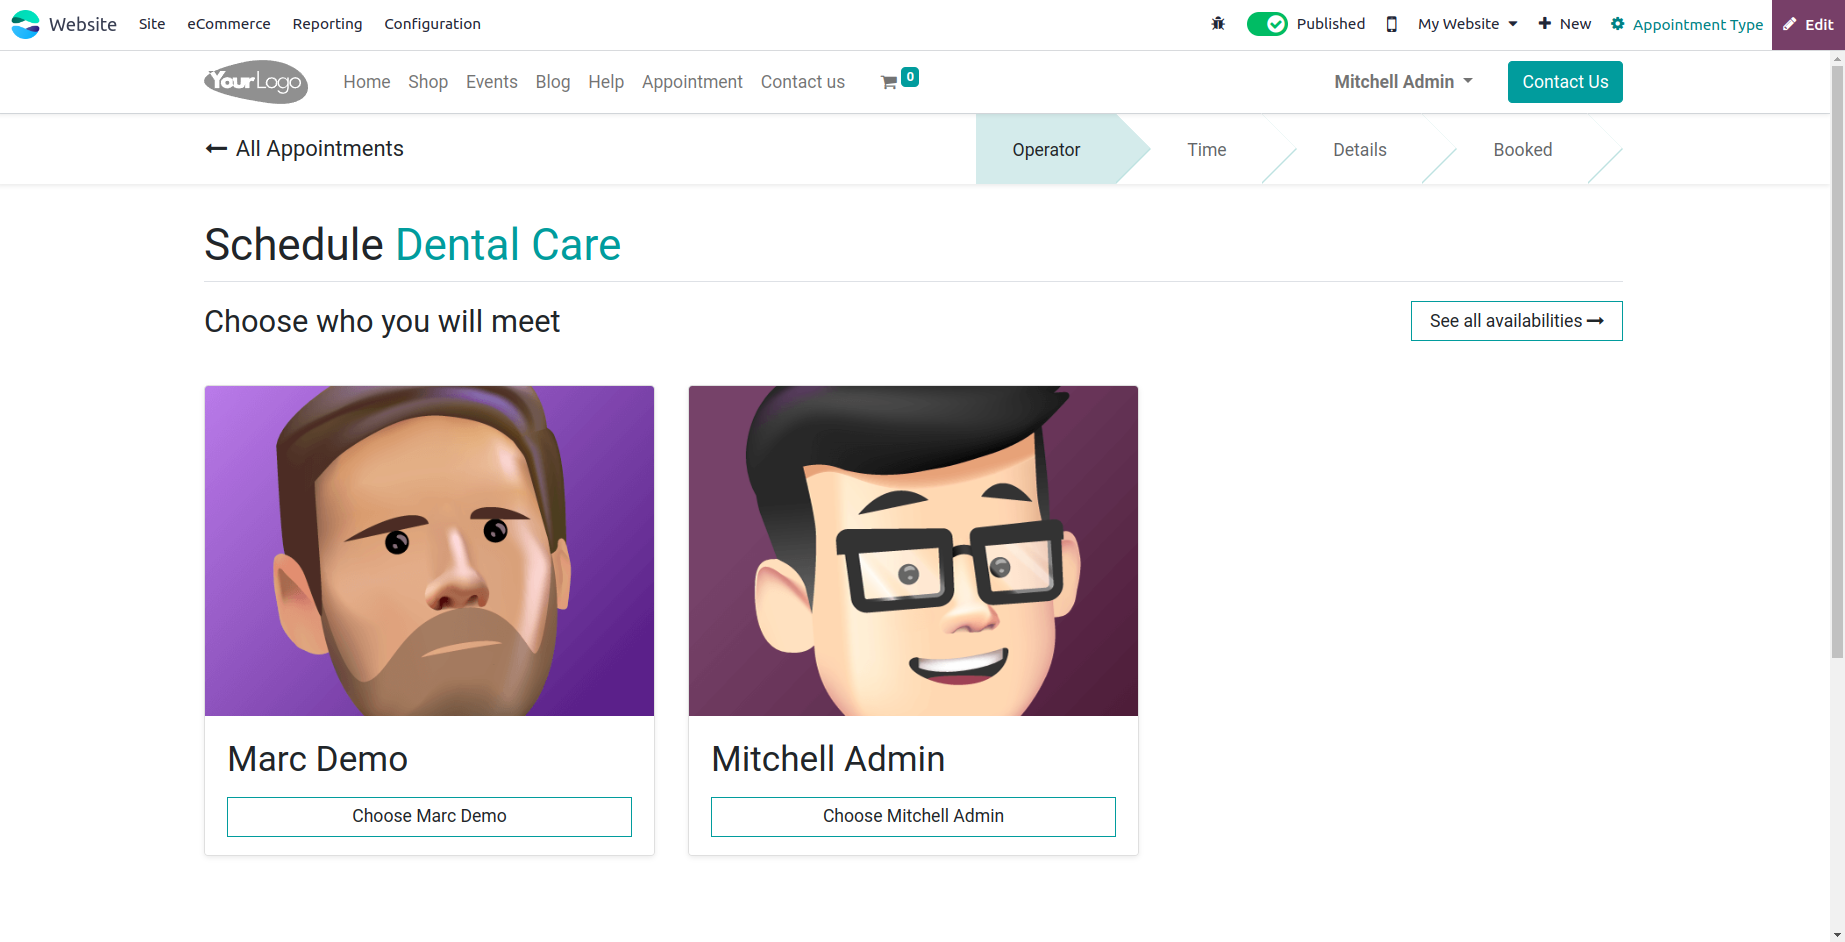
We have been talking about the Online Appointment function thus far, and the Odoo17 platform allows users to use it as a distinct module. Later on, we may go into more detail about this module independently.
Redirects
The Configuration tab of the Odoo17 Website module is where you can find the Redirects feature. You can use this capability to set redirects that will send users to a different domain. You can navigate to Website -> Configuration -> Redirects to utilize this feature. You can now access the Redirects/Rewrite pane, as seen in the picture below.
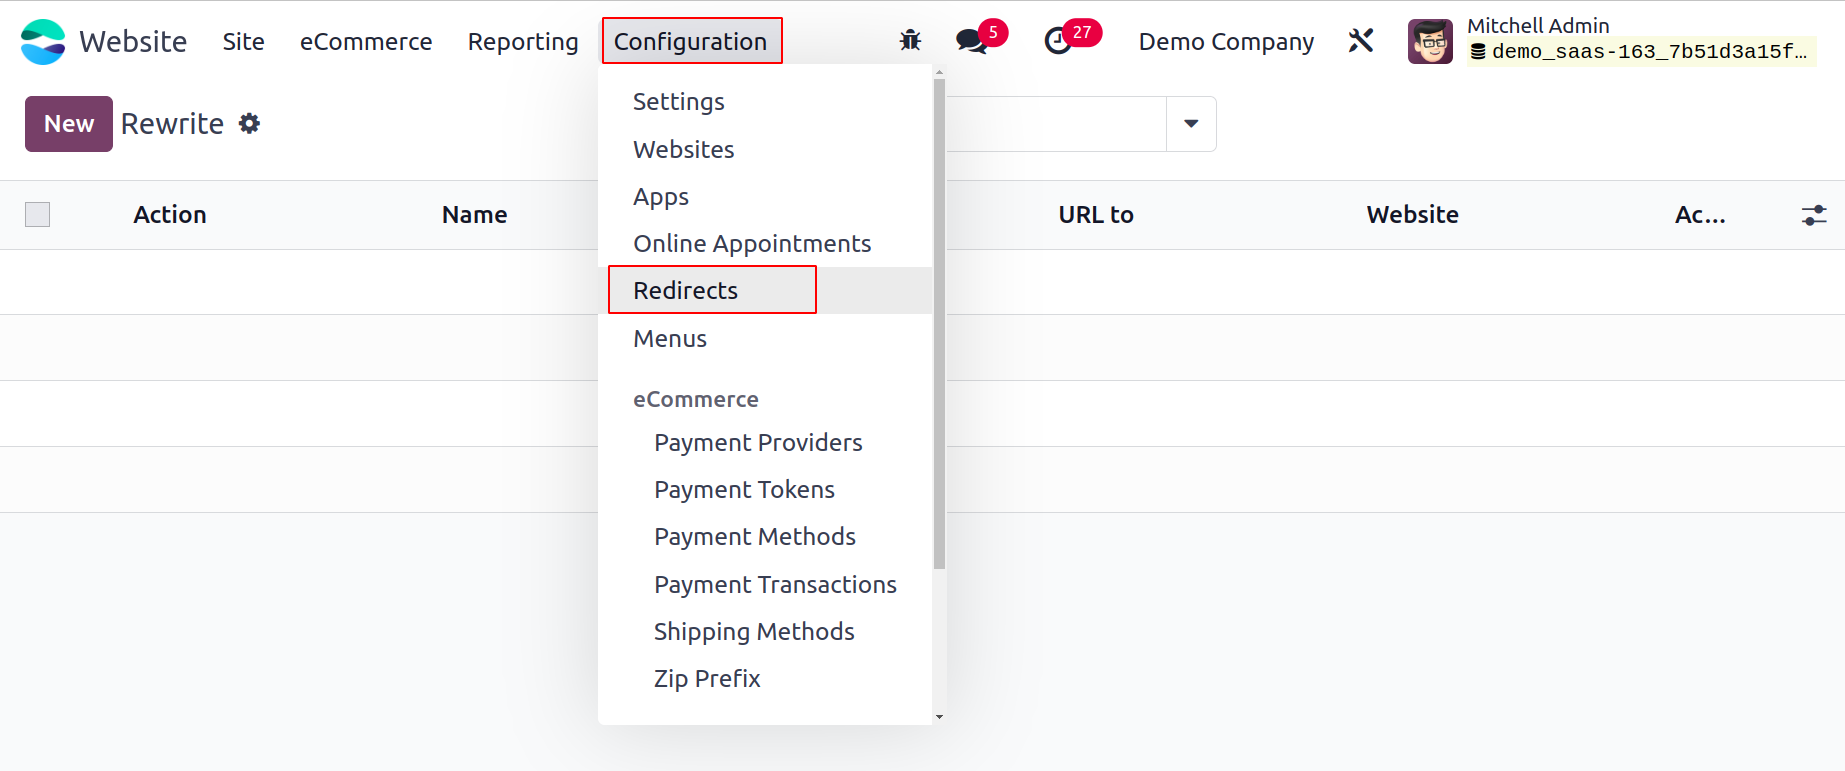
You may see a preview of every redirection that is mentioned in the platform, along with information about it, including Action, Name, URL from, URL to, Website, and Active, in the Rewrite or Redirect window. You can click the New button to create a new Redirect.
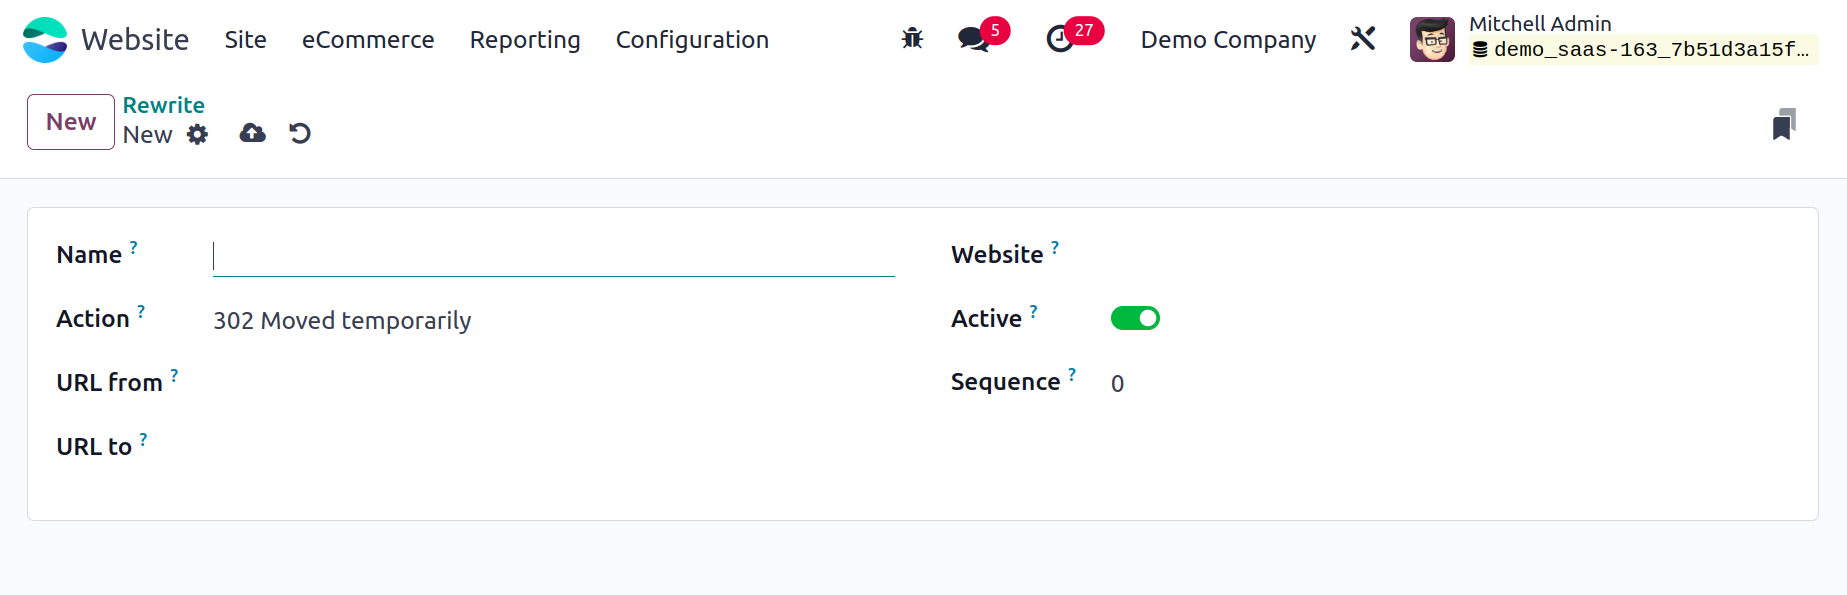
You can assign the Name of the Redirect to the designated place in the Rewrite/Redirect construction box. The type of redirection can then be selected in the Action area. From the provided dropdown menu, you may choose it. The types that are included in the dropdown menu are
-
301 Moved permanently: The new URL will remain in the browser's cache.
-
302 Moved temporarily: The browser will not save the updated URL in its cache and will re-ask for it when it becomes available.
-
404 Not Found: If a certain page or controller needs to be deleted. For instance, you wish to avoid shopping on a particular website even though eCommerce is installed.
-
308 Redirect/Rewrite: If you wish to rename a controller with a new URL, use the 308 Redirect/Rewrite method.
The URL from and URL to fields can be provided after the Action has been specified. If the platform offers more than one website option, you can then choose the relevant website. Next, you may specify the Sequence and activate the new redirect by turning on the Active field. You can save the information by clicking the SAVE button once all of the fields have been filled out.
Now that we have a thorough understanding of the module's Redirects menu, we can talk about the Reporting Feature.
Reporting
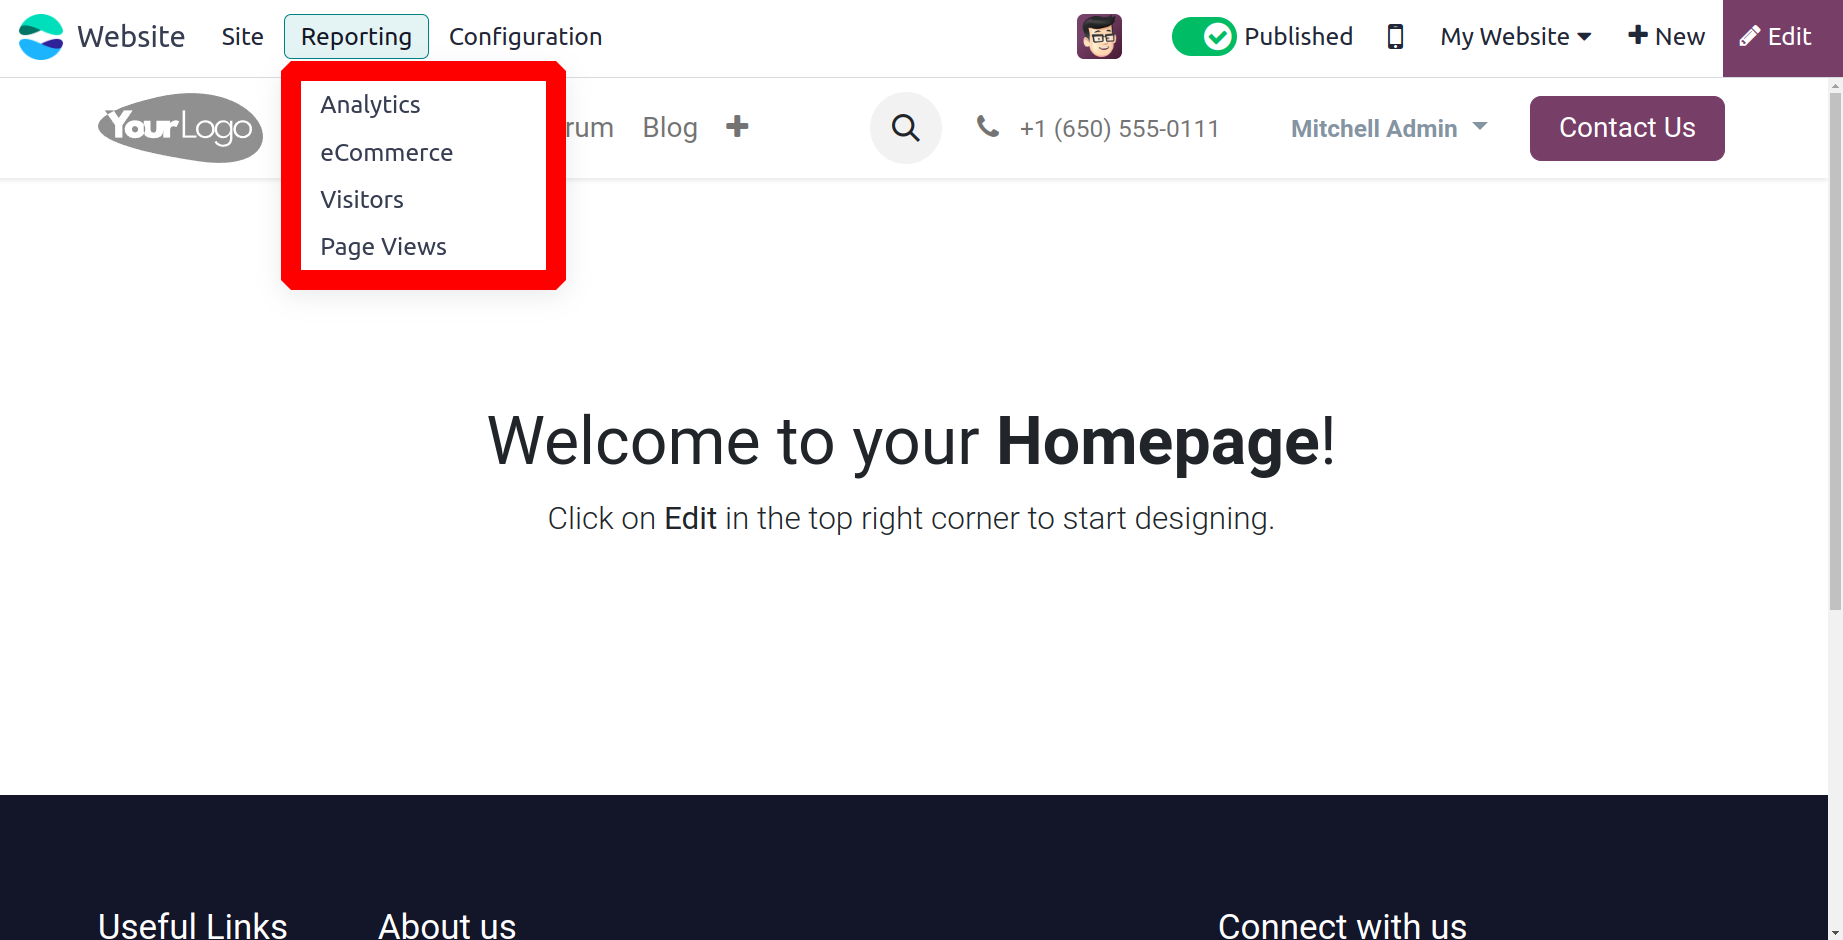
You may examine your online sales using the Reports portion of the Odoo17 Website module. You can see the Analytics, eCommerce, Online Sales, Visitors, Page Views by selecting the Reports tab.
Analytics
The Google Analytics function, which is supported by the Odoo17 Website and eCommerce module, is a useful tool for tracking and evaluating website traffic. With the help of this application, you may examine the quantity, duration, and other characteristics of website visitors. In order to benefit from this feature, you must first create a Google Analytics account and obtain the necessary credentials. Integrating Google Analytics with the Odoo17 Website module is simple. You must activate Google Analytics in the Settings box in order to doso..
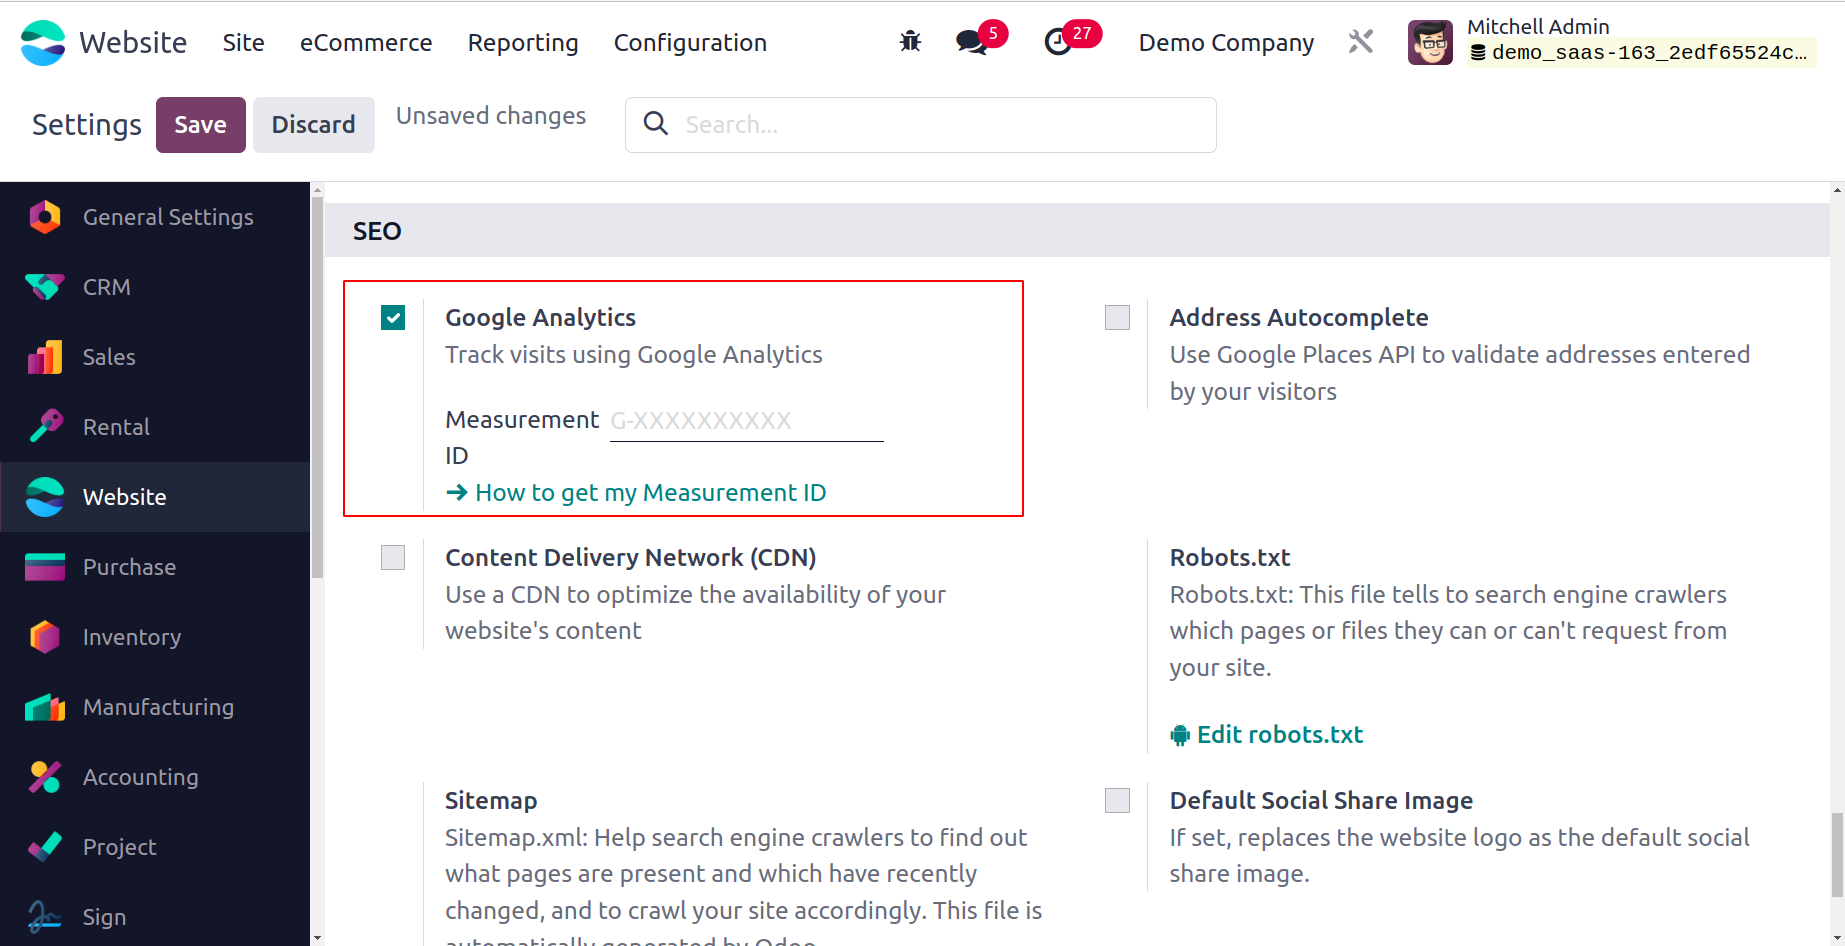
This function, which allows you to track, view, and analyze website visitor numbers straight from the module's Report tab, would be very helpful. Every piece of information gathered upon connecting to the business's Google Analytic activities will be displayed in the analytical report window. You can enter your Measurement ID here.
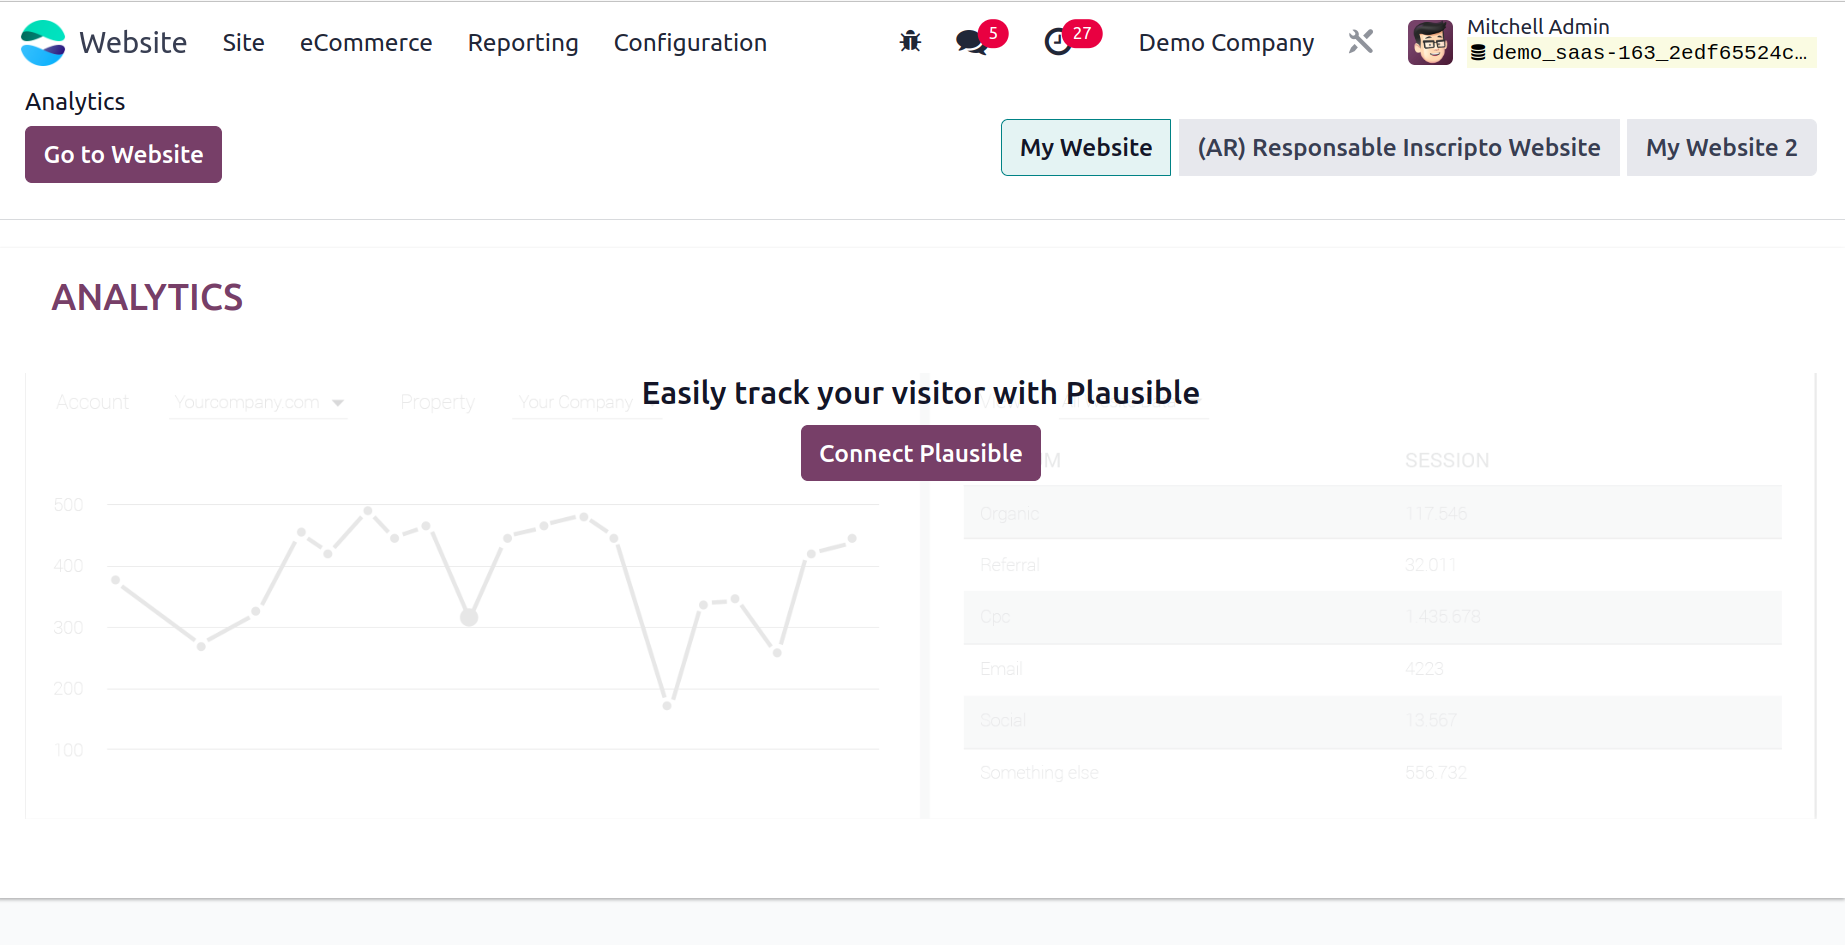
Additionally, you can see the option to link Google Analytics here. As indicated in the image above, click the Connect To Plausible button.
All of the data pertaining to every website operation, including yearly, monthly, and weekly reports, will be effectively displayed in the Google Analytics report window.
eCommerce
You will see the eCommerce Dashboard window of the Website module when you select the Report option. Your web store's actions and performances will be displayed in the eCommerce Dashboard window, as seen below.
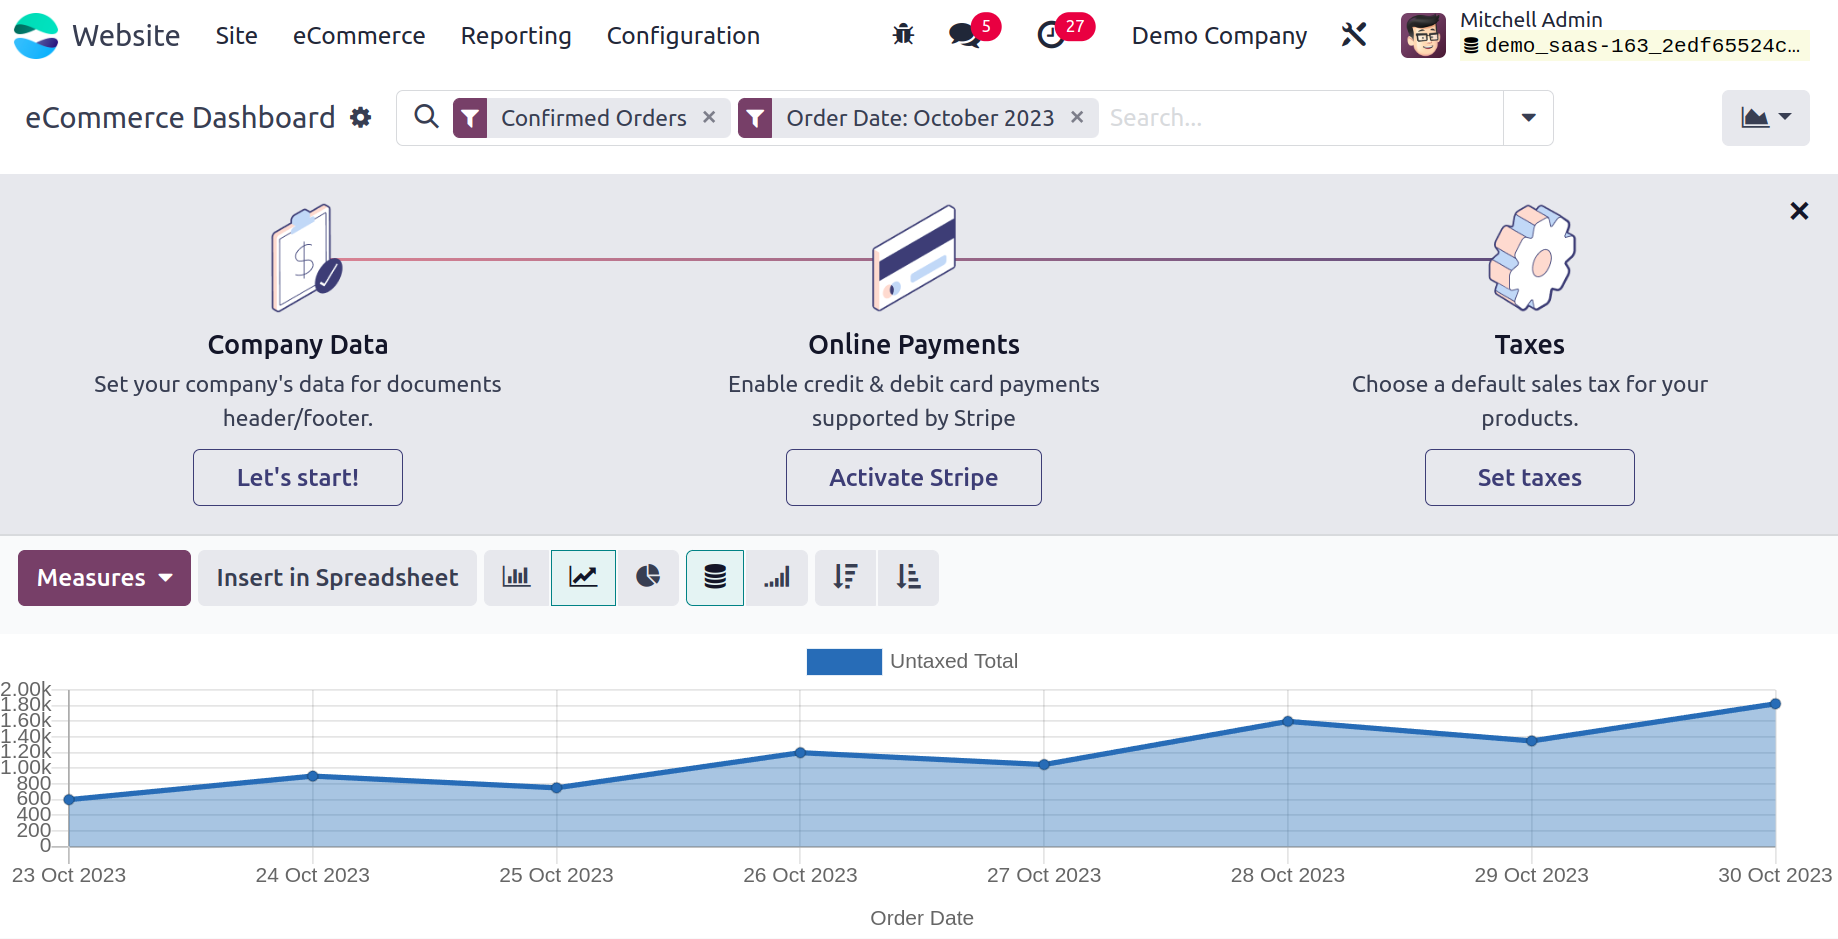
This dashboard view uses a variety of charts, graphs, pivot tables, and aggregated data to give your eCommerce shop's performance a little extra push. It can be viewed as a tool for analyzing reports, specifically for the purpose of visualizing the quantitative and qualitative reports related to the promotion and sale of goods and services via the internet platform. Compared to descriptive reports, it will be simpler to read reports that are generated as graphs or charts. You may monitor the growth of your sales in this window, along with all the reports related to your eCommerce business that you run on our platform. There are options to generate daily, weekly, monthly, and annual reports regarding the sales activities conducted on the website.
Visitors
The Visitors option is located under Reports in the Website module. The Visitors menu will provide all of the data on visitors to your website, without any gaps.
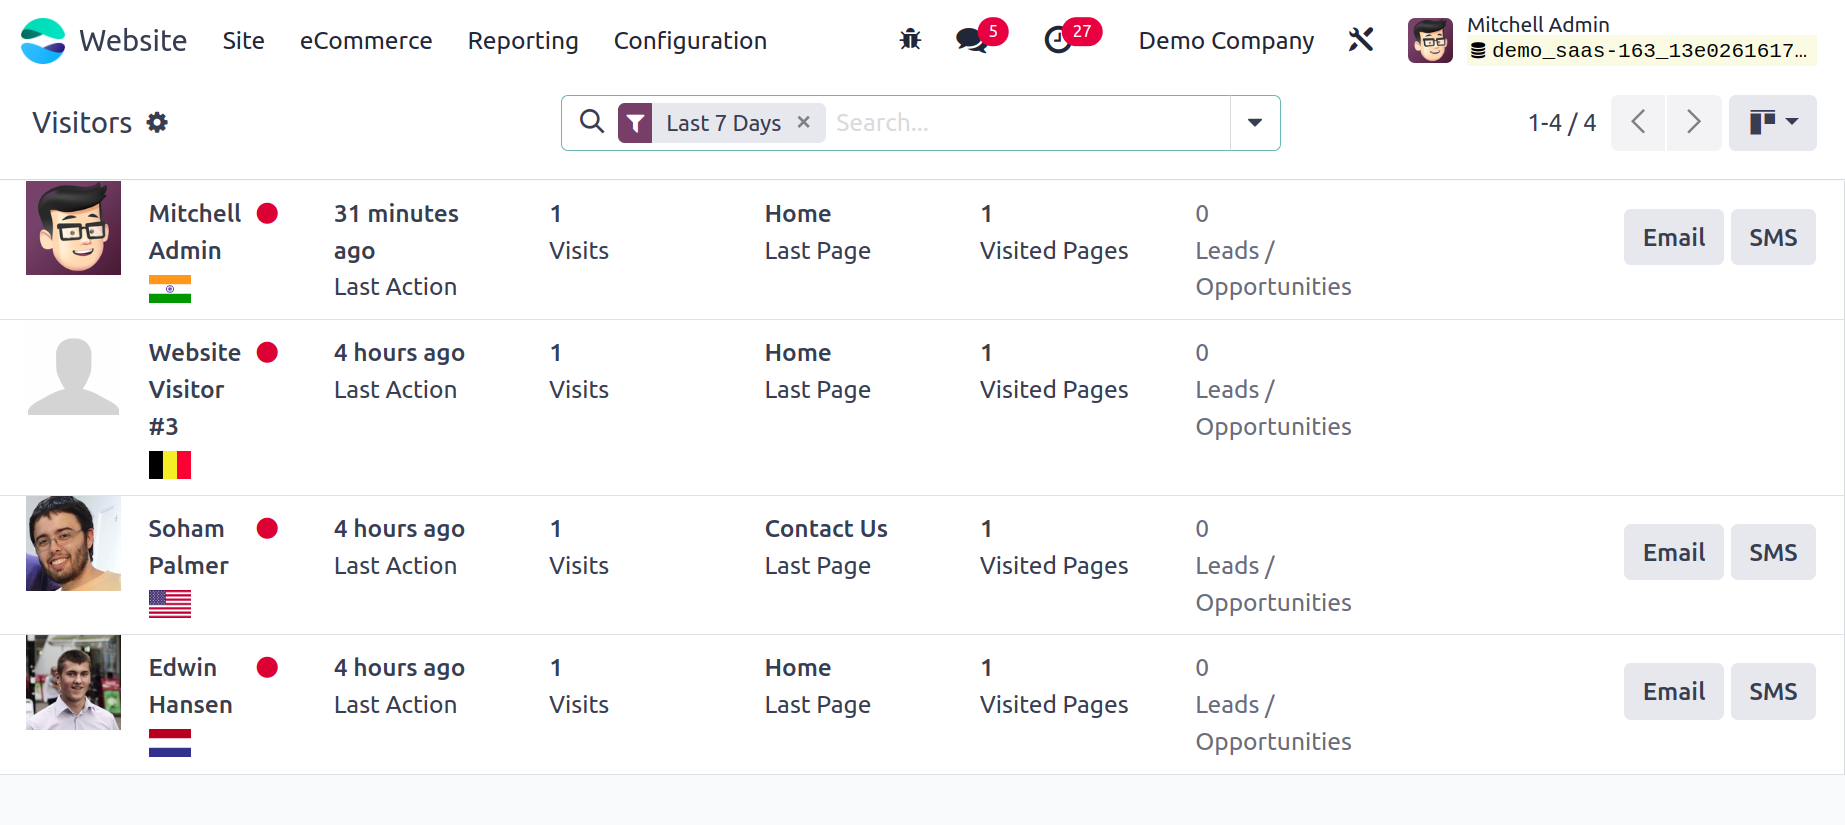
If this specific visitor's contact information is already stored in your system, the Visitors pane will list their name. If not, it will be identified as a visitor to the website. You will also be able to see clearly in this window the number of visits, the last page viewed, the amount of leads or chances provided by this visitor, and the chat option. Furthermore, the platform offers visitors the ability to send emails and SMS in the event that the contact data of that specific employee is obtained. You can click the SMS and EMAIL button next to the other information to accomplish this.
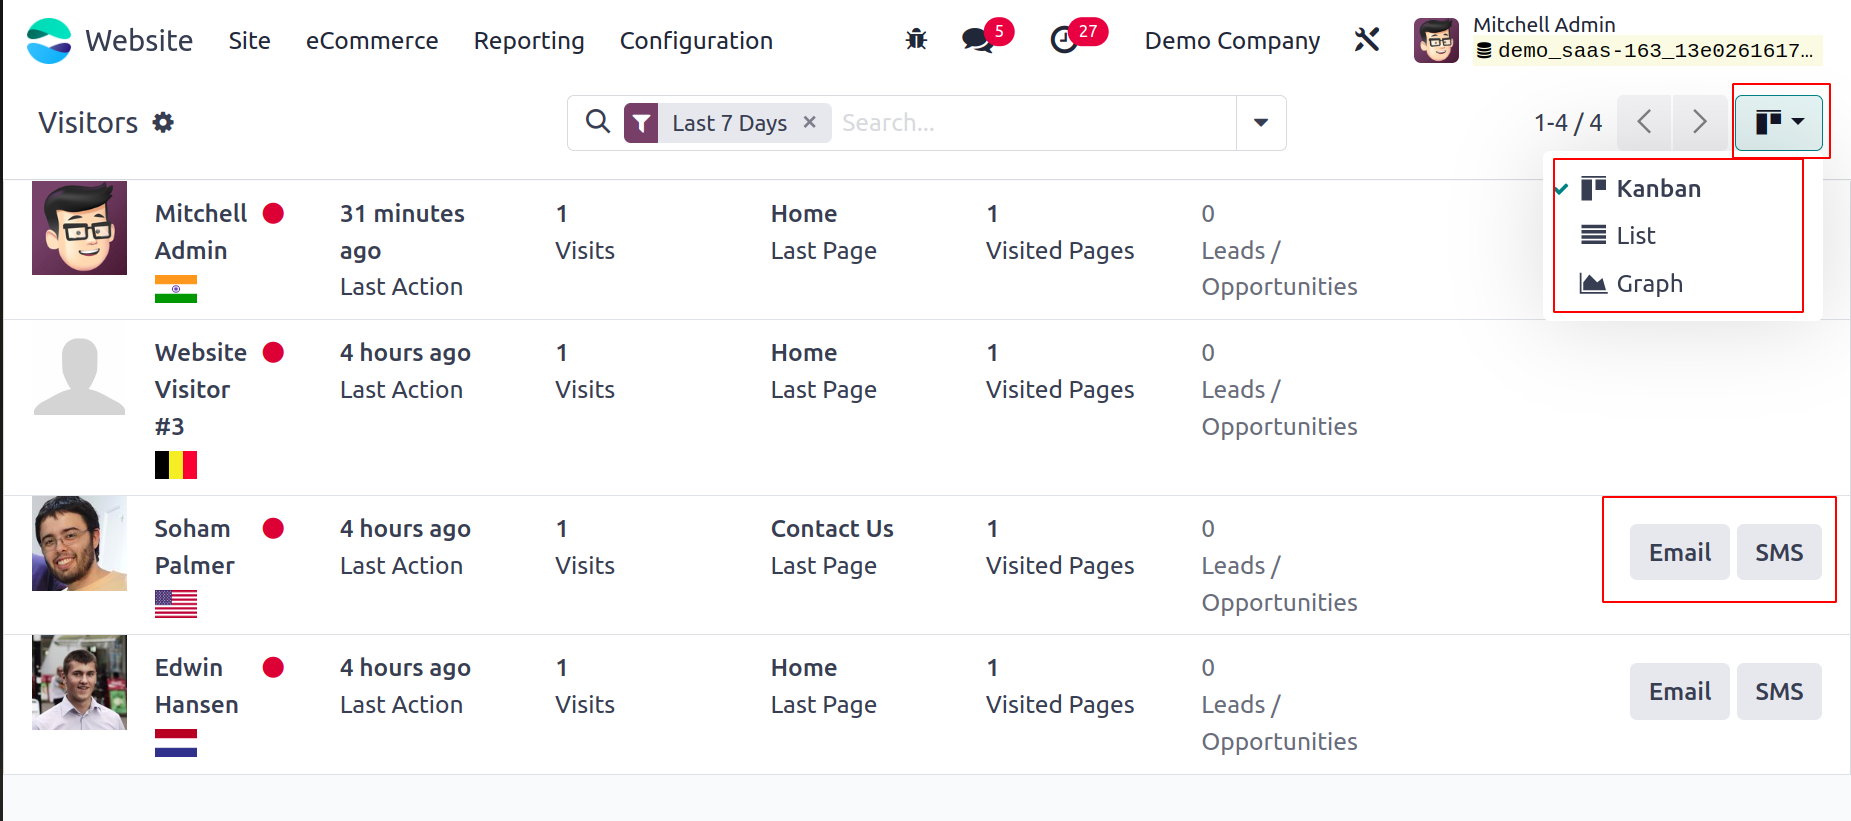
The system lets you view the details in List and Graph views in addition to the Kanban view. As seen in the screenshot above, the menu icons for switching views are located in the upper left corner of the window. Additionally, you have access to a number of configurable and default filters as well as categorization choices under the Filters and Group By page. Last 7 Days, Unregistered, Leads, Contacts, Connected, Available, In Conversation, Push Notification On, Push Notification Off, and Archived are the basic filters that are available in the pane. The standard categorizing options, like Country, Time zone, Language, Visits, Website, First Connection, and Last Connection, are available under the Group By tab.
Let's take a look at the Page Views menu as we navigate through the Visitors menu found under the Reports tab.
Page Views
You may list every page view on your website using the Page Views option found in the Reports tab. You may see the Visitor, Page, URL, and Visit Date details when you glance at the window. The List and Graph views are the two ways to access this window. The Page Views window's List view is seen in the picture below.
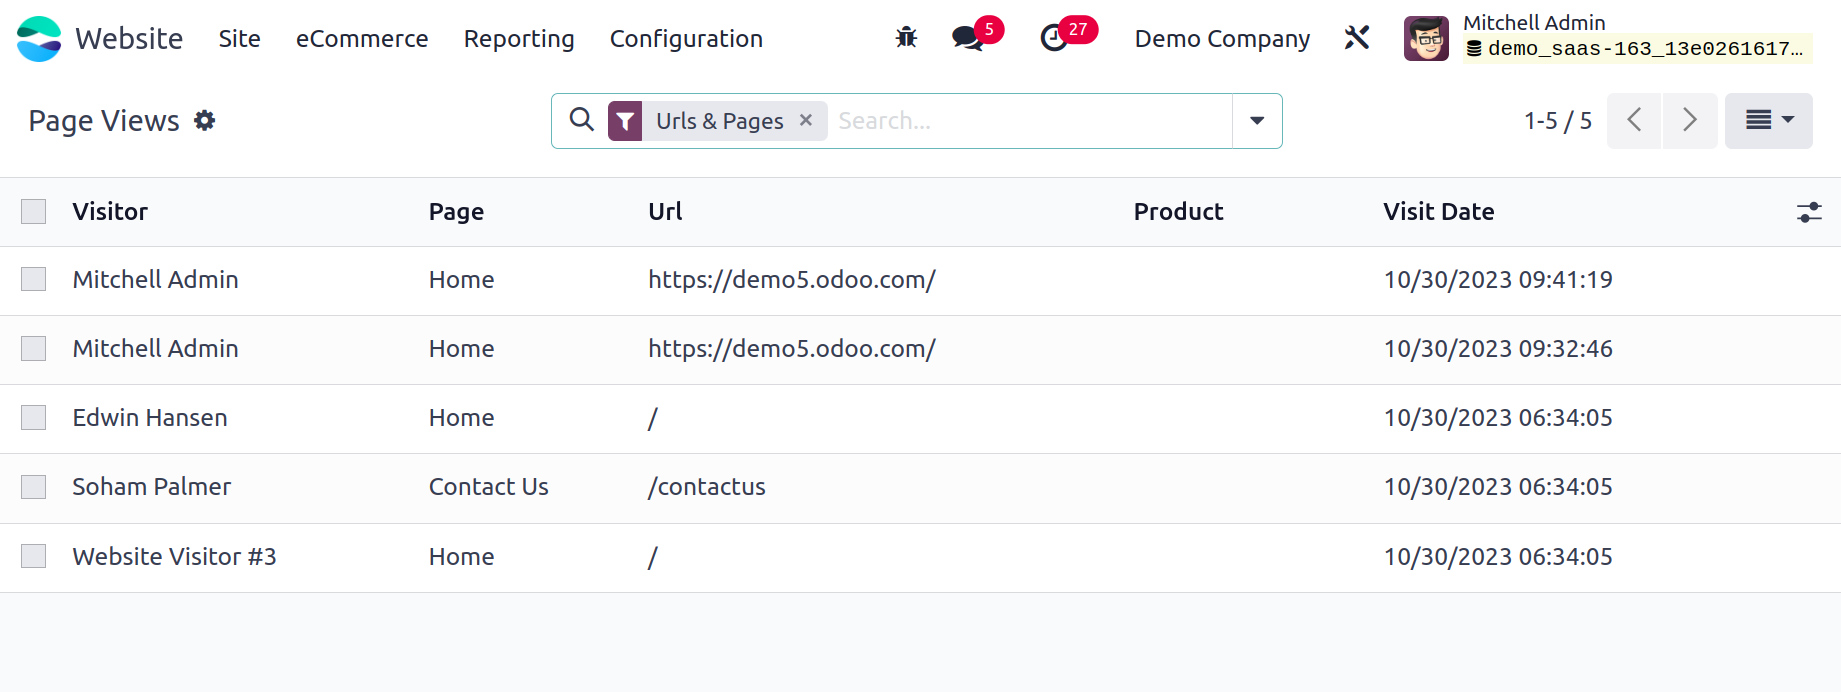
Additionally, you can use several filters and group by options here to sort and categorize the data according to multiple criteria. The available default filters are Pages, Url & Pages, and Products. Additionally, you can use several categories, like Visitor, Page, Url, Product, and Visit Date, to organize the data.
Settings
Many additional functions are available on the Odoo17 Website module's Settings page. Odoo has integrated a number of tools with more detailed features at the module level that you can access when you check each of the modules. These tools are visible in a clearly defined Settings window. You can view a plethora of options that can be activated in accordance with your business policies' requirements by utilizing this Settings panel. You can check the Settings window and activate the extra features to turn your website into a full-fledged website application, giving it more functionality and productivity.
You can access the Settings pane of the Odoo17 Website module to explore the choices there. There are several options in the Settings box, and each option is explained in a separate section. The many segments comprised inside the window are
-
Setting of Website
-
SEO
-
Website Info
-
Shop- Payment
-
Email & Marketing
-
Privacy
You can provide the name of the website you will configure in this section. The exact URL to build a new website, the build + New Website button, is also viewable here.
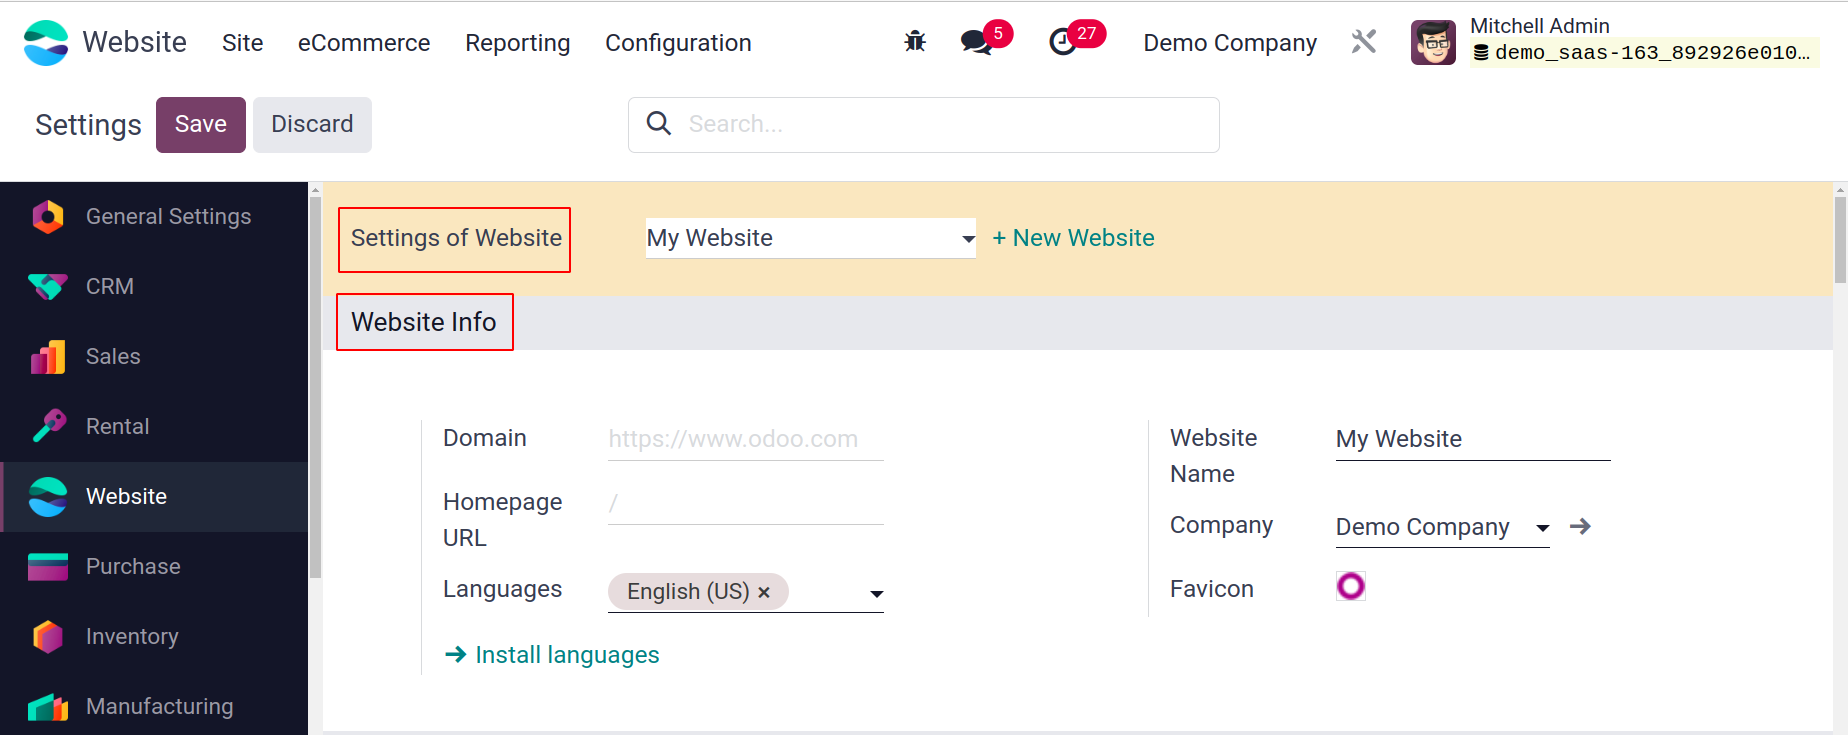
You can see a number of possibilities under the Website section. You can also provide a description of your website's name and favicon under the Website Info section. You may also list the languages you want your website to be available in this section. It is also possible to specify the default language. To install new languages, choose the Install new language menu option. Additionally, the corresponding section contains definitions for the Company, Favicon and Domain.
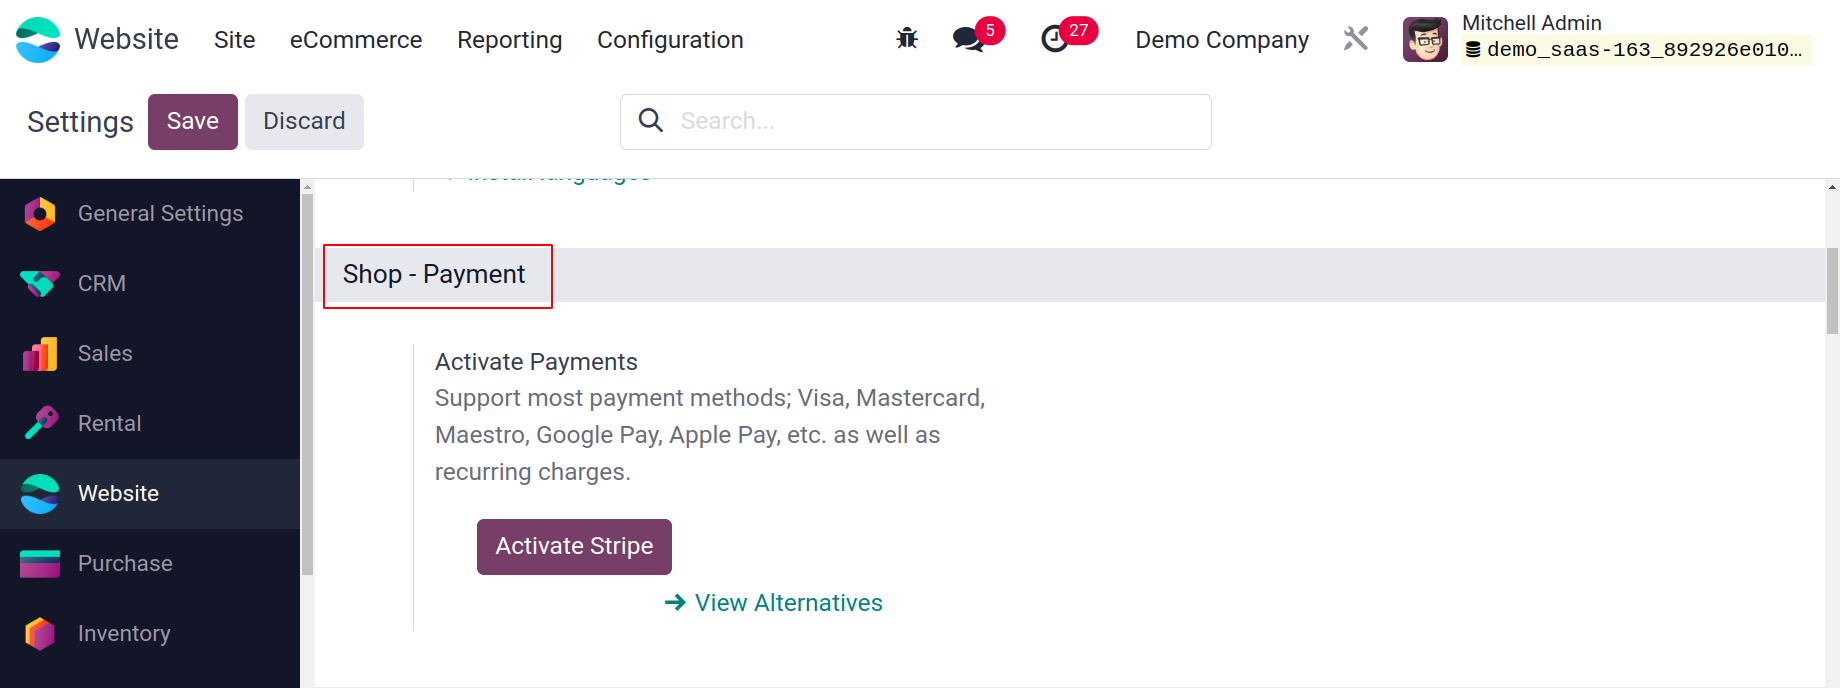
The next section, Shop-Payment allows users to configure the payment providers.
The Email & Marketing part comes next. which includes Email Marketing, Live chat, and the ability to automatically send abandoned checkout emails. By turning on this Live Chat feature, website users can communicate with staff members. Users can conduct bulk mailing campaigns to contacts by using the Email Marketing option.
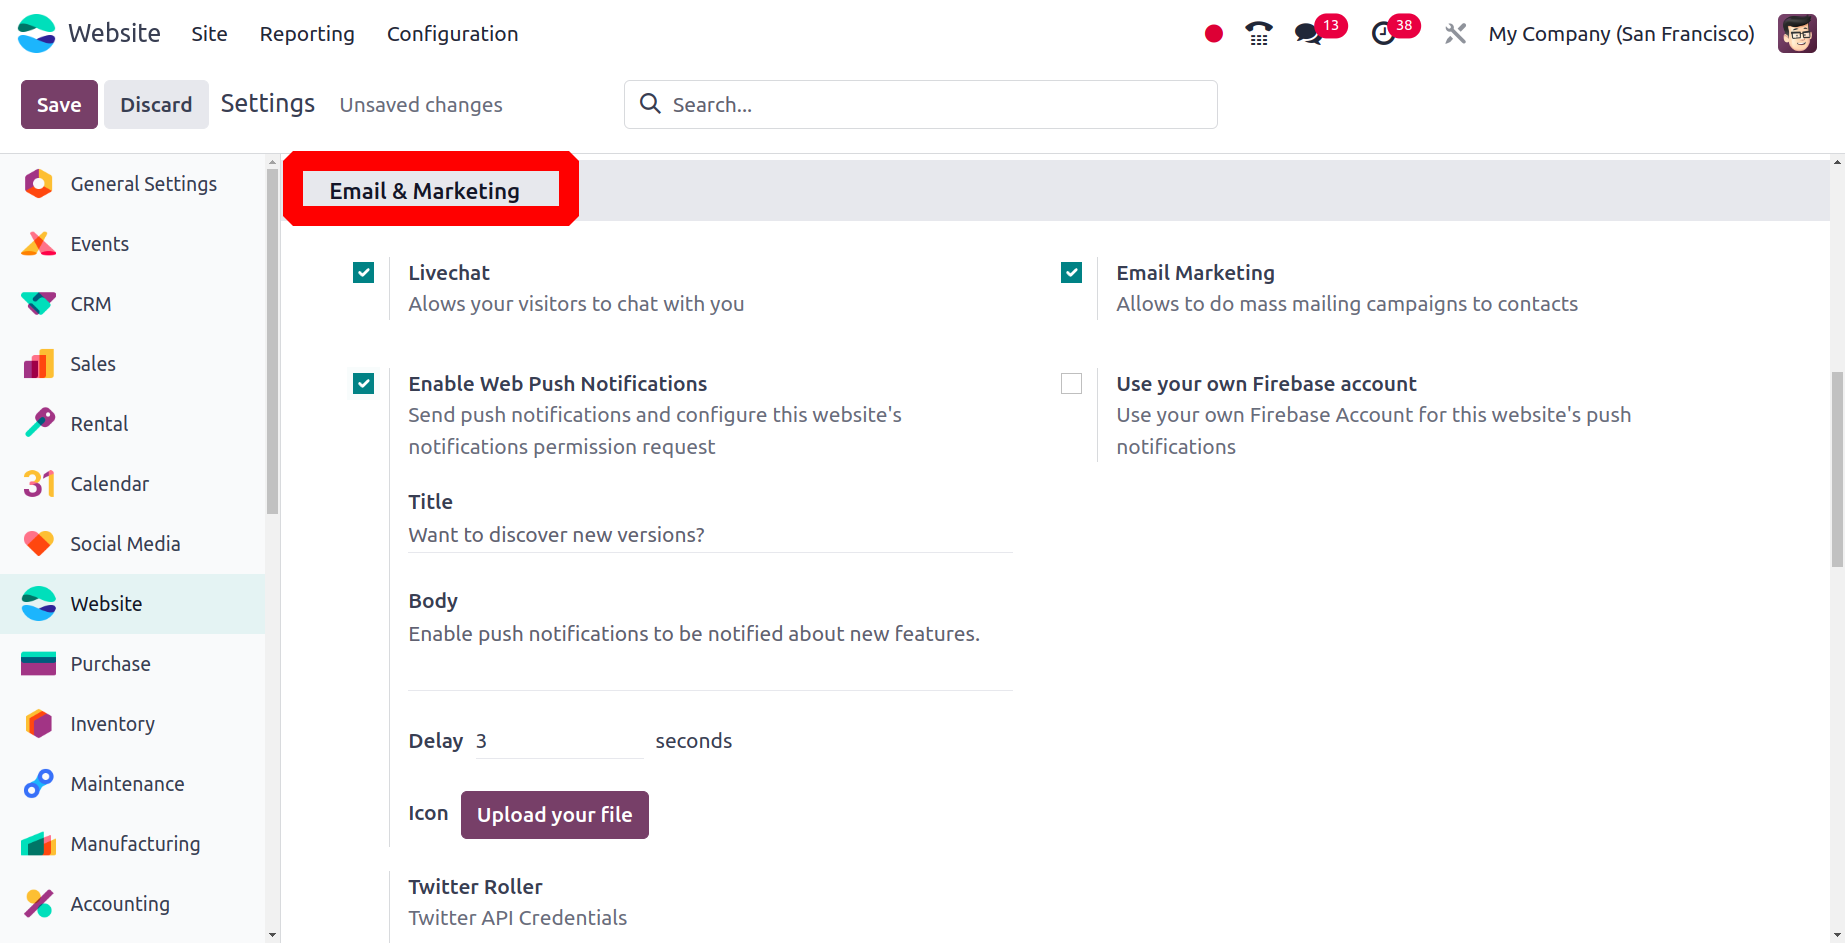
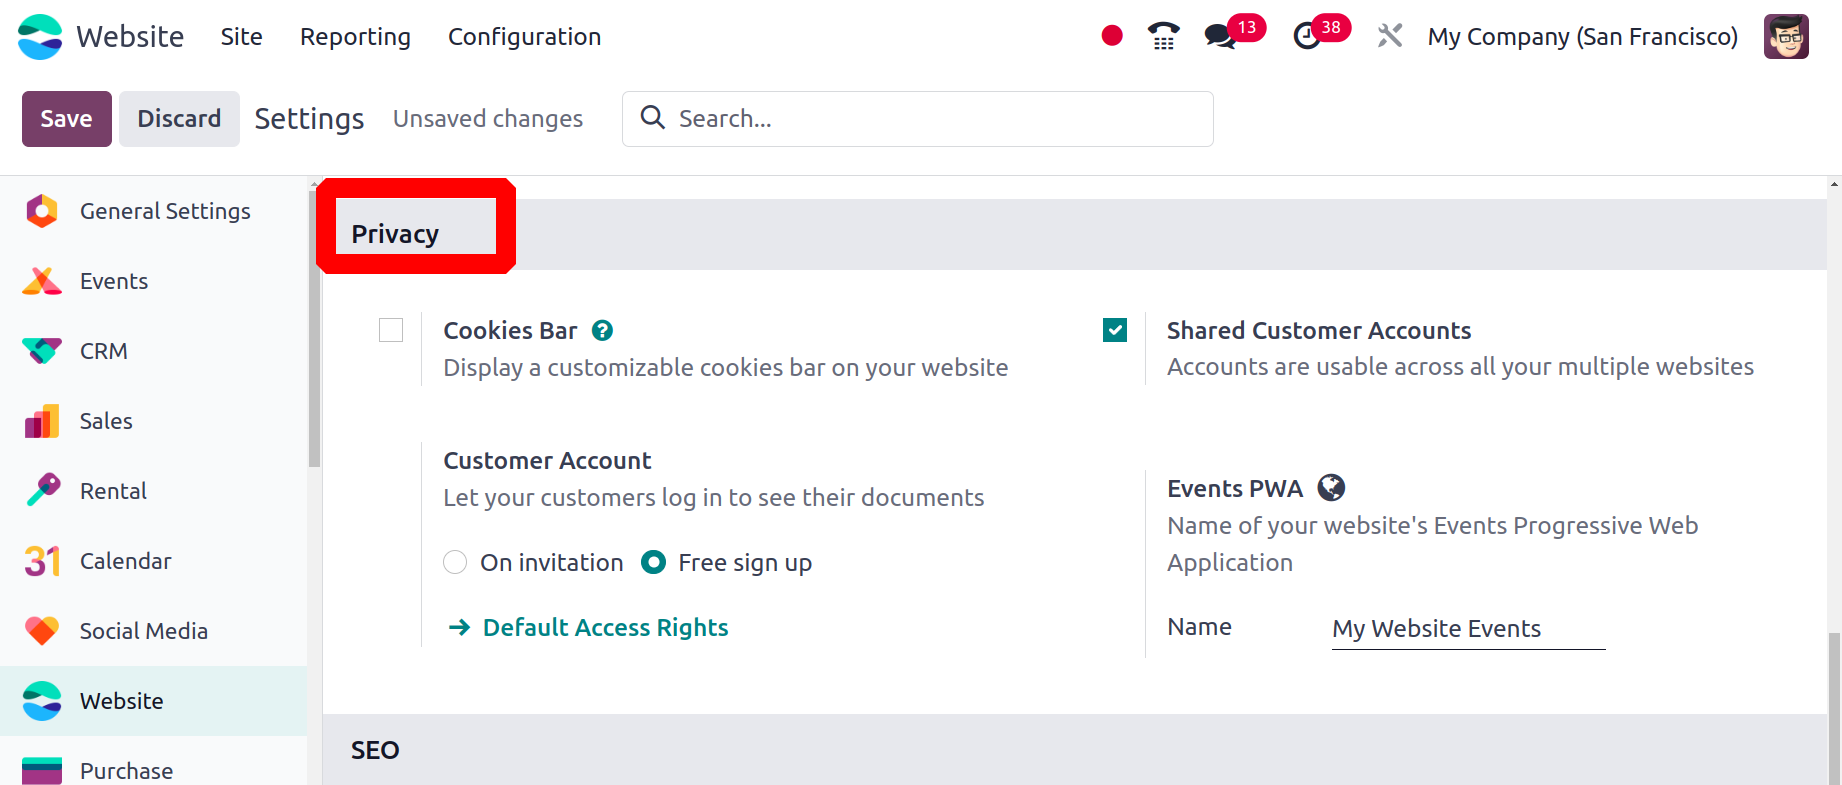
Users can use their accounts on several websites by selecting the Shared customer accounts option under the Privacy session. The Privacy section also includes the Cookies bar and Events PWA options.
Odoo provides Google Analytics, Google Analytics Dashboard, Console Google Search, Sitemap, and Robots.txt tools under the SEO area of the Odoo Website Settings window. To track visits in Google Analytics, activate the corresponding option. To use these features, credits should be required. To track website traffic in Odoo, you may also activate the Google Analytics Dashboard option if you have the necessary credentials. You must supply the Client ID and Client Secret in order to accomplish this.
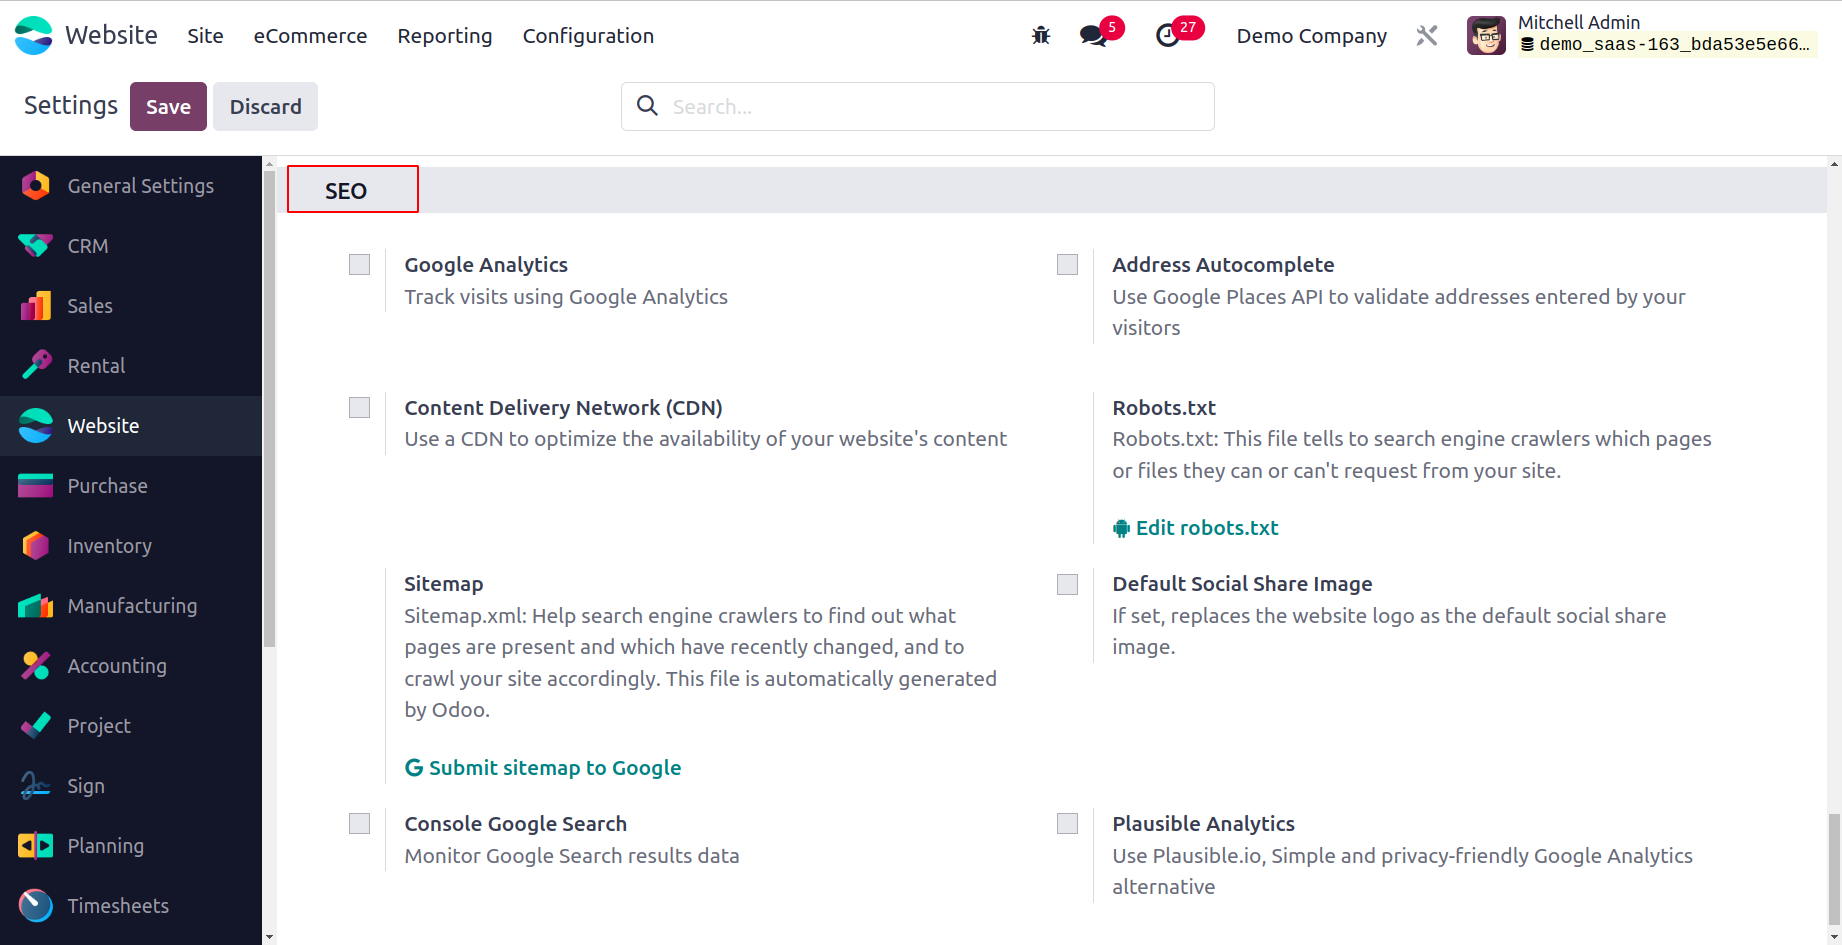
Search engine crawlers can better index your website by using the Sitemap.xml file, which tells them which pages are current and which have recently changed. This file is automatically generated by Odoo. Last but not least, the Console Google Search option can take data monitoring into account. Additionally, the Robots.txt file specifies which files or pages search engine crawlers may or may not request from your website.
Multiple Companies
The Odoo17 platform provides outstanding assistance in managing several enterprises within the ERP system. The Website module displays the same feature. You are able to construct and administer many websites in a single database with the Odoo17 platform's Website module. It can be used for jobs at the same company or at other companies. With the ability to update and modify the website's content, you may navigate between the company websites with ease. The fact that this feature restricts access to company-related data is advantageous for websites. Only the pages of the firm to which they belong can be managed by the corresponding corporate editors.
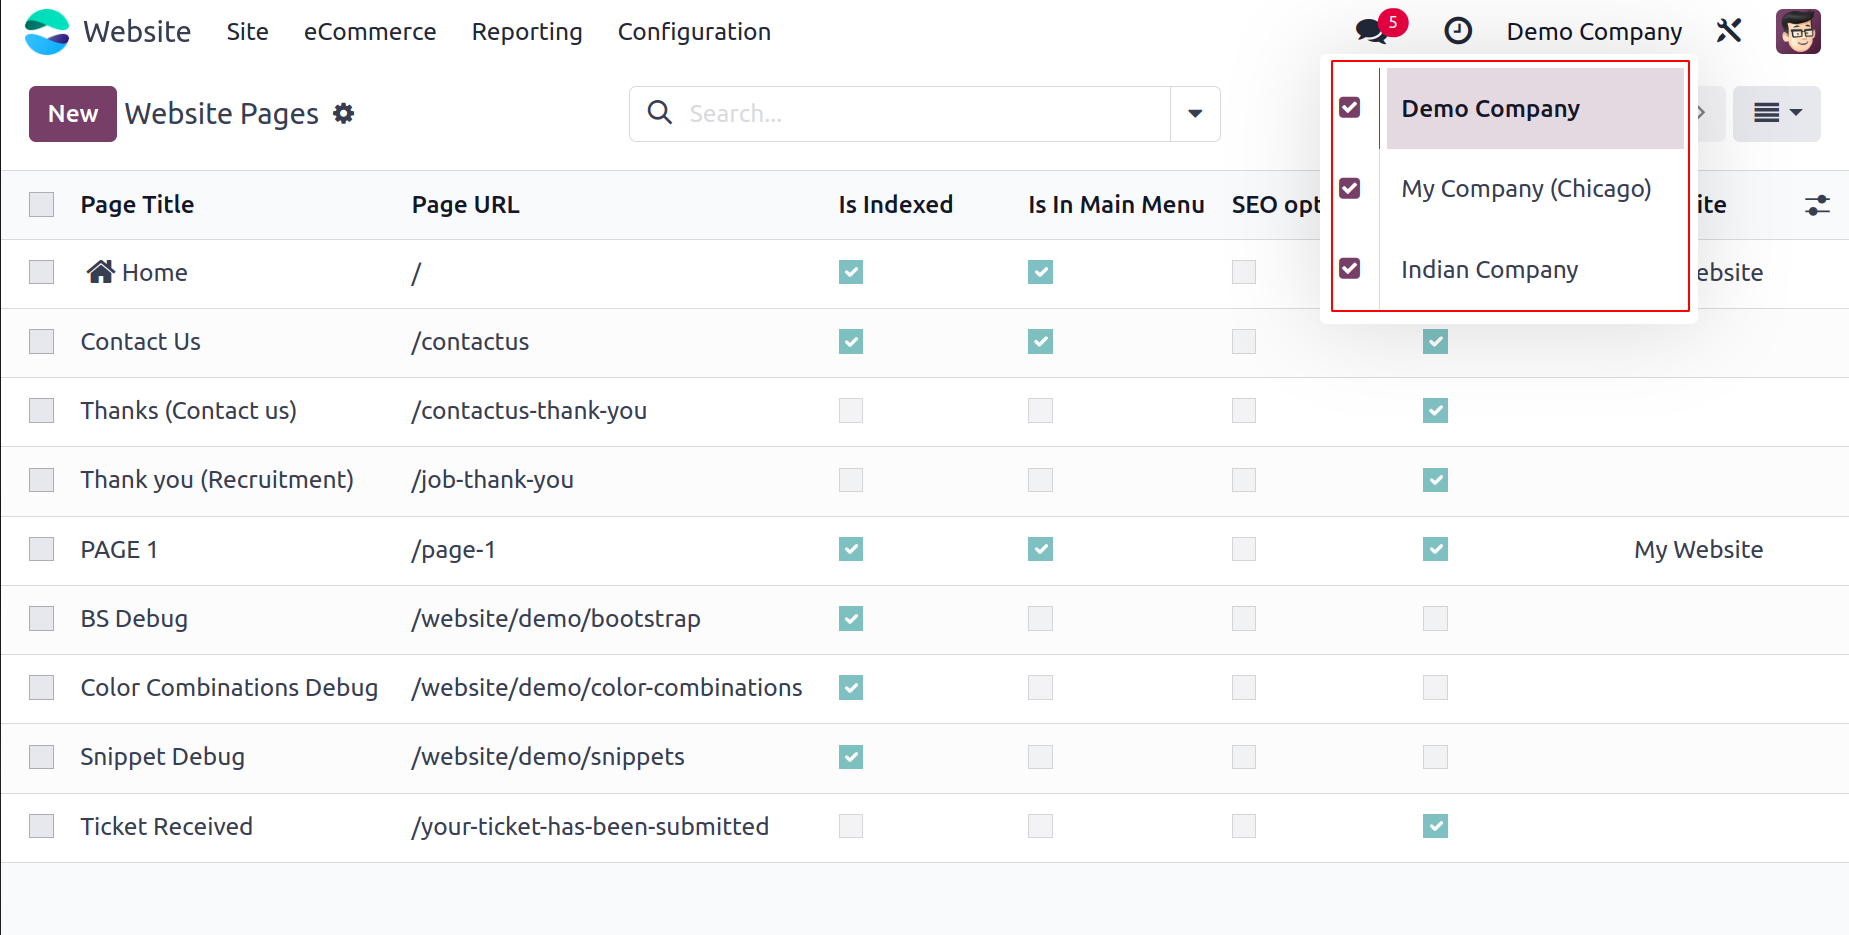
The company icon, seen in the image below, can be accessed to navigate from one company to another. It is located in the upper right corner of the window. This icon will display a drop-down menu that allows you to view every company that has been configured.
We have been talking about the platform's multi-website option up until this point. Let's now take a closer look at the steps involved in configuring an eCommerce website.
The best tool for developing, designing, and maintaining your eCommerce website is the Odoo Website and eCommerce module. You will learn a great deal about the Odoo17 Website and eCommerce module, as well as the different tools and capabilities that can be used to manage different processes with ease, from this chapter.